How to Back up Data to NAS Devices or Cloud Clients
NAS is the acronym for Network Attached Storage. NAS devices are mainly used as file servers by business users, and there are more and more users using Network Attached Storage for backup. Backing up to a NAS device can save users' local storage as well as provide more robust reliability and security for the backed-up data. To back up your important data to a NAS, a professional backup software is needed.
Best Free NAS Backup software - AOMEI Backupper
AOMEI Backupper, the best free backup software for Windows 11/10/8.1/8/7, can help you with NAS backup. It offers you 4 main backup types: System/Disk/Partition/File Backup. You are allowed to back up to local disks, external hard drives, USB flash drives, and network locations. Follow the guidance below to back up files to NAS or cloud clients. You can also learn how to back up files from NAS here.
Storage Management in AOMEI Backupper
Through the tool "Storage Management", you can add NAS to the storage list in advance. You can view, edit, or manage the NAS, and you can also directly select the NAS as the destination path when creating a task.
Then, before you start any operation, download AOMEI Backupper Standard and install it on your computer. Then, learn the "Storage management" tool and backup files later.
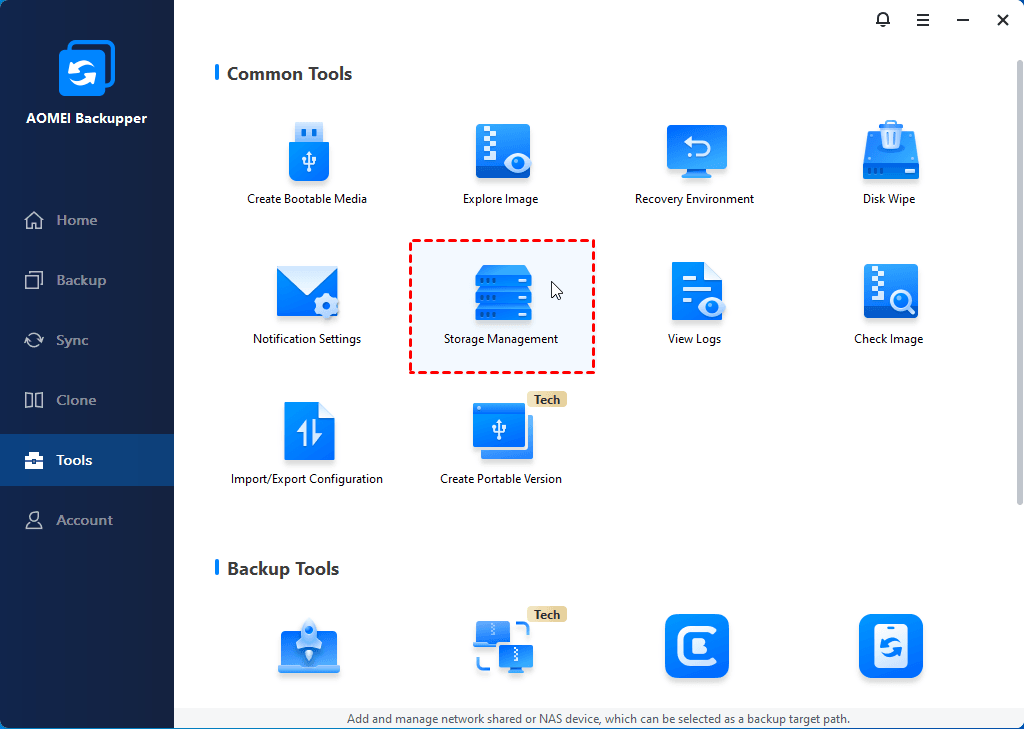
Click the "Tools" button in the left tab, then select the "Storage Management" tool under "Common Tools".
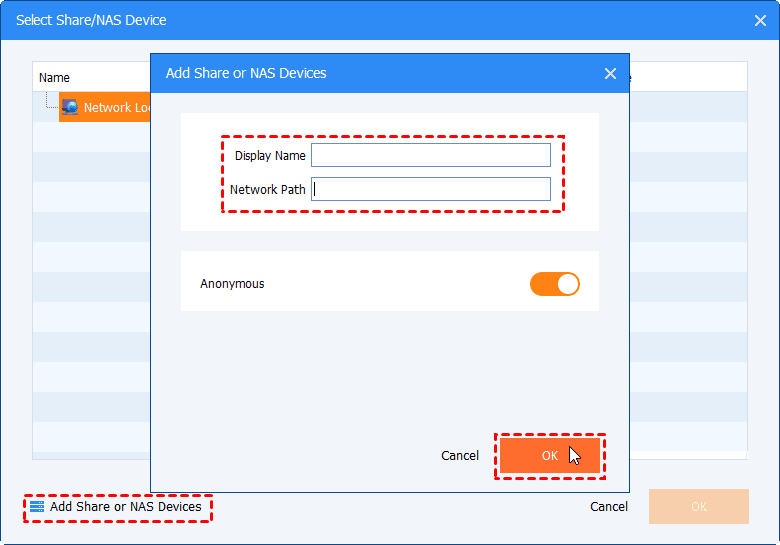
Add Share or NAS Devices
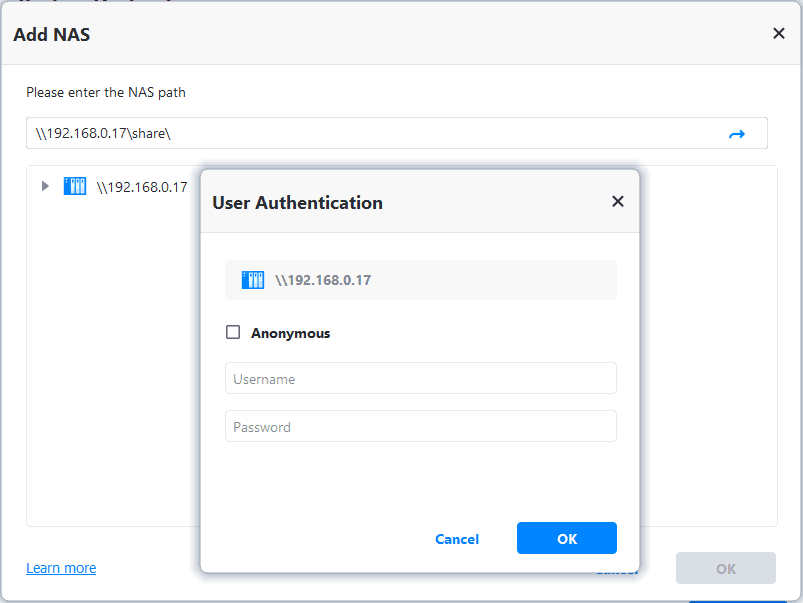
Click the "Add Destination" button in the lower-left corner of the pop-up window. In the Add Share or NAS Devices window, enter the IP address of the network location and click the blue button at the right. You can use an "Anonymous" login. Or, you can disable "Anonymous" and enter the NAS username and password. After the NAS is configured, please click "OK" to save it.
Manage Share/NAS Devices
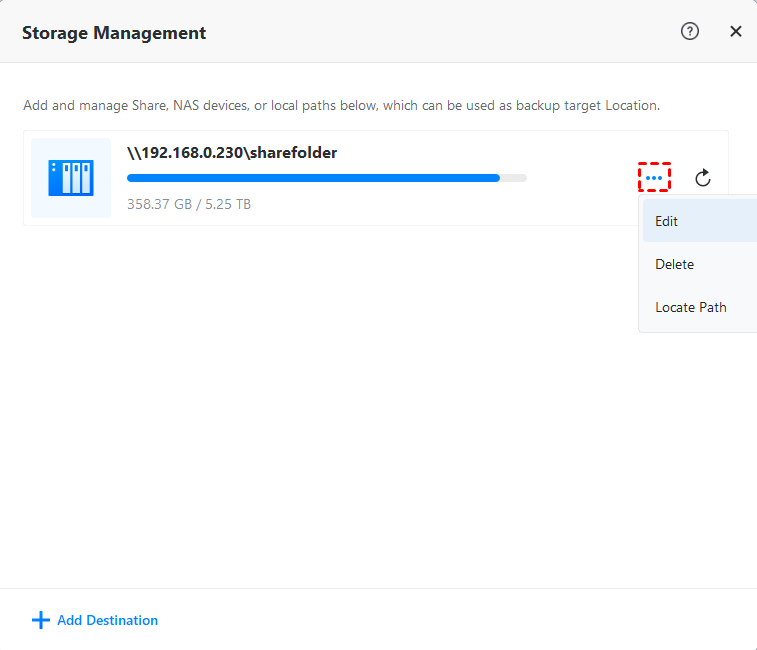
Move the mouse to the NAS, and the menu button and refresh button will appear on the right. Click the "Menu" button to pop up the drop-down list.
1. Edit NAS
Click the "Edit" button in the drop-down list to display the "Edit Storage Path" page, where you can edit the username and password.
In the "Edit" option, you can set an alert when the space is below a certain value; that is, the storage management page and the destination selection page will prompt that there is insufficient space.
2. Delete NAS
Click the "Delete" button in the drop-down list to directly delete the NAS path from the list.
3. Locate Path
Click the "Locate Path" button in the drop-down list to directly open the path.
Back up to NAS
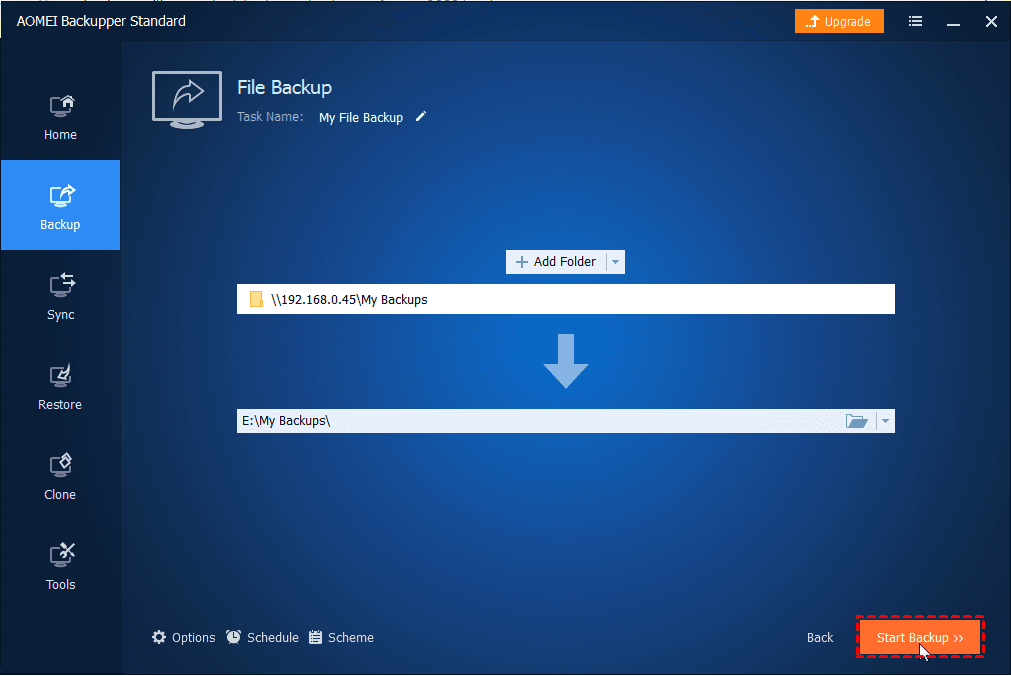
1. Launch AOMEI Backupper Standard, then click Backup and select File Backup. You can also back up the system, partitions, and even whole disks to a NAS device by choosing other backup types.

2. Name the task so that you can distinguish it from other backup tasks. Click "Select Source" and click "Add File" or "Add Folder" to select the files/folders you want to back up.

3. Click the destination path. If you have added the NAS from the Storage Management tool, you can select it from the common locations. If you want to add another NAS location, you can click the "NAS" or "Network Share" option to add other NAS/network share locations.
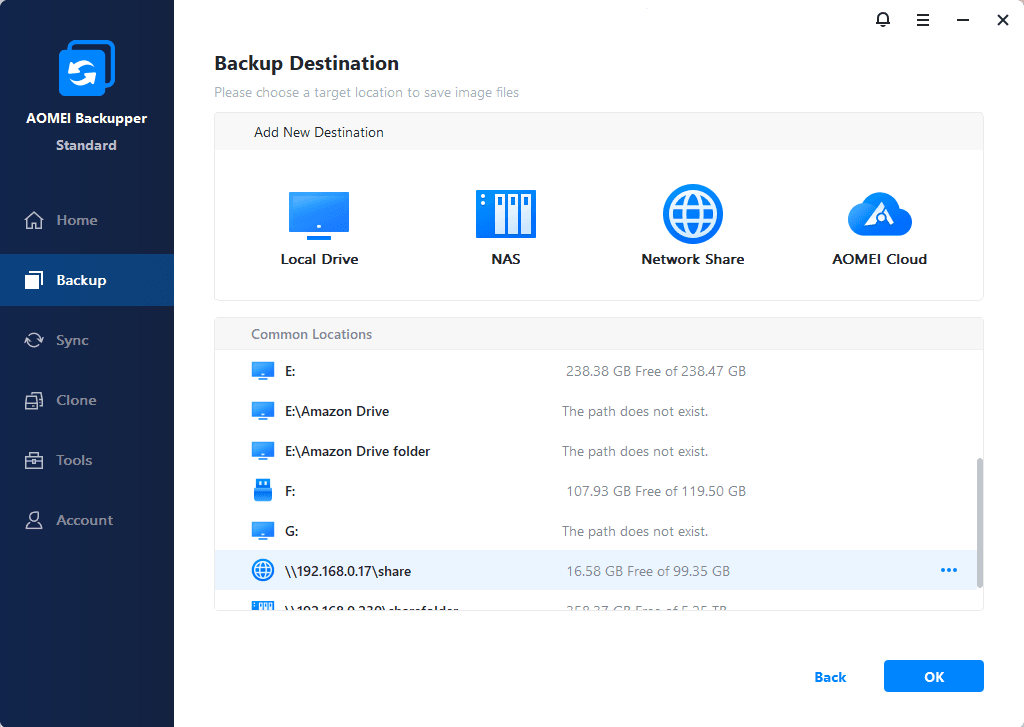
You can also map the NAS/Share (network drive) as a local drive in Windows and choose the mapped drive as the destination location.
4. Enter the IP address of your NAS and enter. Input the username and password if it is required.

5. After the NAS device has been added, all the folders under this NAS device will be listed. Choose one folder as the destination path, and then click OK.

6. Confirm the operation and click Start Backup to back up files to the NAS.
Tips:
-
AOMEI Backupper supports NAS devices using the SMB protocol only.
-
If you want to run an automatic backup to NAS, you may use the "Schedule Backup" feature.
Backup from NAS
1. Click "Backup" on the left pane and select "File Backup".
2. Click "Select Source" and select "Add File" or "Add Folder". In the pop-up window, click NAS or Network Share.

3. Enter the IP address of your NAS.
4. Select the folder you want to back up from the NAS device.
5. Click the second column to specify a destination path.
6. Confirm the operation and click Start Backup to back up files from the NAS.
Tips:
-
Only the File Backup and Sync options will allow you to select the NAS as the source.
-
For the real-time sync task, specifying the NAS as the source is not supported.
Conclusion
Backing up to a NAS can save local storage space to improve the utilization of local storage. In addition, storing backup files on NAS can also prevent the loss of backup data due to local disk corruption.
As for cloud backup, AOMEI Backupper currently does not support backing up files/folders to third-party cloud services. But AOMEI Backupper has released AOMEI Cloud, where you can back up files/folders to the online cloud space of AOMEI Cloud. For more details, please refer to the Cloud Backup feature.
FAQs
Q: When you add the network path or run a NAS backup/task sync, it shows the error:
The program is unable to connect to the network. Please enter the correct credentials and check that your network is functioning correctly.
or
“Failed to access the network path, please check if your username, password, and network path are correct.”
or
“A specified logon session does not exist. Please detect if there is a directory name behind the network path, such as "\\192.168.0.100\directory_name", not "\\192.168.0.100". If the error still exists, you can reboot and try again.......”
or
303: invalid network path.
A: Please press Win+R, then type into the NAS path (such as \\192.168.1.230\xxx ), and then check if Windows can access the NAS path with the same username and password. If yes, please try to delete the NAS.xml file under C:\ProgramData\AomeiBR and then reconnect it to AOMEI Backupper.
Please check if the devices or programs connected to the NAS have reached the ceiling of the NAS. If yes, you need to disconnect some devices or programs so that the AOMEI Backupper can connect the NAS to do the backup. Or, please increase the allowed connection devices in your NAS settings. For the shared drive, please also check if the number of users sharing simultaneously in the shared folder has reached the limit. We suggest that you set the number of users shared simultaneously to 20(default).
If Windows also can't access the network path via the above method, please check if you have enabled the SMB protocol on the NAS device, or tick the option "SMB1.0 /CIFS File Sharing Support" on the shared device (Control Panel-->Programs and Features-->Enable or disable Windows features).
Q: Why can the username and password not be retained, and you have to configure the username and password every time you run a backup to the NAS?
A: If you select the mapped network drive as the destination, please try to add the network path to AOMEI Backupper, and then recreate the backup/sync task and select the added network path as the destination.
If you have added the network path to AOMEI Backupper and use it as the destination, when the password has been changed, please delete the "NAS.xml" file under the path C:\ProgramData\AomeiBR and then re-add the NAS again.
Q: Why is no NAS found in AOMEI Backupper, though Windows can access the NAS?
A: Please make sure the NAS is under the same physical LAN and with the SMB protocol.
And, it is recommended to add the NAS with the format of IP address, for example, \\192.168.4.230\, not with the format of domain name.
Also, please verify if the devices or programs connected to the NAS have reached the ceiling of the NAS. If yes, you need to disconnect some devices or programs so that the AOMEI Backupper can connect the NAS to do the backup. And, please increase the allowed connection devices in your NAS settings.
Click here to learn more FAQs.