- Windows ADK
- Free Burning Software
- Burn ISO Files
- Deploy Image Without SID
- Differences between Backup and Clone
- Exclude Files
- Restore Single File
- Shutdown PC on Backup Completion
- Change Legacy to UEFI
- Differences among Backup&Clone&Sync
- Boot from WinPE Bootable USB
- Enable APP Password
- Copy Log Files
- Sync between Two Computers
How to Change Legacy to UEFI
Introduction
As it is known, the UEFI boot has more advantages over the traditional Legacy boot of BIOS. Many features available in UEFI are not supported in traditional BIOS. With the release of Windows 11, the UEFI boot mode becomes a must for a computer. To upgrade your system to Windows 11, you need to change the Boot Mode from Legacy to UEFI.
For the newest motherboard, normally CSM is enabled by default and UEFI is also enabled so that there is no need to manually change the Boot Mode. However, if the UEFI boot mode is not enabled, you still need to manually convert Legacy to UEFI boot mode.
How to Change the Boot Mode from Legacy to UEFI
For older motherboards, the change of Boot Mode from Legacy to UEFI may take steps.
1. Press Del or F2 or other shortcuts continuously when prompted to enter the BIOS menu. From the BIOS Main Menu screen, select Boot.
NOTE: different computers use different keys to achieve this. Typically, it will either be the Del key or the F2 key. Press this key repeatedly immediately after power-up until you see the BIOS/UEFI screen.
2. From the Boot screen, select UEFI/BIOS Boot Mode, and press Enter. Then the UEFI/BIOS Boot Mode dialog box appears.
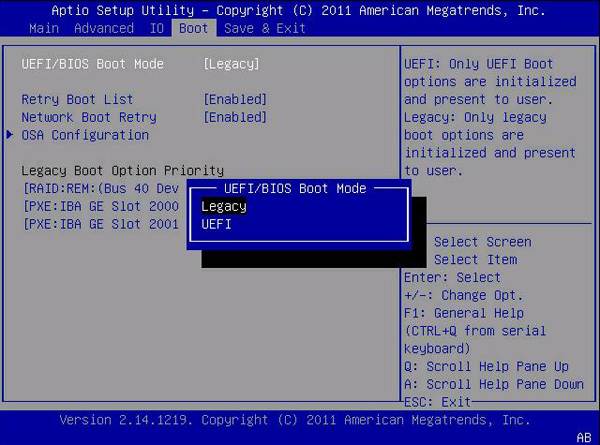
3. Use the up and down arrows to select Legacy BIOS Boot Mode or UEFI Boot Mode, and then press Enter.
4. To save the changes and exit the screen, press F10.
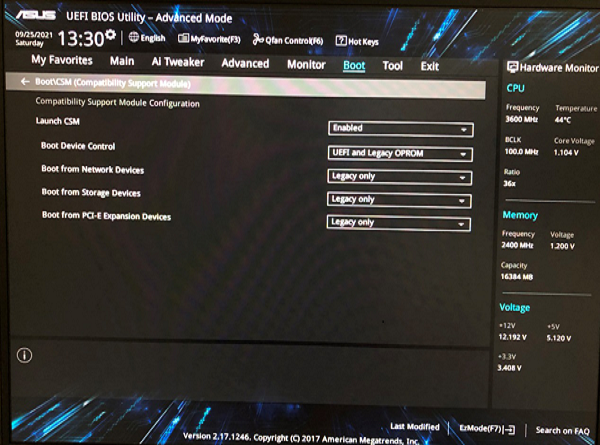
For newer motherboards, the setup of UEFI boot mode is much simpler. Once you enter into UEFI screen, please make sure the Launch CSM under Boot is enabled and UEFI support is turned on so that UEFI boot is configured successfully.