How to Create System Clone in Windows Easily
System Clone is a powerful and essential feature in AOMEI Backupper that allows users to clone the entire system partition along with all related partitions required for the system to run smoothly to a designated destination location while ensuring a secure boot.
The System Clone function is particularly useful in the following situations:
1. Upgrading to a Larger Disk: As our data storage needs grow, a larger disk becomes necessary. System cloning facilitates a seamless transfer of the entire system, along with all data and configurations, to a new and larger disk. This process ensures that we have sufficient storage space for our expanding data and allows the computer to function smoothly without storage-related performance issues.
2. Upgrading to SSD: SSDs offer significant performance advantages over traditional mechanical hard disks. By using system cloning, we can effectively migrate our existing system to an SSD, reaping benefits like faster boot times, quicker application launches, and overall improved system responsiveness. This upgrade enhances the overall computing experience and productivity.
3. Replacing Aging or Faulty Disks: As disks age or develop issues like bad sectors, their reliability, and performance may degrade. System cloning provides a solution to migrate the entire system to a brand new disk, eliminating potential problems and ensuring data integrity and stability. This replacement extends the lifespan of the system while minimizing the risk of data loss due to disk-related issues.
Create System Clone in Windows 10 Step by Step
Prerequisites for System Clone:
Please boot the Windows system that you want to clone and install AOMEI Backupper. AOMEI Backupper currently supports Windows system clone only.
Connect the appropriate target disk to the computer, and please make sure the destination space is larger than or at least equal to the total used size of all system partitions.
Note: System Clone is a paid feature, so you need to upgrade to AOMEI Backupper Professional. If you want to clone a server system, please use AOMEI Backupper Server Edition. And, if you need to clone for multiple computers, you can consider Tech or Tech Plus Edition.
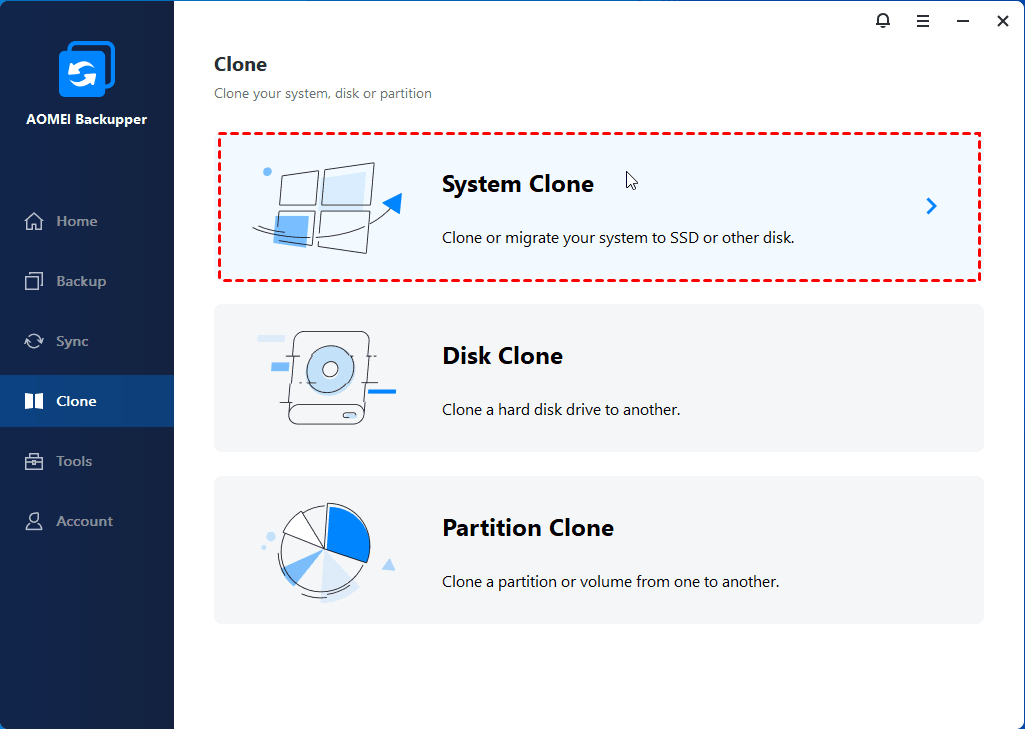
Step 1: Initiate System Clone
Launch the system migration software - AOMEI Backupper Professional. Click Clone on the left column, and then select System Clone.
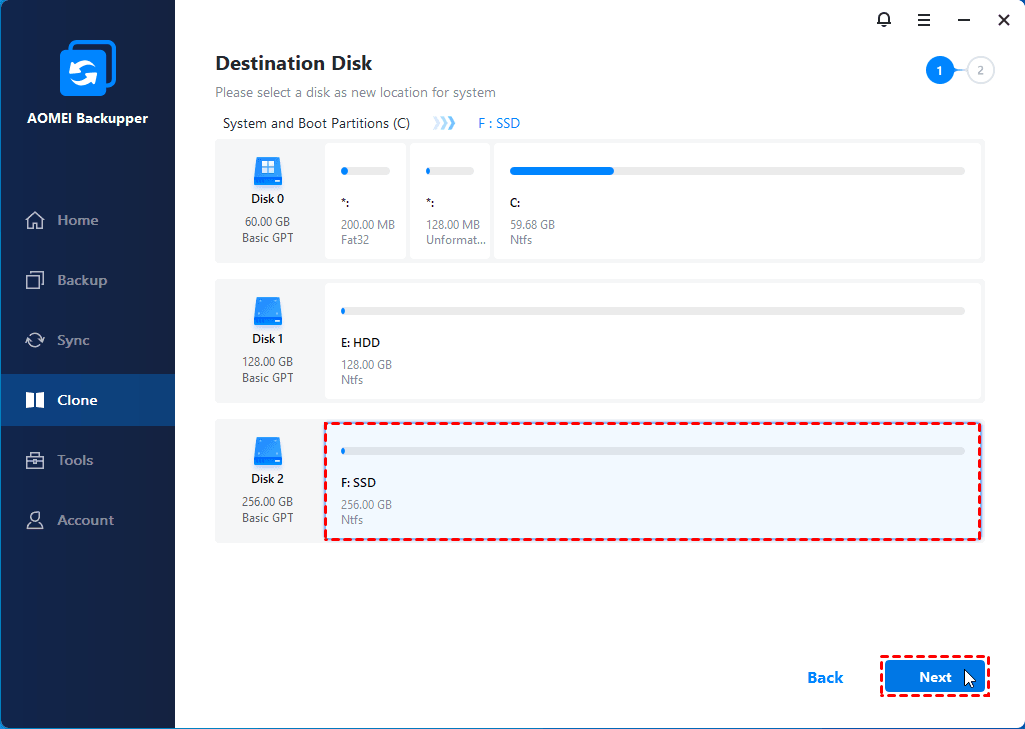
Step 2: Select Destination
The system-related partitions are selected as the source by default. You only need to select a partition or unallocated space on the target disk that you want to clone your system to.
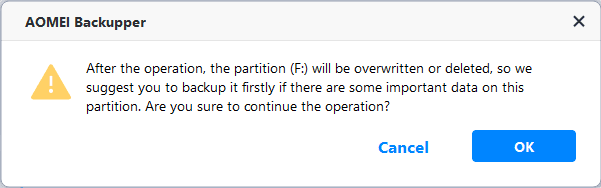
If the selected destination location is partitioned, a window will pop up to prompt that this partition will be deleted or overwritten. Click "OK" to continue. Please make sure that there isn't important data on this partition, or else it will be overwritten.
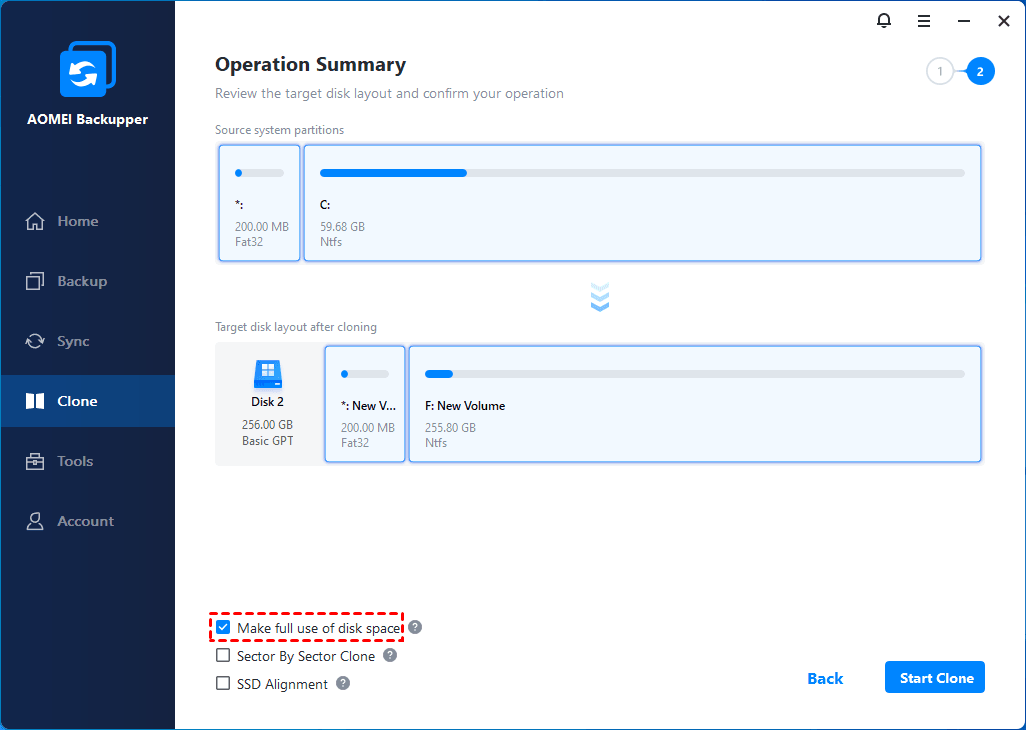
Step 3: Operation Summary and Start Clone
Then, you will access the Operation Summary window, confirm the drive information, and click Start Clone to perform the system clone to SSD or HDD.
Step 4: Additional Clone Options (Optional)
- Helpful cloning feature you may need:
- "Sector by Sector Clone": It’s to copy all sectors of the system partitions, and migrate them to a larger drive, HDD, or SSD. And it may take more time to complete. Don't tick this feature if the destination disk is smaller; otherwise, the cloning process will fail.
- "SSD Alignment": This option can also be selected to optimize the performance if the target is an SSD.
- "Make full use of disk space": It ensures that all the unallocated space on the target disk is fully utilized, and it is checked by default if you are moving the system to a larger drive.
How to Boot from the Cloned Drive
After cloning successfully, you still need to check if the cloned drive or SSD is bootable. Please follow the steps below:
- Shut down the computer completely.
- Remove the source drive from the disk drive bay and install the newly cloned drive or SSD in it.
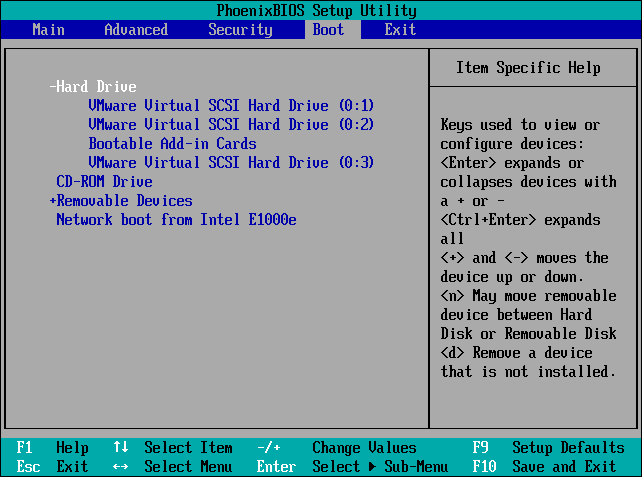
- Restart the computer to let it boot from the new drive or SSD. You may need to enter the BIOS/UEFI settings and ensure the newly replaced disk is the first bootable device if it’s not bootable.
2. Please confirm that you use the destination disk on the same machine you do the clone. If you would like to clone the system to another computer to use, we advise you to run a system backup on a working machine and use the feature "Universal Restore".
3. If the current system drive and the target drive are different disk types ( for example, one drive is MBR and the other one is GPT), it is recommended to first convert the target drive to the same type as the source drive and then clone again.
4. If you indeed want to clone the OS from MBR to a GPT disk, please confirm that your motherboard supports EFI/UEFI boot. And, you also need to change the boot mode to UEFI when you boot from the cloned system.
- If you also want to clone data partitions together on the system disk, you can try Disk Clone.
- We don't suggest that you use the Partition Clone way to clone the C: drive only. If so, the cloned drive might be unable to boot.
- For an MBR disk, System Clone will clone the system reserved partition (“system” partition) and C: drive ("boot" partition). For some environments, there is only the C: drive as the system partition, which includes “System” and “Boot” files.
- For the GPT disk, System Clone will clone the EFI partition, C: drive, and system recovery partition.
Conclusion
You can easily perform a system clone to another drive, HDD, or SSD, with a reliable system migration software - AOMEI Backupper Professional. It supports cloning all kinds of disks, regardless of disk type (MBR, GPT) and interface (SATA, NVMe, M.2, PCIe, etc). And it also provides other highlight features to make this process easier, such as Make full use of disk space, SSD Alignment, Sector by Sector Clone, etc.
FAQs
Q: Can I run a system clone in a Standard or Trial version?
A: No, system clone is a paid feature, which can to be tested in a Standard or Trial version.
Q: Why is the target drive I would like to clone not listed?
A: Please check if the target disk is 4096 bytes/sector. You can press Win+R, type “msinfo32” in the Run box, then open Components-->Storage-->Disks-->check the Bytes/sector of the drive. AOMEI Backupper currently doesn't support a 4096 disk.
Please check if the target disk is a dynamic disk. AOMEI Backupper currently can't clone a system to a dynamic disk. You can delete all partitions on the dynamic disk via Windows Disk Management, and then it will be a basic disk.
Q: When you do the system clone, it shows the error message: The program did not find the system partition. Please reboot the system and try again.
A: Please check the following items:
1. Please check if the system disk is 4096 bytes/sector. You can press Win+R, type “msinfo32” in the Run box, then open Components-->Storage-->Disks-->check the Bytes/sector of the drive. AOMEI Backupper currently can't list a 4096 disk. So, it can't back up a 4096 disk.
2. If the disk is 512 bytes/sector, but it also failed to be listed, please try to uninstall AOMEI Backupper, reboot the computer, and then reinstall it to check.
3. If you are using the WinPE environment of AOMEI Backupper, it might be that WinPE lacks the drives of the disk. So, WinPE can't read the disk. You might need to recreate the WinPE and manually add the drivers.
4. It might be that some other applications are protecting the system partition from being read by other software. Currently, we found that RollBack Rx, Reboot Restore Rx, and Drive Cloner Rx software will protect system partitions, and make AOMEI Backupper unable to access system partitions. In this case, you might need to uninstall the software so that AOMEI Backupper can do the system clone.
Q: After cloning the OS, will the source system be deleted, or will it be non-bootable?
A: System clone won’t take any effect on the source system, so you can still boot from the source system drive.
Q: Can I manually delete or wipe the original OS drive as a data drive to make full use of the drive space?
A: Once the system clone is finished and your PC boots from the new drive without any problem, you can delete it as a data drive.