How to Turn off the “Secure Boot” Option
If “Secure Boot” is enabled, you can't install other systems on the computer but only use the original system. Learn how to turn off “Secure Boot” here.
By AOMEI Updated on September 6, 2022
Nowadays, some Microsoft or OEM computers whose motherboards support UEFI add the option of “Secure Boot” to the motherboards to prevent installing other operating systems on such computers. If this option turns on, only original legal operating system or computer factory system can be installed on the computers, and computers are not allowed to boot after installing other systems.
For example, when “Secure Boot” option turns on, it is impossible for you to downgrade system from Windows 8 to Windows 7. Fortunately, you can enter into BIOS setting to turn off this option and then non-original system is able to boot.
Due to this option, AOMEI OneKey Recovery’s one key function is limited; if you need to press F11 key to enter AOMEI system recovery environment when computer is booting, you should enter BIOS to turn off Secure Boot at first, and then you can press F11 key to load AOMEI recovery environment normally. The followings are operating steps.
Step 1. When your computer starts up, you can press Delete key to enter into BIOS in common situation. (Some computers may require pressing F2 or F12, you can check the computer's motherboard specification or computer’s user manual for detail.)
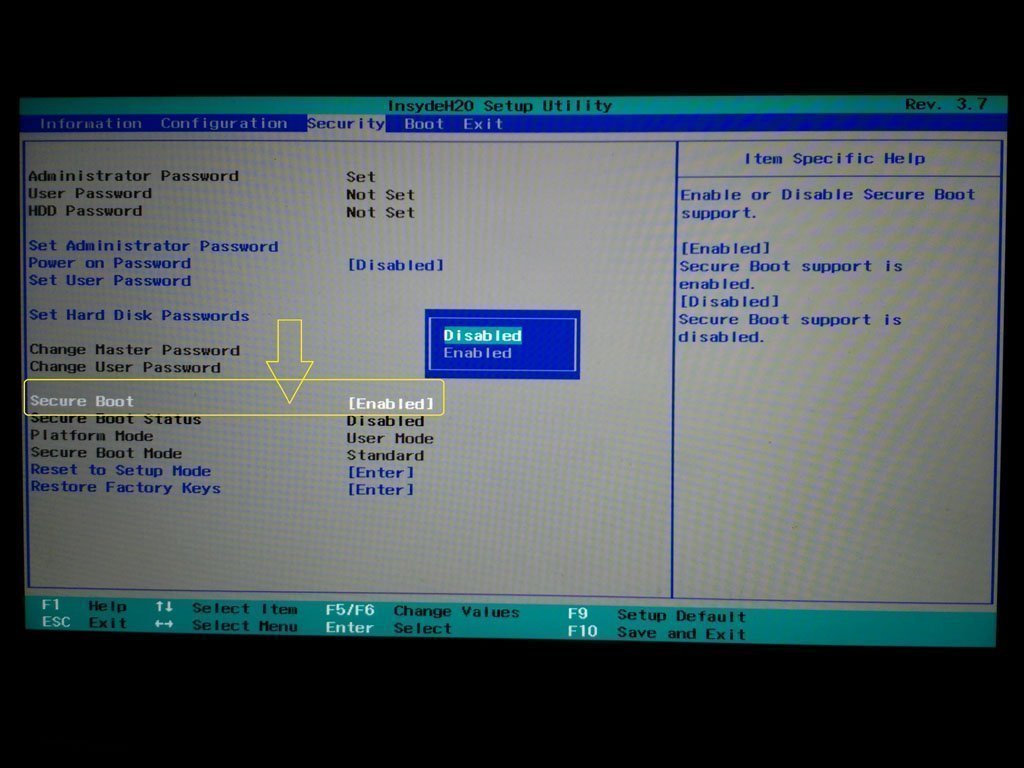
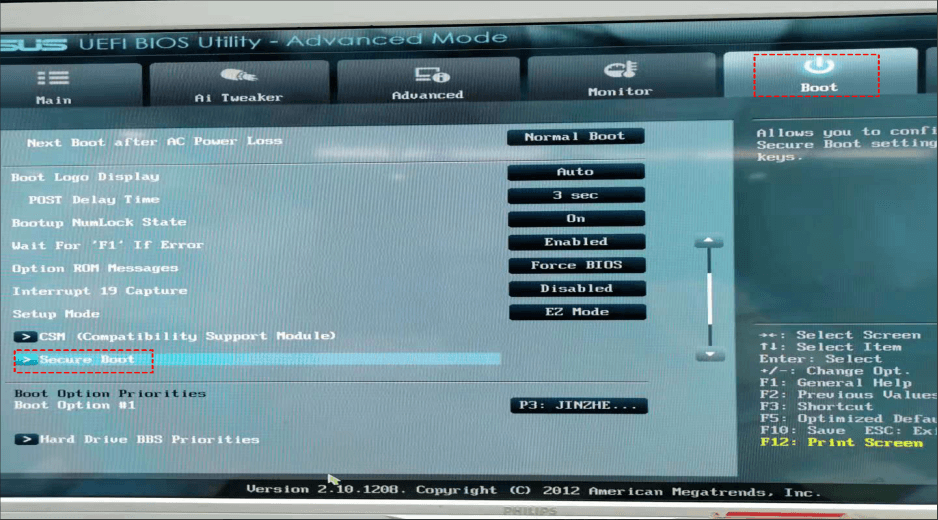
Step 2. After that, you can find “Secure Boot” option in BIOS (usually under “Security” or “Boot” option), just as the following pictures show:
Step 3. After turning off “Secure Boot”, press F10 to save the setting and exit BIOS. Then continue to press F11 key and you will be allowed to enter AOMEI system recovery environment for system recovery or system backup.
Finally, after exit AOMEI recovery environment, you need to enter BIOS again to turn on “Secure Boot” to make sure your original system can boot.
Note: Secure Boot option is in UEFI motherboard, so if your motherboard doesn’t support UEFI, there is no this option in your motherboard.

