How to Backup Files and Folders with AOMEI Cyber Backup
Sometimes your files can be lost due to virus attacks, ransomware intrusion, disk corruption, accidental deletion, etc. Therefore, it is important to make backups of your files from time to time.
In AOMEI Cyber Backup's file and folder backup feature, files and folders backup can be backed up to an image file for convenient storage of your data.
How to Create Backups of Files and Folders
Prerequisites for Windows Backup:
- Computer with AOMEI Cyber Backup installed
- Computer with AOMEI Cyber Backup Agent installed
- Local disk or network share to store backup files
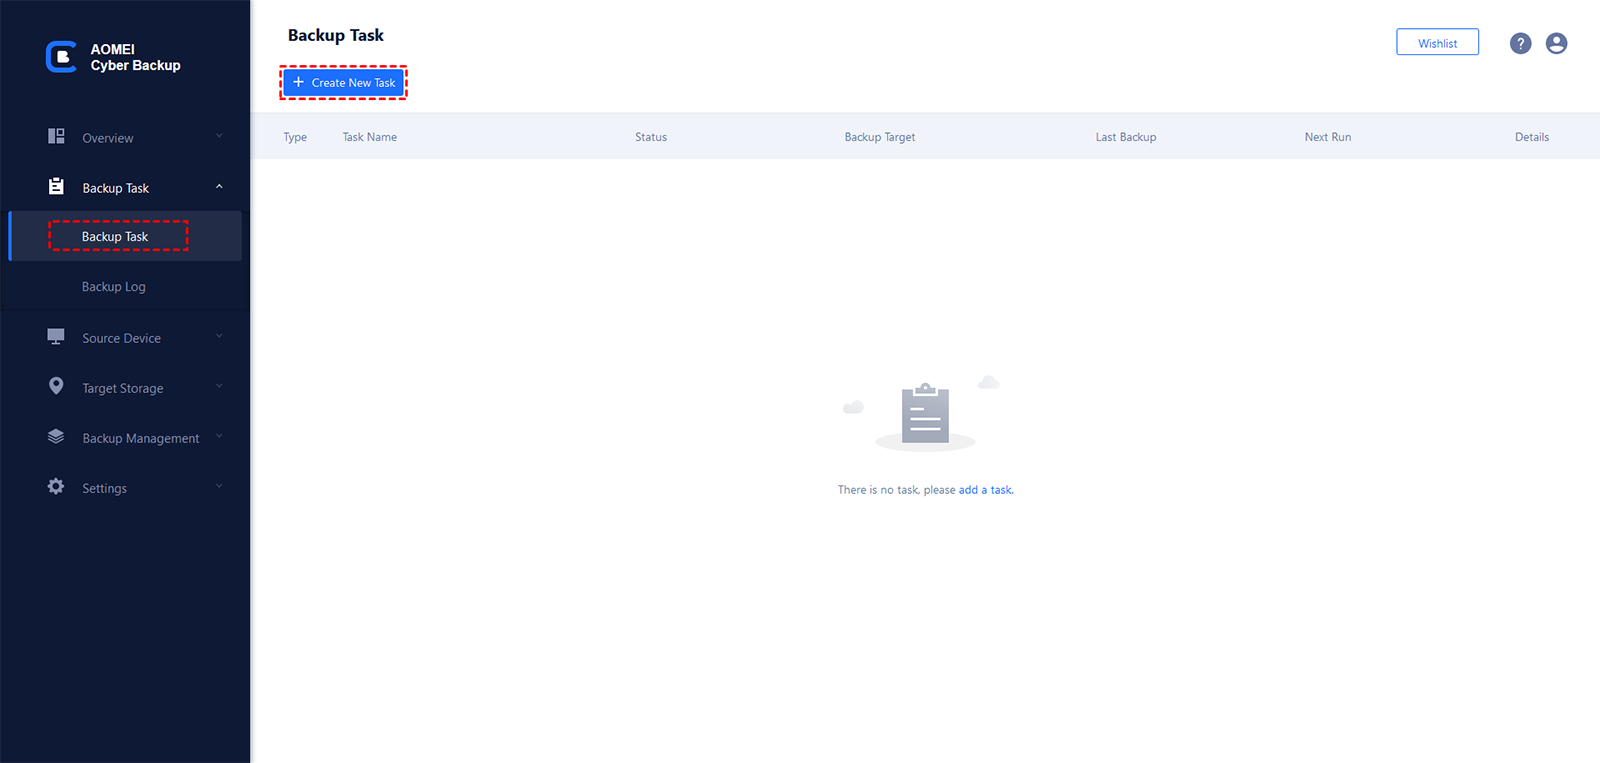
Step 1: Initiate Backup
Click "Backup Task" on the left menu bar, select "Backup Task". Click "Create New Task" to open the task creating page.
Step 2: Select Backup Type
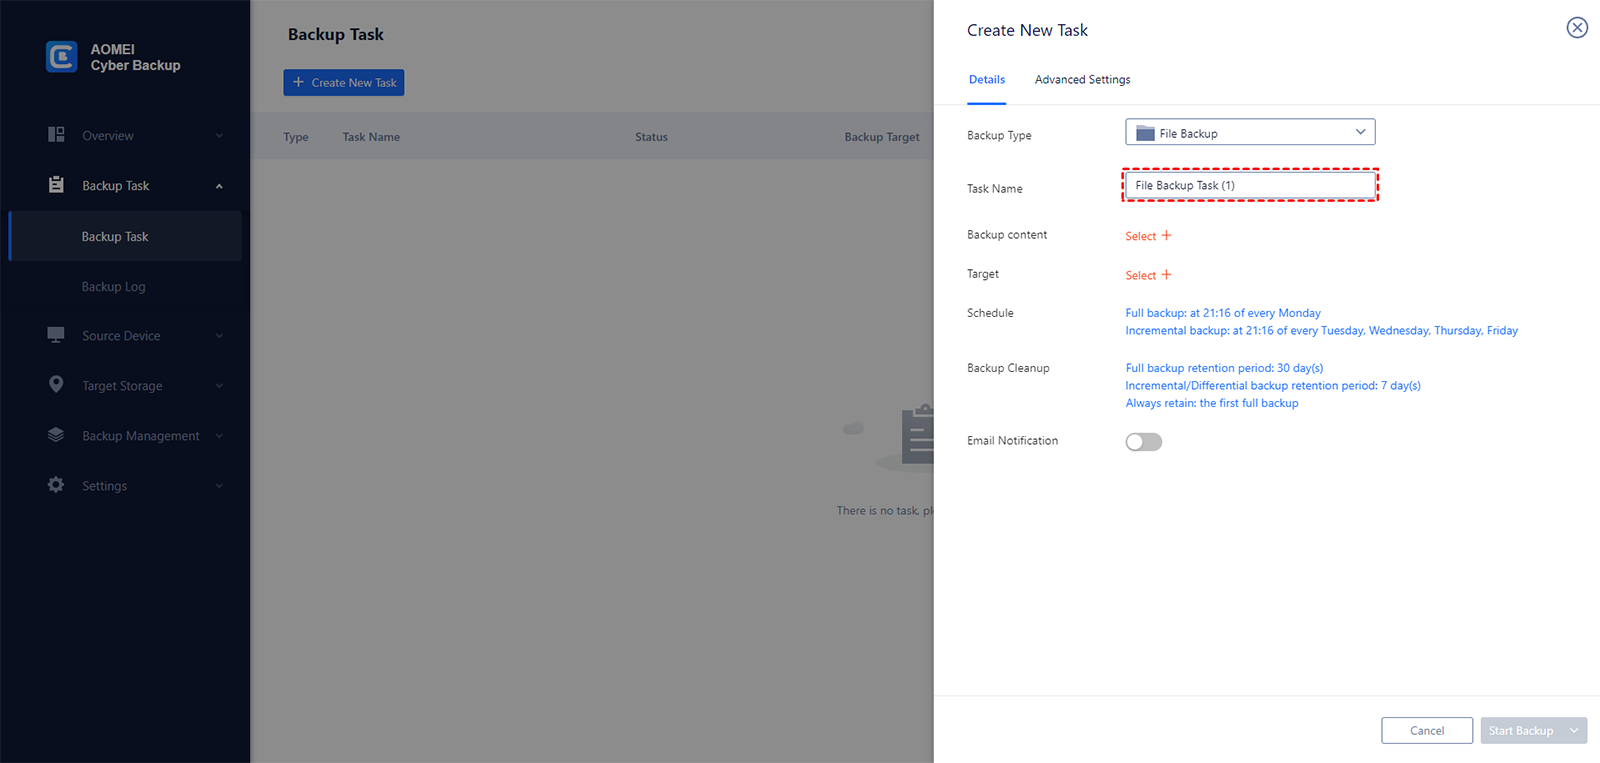
Select "Backup Type" as File Backup.
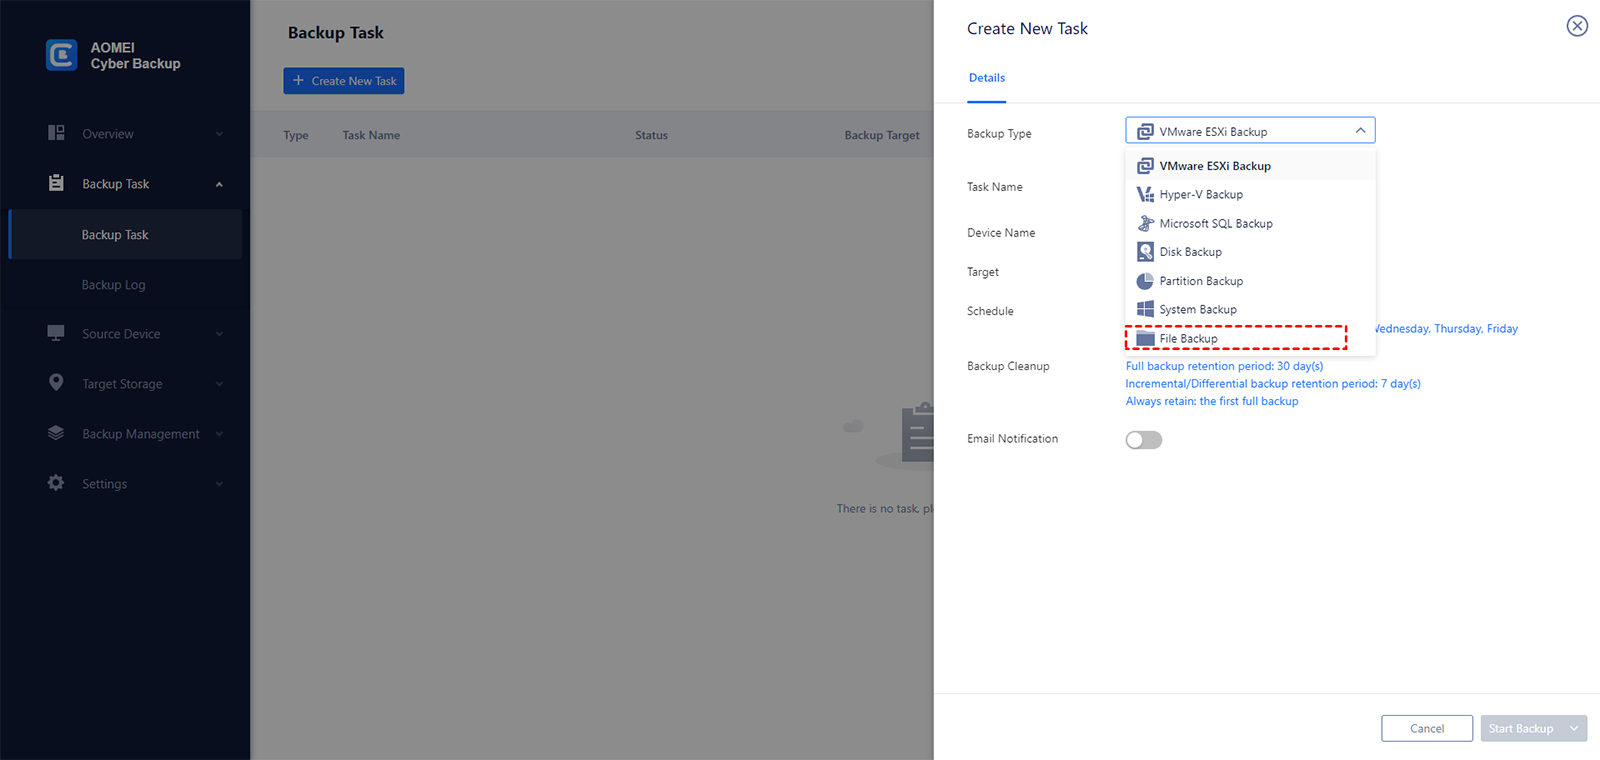
Tips: Set a "Task Name". It will have a default name. You can edit the name of the task.
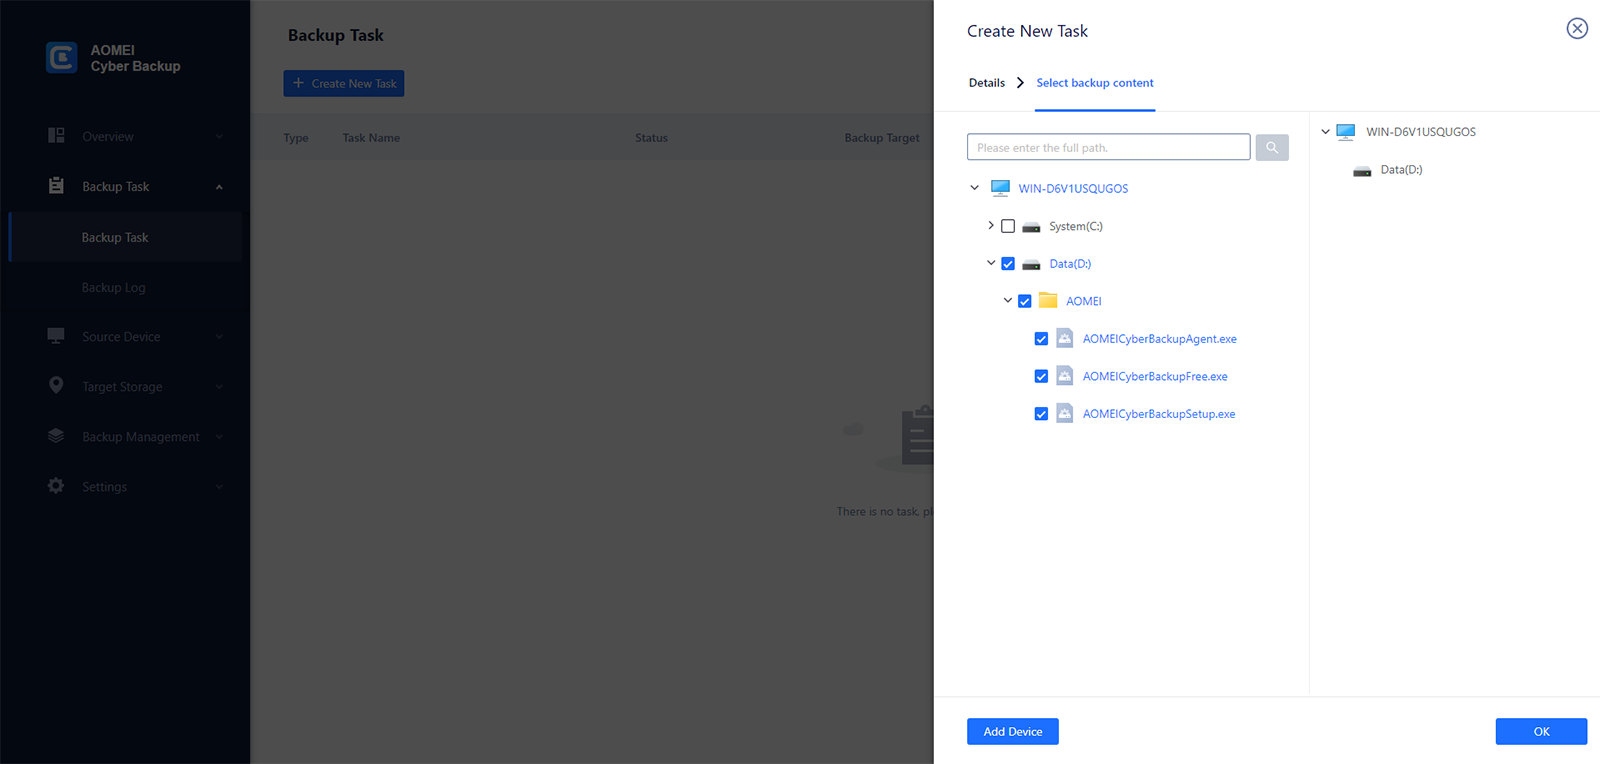
Step 3: Select Backup Content
1. Select "Backup content". All files and folders on this Windows device will be listed.

2. Then you can select the files and folders for backup.
Step 4: Select Destination
1. Select "Target" to save backups.
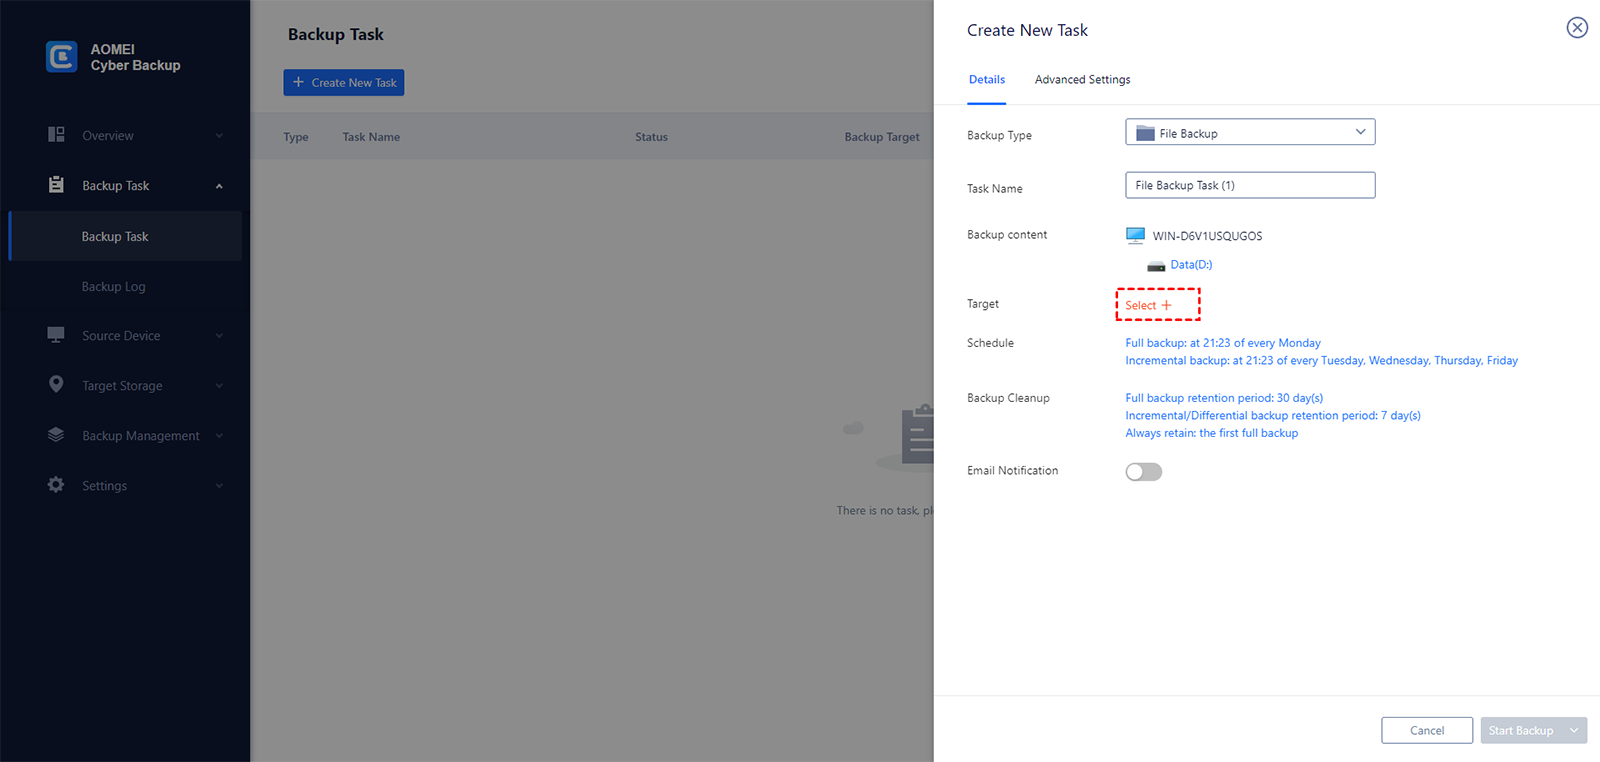
2. You can select a local or network path.
Added storage: It will list all added backup target. You can select the backup target without adding it again.
Add a new local storage: It will list the local directory of this computer with AOMEI Cyber Backup installed , then you can select a location as backup target.
Add a new network storage: You can type into a network path (such as: 192.168.1.1\data), then fill in username and password of the network path to add. After that, you can continue to select a folder of the network path as backup target.
Tips: You can also add and managetarget locations in Target Storage.

You can enable Backup Archive to backup to Amazon S3, for more detailed information, please see here.
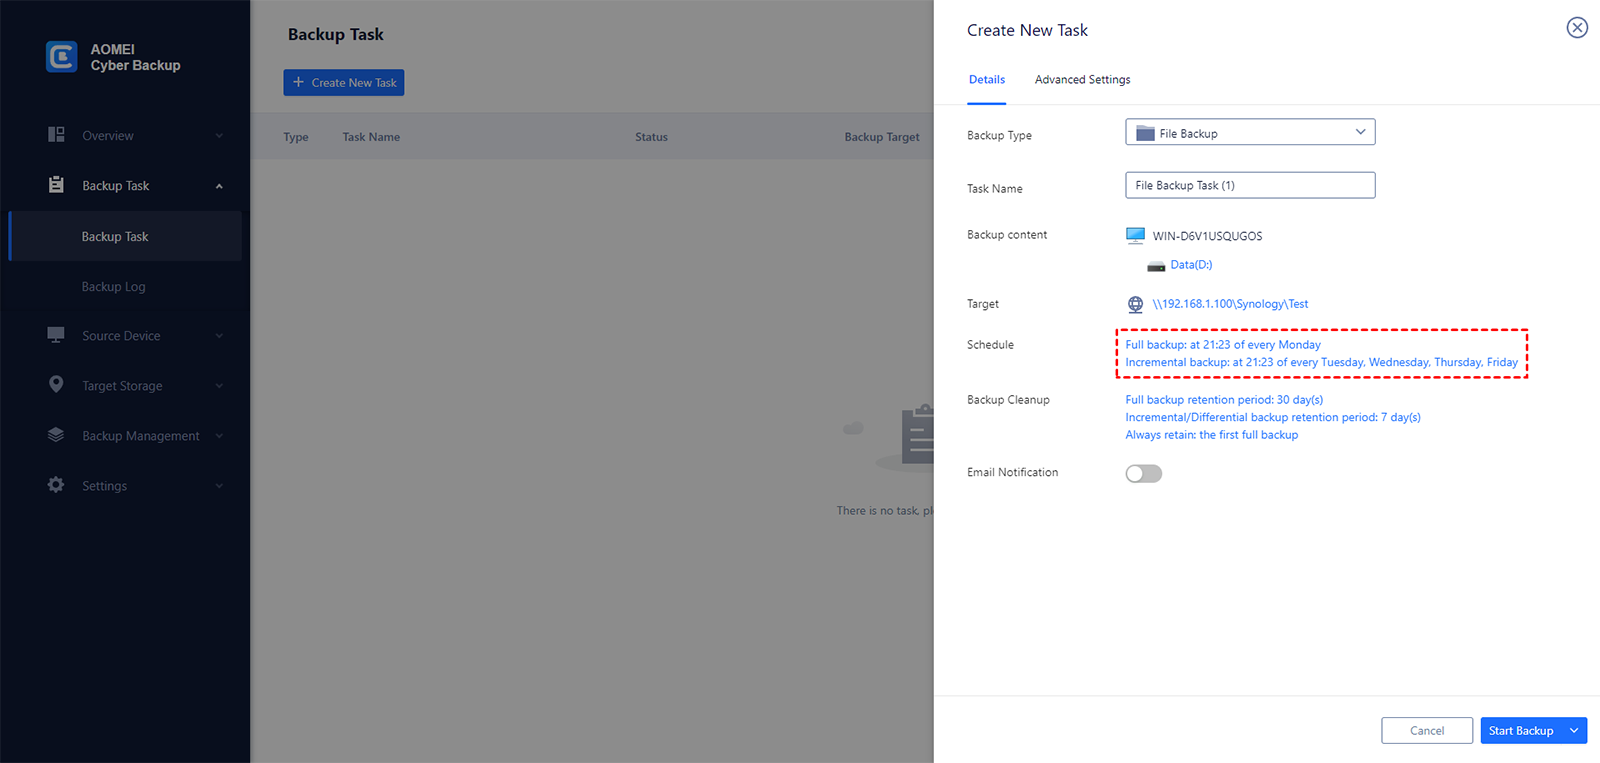
Step 5: Set Schedule Backup
Schedule Backup helps you backup your virtual machines automatically and regularly. After activating this option, you can let AOMEI Cyber Backup automatically run backups without worrying about a certain day's backup not being performed.
Generally, the schedule setting is enabled by default. You can change the schedule on your needs, or disable it. For more details about this function, please check Schedule Backup.
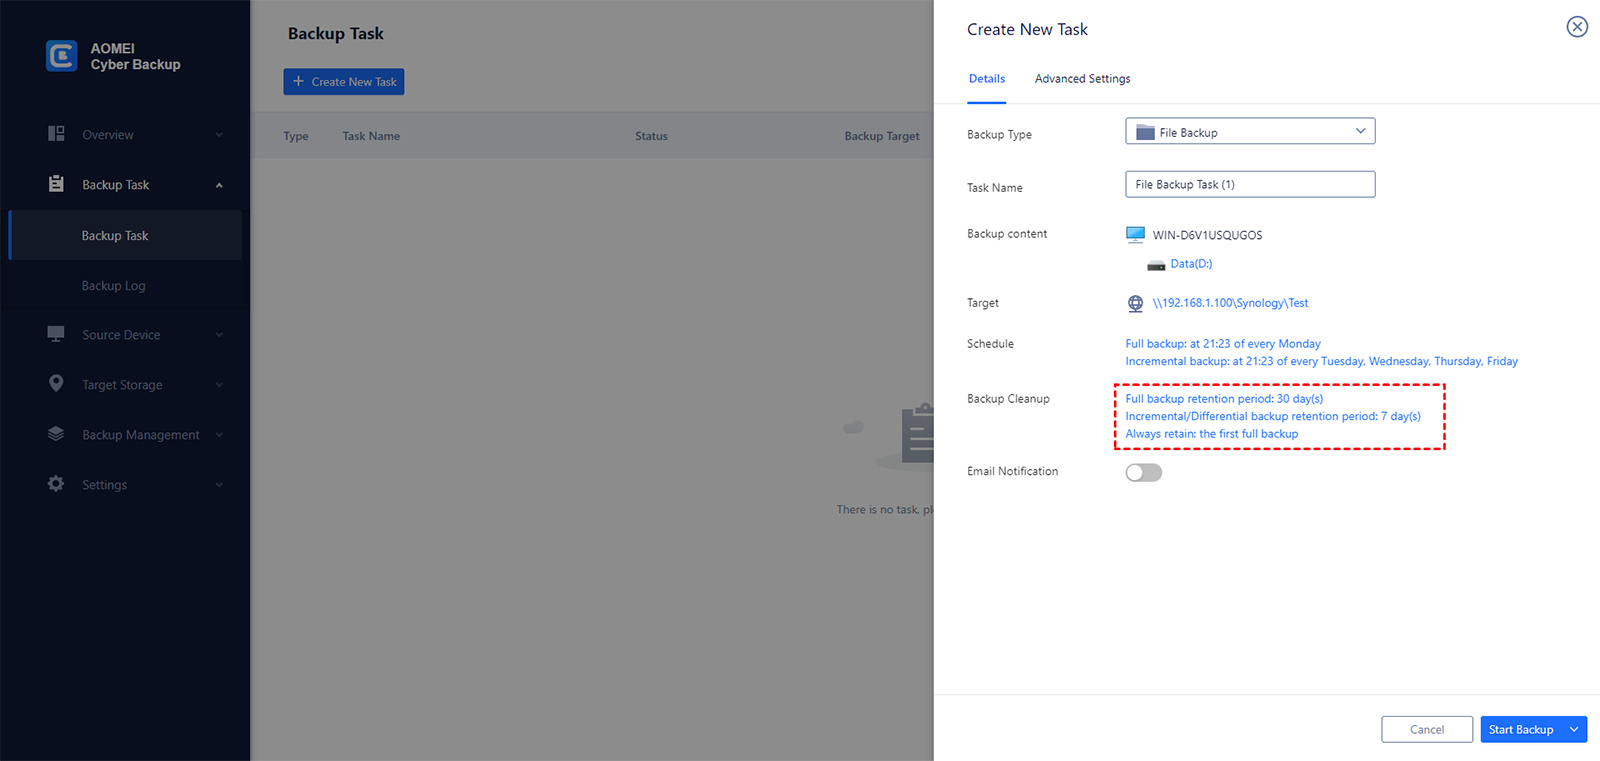
Step 6: Set Backup Cleanup
Backup Cleanup helps youautomatically removehistory backup versions based on rule to save storage space. After activating this option, you can let AOMEI Cyber Backup clean up automatically without worrying about backup failure due to disk space being full.
Generally, the backup cleanup is enabled by default. You can change the backup cleanup based on your needs, or disable it. For more details about this function, please check Backup Cleanup.
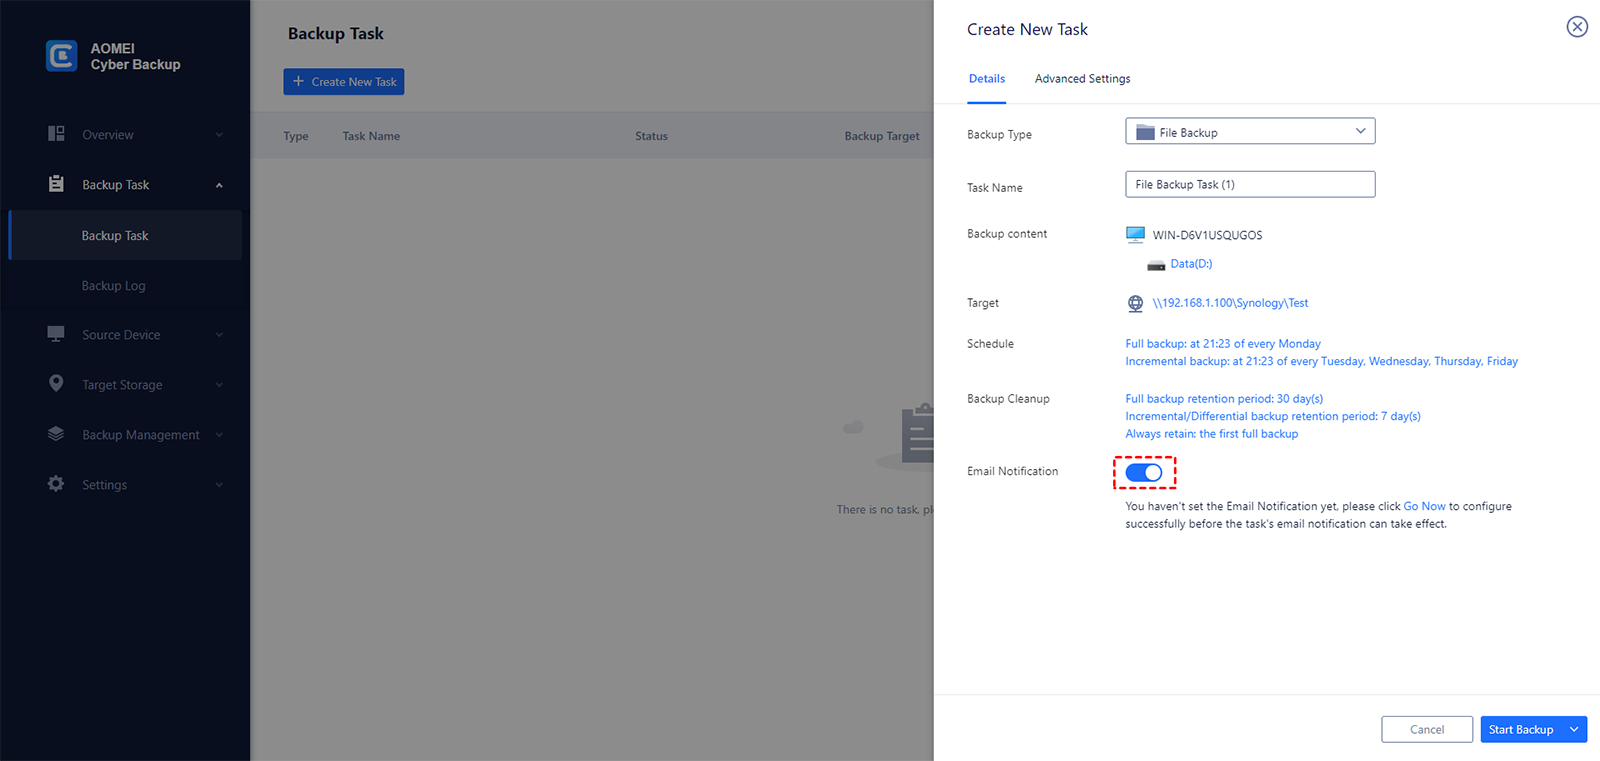
Step 7: Set Email Notification
You can enable "Email Notification" to receive email notifications when the task is abnormal or successful. Click "Go Now" to set or modify the notification settings. Currently Gmail Server, Hotmail Server and Custom SMTP Server are supported. Please note SMTP server authentication is required and cannot be empty. For more details about this function, please check Email Notification.
Step 8: Advanced Settings
1. You can also set the files to be excluded or included in "Advanced Settings".
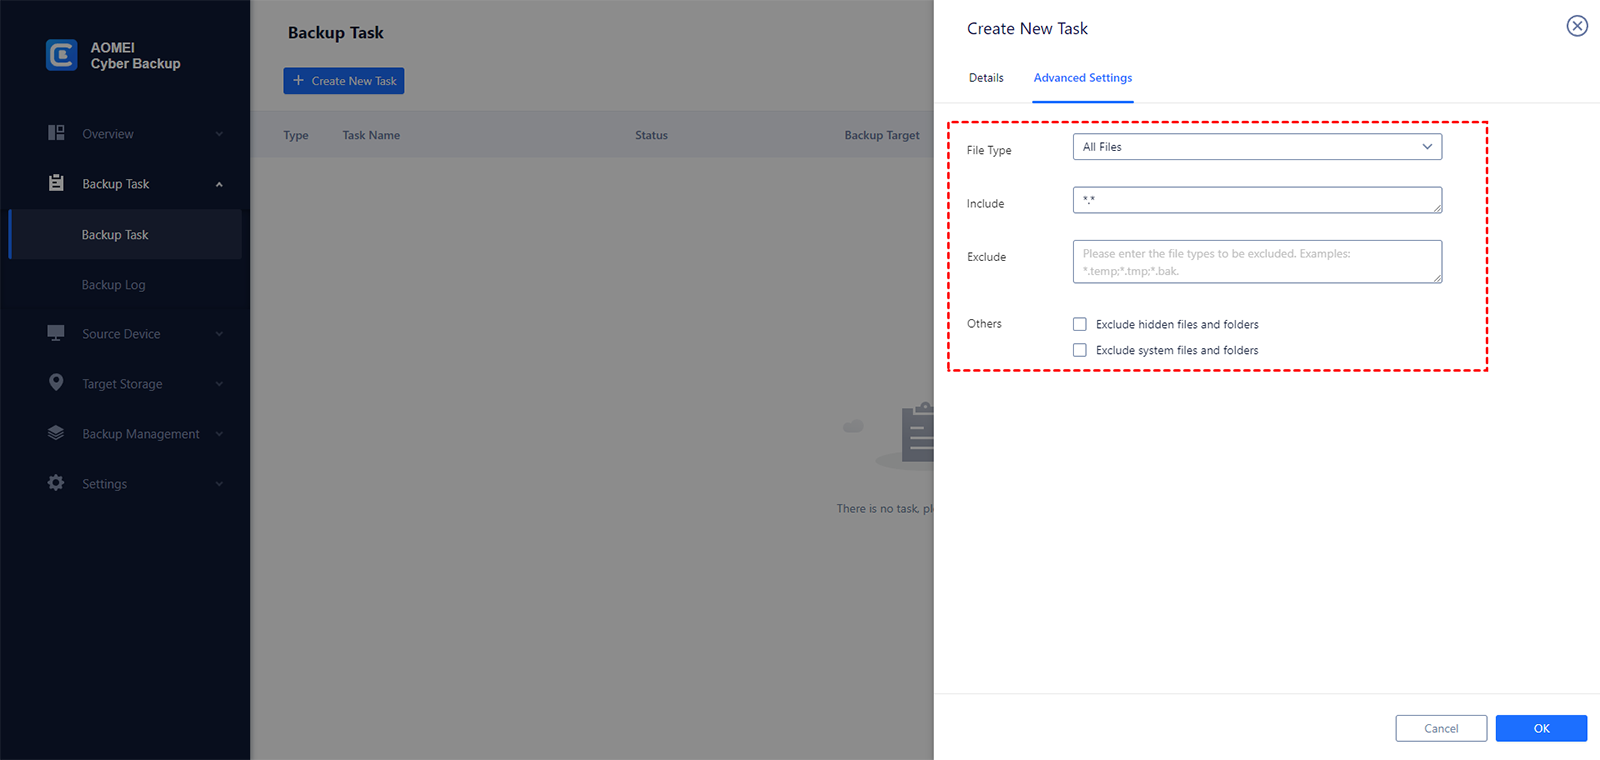
2. The "Include" option can specify the files that you need to backup. Wildcards are supported and separate multiple fields with semi-colon (*.doc;*.xls;*.ppt ).
With this option, you can configure including backup according to file extensions, such as .doc, .xls, .ppt, and so on. So, only files with the same extensions will be backed up to the target path.
For example, you would like to only backup .doc files in the selected source folders. You can just configure "*.doc" in the option. (If you would like to include more extensions, please separate the formats with semi-colons).
3. The "Exclude" option specifies the files that you need to exclude. Wildcards are supported and separate multiple fields with semi-colon (*.temp;*.tmp;*.bak).
With this option, you can configure to exclude according to file extensions, such as .temp, .tmp, .bak and so on. As a result, all files with the same extensions will not be backed up to the destination location.
For example, you would like to only exclude .temp files in the selected source folders. You can just configure "*.temp" in the option. (If you would like to exclude more extensions, please separate the formats with semi-colons).
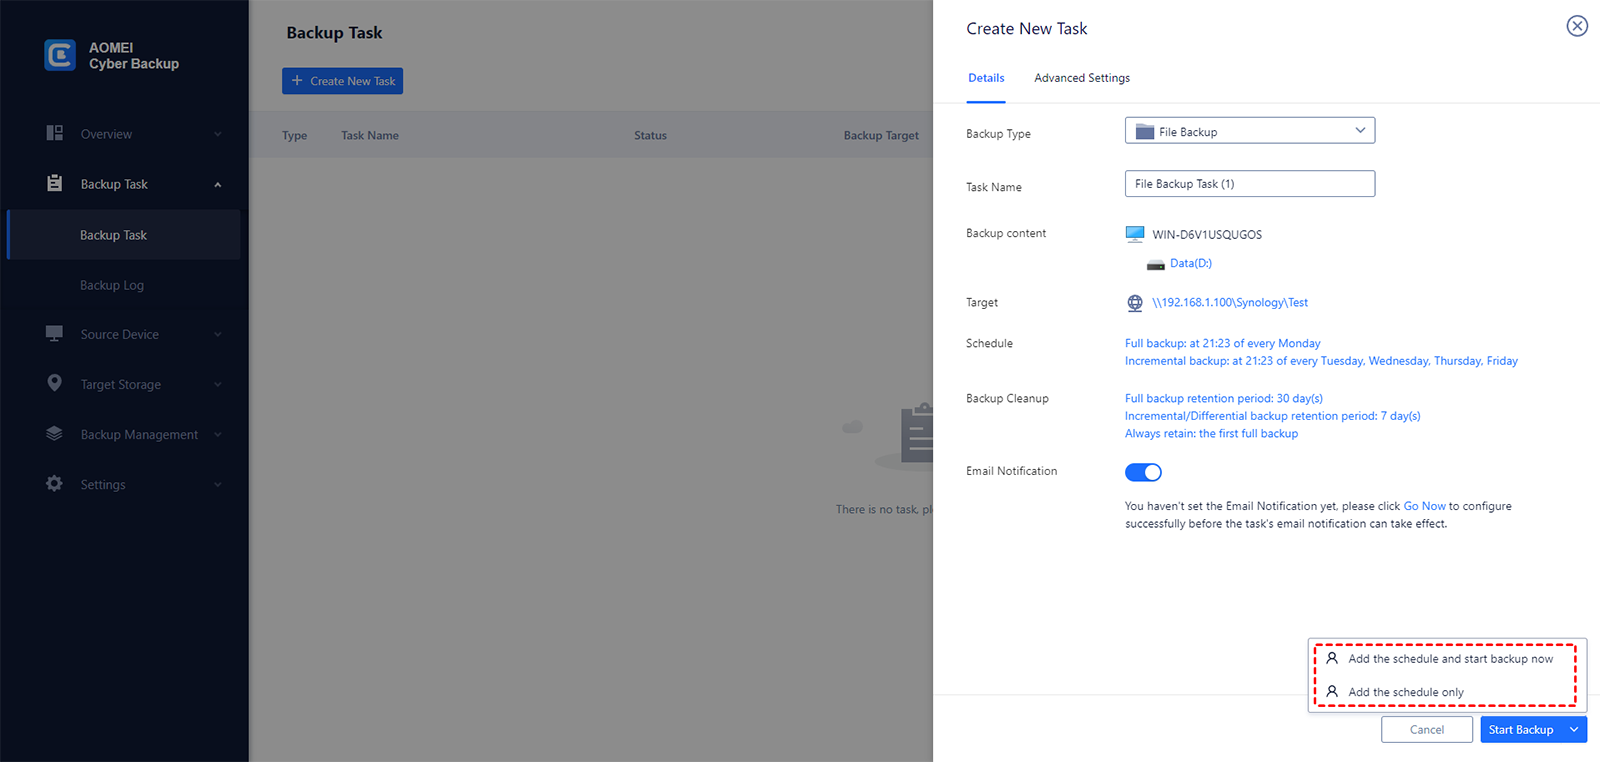
Step 9: Start Backup
1. Click "Start Backup" to create the backup task and perform backup.
2. Once you enable schedule, you can also select "Add the backup and start backup now" or "Add the schedule only".
If you select "Add the backup and start backup now", the backup will be added and the backup task will start immediately.
If you select "Add the schedule only", the backup task will be created with schedule and wait to start at the scheduled timepoint.
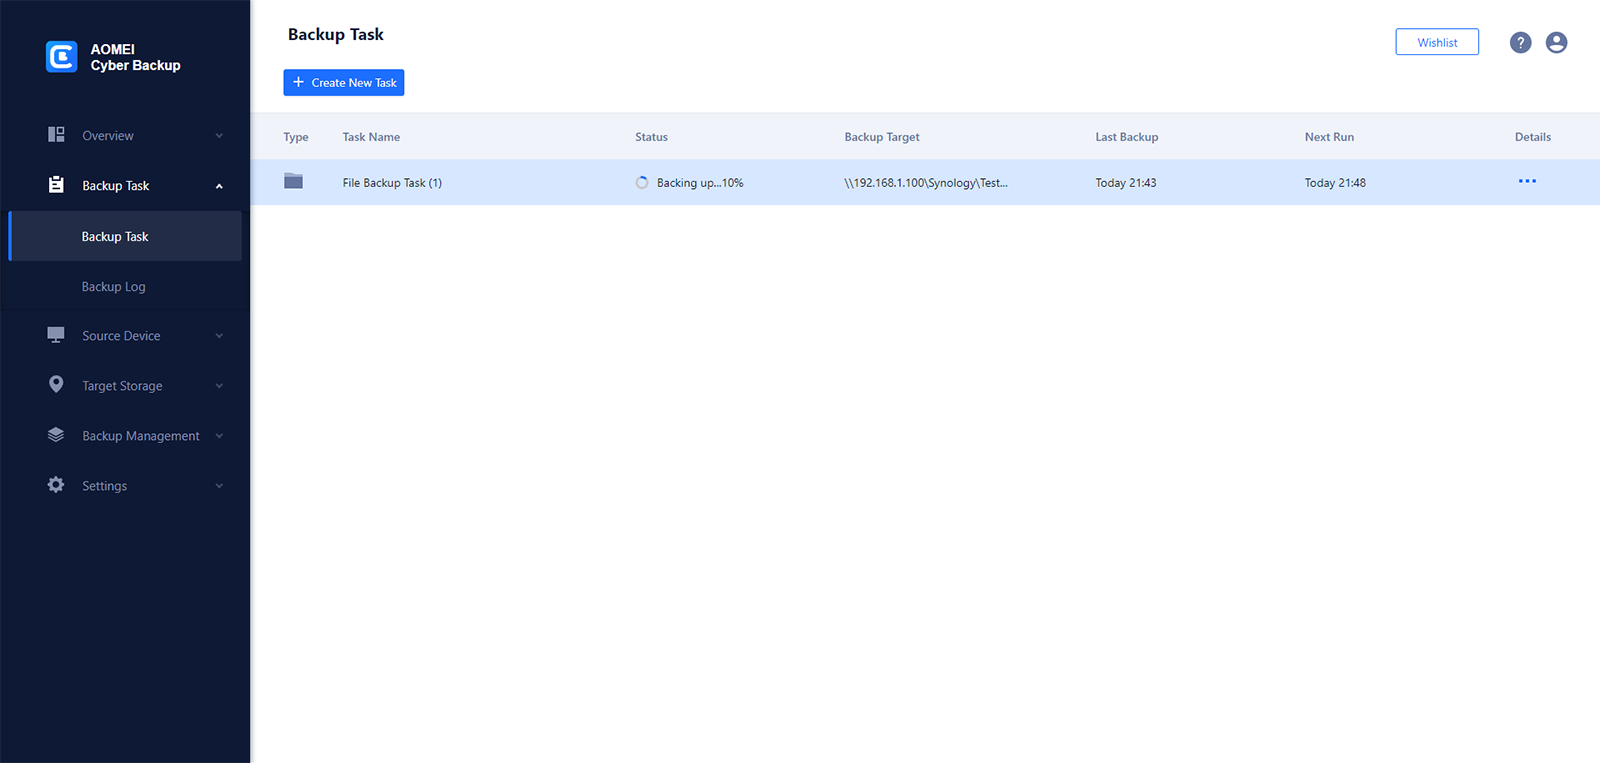
Step 10: Monitor/Complete Backup
1. The backup is running, please wait patiently for the backup to complete. You can click on theellipsis button to see backup details and backup progress.
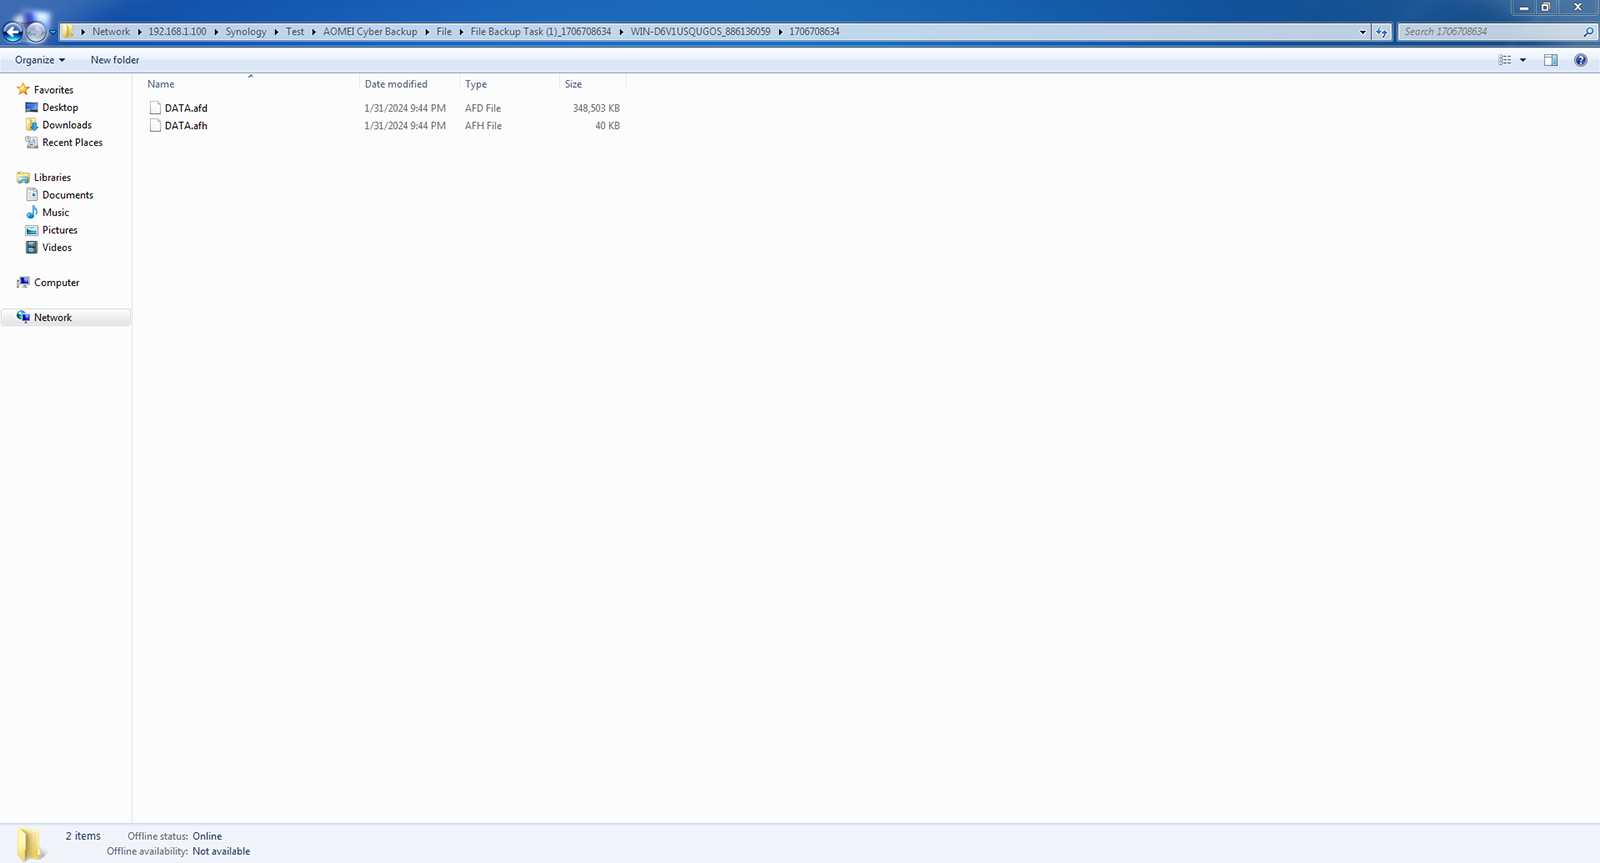
2. After the backup is complete, DATA.afd and DATA.afh files will be created in the destination location. The folders are named as follows: \AOMEI Cyber Backup\File\task name\computer name
Summary
You can see the backup details in Backup Tasks, and you can continue to do full backup, incremental backup or differential backup. You can also manage backup tasks here, like edit or delete the tasks.
If there is an abnormality in the files, you can restore it to the previous state.