How to Restore Virtual Machines with AOMEI Cyber Backup
You may need to restore your virtual machines in many cases, for exmaple, virtual machine crash, system corruption, data loss, and so on. With the help of AOMEI Cyber Backup, you can easily restore the devices you backup. It will recover your data and save your time.
In this article, we will introduce how to restore the backups of virtual machines VMware ESXi and Hyper-V created by AOMEI Cyber Backup.
How to Restore Virtual Machines
Prerequisites for VM restore:
- Computer with AOMEI Cyber Backup installed
- VMware or Hyper-V backups created by AOMEI Cyber Backup
Full Restore
Once you have created backups for your virtual machines, you can restore them at any time. Currently, VMware ESXi Restore and Hyper-V Restore are supported. Here we take restore of VMware ESXi as an example.
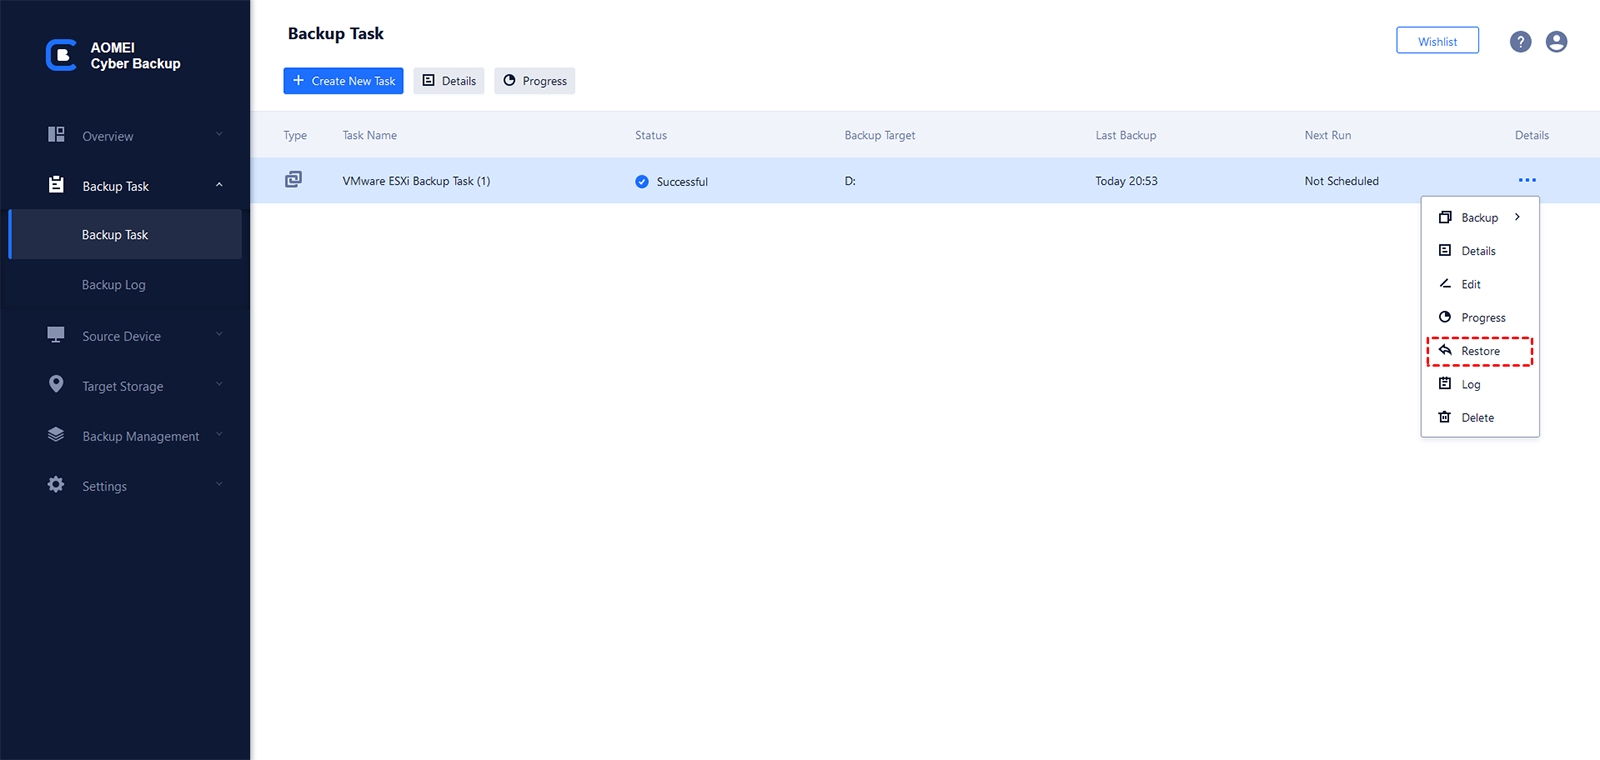
1. Click "Backup Task" on the left menu bar, locate the task you want to restore, and click "![]() "--> "Restore".
"--> "Restore".
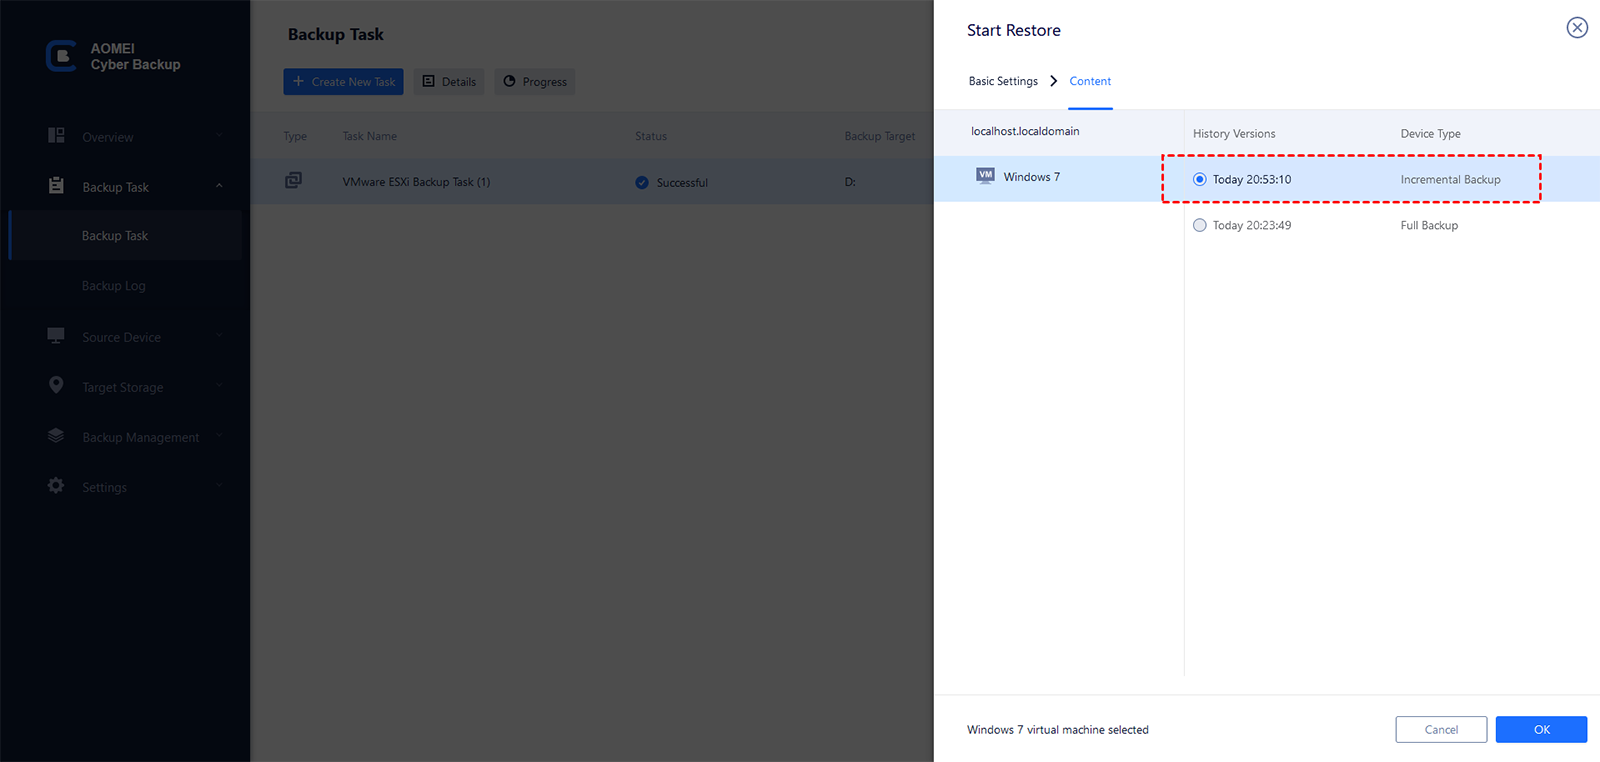
2. Select a backup version that you want to restore.
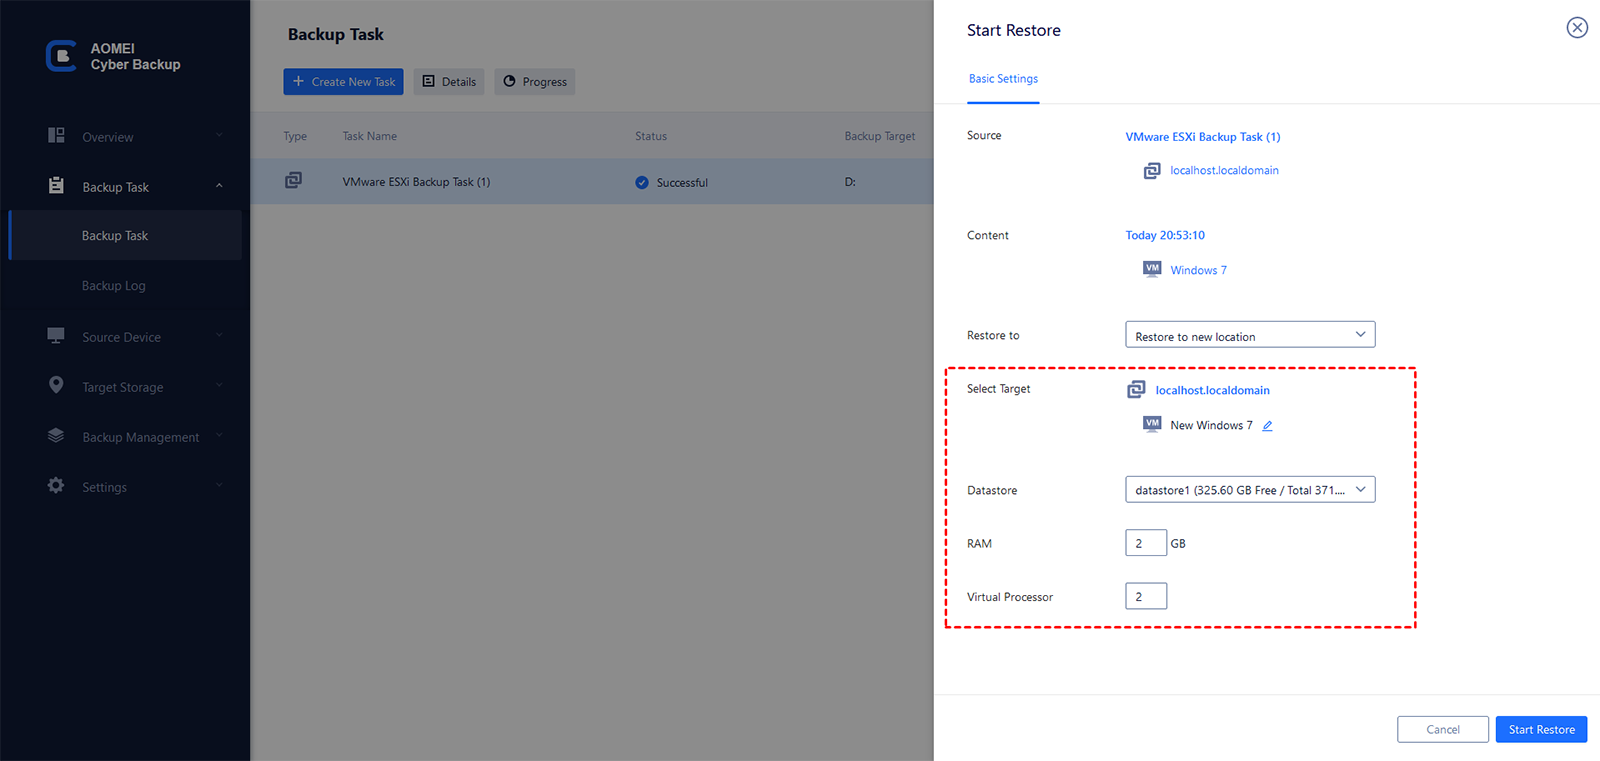
3. Select the target location that you want to restore to.
If you restore to original location, you don’t need to select target. "Restore to original location" is selected by default, you can directly click "Start Restore".
For VMware ESXi device, "Restore to original location" will restore system and data of the original virtual machine to the status that the restored backup version is created. But, if you create snapshots before restore, it will still retain these snapshots, you can recover these snapshots after when you need them.
For Hyper-V device, "Restore to original location" will overwrite the original virtual machine with the backup version. If there are new important data, please backup them before restore.

If you restore to new location, you need to select target and specify the name of the new virtual machine. You can also select datastore and modify the values of RAM and Virtual Processor.
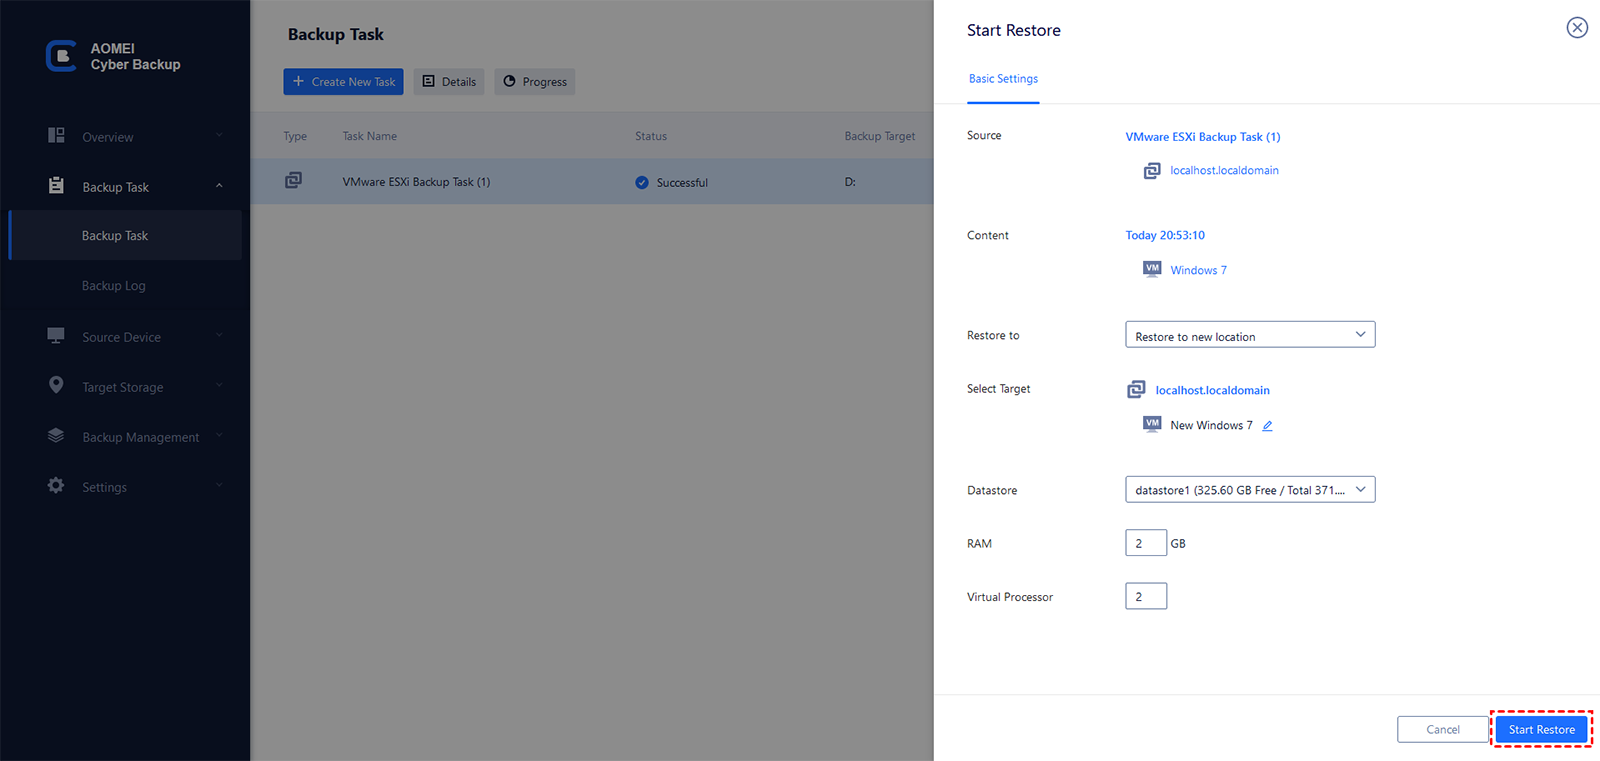
4. After all settings are completed, click "Start Restore" to begin the restore progress.
5. The restore is running, please wait patiently for the restore to complete. You can click on the "![]() " button to see restore details or cancel the restore.
" button to see restore details or cancel the restore.

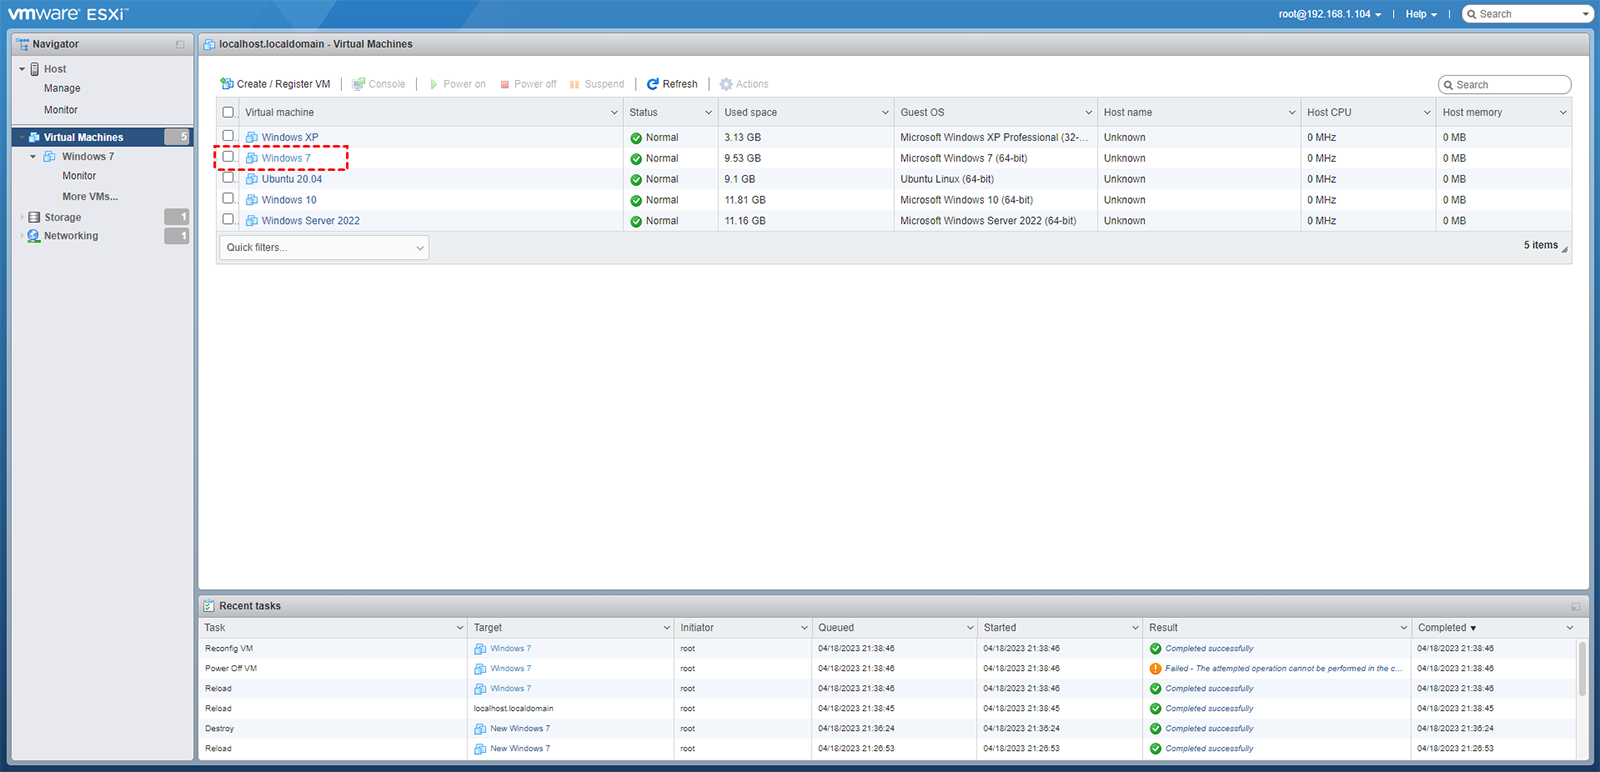
6. After the restore is complete, you can see the restored virtual machine in VMware ESXi console.
If you restore to original location, you will see that the old virtual machine has been replaced by the newly restored virtual machine.
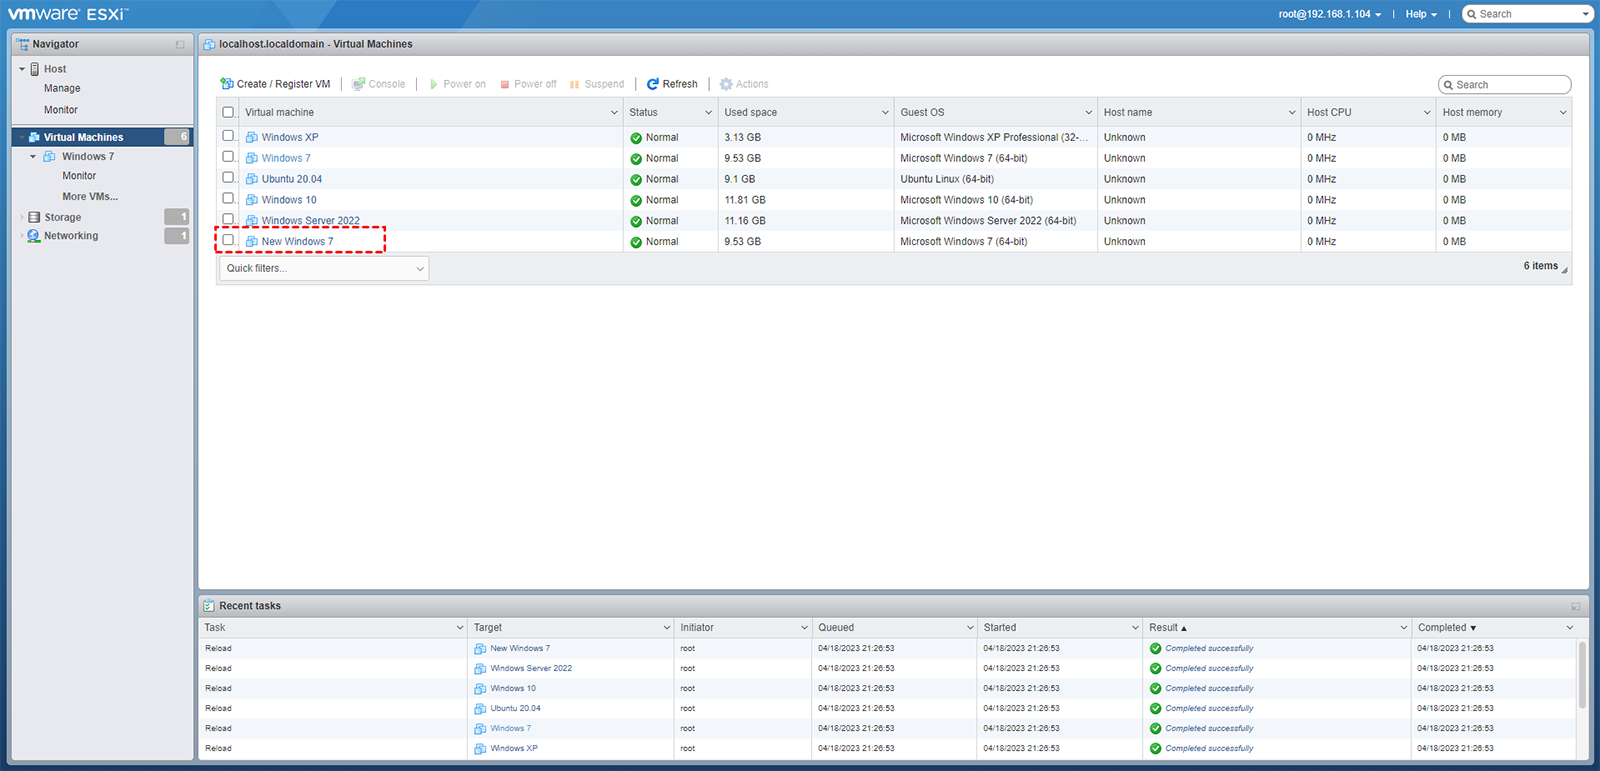
If you restore to new location, you will see the new virtual machine with the name you specified.
Tips: You can also restore from "Backup Management"-->"History Versions".
Granular Recovery
If you only want to restore a certain file from the virtual machine backup, you can use Granular Recovery. Here we also take VMware ESXi as an example.
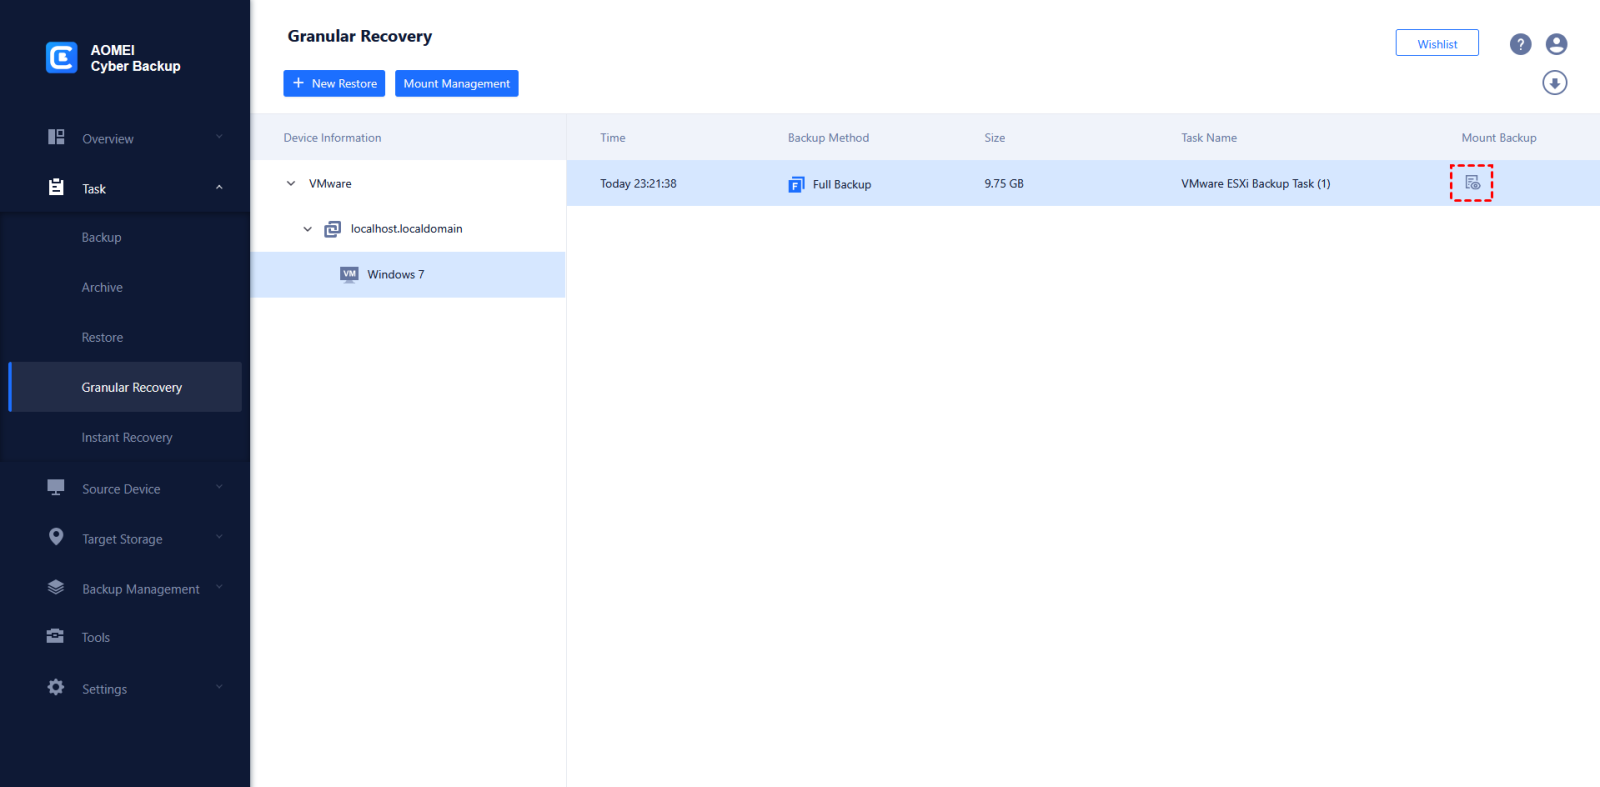
1. Click "Task" on the left menu bar, and choose "Granular Recovery". Locate the task you want to restore, and click the "Mount Backup" icon.
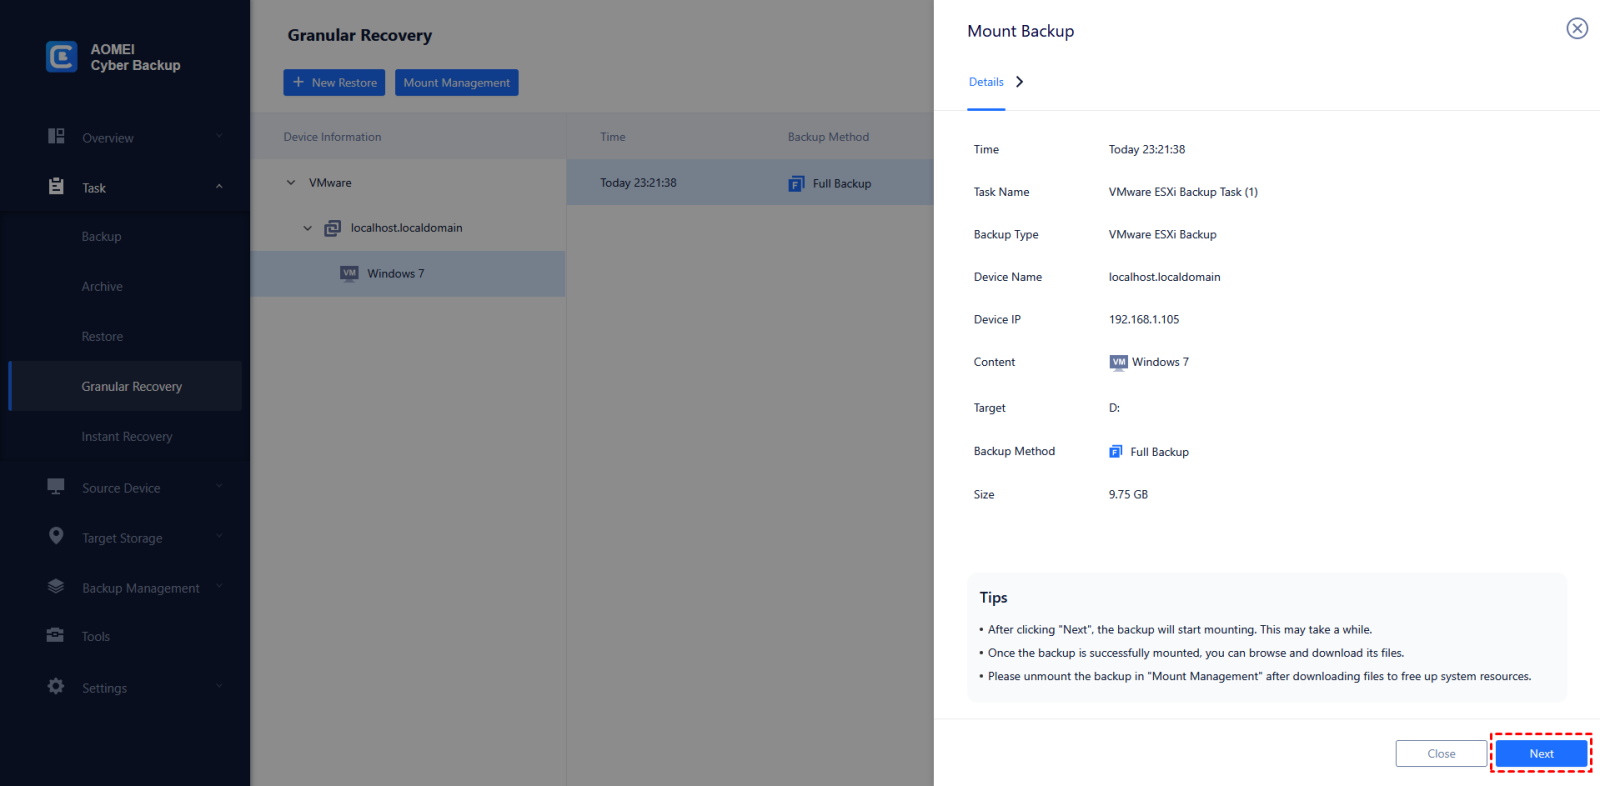
2. Click "Next" to start mounting.
3. Once the backup is successfully mounted, you can browse and download its files. Choose the files you want to restore and click the "+" button.
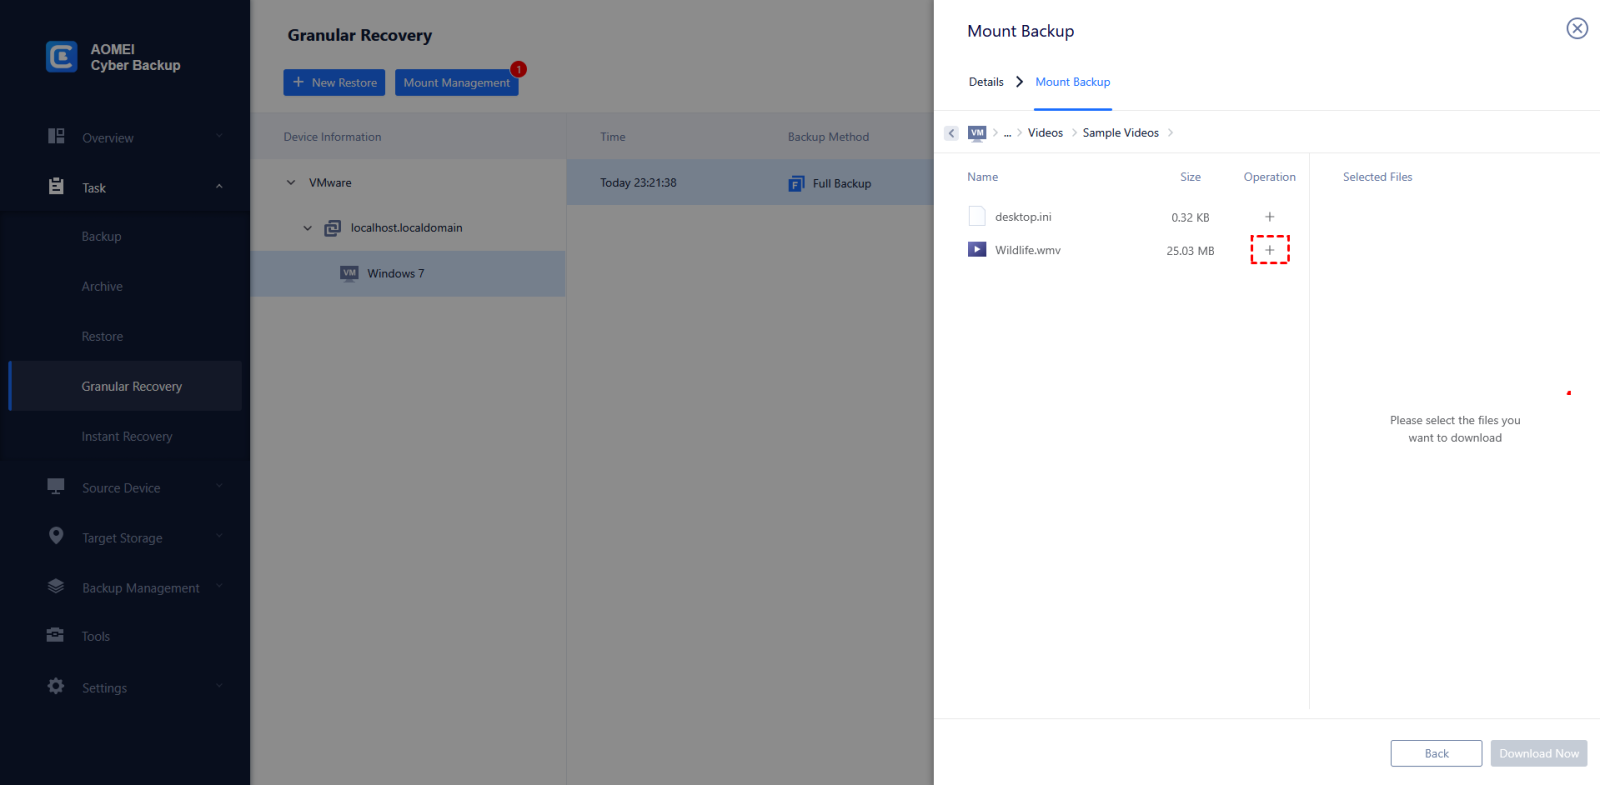
4. The chosen files will be listed in "Selected Files". Click "Download Now" to start restoring.

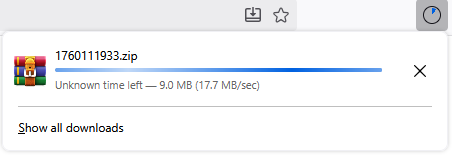
5. The files will be packaged into a zip compressed file and downloaded in the web browser. The path where the files are saved is the default download path set by the web browser.
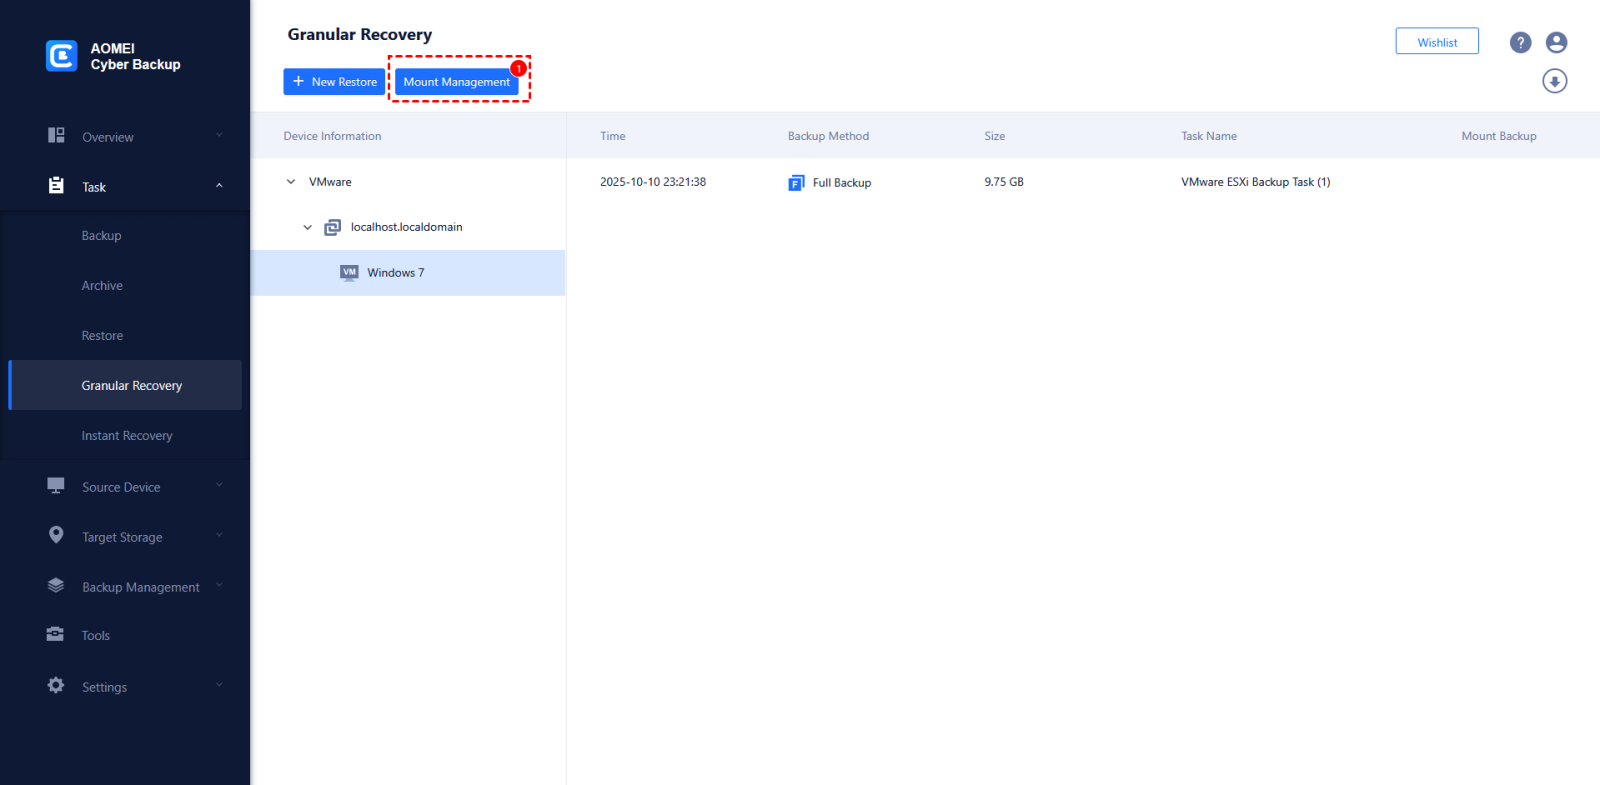
6. After the download is complete, it is recommended to unmount the backup to free up system resources. Click "Mount Management" to open the manage console.
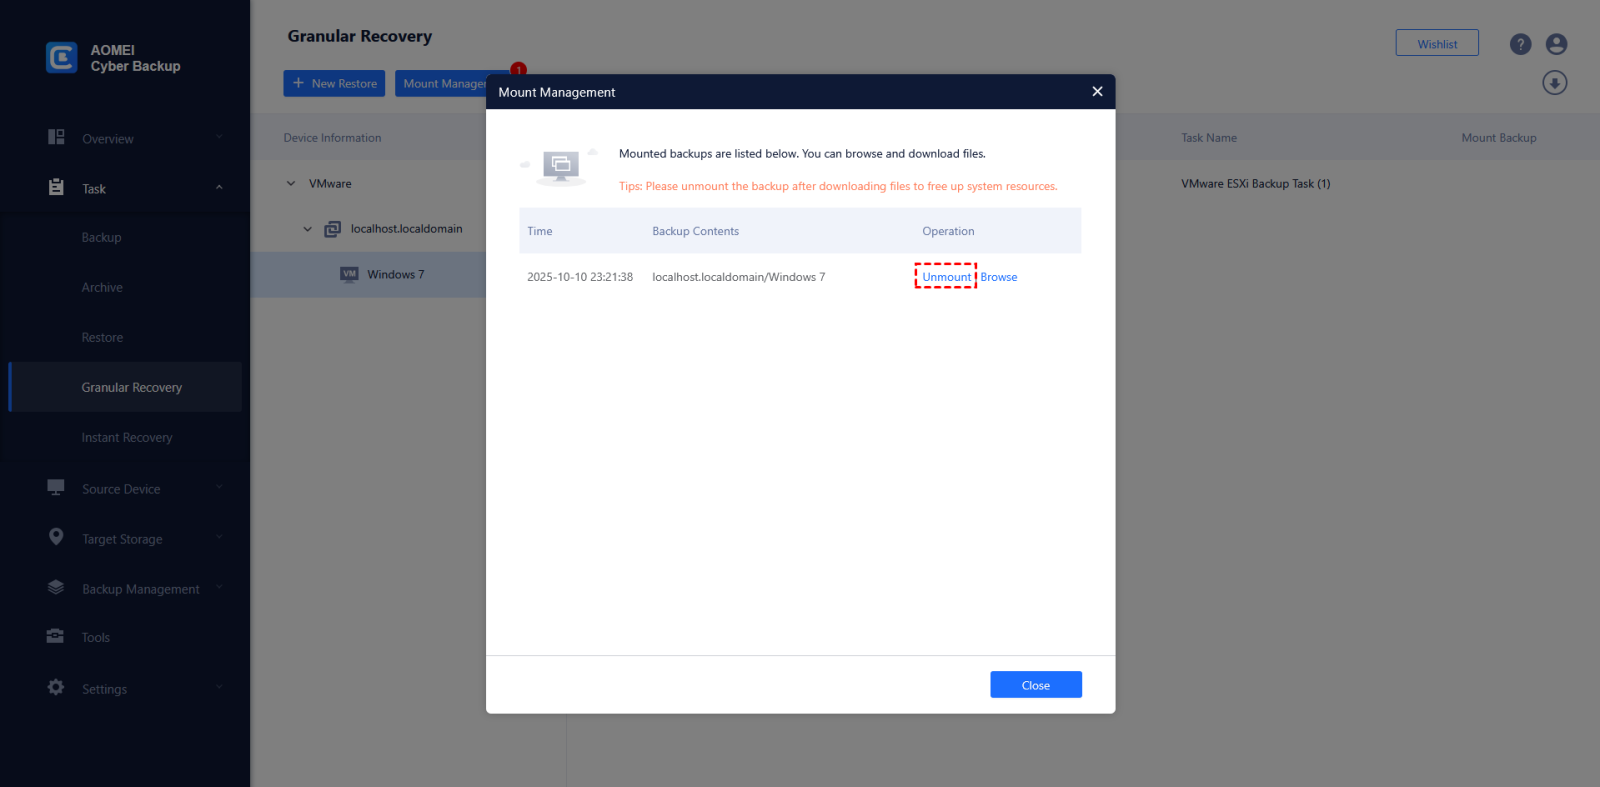
7. Click "Unmount" to dismount the backup.
Summary
Now that we've covered the VMware ESXi restore process, the same goes for restoring Hyper-V.
After the restoration is successful, you can see the restored virtual machine in the VMware ESXi console or Hyper-V Manager. After the virtual machine boots successfully, it will be in the previous state.
Notes:
- Before the restoration starts, you need to shut down the virtual machine.
- "Restore to original location" must confirm the original location exist. Or else, you can only select "Restore to new location".
- If your backup tasks are accidentally deleted, or you need to restore backups created on another computer, you will need to select backup files manually to restore.