Destination Management in AOMEI Cyber Backup
You can add the target locations first, then they will be listed under the Favorite Storage of creating task page, so you can easily select destination when you create a backup task. And, you can also easily manage destinations under Destination Management.
AOMEI Cyber Backup currently supports local and network location as destination.
How to Add Local Location
You can select the local locations of this computer that installed AOMEI Cyber Backup software as backup destination.
1. Select “Target Storage” on the left bar, click “Local Storage”.
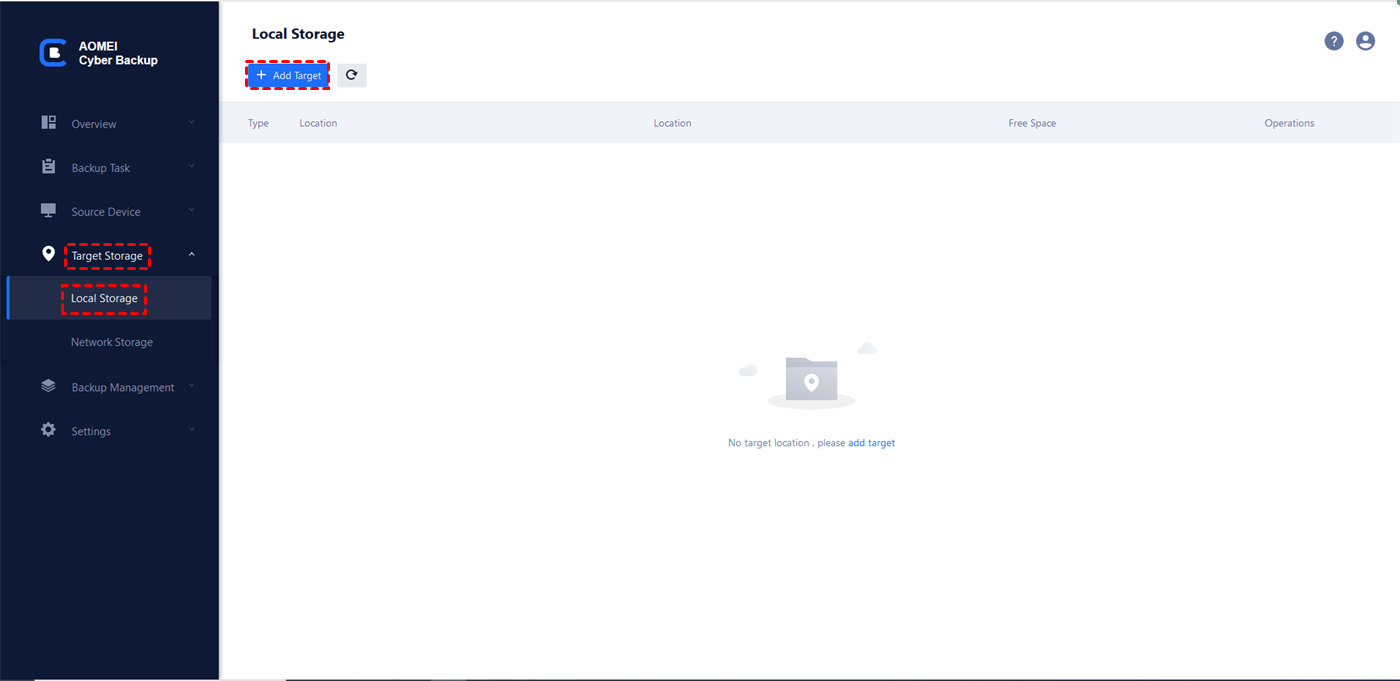
2. Click “Add Target”, it will list the local directories that installed AOMEI Cyber Backup software.
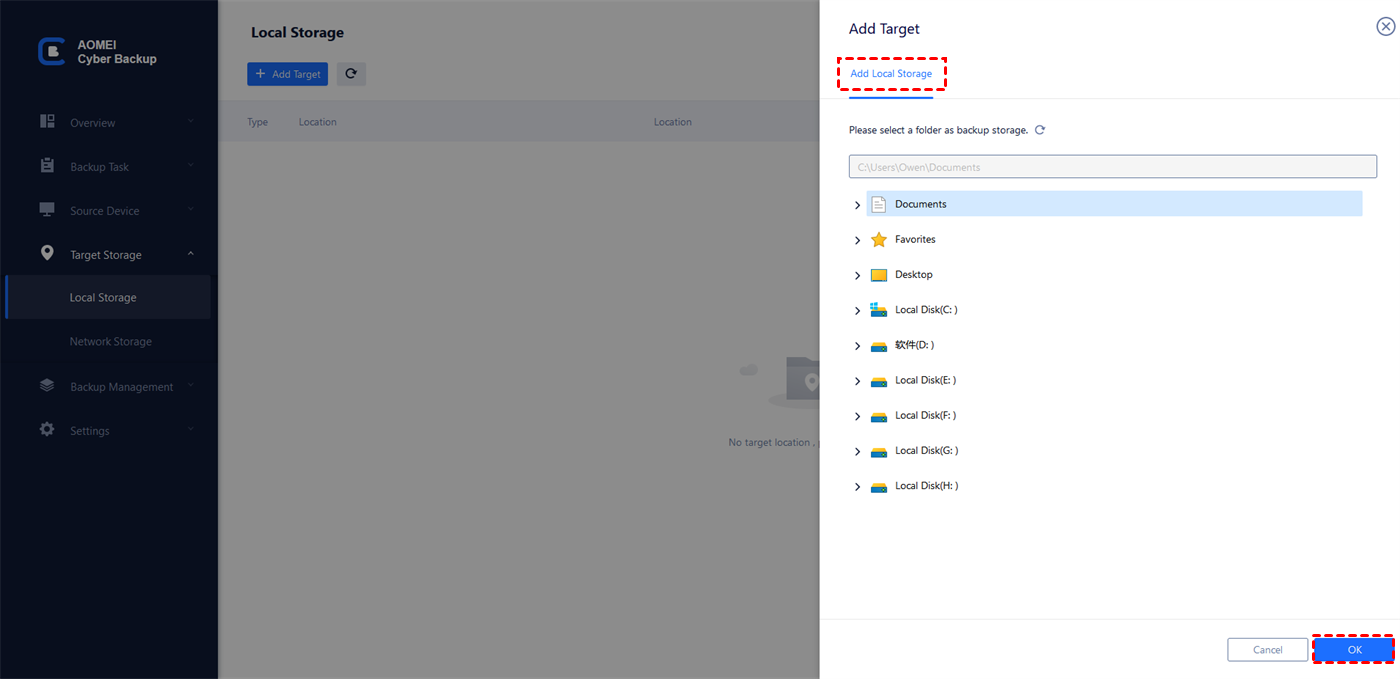
3. Browse and select a local location, click “OK” to add the destination.
Manage Local Destination
When adding local location successfully, it will be listed on the target list.
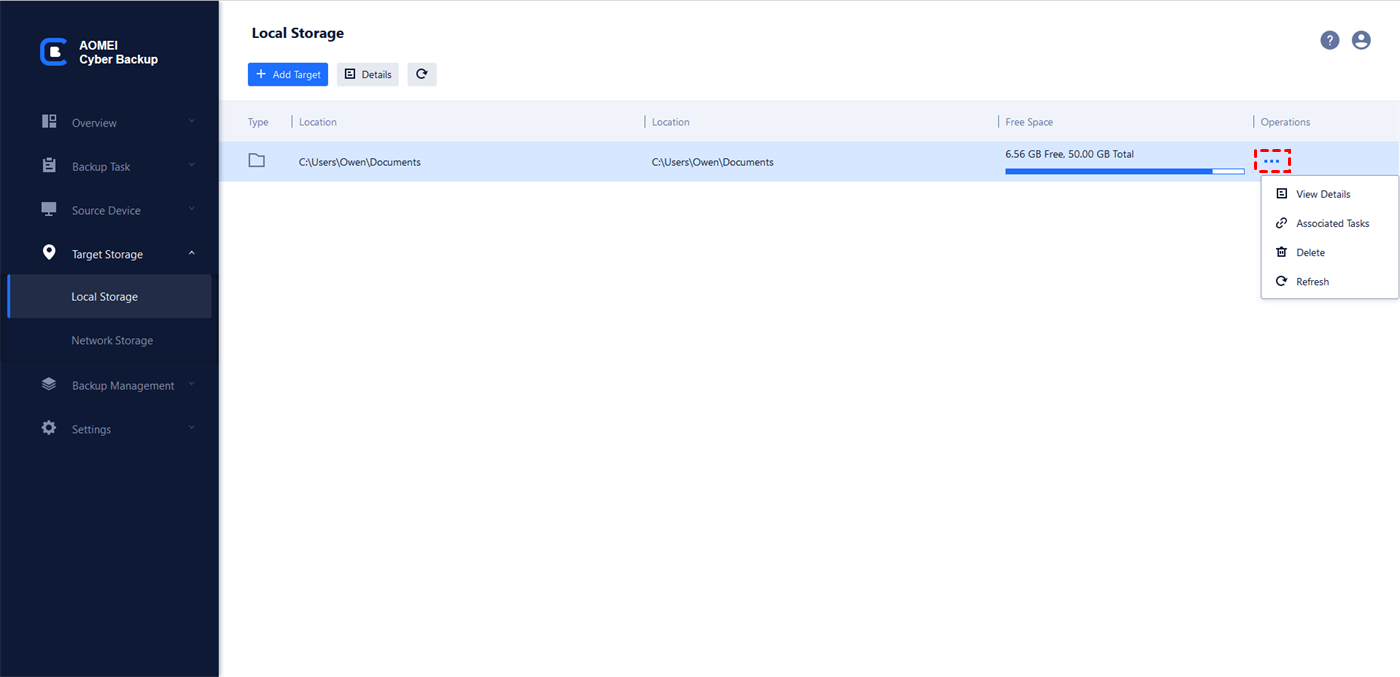
1. You can see the detailed path and free space of the local location.
2. Click “![]() ” on the added local destination, select “Associated Tasks” to check all backup tasks that back up to the location.
” on the added local destination, select “Associated Tasks” to check all backup tasks that back up to the location.
3. Click “![]() ” on the added local destination, select “Delete” to delete the location. If there are some backup tasks are using the location as destination, you need to first delete these tasks, then continue to delete the location.
” on the added local destination, select “Delete” to delete the location. If there are some backup tasks are using the location as destination, you need to first delete these tasks, then continue to delete the location.
4. Click “![]() ” on the added local destination, select “Refresh” to refresh space information of the location.
” on the added local destination, select “Refresh” to refresh space information of the location.
How to Add Network Location
You can add a Network/Share drive as backup destination. But, the network location and backup devices must be on the same LAN.
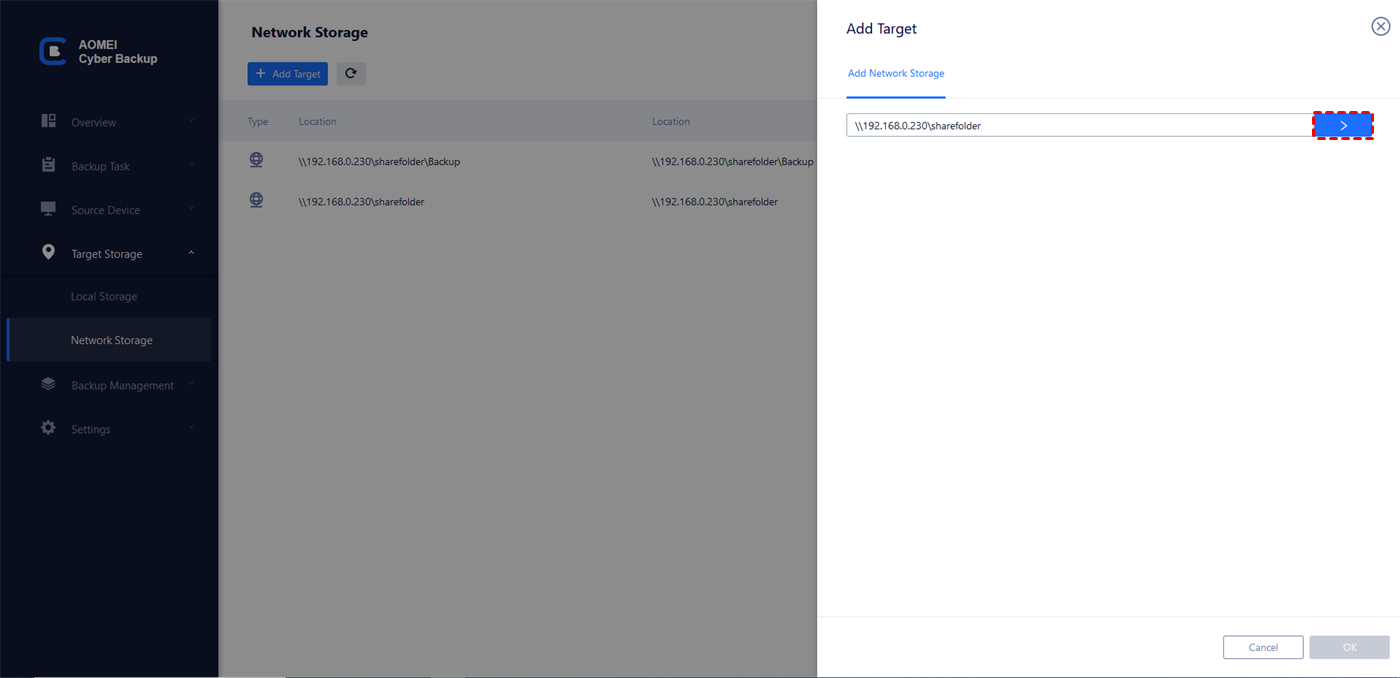
1. Select “Target Storage” on the left bar, click “Network Storage”.
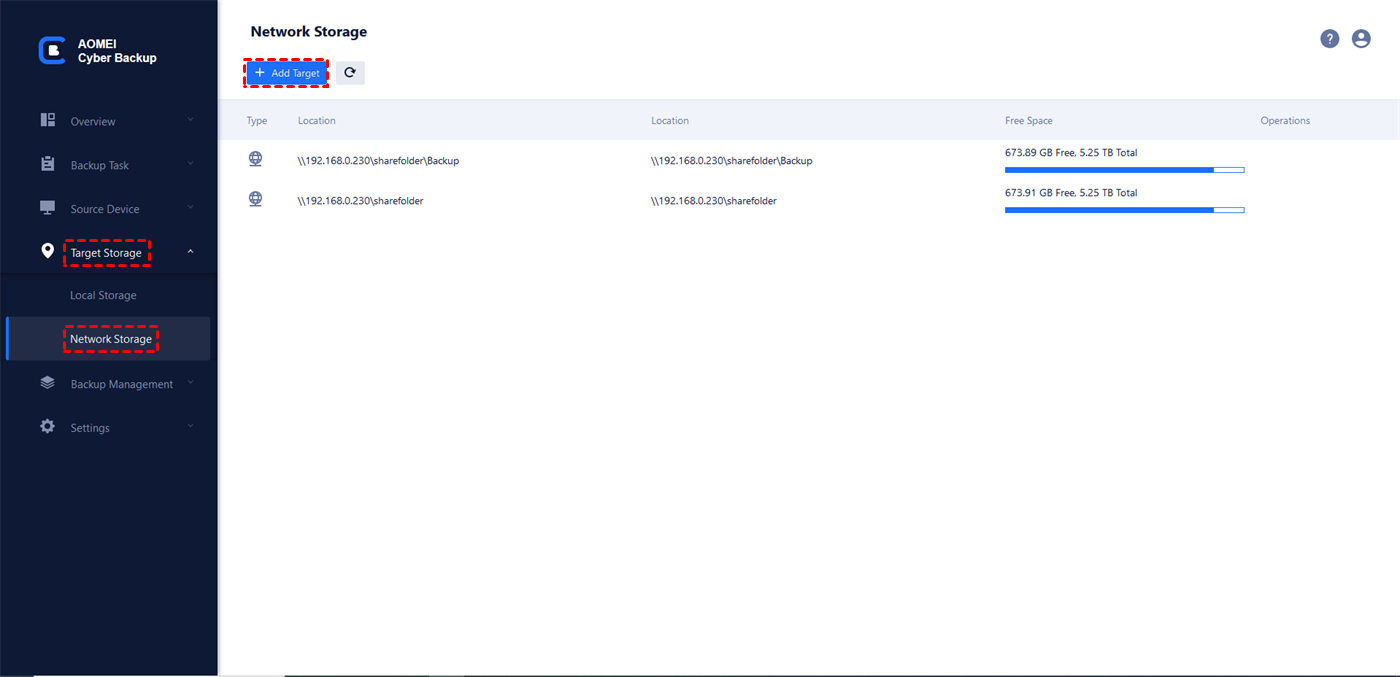
2. Click “Add Target”, then type into a network path (such as: 192.168.1.1\data) on the open page, then click “>”.
Note: Currently only IP address is supported, not domain name.
3. Fill in username and password of the network path, or use “Anonymous login” when you don’t set username and password for the network path, then click “Confirm” to verify login information.
4. When verify successfully, it will list all directories under the network path. Please browse and select a directory, click “OK” to add the network location.
Manage Network Location
When adding the network location successfully, it will be listed on the target list.
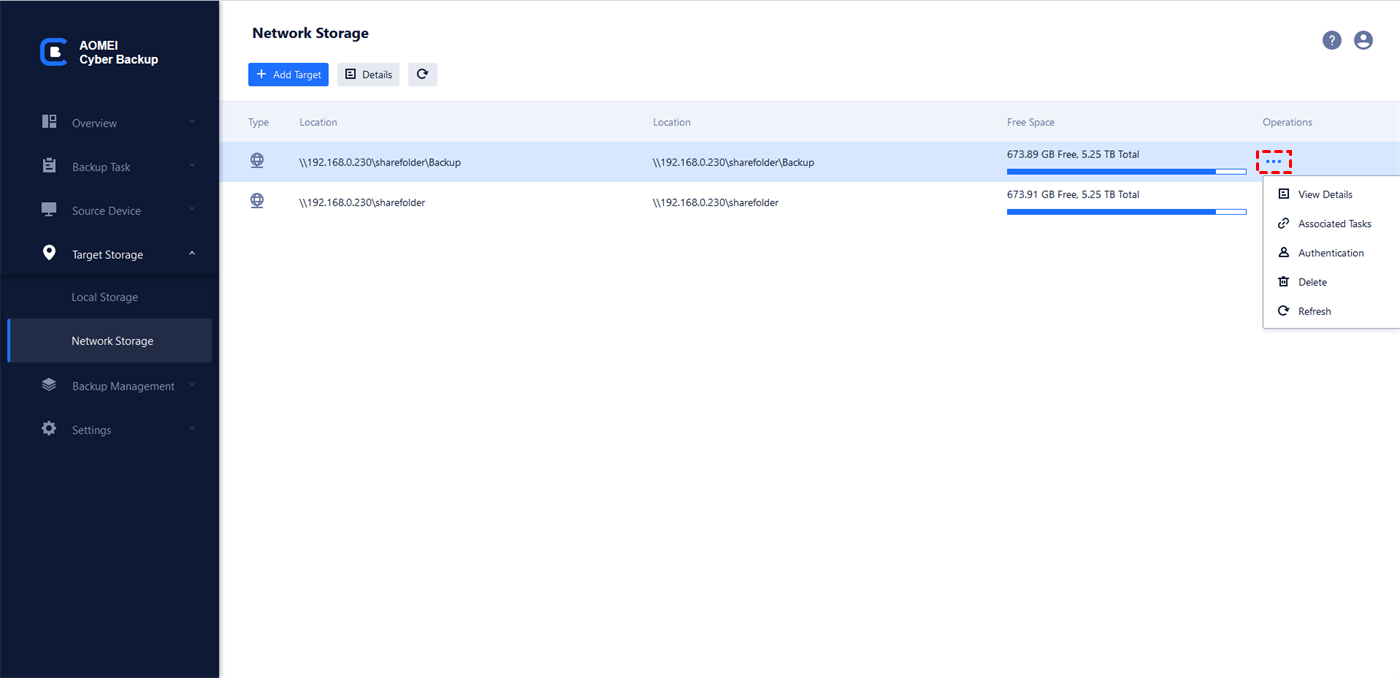
1. Click “![]() ” on the added local destination, select “View details” to check the detailed path and free/used space of the network location.
” on the added local destination, select “View details” to check the detailed path and free/used space of the network location.
2. Click “![]() ” on the added local destination, select “Authentication” to edit and re-verify the login information of the network path.
” on the added local destination, select “Authentication” to edit and re-verify the login information of the network path.
3. Click “![]() ” on the added local destination, select “Associated Tasks” to check all backup tasks that back up to the location.
” on the added local destination, select “Associated Tasks” to check all backup tasks that back up to the location.
4. Click “![]() ” on the added local destination, select “Delete” to delete the location. If there are some backup tasks are using the location as destination, you need to first delete these tasks, then continue to delete the location.
” on the added local destination, select “Delete” to delete the location. If there are some backup tasks are using the location as destination, you need to first delete these tasks, then continue to delete the location.
5. Click “![]() ” on the added local destination, select “Refresh” to refresh space information of the location.
” on the added local destination, select “Refresh” to refresh space information of the location.