How to Install AOMEI Cyber Backup Proxy Program
To add a database or Windows device, you need to install the proxy program AOMEI Cyber Backup Agent on the device first, and the device that is successfully installed and connected to the server will be displayed on the "Source Device"-->"Agents" page. AOMEI Cyber Backup provides two ways to install Agent: local installation and remote installation.
Local Installation
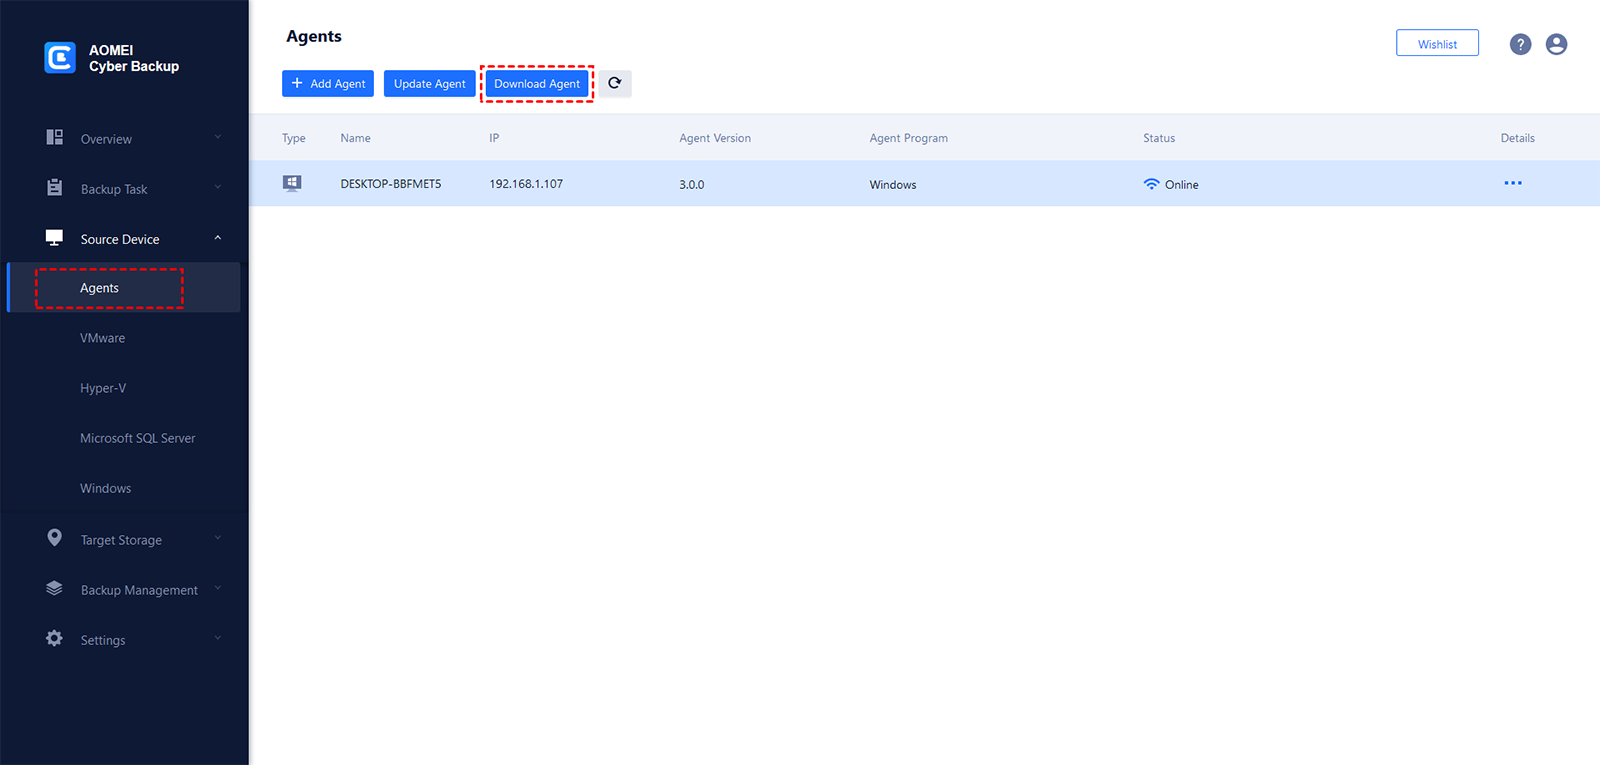
1. Click "Source Device"-->"Agents"-->"Download Agent" to download the installation file to your local computer, and then copy it to the corresponding device for installation. You can also click "Source Device"-->"Agents"-->"Add Agent"-->"Download AOMEI Cyber Backup client" to directly copy the download link to the device to be installed for download and installation.
2. Go to the database or Windows device to install the proxy, run the .exe program, and enter the installation wizard.
3. Click "I have read and agree to the license agreement" to browse the license agreement file.
4. Enter the IP of the AOMEI Cyber Backup management server, or you can skip this step first.
5. After the installation is complete, the proxy interface will pop up automatically. On this page, you can enter the IP and port number of the AOMEI Cyber Backup management server, or display the connected server information.
6. After the connection is successful, you can go to the "Microsoft SQL Server" or "Windows" page on the server side to refresh. If the database exists or Windows device version is supported, it will appear in the device list.
Remote Installation
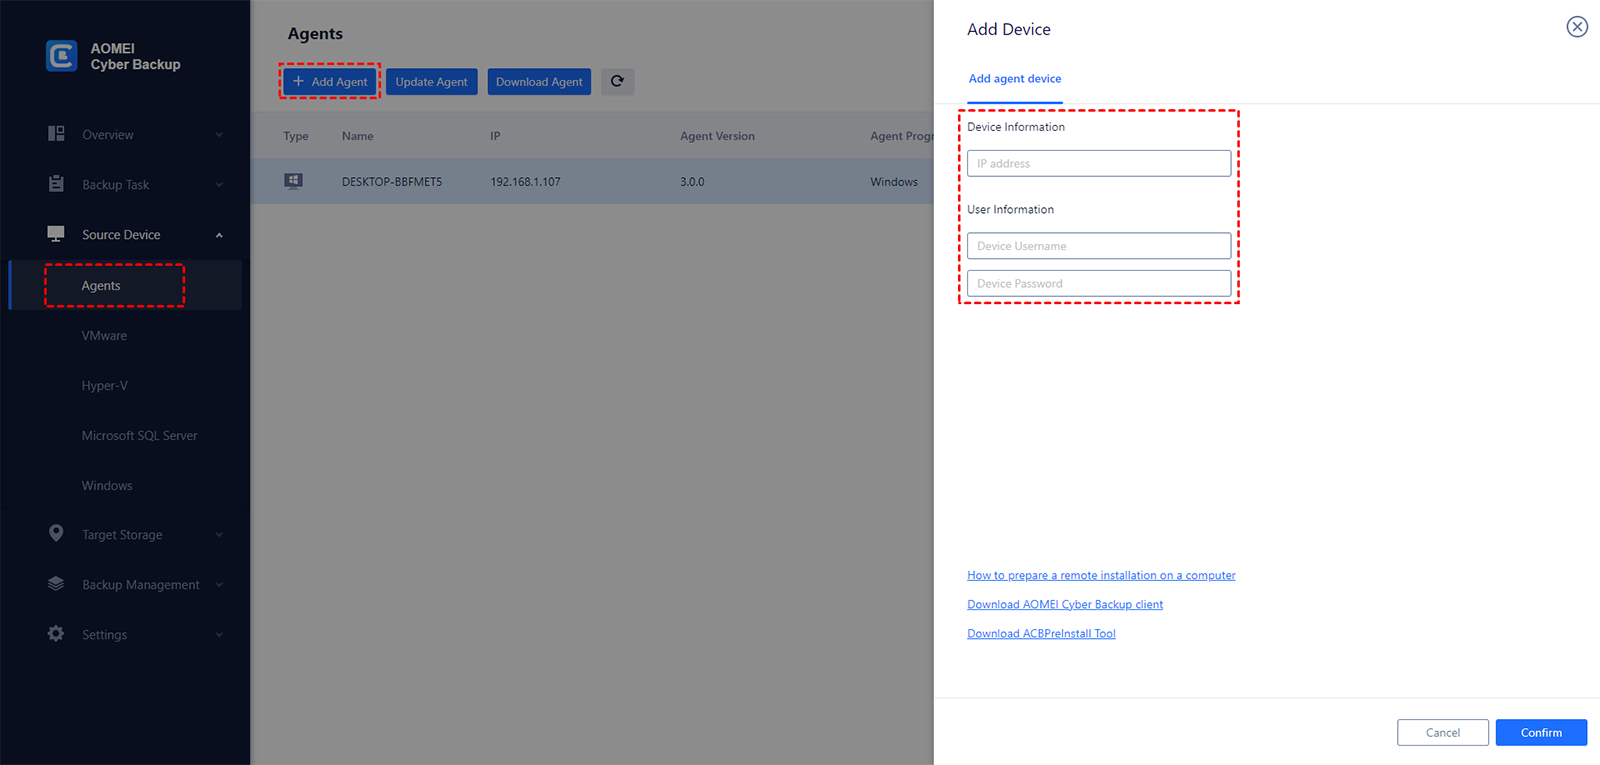
1. Click "Source Device"-->"Agents"-->"Add Agent" to open the "Add Device" page.
2. Enter the IP address and Windows login information of the agent machine, click "Confirm" to add the agent machine. After successful authentication, the AOMEI Cyber Backup Agent program is automatically installed at the agent machine.
3. After the installation is successful, you can go to the "Microsoft SQL Server" or "Windows" page on the server side to refresh. If the database exists or Windows device version is supported, it will appear in the device list.
Tips: The following conditions need to be met for the agent machine to be remotely added correctly:
1) For a successful installation on a remote computer running Windows 7 or later, the Control Panel > Folder Options > View > Use Sharing Wizard option must be disabled on this computer.
2) File and Printer Sharing must be enabled on the remote computer. To access this option on a Windows 7 or later computer, click Control Panel > Windows Firewall > Network and Sharing Center > Change advanced sharing settings.
3) On the remote computer, open Control Panel > Windows Defender Firewall > Allow an app or feature through Windows Defender Firewall > check "Windows Remote Management" and "Windows Management Instrumentation (WMI)".
4) For a successful installation on a remote computer that is not a member of an Active Directory domain, User Account Control (UAC) must be disabled.
Depending on your operating system, do one of the following:
In Windows operating systems prior to Windows 8:
Go to Control Panel > View by: Small icons > User Accounts > Change User Account Control settings and move the slider to "Never notify", then restart the computer.
In any Windows operating systems:
<1> Open the Registry Editor.
<2> Locate the following registry key: HKEY_LOCAL_MACHINE\Software\Microsoft\Windows\CurrentVersion\Policies\System
<3> For the EnableLUA value, change it to 0.
<4> Restart the computer.
Disable UAC remote restrictions:
<1> Open the Registry Editor.
<2> Locate the following registry key: HKEY_LOCAL_MACHINE\SOFTWARE\Microsoft\Windows\CurrentVersion\Policies\System
<3> For the LocalAccountTokenFilterPolicy value, change it to 1.
If the LocalAccountTokenFilterPolicy value does not exist, create it as a DWORD (32-bit). For more information about this value, see the Microsoft documentation.
Note: AOMEI Cyber Backup Agent only supports installation on Windows 7 and above systems.