How to Backup Virtual Machines with AOMEI Cyber Backup
Due to system updates, virus attacks, etc., your virtual machine system may crash. It is very time-consuming to rebuild the virtual machine system and all applications. Therefore, by regularly backing up the virtual machine, you can quickly restore the previous state when needed. With AOMEI Cyber Backup, you can easily do all this.
In this article, we will introduce how to create backups of virtual machines VMware ESXi and Hyper-V with AOMEI Cyber Backup. AOMEI Cyber Backup provides a convenient and reliable solution for centralized backup management of multiple devices, without installation any agent on the virtual host device. With the program, you can back up all devices to a local or network location. And, you can easily monitor and manage the backup of the equipments via central control server.
How to Create Backups of Virtual Machines
Prerequisites for VM backup:
- Computer with AOMEI Cyber Backup installed
- VMware or Hyper-V host
- Local disk or network share to store backup files
Currently, VMware ESXi Backup and Hyper-V Backup are supported. Here we take backup of VMware ESXi as an example. For the usage environment supported by AOMEI Cyber Backup, please refer to here.
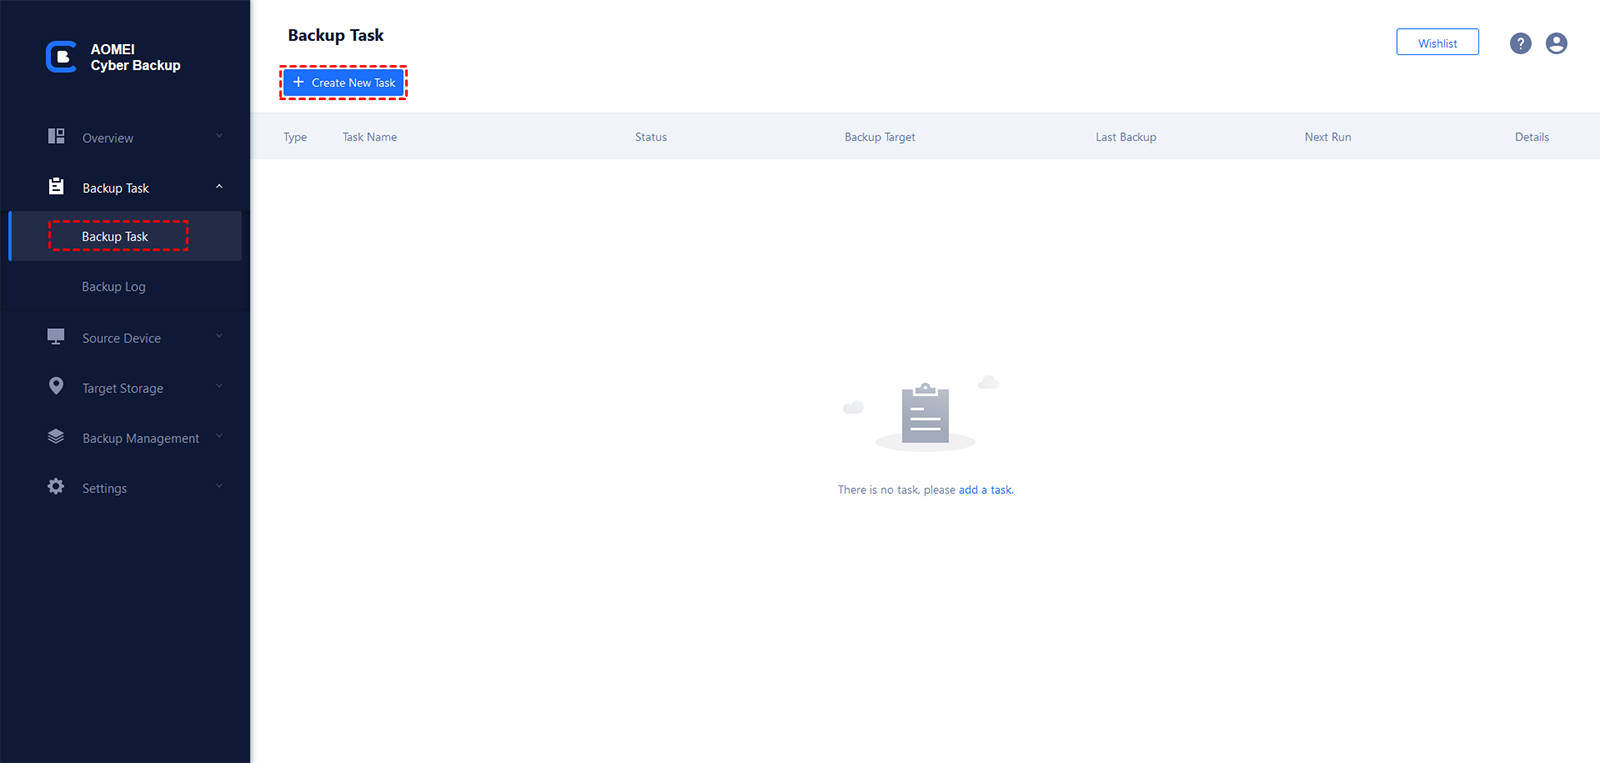
Step 1: Initiate Backup
Click "Backup Task" on the left menu bar, select "Backup Task". Click "Create New Task" to open the task creating page.
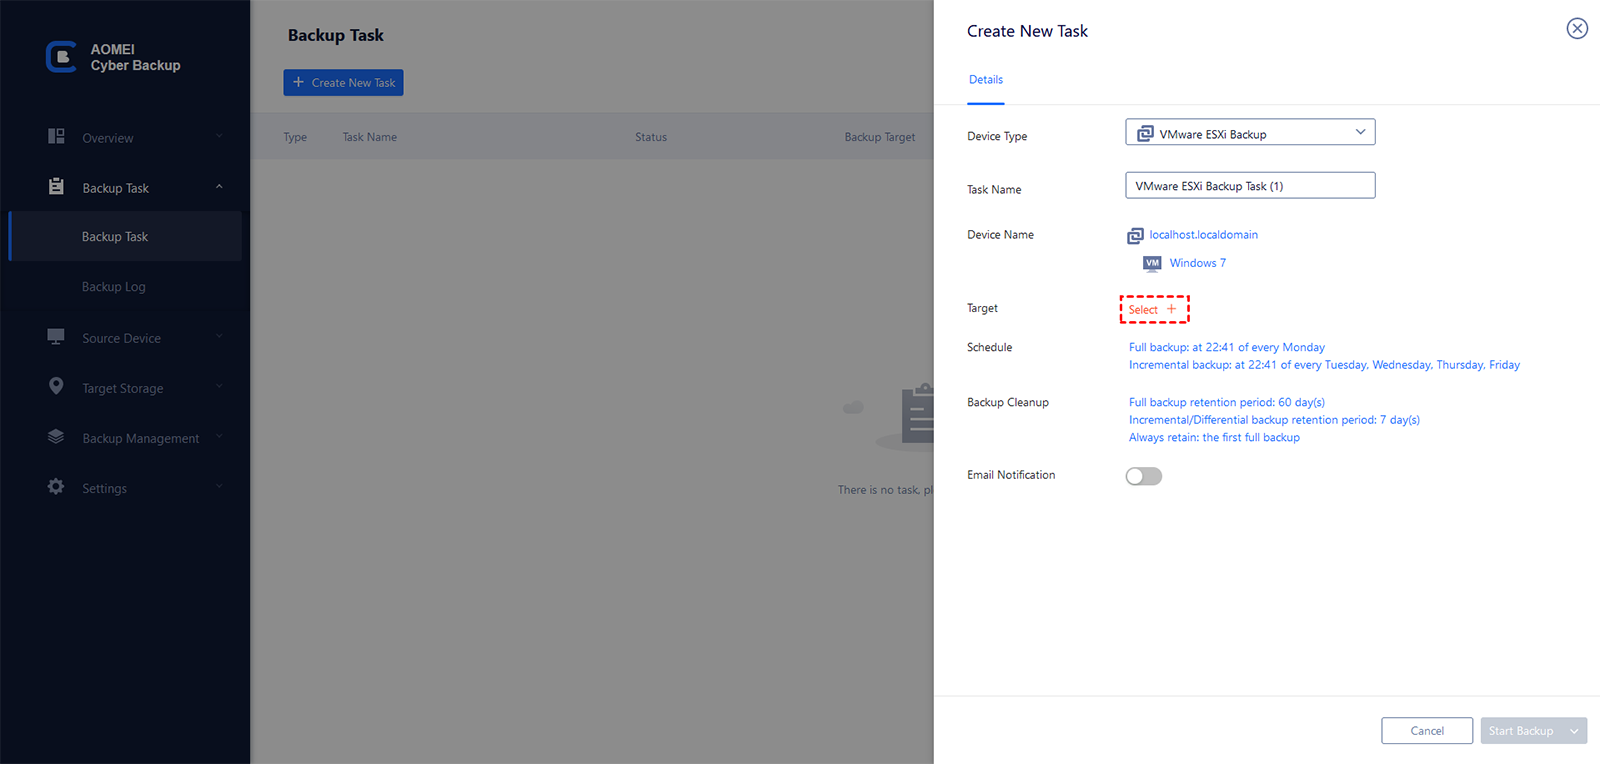
Step 2: Select Backup Type
Select "Backup Type", you can choose VMware ESXi Backup or Hyper-V Backup.
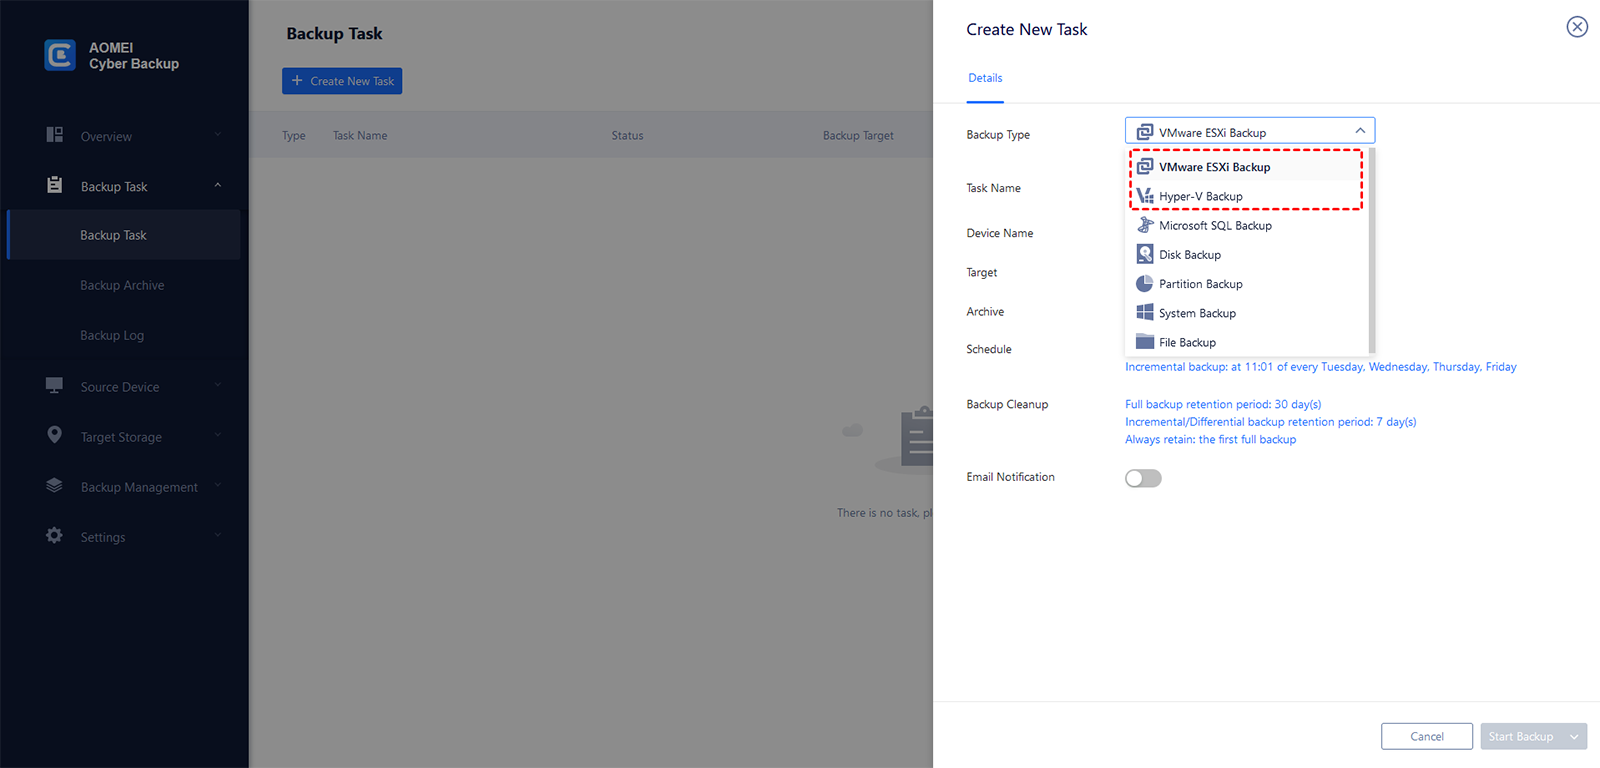
Tips: Set a "Task Name". It will have a default name. You can edit the name of the task.
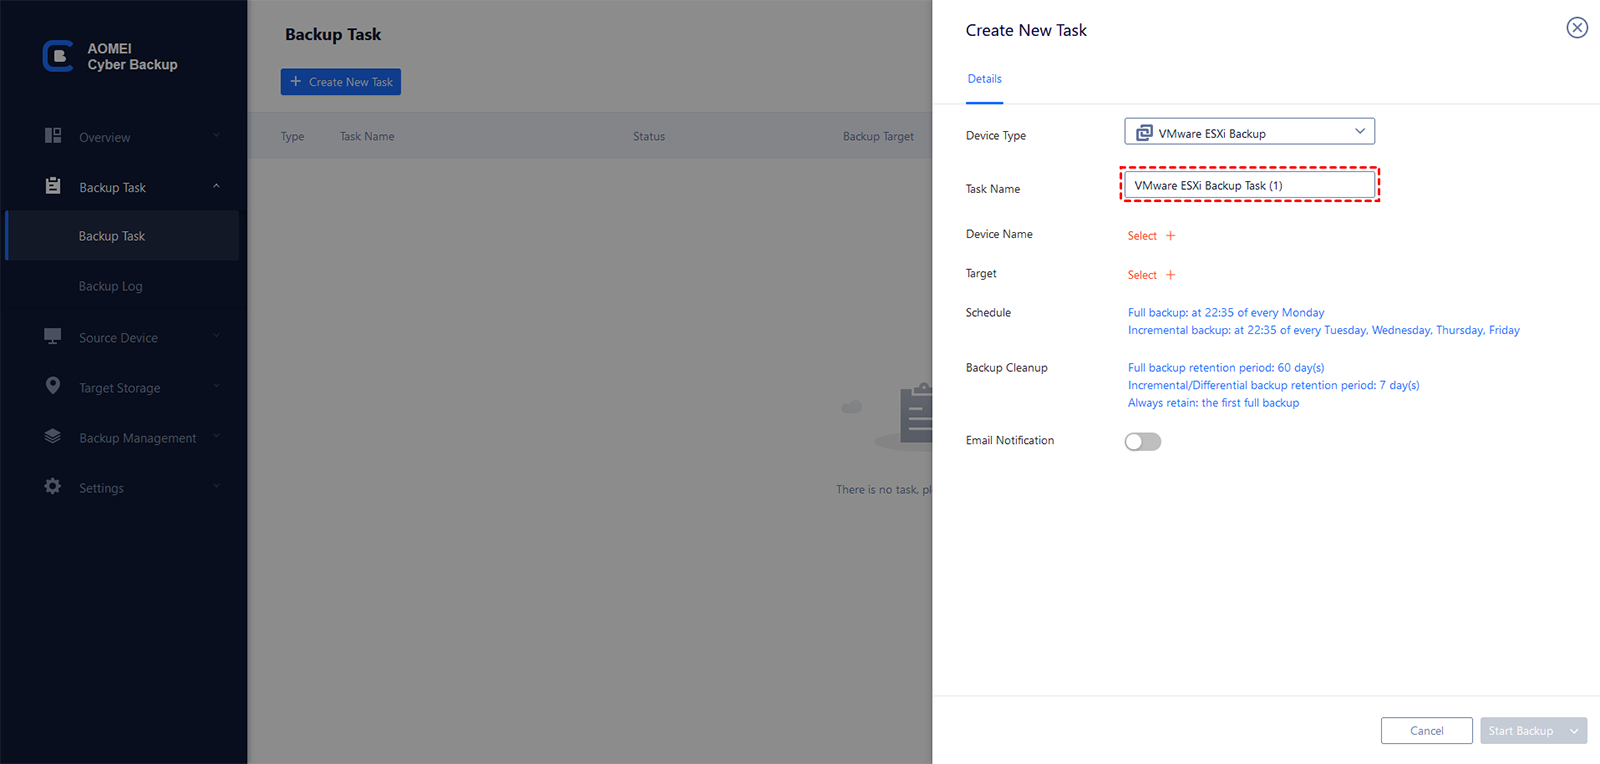
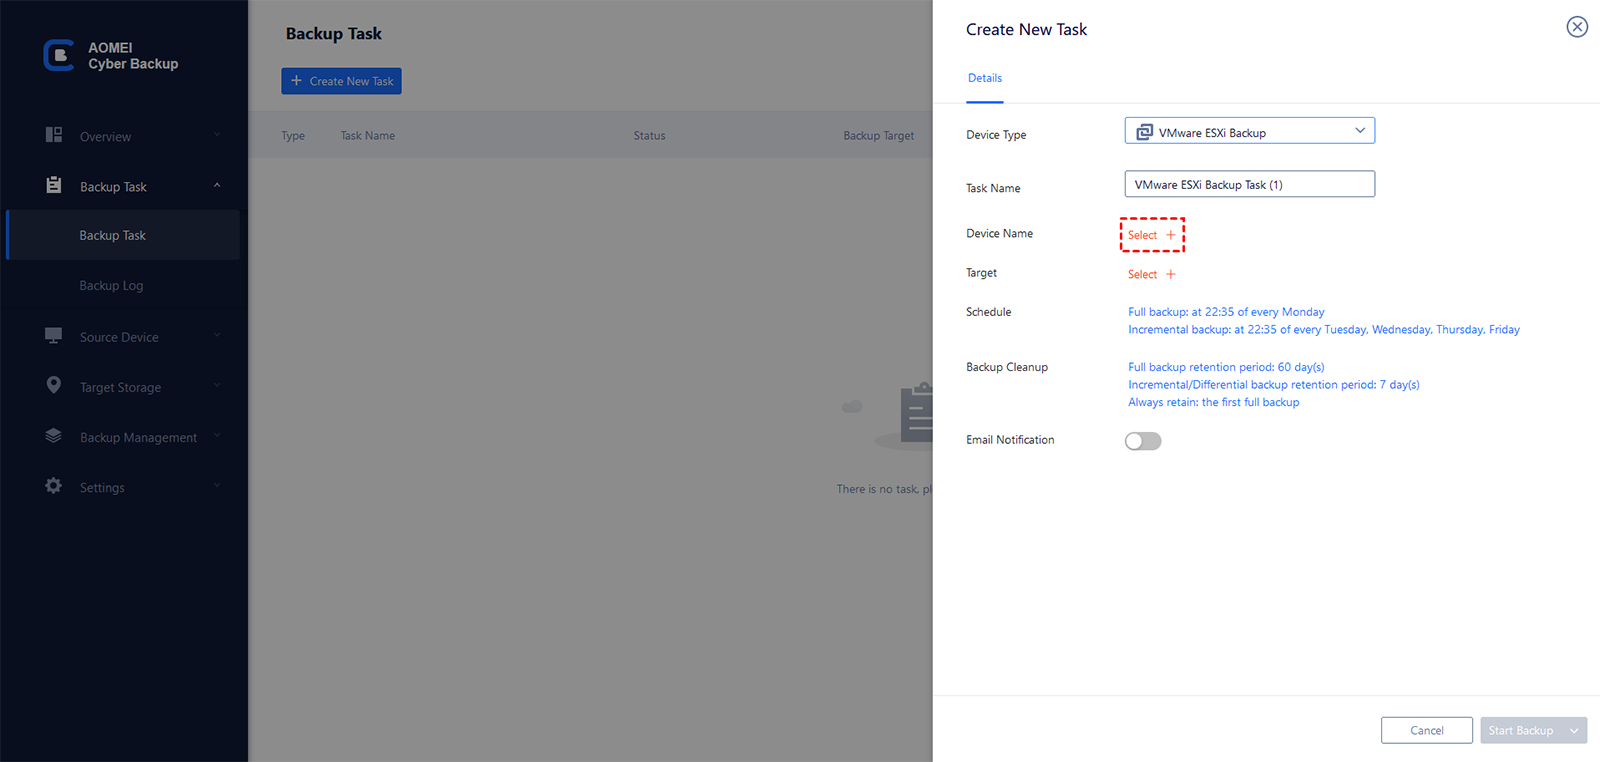
Step 3: Select Backup Device
1. Select "Device Name". The host you have added and all virtual machines under the host will be listed.
Tips: If you haven't added any devices, there won't be any virtual machines listed here. You can click the "Add Device" button in the lower left corner to jump to the interface for adding devices.
2. Then you can select one or multiple virtual machines under the host for backup.
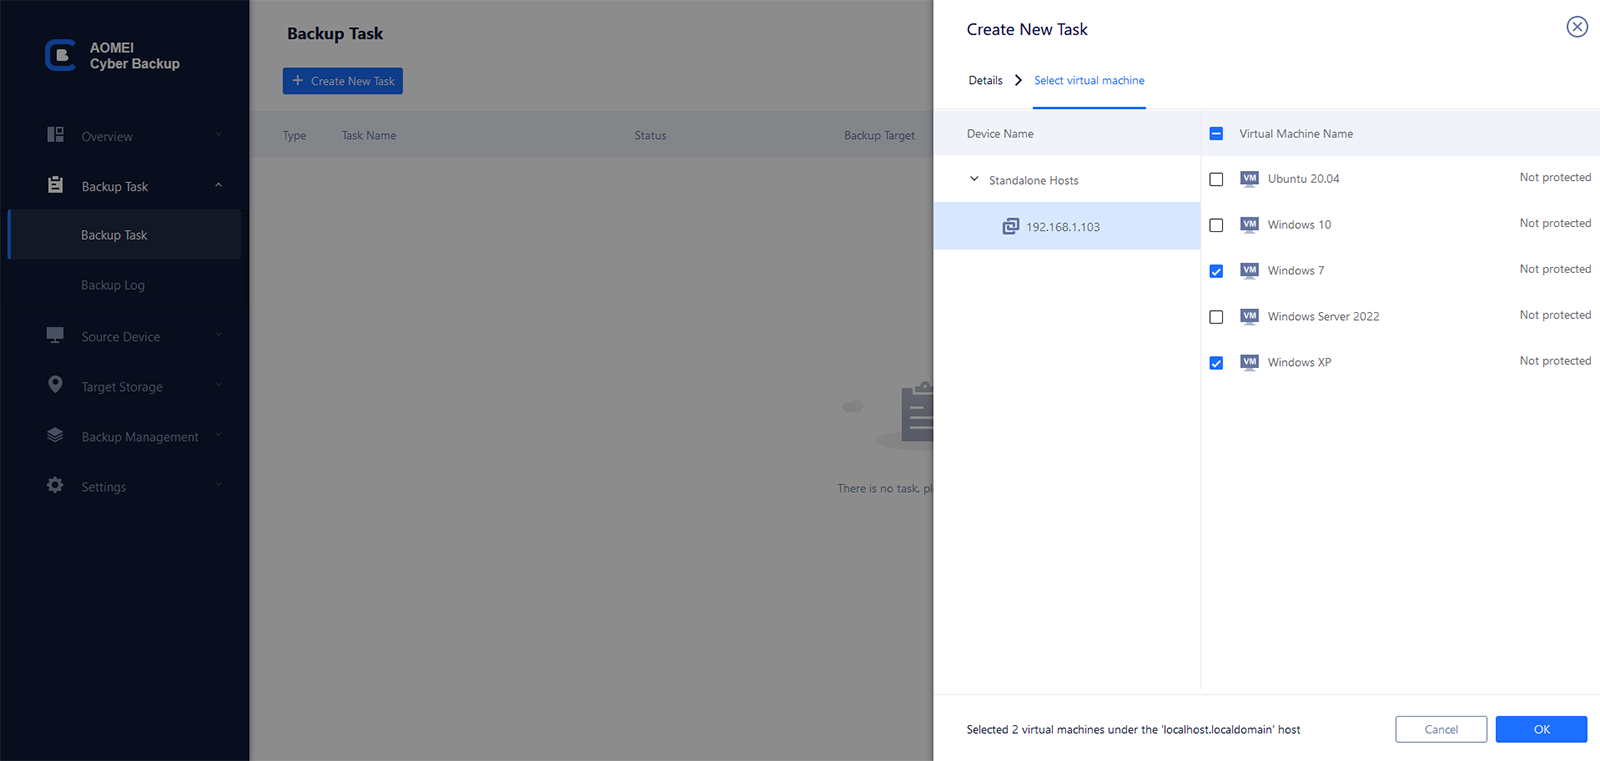
Tips:
- When a virtual machine has already been backed up in an existing backup task, you can’t select the virtual machine again to create a new task. If you want to re-create backup task for it, please delete the virtual machine from the existing backup task first.
- You can select multiple virtual machines for backup, but only one virtual machine can be backed up at a time, and the next one will not be backed up until the previous backup is completed.
Step 4: Select Destination
1. Select "Target" to save backups.
2. You can select a local or network path.
Added storage: It will list all added backup target. You can select the backup target without adding it again.
Add a new local storage: It will list the local directory of this computer with AOMEI Cyber Backup installed , then you can select a location as backup target.
Add a new network storage: You can type into a network path (such as: 192.168.1.1\data), then fill in username and password of the network path to add. After that, you can continue to select a folder of the network path as backup target.
Tips: You can also add and manage target locations in Target Storage.
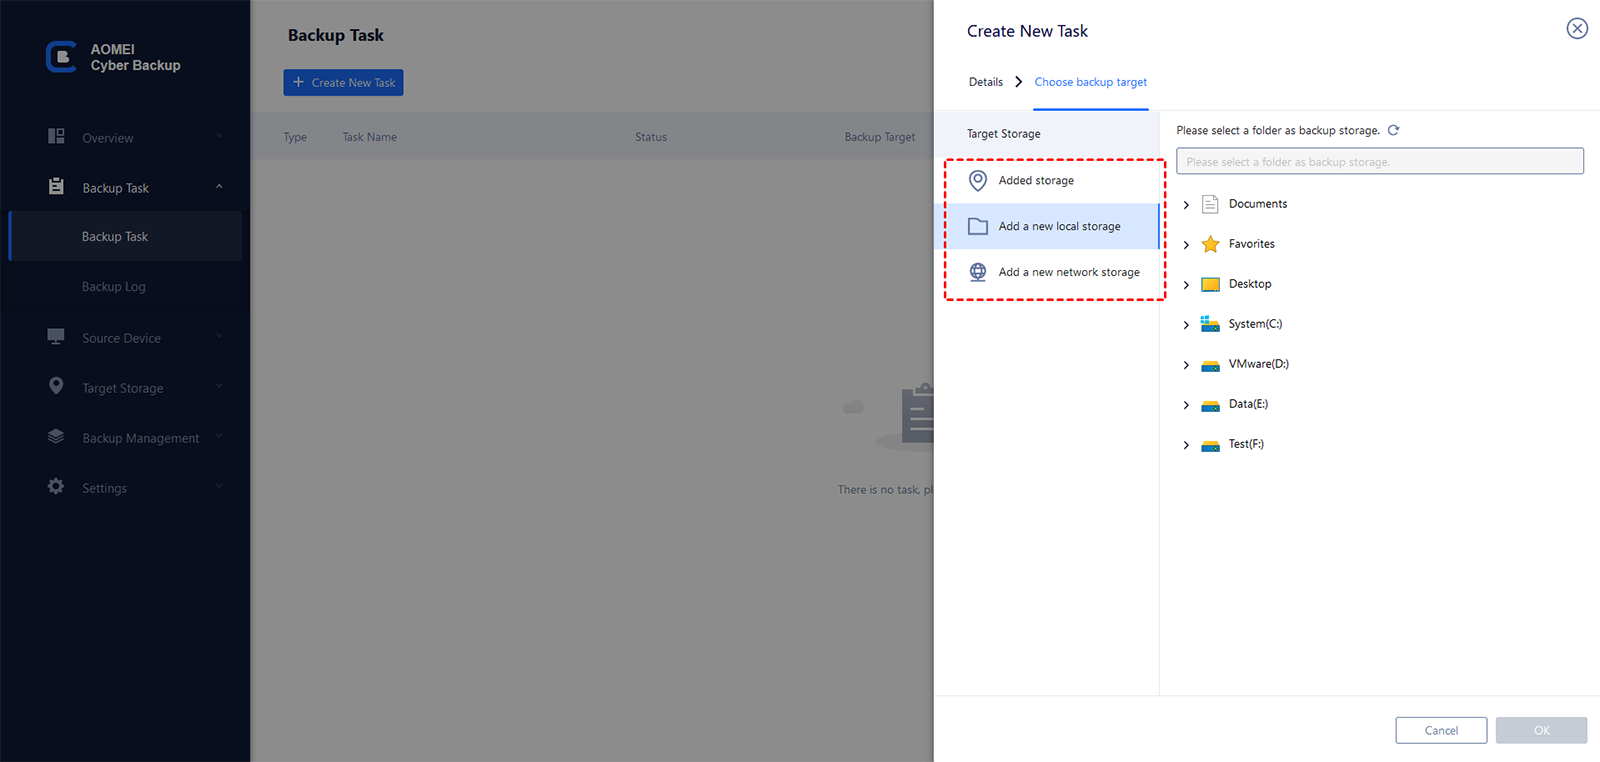
You can enable Backup Archive to backup to Amazon S3, for more detailed information, please see here.
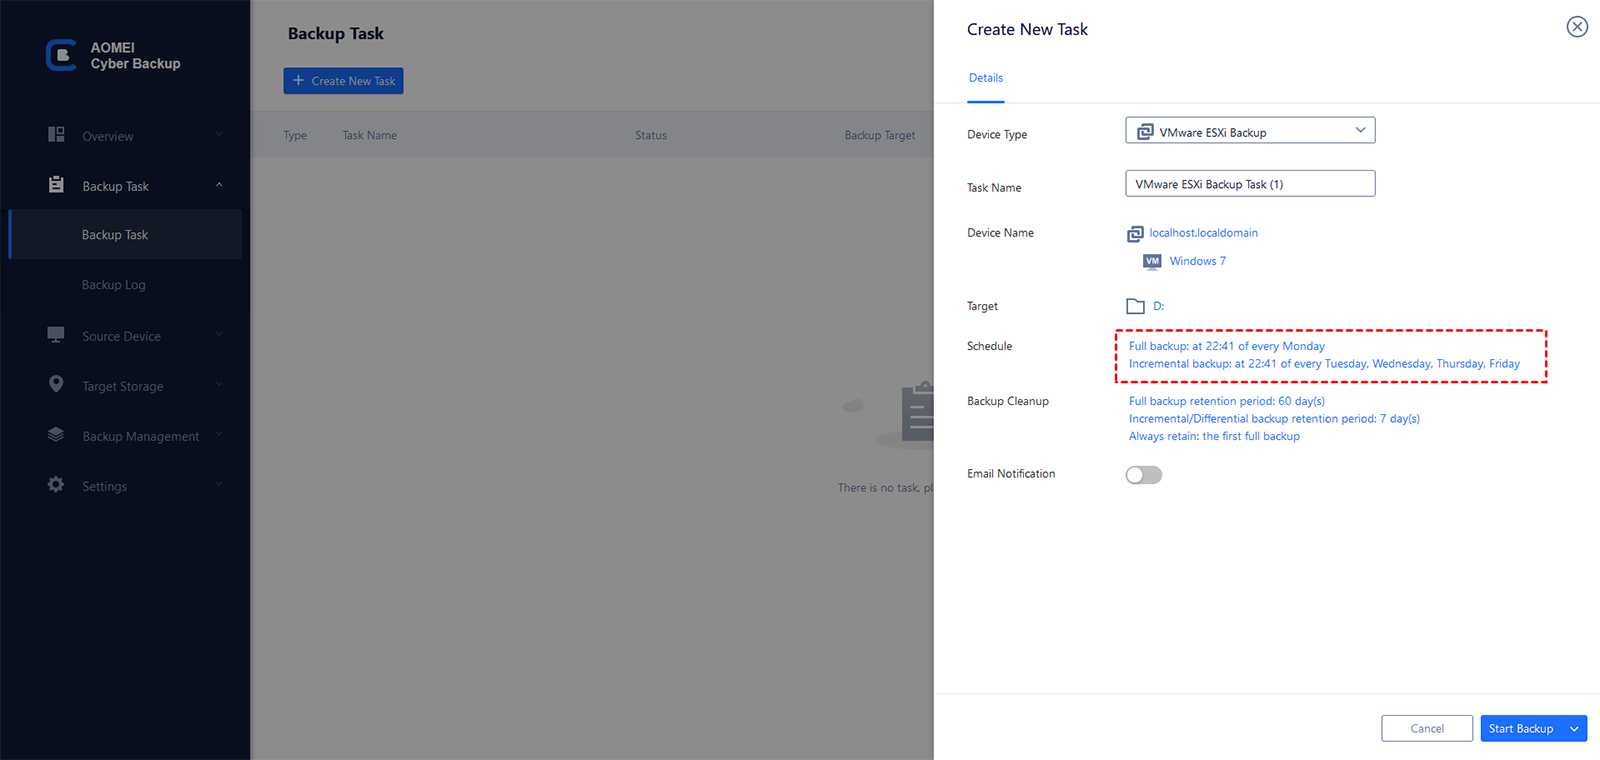
Step 5: Set Schedule Backup
Schedule Backup helps you backup your virtual machines automatically and regularly. After activating this option, you can let AOMEI Cyber Backup automatically run backups without worrying about a certain day's backup not being performed.
Generally, the schedule setting is enabled by default. You can change the schedule on your needs, or disable it. For more details about this function, please check Schedule Backup.
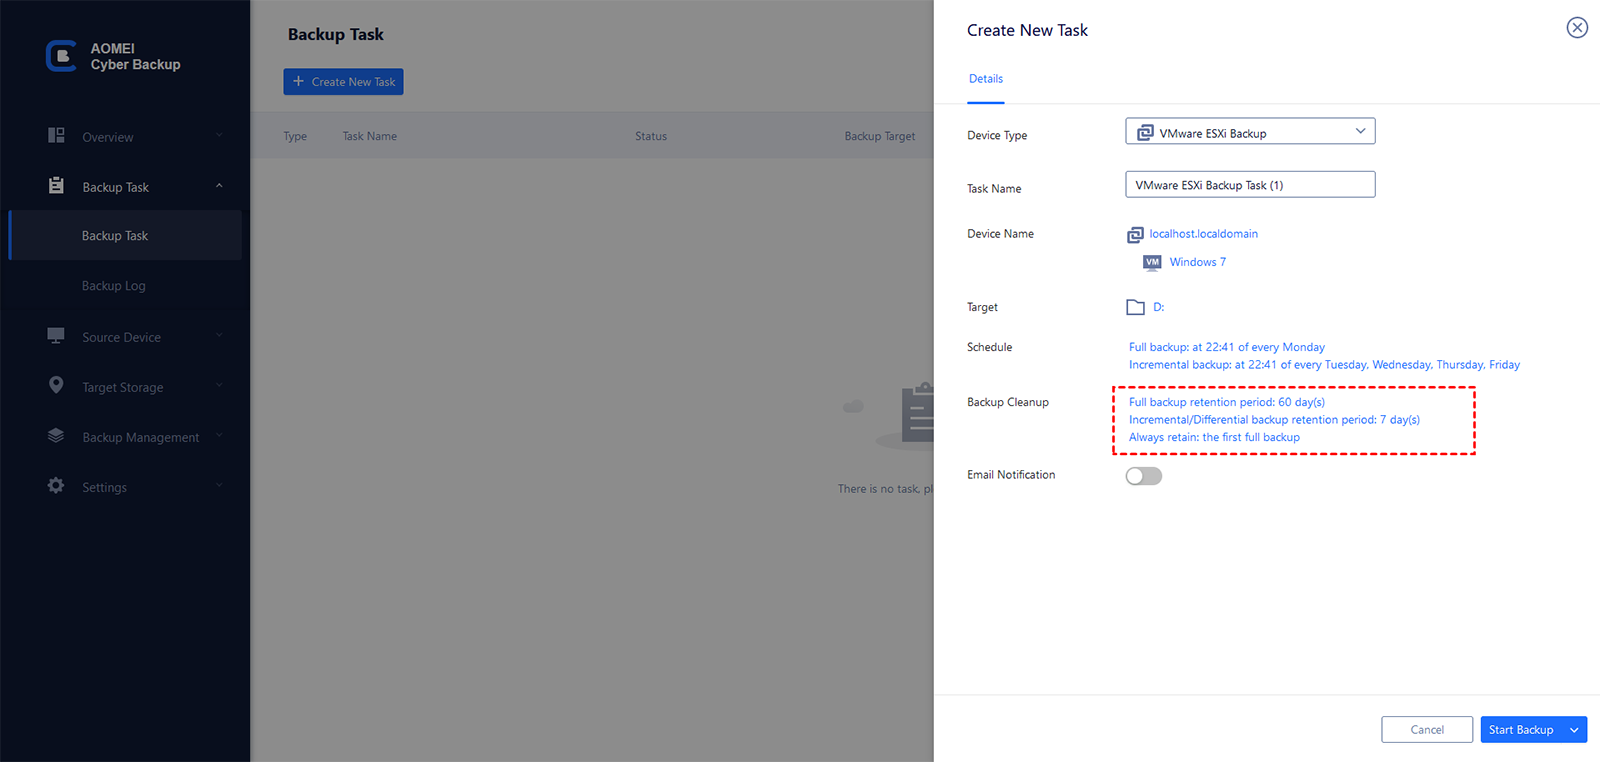
Step 6: Set Backup Cleanup
Backup Cleanup helps you automatically remove history backup versions based on rule to save storage space. After activating this option, you can let AOMEI Cyber Backup clean up automatically without worrying about backup failure due to disk space being full.
Generally, the backup cleanup is enabled by default. You can change the backup cleanup based on your needs, or disable it. For more details about this function, please check Backup Cleanup.
Step 7: Set Email Notification
You can enable "Email Notification" to receive email notifications when the task is abnormal or successful. Click "Go Now" to set or modify the notification settings. Currently Gmail Server, Hotmail Server and Custom SMTP Server are supported. Please note SMTP server authentication is required and cannot be empty. For more details about this function, please check Email Notification.

Step 8: Start Backup
1. Click "Start Backup" to create the backup task and perform backup.
2. Once you enable schedule, you can also select "Add the backup and start backup now" or "Add the schedule only".
If you select "Add the backup and start backup now", the backup will be added and the backup task will start immediately.
If you select "Add the schedule only", the backup task will be created with schedule and wait to start at the scheduled timepoint.
Step 9: Monitor/Complete Backup
1. The backup is running, please wait patiently for the backup to complete. You can click on the ellipsis button to see backup details and backup progress.
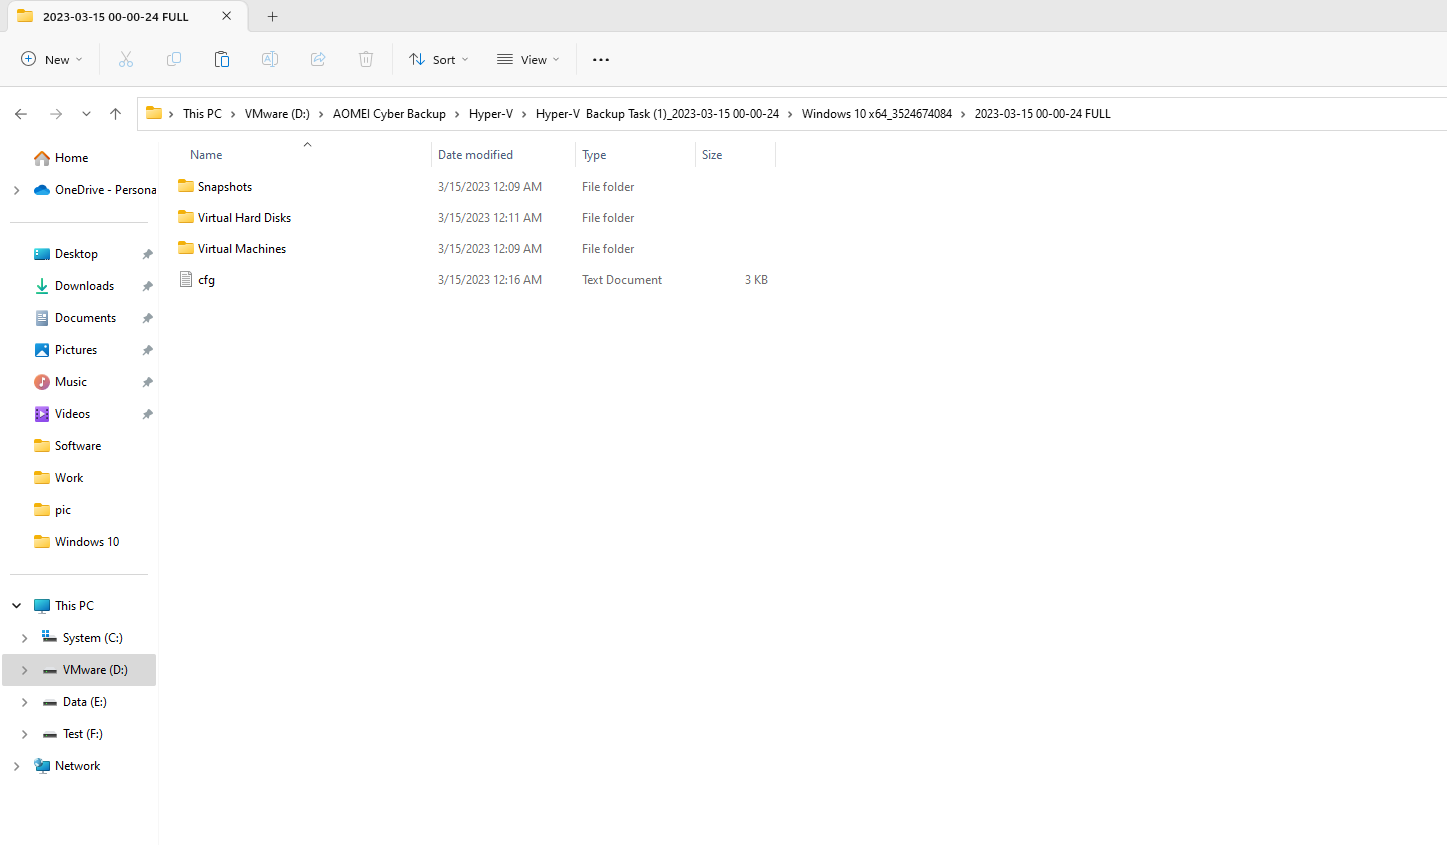
2. After the backup is complete, two backup files, backup.aci and config.aci will be created in the destination location. The folders are named as follows: \AOMEI Cyber Backup\VMWare EXSi\task name\virtual machine name\backup time and type
3. If it is a Hyper-V backup, the following backup files are created:
Summary
Now that we've covered the VMware ESXi backup process, the same goes for backing up Hyper-V.
You can see the backup details in Backup Tasks, and you can continue to do full backup, incremental backup or differential backup. You can also manage backup tasks here, like edit or delete the tasks.
If there is an abnormality in the virtual machine system, you can restore it to the previous state.
Notes:
- Both vCenter and Standalone ESXi are supported by AOMEI Cyber Backup.