Backup Data Offsite on Windows 10 to Protect Data | 3 Ways
You will learn how to backup data offsite in Windows 10 with the best offsite storage and 3 practical ways.
By Ivy Updated on October 29, 2024
What is offsite data backup in Windows 10?
The offsite data backup is to collect data from the computer you are currently using to a different location, it can be tapes, external hard drives (eg: HDD, SSD), USB flash drives, cloud drives like Microsoft OneDrive, network drives, another computer, etc. And it's the key piece of the 3-2-1 backup strategy.

Besides, you may hear the onsite data backup, which makes an exact copy of data and save it on the current computer. You can use it to restore files quickly if it's deleted by accident. But if the system disk is corrupted or system crashes, your data is deleted completely unless you have an offsite backup.
Best offsite data backup solutions to protect files
Microsoft provides you with different offsite backup storage, such as external disk, network drive or NAS, cloud drive, etc. Then, which is the best option to protect your data? You could check the following contents and select one of them in your situation.
| Advantages | Disadvantages | |
| External or USB hard disk | You can take it to home or office, and use it on any PC, not requiring a network. | The disk space is fixed. |
| Network location or NAS | You can access files at any location as long as there is a PC. | You can only access files with a network connection. |
| Cloud storage | You can access files a desktop or laptop, tablet, phone. And the cloud storage is scalable. | You need to pay for the extra cloud storage you use. It also requires a network. |
As you can see from above, backing up files to a network location or NAS, or cloud storage seems to be a good choice. If you have neither, backing up files to external disk is ok.
How to create offsite backup in Windows 10 step-by-step
To create an offsite backup in Windows 10, you can choose to backup files with File History, Backup and Restore or third-party backup software - AOMEI Backupper. The previous two options backup user files by default, but you still can backup specific folders in Windows 10.
1. Use File History to backup data offsite in Windows 10
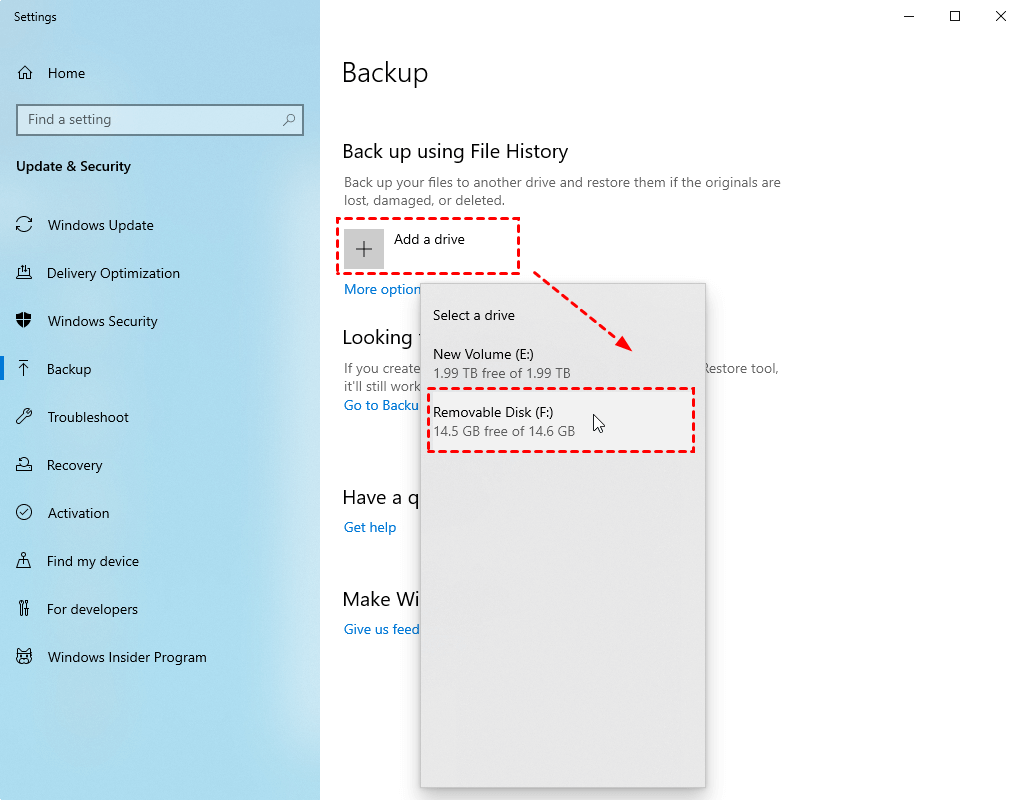
1. Go to Start > Settings > Update & Security> Backup to access "Back up using File History" section.
2. Then, click "+ Add a drive" button and select external hard drive or network location as backup destination.
3. The slide button "Automatically Back Up My Files" appears and it's on by default. It will backup all the user folders every hour and keep backup versions forever.
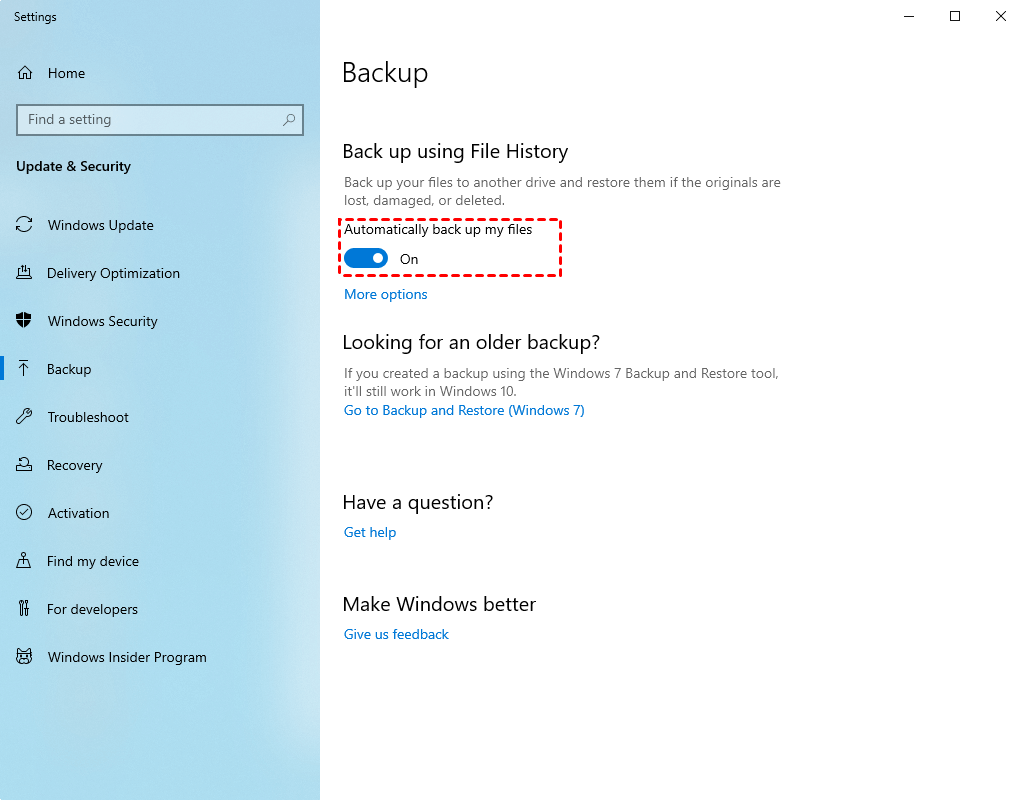
4. Also, you can click More options to set more flexible backup options in the following.
-
Backup frequency: You have 9 options in total, ranging from every 10 minutes to daily, and the default option is hourly that can keep track of changes timely.
-
Backup retention: You have 8 options totaly, from 1 year to forever plus until space is needed. The default one is forever that can full fill the disk space sooner or later. To avoid this situation, you need to change it to either "Untill space is needed" or specific retention time, then it will delete backup files automatically to free up space for backup.
-
Include/Exclude folder: Scroll down and you will see Back up these folders and Exclude these folders section, click "Add a folder" under them and then you can select any folder on your computer.
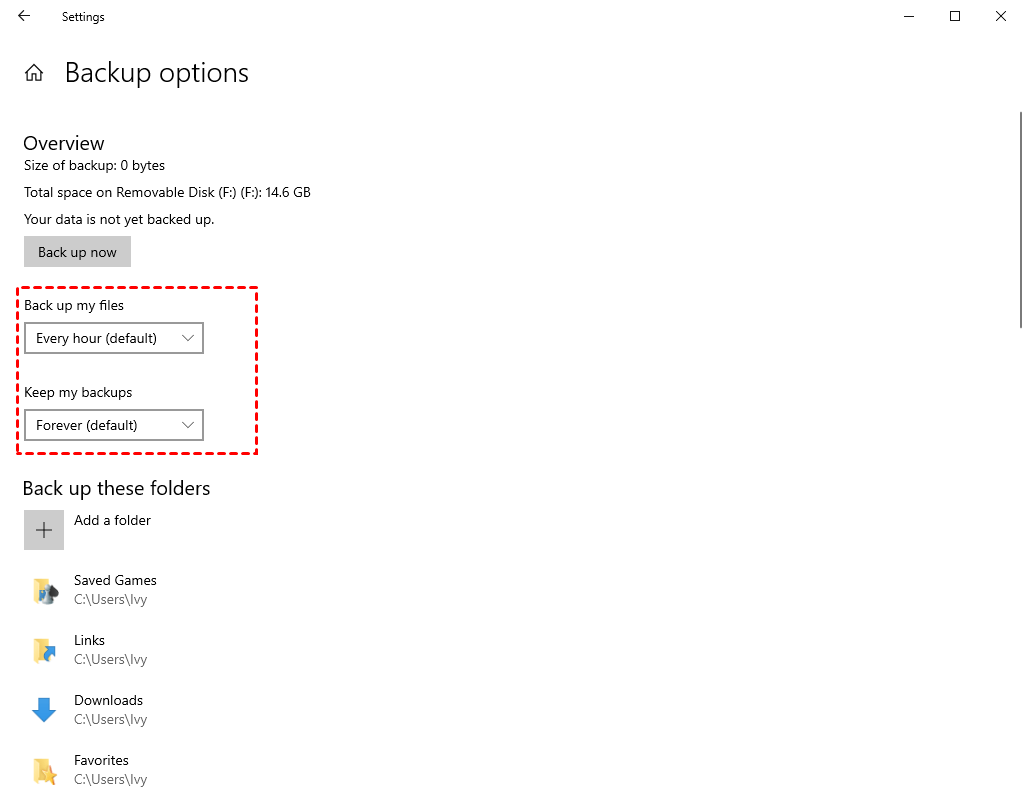
5. Finally, back to the Overview section and click “Back up now” to start file backup manually.
Restore your Files using File History:
Now, you can restore files to previous version or get back deleted or corrupted files in the event of a disaster.
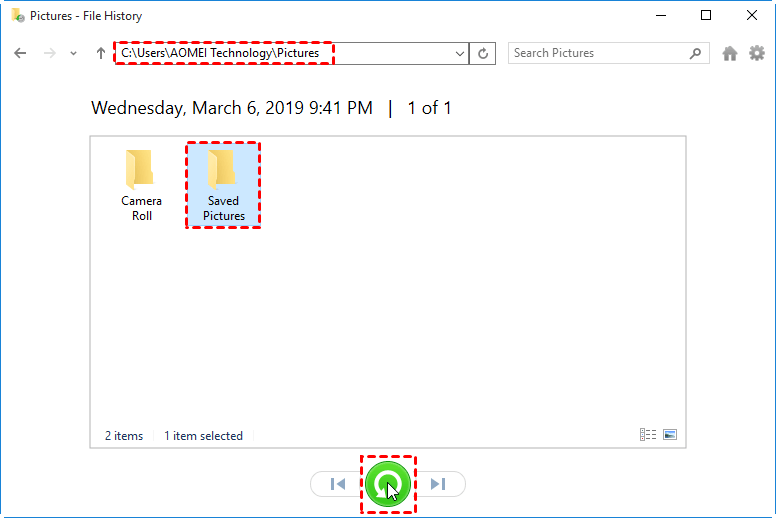
Type "Restore files" and select "Restore your files with File History", then you will see a window containing all the backed up data.
At the lower location, you can see a set of forward and backward buttons, which allows you to find different file versions. Then, click the green Restore button, it will be restored files to origincal location. Also, you can click the Settings icone and Restore to manually choose a differnet location.
2. Use Backup and Restore (Windows 7) to backup data offsite
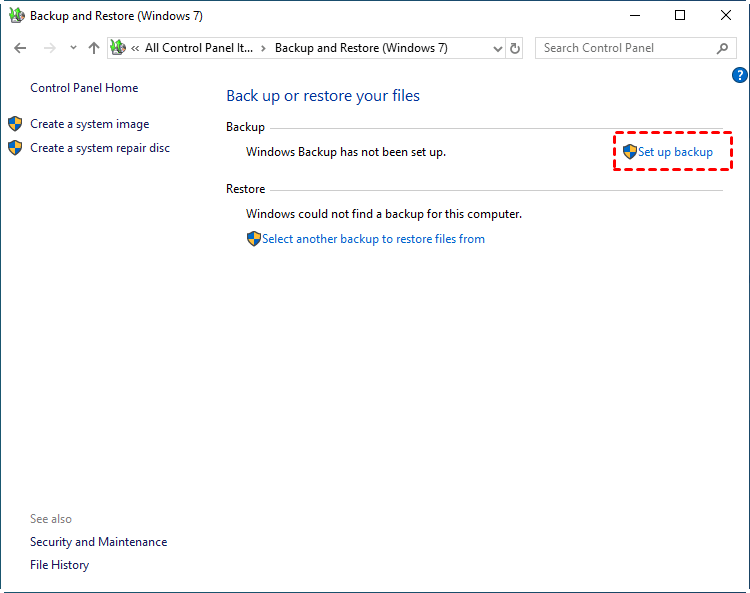
1. Go to backup settings window and then scroll down to "Looking for an older backup" section, click "Go to Backup and Restore (Windows 7)". Then, click "Set up backup" under the Back up or restore your files section.
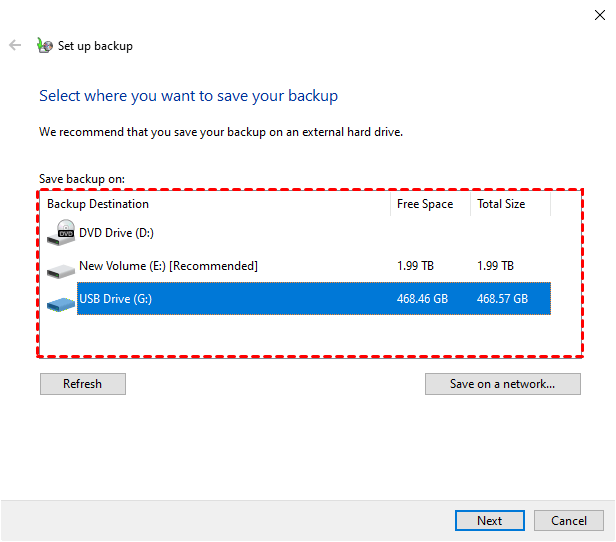
2. Select an external hard drive among all the available backup destinations. Also, you can click "Save on a network..." to backup Windows 10 to network drive.
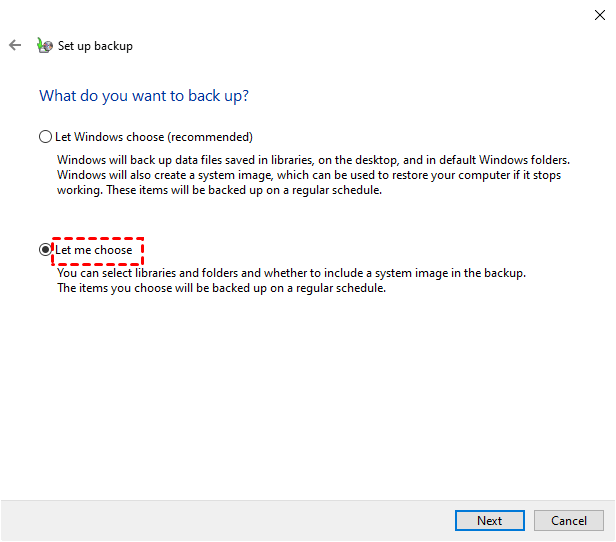
3. tick "Let me choose" to select libraries and folders per your needs. The "Let Windows choose (recommended)" option is a more worry-free way, you can tick it if you want to include the system image backup.
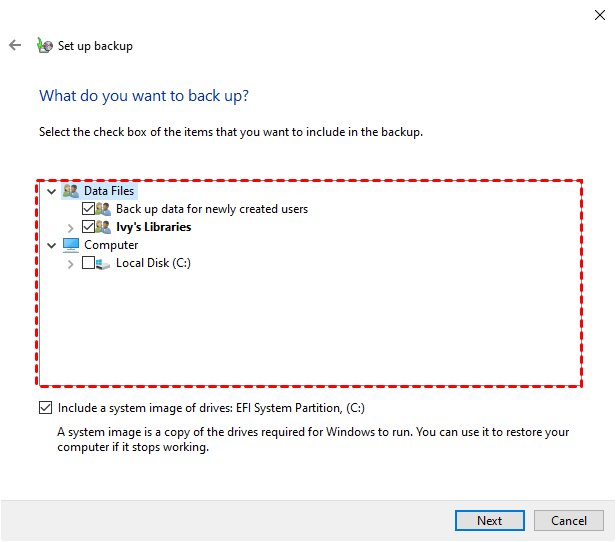
4. Select files under Data Files and Computer and click "Next"
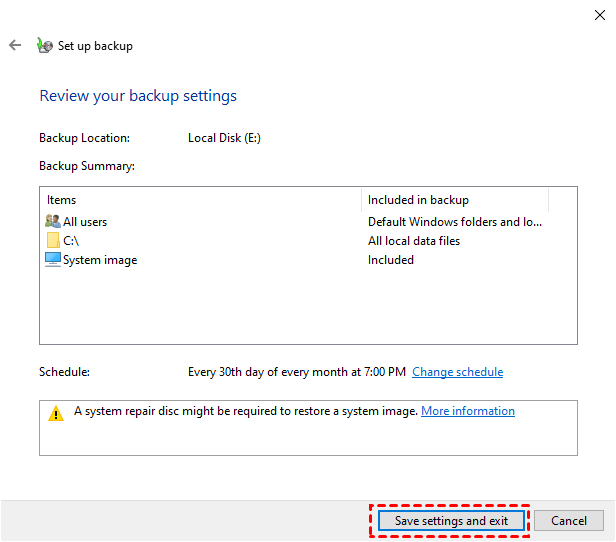
5. Review the backup settings and click "Save settings and run backup". It will start the first backup and then backup files at 7:00PM every Sunday. To make it frequently, click the "Change schedule" link and select daily, backup date and time.
Restore your files with "Backup and Restore(Windows 7):
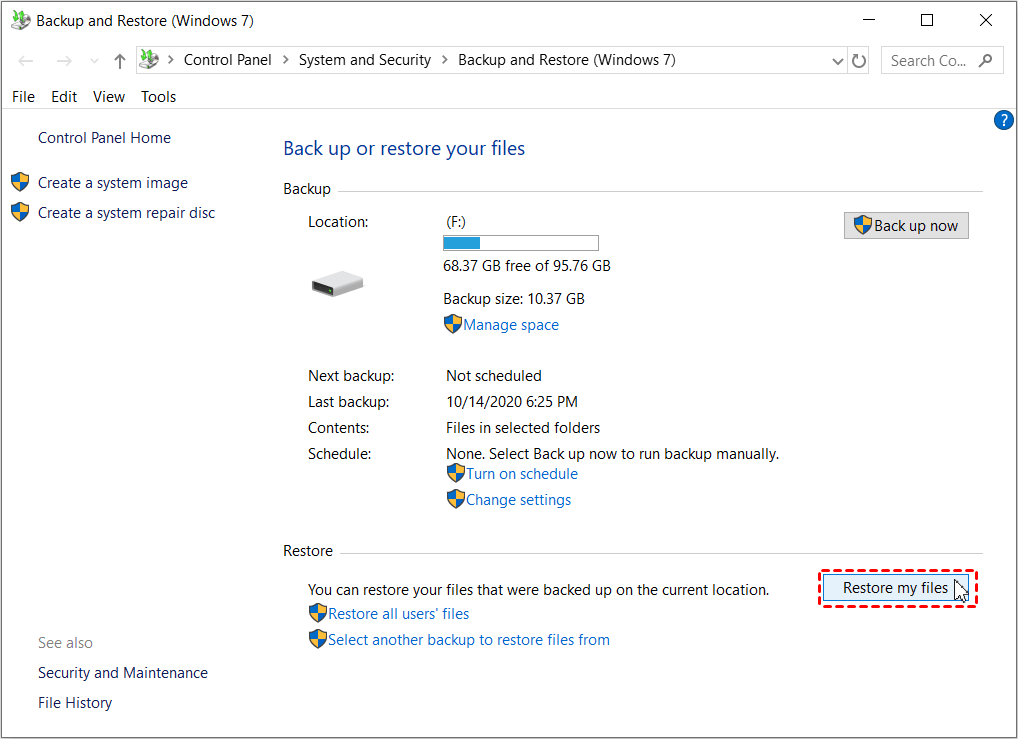
Go to the main page of "Backup and Restore(Windows 7), scroll down to the Restore section and click "Restore my files". If you want to restore files from backup created on different computer, click "Select another backup to restore files from".
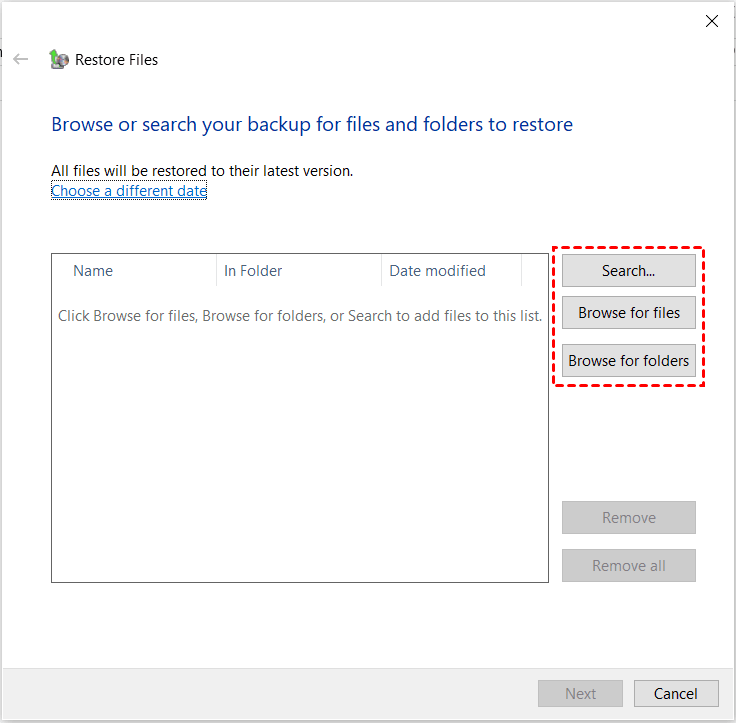
Then, in the following window, you can browse or search files or folders you want to restore. Then, you can choose to restore files in the original location or a different location. After that, click "Restore" to restore files.
-
Search: You just need to type part of the name of files and select the files you want to restore.
-
Browse for files: You can search the folder containing files you want to restore and then select it -> click Add Files.
-
Browse for folders: You can add entire folder to be restore.
Also, if you include a system backup, you can restore system image to new hard drive when something bad happens. It requires you to boot Windows 10 from recovery environment and then select System Image Recovery in the Avdnaced options window.
3. Backup data offsite with free backup software
AOMEI Backupper Standard is an all-in-one backup and restore software, which can help you backup files to external hard drive, USB flash drive, network drive, cloud drive, NAS etc. And it's a smarter.
1. Download AOMEI Backupper Standard and install it first. Then, launch it, click "Backup" > "File Backup" in the deep-blue main page.

Tip: If you have an AOMEI account, you can also backup files to AOMEI Cloud with the Cloud Backup feature. And it offers you 1TB of free cloud storage in 15 days.
2. Here you will enter the file backup main page, change the task name to clearly distinguish from other tasks. Then, click "Add Folder" or "Add File" to select data on the current computer you are using.

3. Click the inverted triangle at the second bar and select a destination path with the following 3 options.
Add Share or NAS Devices: It is to backup files to network location or NAS. You need to add it by clicking this option and type network path.
Select a cloud drive: It allows you to backup files to Google Drive, OneDrive and Dropbox if you install them on the computer.

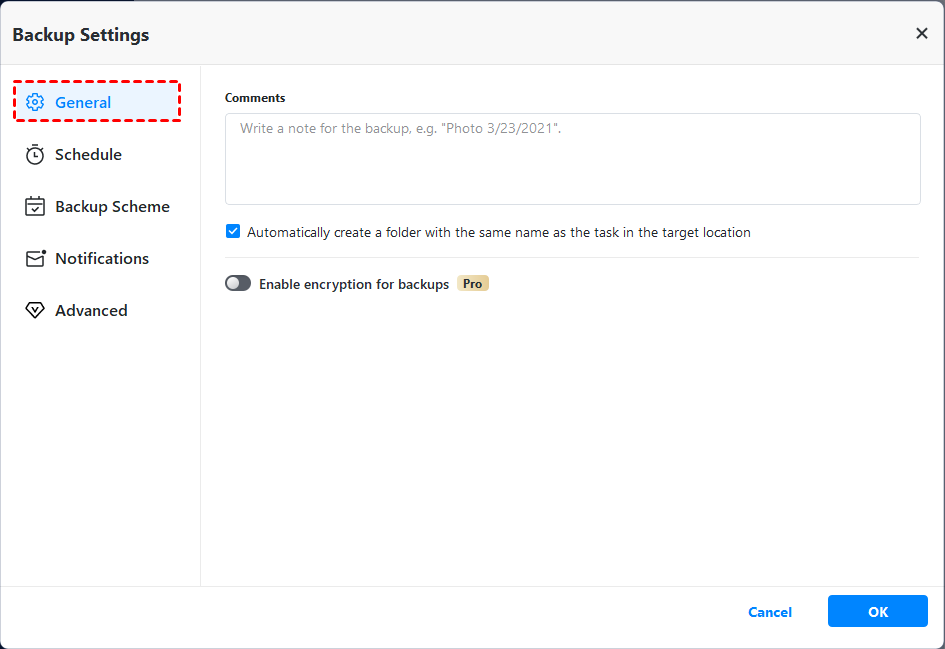
4. Go back to the file backup main page and set backup settings in the following. Then, click "Start Backup" to create offsite backup in Windows 10. And this backup only includes items that exist at this point in time.
Backup Options: You can enable email notification, compress backup with normal or high compression level, set pre/post-command etc.
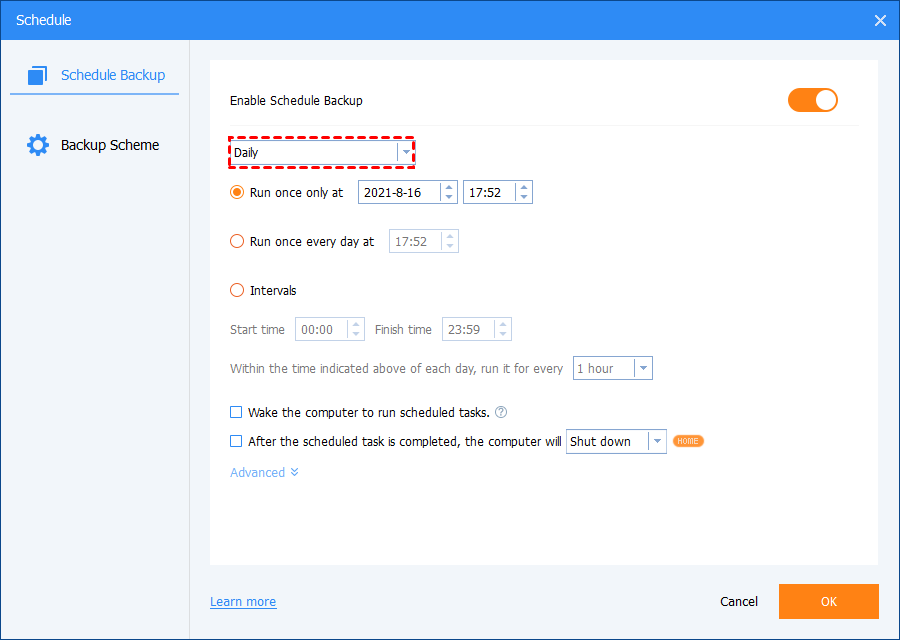
Schedule Backup: Also, you can enable daily/weekly/monthly schedule backup. Once it is enabled, it will backup only changed files automatically with incremental backup.
Also, you can try "USB Plug in" and "Event triggers" feature on the professional version. And the previous one is strongly recommended if your target disk is USB drive and don't want to always keep it connected. It will copy files automatically when you plug it into your computer.
Backup Scheme (premium feature): You can set differential backup as the way to backup files. And delete backup image on a regular basis with one of automatic backup cleanup methods. It is the most effective way for backup disk issue. Please upgrade to the professional version and enjoy it!
Restore your files with AOMEI Backupper Standard:
Launch AOMEI Backupper Standard again, then click "Restore" > "Select Task", then you will be asked to select backup image and files or folders you want to restore, afterward select restore to original location or new location and click "Start Restore".

Extended Reading: Why create offsite data backup in Windows 10?
The offsite data backup is an important part of 3-2-1 backup strategy, which ensures maximum data security. Here we summarize the main causes of creating offsite backup in Windows 10. It also applies to other systems.
👍Avoid onsite disasters,such as, fire, flood, tornado, earthquake, or hurricane.
👍Prevent a complete system crash. If the disk or partition with Windows installed is corrupted completely, you will receive an error message like "No operating system found" and cannot boot from it. All the installed programs, personal data, etc. will be deleted.
👍Preserve space for system disk. If you create an onsite backup, it will take up much disk space, especially for a scheduled task, since the backup image is increasing.
Summary
That's all the offsite data backup solutions to backup data offsite in Windows 10 and restore data when needed. According to Gartner, 25% of all PC users suffer from data loss each year. 7 out of 10 small firms that experience a major data go out business within a year, this info is from DTI/Price Water House Coopers.
If you don't want to lose your precious data, please start to back up your data right now! You can choose one solution per your needs.

