Copy vs Xcopy vs Robocopy: Which is Better for File Backup
Copy vs Xcopy vs Robocopy, which one is better? This may confuse many Windows users. Robocopy, Xcopy, and Copy are three Windows built-in command line file copy utilities. You can learn the difference between them and learn an easier way to do file copy operations on this page.
By Yuka Updated on May 20, 2024
Overview of Copy, Xcopy, and Robocopy

Copy, Xcopy, and Robocopy are essential tools in Windows for copying files and folders. Copy is the simplest, allowing you to copy files one at a time. Xcopy is more advanced, enabling you to copy entire directories and their contents. Robocopy is the most powerful, offering advanced options for copying files, directories, and even entire drives with more control and flexibility. These utilities are useful for various tasks, from simple file backups to complex data migrations.
What is the Copy command?
In computing, the Copy command is a fundamental tool used for duplicating files or directories from one location to another within a Windows operating system environment. It offers a straightforward method for replicating individual files or entire directory structures quickly and efficiently. While the Copy command may lack some of the advanced features found in other file copying utilities like Xcopy, it remains a versatile and widely used tool for basic file management tasks. Some key features of the Copy command include:
✡ Copying individual files from one location to another.
✡ Creating duplicates of files in different directories.
✡ Providing a simple and intuitive syntax for copying files without the need for complex commands.
✡ Allowing users to copy files across different drives or network locations seamlessly.
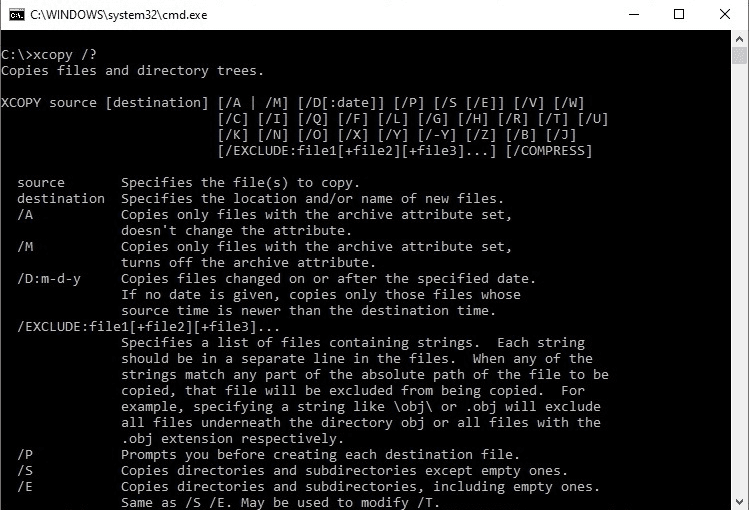
What is the Xcopy command?
In computing, XCOPY is a command used for copying multiple files or entire directory trees from one directory to another and for copying files across a network. It is a built-in command on Windows OS that has more advanced features than the basic Copy command. The additional features Xcopy has are listed below:
✡ Xcopy can copy directories.
✡ Xcopy can copy all files including subdirectories recursively and replicate the source directory structure as it is.
✡ Xcopy can exclude files based on file name or extension.
✡ Xcopy can help identify updated files (based on archive attribute or based on a given cutoff date), so it’s useful for incremental backup needs.
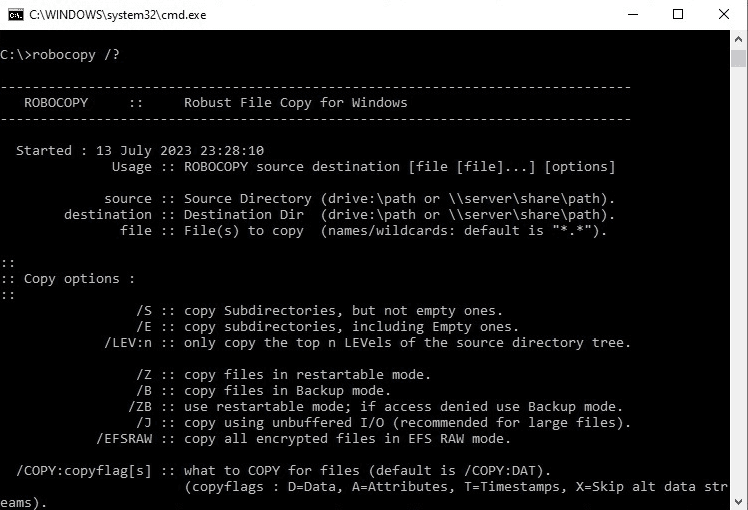
What is Robocopy?
ROBOCOPY, for "Robust File Copy", is a command-line directory and/or file replication command for Microsoft Windows. It has been a standard feature of Windows since Windows Vista and Windows Server 2008. The additional features Robocopy has are listed below:
✡ Robocopy can pre-specify what to do with conflicting file names.
✡ Robocopy can exclude some files or folders.
✡ Robocopy can schedule a copy-and-paste operation.
✡ Robocopy can mirror 1 folder to another, deleting files in the destination that don’t exist in the source folder.
Copy vs. Xcopy vs. Robocopy: The Differences
These three command line tools are often used in file transfers for Windows. XCopy is included in most versions of Windows but has been less used since Robocopy was released. All are useful programs for all types of bulk file copying, but Robocopy has some options to make the job easier.
| Aspect | Copy | Xcopy | Robocopy |
|---|---|---|---|
| External/Internal | Internal | Internal | Internal |
| Command type | Basic | Intermediate | Advanced |
| Data type | Files | Files | Files and directories |
| File backup | Limited | Limited | Yes, supports incremental backups |
| Multithreading | No | No | Yes |
| Copy speed | Basic | Intermediate | Advanced, can handle large data transfers |
| Error handling | Basic | Basic | Advanced, includes retry and logging |
Tips: The sync feature from AOMEI Backupper software offers a better user experience.
⭐It allows for syncing not only individual files and folders but also entire disks, providing comprehensive data protection.
⭐It supports scheduled and real-time syncing, ensuring that your data is always up to date without manual intervention.
⭐With incremental syncing capabilities, it optimizes storage space usage and reduces backup time by only copying changed or new files.
⭐Its user-friendly interface and customizable settings make it accessible to users of all skill levels, while its integration with backup functionality offers a holistic approach to data management.
Specific: XCOPY vs ROBOCOPY
◑ Robocopy uses MIRRORING, XCopy does not
Unlike Xcopy, Robocopy is used to mirror or synchronize directories. Robocopy will be able to check the target directory and delete files that are no longer in the main tree, instead of copying all files from one directory to another. It will also check the files in the target directory against the files to be copied, and will not waste time copying unchanged files.
◑ Robocopy has AUTOMATION settings, XCopy does not
Using the "Run Hours" (/RH) option with Robocopy allows you to set when copies should be done rather than the time of the command as with Xcopy. This automation is most useful for performing daily backups or large batch jobs that require some time but do not require interaction.
◑ Robocopy has MONITORING support, Xcopy does not
Robocopy supports file and directory monitoring with the "/MON" or "/MOT" commands. “/MON:n” copies the file to the destination with ‘n’ or more changes, while “/MOT:m” will check the file every “m” minutes for any changes, then copies it when there are. This is similar to saving files regularly while processing them, but it is more efficient. XCopy has no monitoring support.
◑ File Attributes
Both XCopy and Robocopy have support for copying over the "archive" attribute on files, while Robocoy copies over more file attributes than XCopy, including security, owner, timestamps, and auditing info.
Copy vs Xcopy vs Robocopy: how to use them
Use the Copy command in Windows
The "Copy" command in Windows is a built-in command-line utility used to copy one or more files from one location to another. It allows users to duplicate files and directories within the file system.
To use the Copy command:
- Open the Command Prompt by searching for "cmd" in the Start menu and pressing Enter.
- Type "copy" followed by the name of the file you want to copy, then space, and finally the destination where you want to copy the file.
- Press Enter to execute the command.
For example, to copy a file named "example.txt" from the current directory to another directory named "backup" located in the same directory, you would type:
copy example.txt backup\
This command will copy the "example.txt" file to the "backup" directory.
Copy folders and contents using the Xcopy command in Windows 10
The most used command syntax would be XCOPY source [destination] [options]. And there are plenty of options and switches for different demands. Click the Windows Xcopy Command to see more. Next, I will explain how to use the Xcopy command to copy folders and subfolders and their contents from one location to another.
- Click Start and type cmd in the search box. Right-click Command Prompt from the list and select Run as administrator.
- Now, when you're in the command prompt, you can type the Xcopy command as below to copy folders and subfolders including contents. For example, if you want to copy the “test” folder and its subfolders on C drive to D drive, type Xcopy command as:
Xcopy C:\test D:\test /E /H /C /I
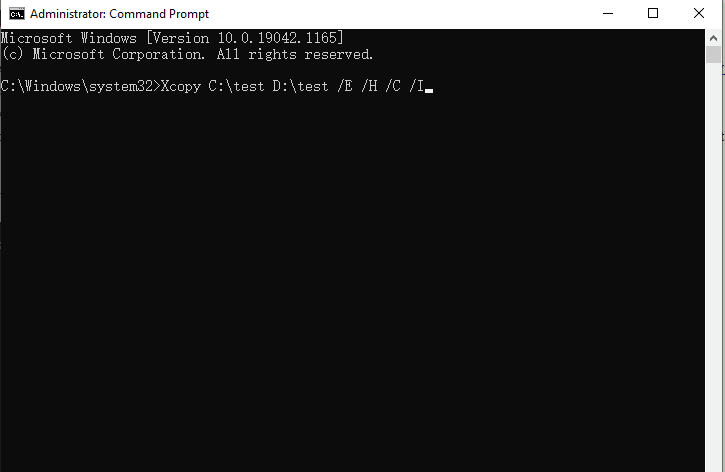
Tips✍:
● /E – Copy subdirectories, including any empty ones.
● /H - Copy files with hidden and system file attributes
● /C - Continue copying even if an error occurs.
● /I - If in doubt, always assume the destination is a folder. e.g. when the destination does not exist.
How to use Robocopy to Transfer Files in Windows 10
The basic syntax of the robocopy command is: robocopy [source] [destination]. There are various options you can use with the Robocopy command to meet different needs. Click Windows Robocopy Command to see more. Next, I will explain how to use the Robocopy command to transfer files from one location to another.
- Click Start and type cmd in the search box. Right-click Command Prompt from the list and select Run as administrator.
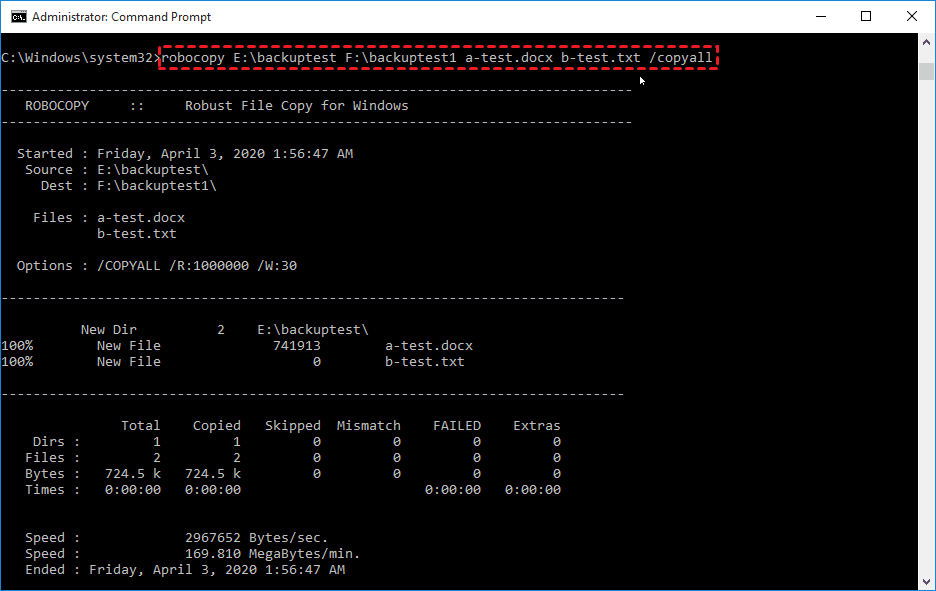
- Now, when you're in the command prompt. Here, we transfer two files: a-test.docx, and b-test.txt from E:\backuptest to F:\backuptest1 as an example. You can type the Robocopy command below:
Robocopy E:\backuptest F:\backuptest1 a-test.docx b-test.txt
Tip✍: You could create an incremental copy with /xo (exclude older files), or /mir (Mirror a directory tree (equivalent to /E plus /PURGE).) option.
Now you know how to use Xcopy and Robocopy, although the whole process seems complicated, both utilities have some shortcomings.
❀ Both Xcopy and Robocopy will not copy open files.
❀ Xcopy doesn’t display any progress or completed operations information when executed. It is not useful for backing up live operating system volumes.
❀ Robocopy does not mirror properly on systems older than Windows Vista. It ignores the changed security attributes of previously mirrored files.
An Easier Way to Perform File Copy Operations—AOMEI Backupper
If you want to find an easier way to copy files, the best free Xcopy or Robocopy alternative—AOMEI Backupper Standard is highly recommended. This freeware is designed with a user-friendly graphical user interface, which is easier to operate than the above two Windows built-in command line file copy utilities.
♨ It allows you to sync files to a USB drive, network location, NAS device, cloud drive, and so on.
♨ It allows you to perform one-way sync, two-way sync, mirror sync, or real-time sync as per your needs (the last three modes are available in its Pro edition).
♨ It enables you to do automatic sync for frequently changed data, thus saving you from repetitive work.
♨ It allows you to copy open files without effort, and it will not affect the copying process when using the file.
Step-by-step guide to copy files or folders via AOMEI Backupper
Step 1. Download AOMEI Backupper Standard, install it, and launch it.
Step 2. Click “Sync” and select “Basic Sync” subsequently.

Step 3. Click "Add Folder" to select the folder that you want to synchronize. You can click the “plus” icon to add more folders to sync.

Tip: You can name this File Sync Task to help you distinguish it from other sync tasks.
Step 4. (Optional) You can click the "funnel" icon to open the "Filter Settings" after you add the source folders.
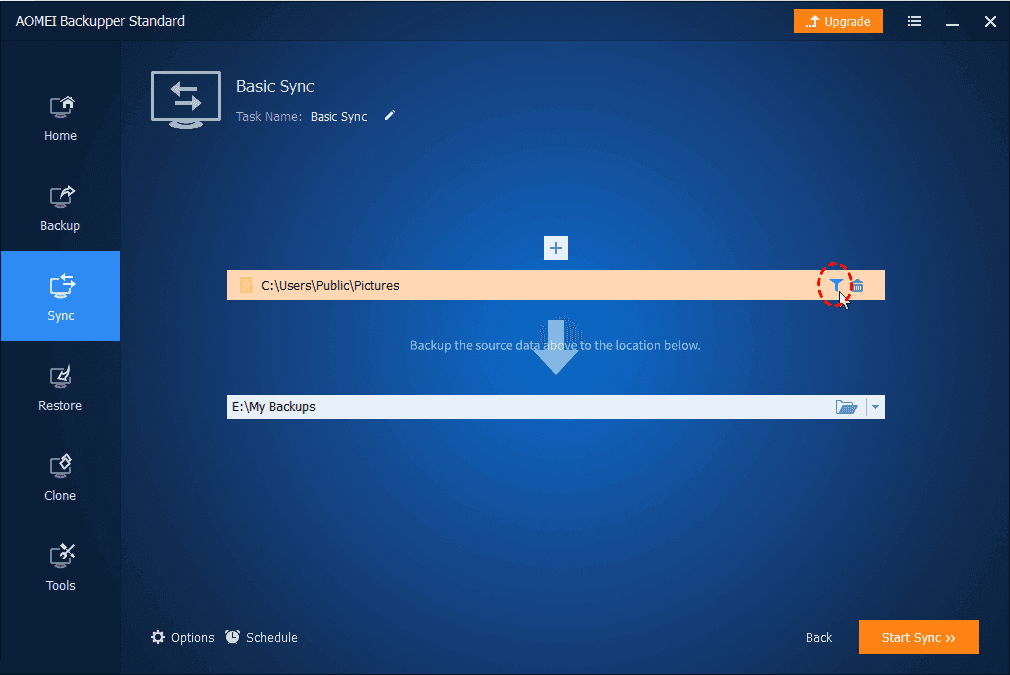
Note: The feature "Filter Settings" is only available in higher versions.

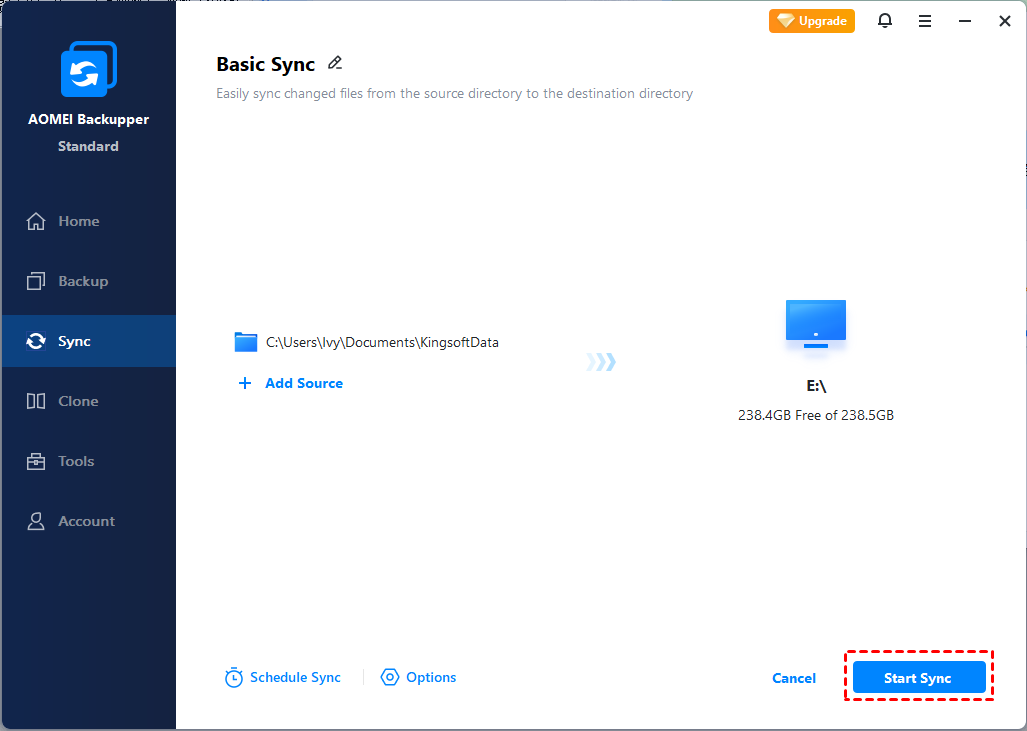
Step 5. Select a destination location to store the folder, then click "Start Sync" to perform the operation. You can sync files to an external hard drive, USB flash drive, cloud drive NAS, etc.
Tips✍:
▶ Options: You can write a note for your task and check the email notification option here.
▶ Schedule: Schedule the required sync task to sync files Daily, Weekly, Monthly, etc.
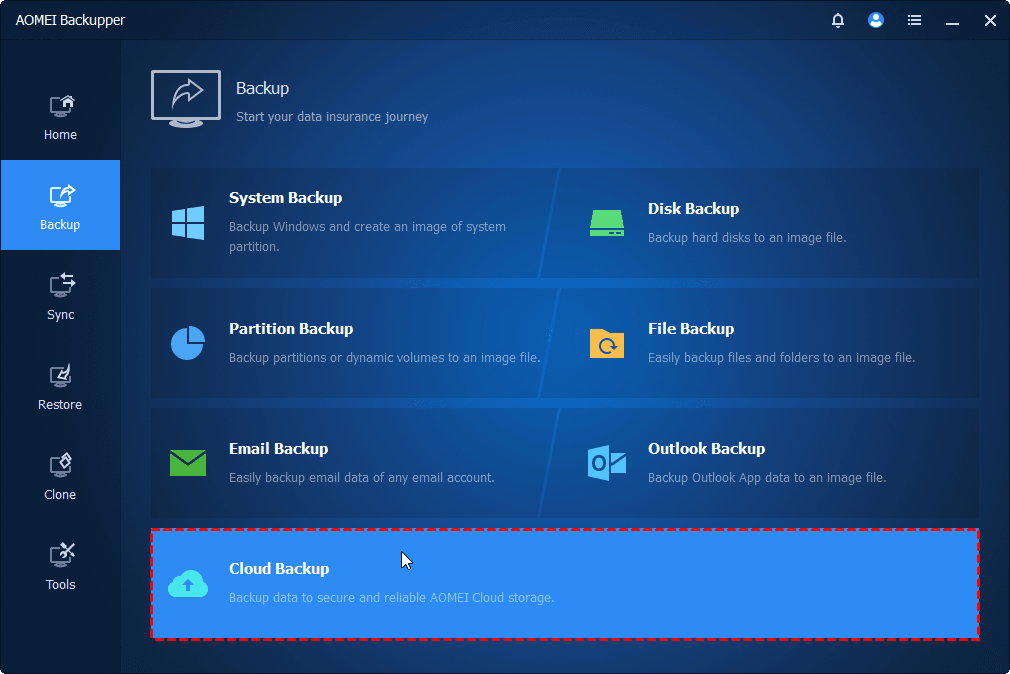
Except for the Sync method, you still can use the File Backup feature to create a duplicate copy. For free users with a few GB of cloud storage, it's suggested to backup folders to AOMEI Cloud with the Cloud Backup feature and you will get 1TB of free cloud storage 15 days after registration.
Summary
This article shows you the content of Copy vs Xcopy vs Robocopy. It gives you instructions for performing file copy operations with these two tools. But they all have some limitations and some users will also encounter some problems when using these three tools. Such as Xcopy does not copy all files, Xcopy fails with an "insufficient memory" error, Robocopy fails running auto copy, etc.
Don't get frustrated, AOMEI Backupper can help you solve these problems. In addition to synchronization functions, it also provides backup, recovery, and cloning functions, as well as other useful tools. It enables you to run Robocopy incremental backup on schedule. Try it right now!

