4 Ways to Backup Files from Command Prompt in Windows 10
You will learn how to backup files from command prompt in Windows 10 or uses a smarter way.
By Ivy Updated on September 2, 2025
Need to backup files from command prompt in Windows 10
It goes without saying, file backup is important for computer users to prevent data loss, after all, unexpected errors can happen at any time, for example, Windows updates issue, virus attack, file system error, file corruption, system crash, hard disk failure etc.
High-level computer users are willing to backup files from command prompt, it's more flexible and you can batch operation instead of doing it manually. Some of them want to backup data without booting into Windows 10 and this works perfectly when their computer fail to boot.
However, people who're insisting on using this method are gradually decreasing since there are many smart backup software to backup files automatically and easily. AOMEI Backupper Standard is such software. And it has an intutive interface, so you can easily understand and use it as a professional.
How to backup files from command prompt in Windows step by step
Here in the part you will learn to backup files using cmd within Windows, 4 methods in total, namely, using Robocopy, XCopy, SDCLT and Notepad. Any unexpected error may result in data loss, it's suggested to backup files if necessary. Then, keep reading below to learn more about it.
Method 1: Backup files from Robocopy command prompt in Windows 10
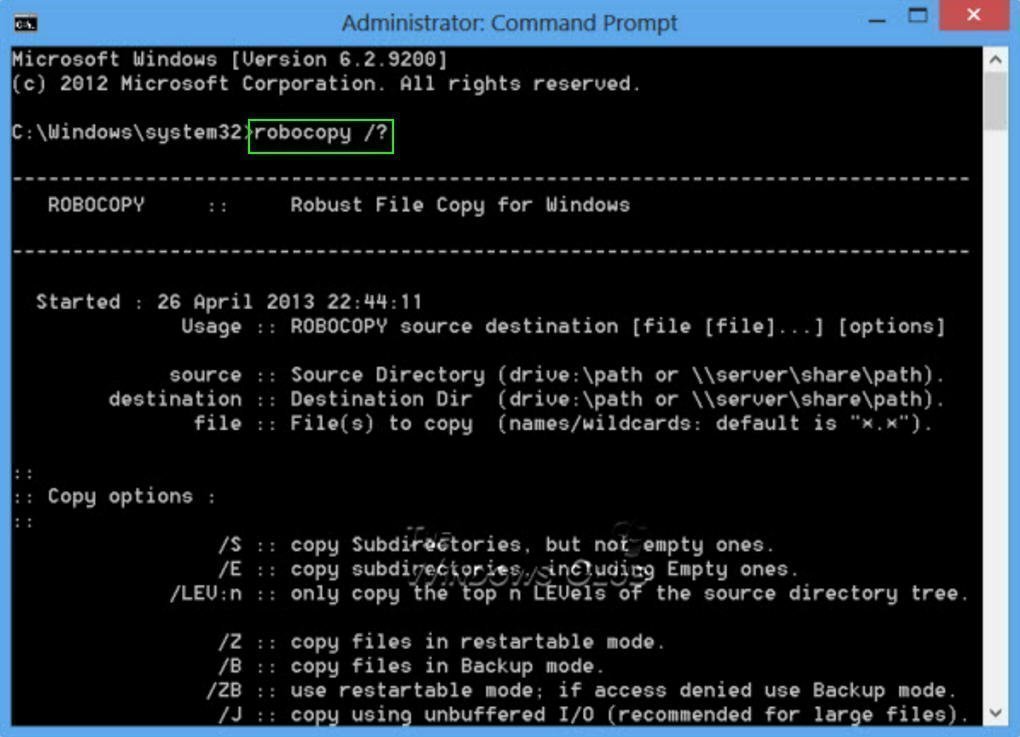
Robocopy(also named as Robust File Copy) is a command-line directory and/or file replication command for Microsoft Windows, providing more than 80 command-line parameters and switches, so you can copy any files or folders you want. Also, it's supported in Windows 7/8/10 and Windows Server 2008/2012(R2)2016/2019.
Learn parameters to copy files using command prompt in Windows 10:
-
To get Robocopy command line option, you can type "Robocopy /?".
-
In addition, you still need to learn syntax for Robocopy command line, it's robocopy source destination [file[file]...]
Example to backup files using Robocopy:
Here take backup user profile C:\Users\William to a FileBackup folder on an external hard disk(H:) as an example, you are supposed to type as follow.
Robocopy "C:\User\William" "H:\FileBackup" (You'll, of course, replace the path and name with your own.)
If you don’t want to backup the hidden system files, you can use "/XA:SH" option and type as follow.
robocopy "C:\User\William" "H:\FileBackup" /XA:SH
Method 2: Copy files using XCopy command prompt in Windows 10
XCopy is used to copy multiple files or entire directory trees from one directory to another over network. It's first introduced in DOS 3.2 and later inherited in new operating system, such as, Windows 10. But Microsoft thinks Robocopy is a more powerful tool and has great compatibility.
Command line is complicated for most users, it's worth to pay more attention. Thus, it's suggested to learn parameters and syntax you will use.
-
To get the parameters of XCopy, you can type "XCopy/?".
-
The syntax is xcopy source destination [file[file]...].
Example to Copy files using XCopy:
To create a new directory including all contents of the existing directory, any files or subdirectories having the "hidden" or "system" attributes and empty directories, you are supposed to type as follow.
xcopy "C:\User\William" "C:\User\NewFolder" /e /i /h
Method 3: Backup files using SDCLT command prompt in Windows 10
SDCLT is also a command line utility that can help you backup specific files you want. It is located in the folder C:\Windows\System32, you can directly use it in the command prompt window.
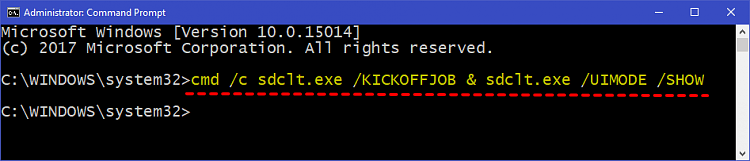
To create an incremental backup silently, type the first command in the following. If you want details, you can use the second command line.
sdclt.exe /KICKOFFIOB
cmd /c sdclt.exe /KICKOFFJOB & sdclt.exe /UIMODE /SHOW
To create a differential backup without prompt, use the first command below. If you want to get details, you can copy and paste the second command.
sdclt.exe /KICKOFFNEW
cmd /c sdclt.exe /KICKOFFNEW & sdclt.exe /UIMODE /SHOW
Method 4: Backup files using notepad CMD
Notepad is not a real command line utility, but sometimes you need to open it using cmd and then copy files you want. For example, if you computer fail to boot and you don't know the specific path of files you want, you need to open notepad in the recovery environment and use its "Save as" feature to find the files and copy it.
Please prepare Windows 10 recovery drive or installation disc to boot your computer if your computer is unable to boot, you can use the installation disc and the notepad command prompt to backup files in Windows 10. If you don't have any one, you can download media creation tool from Microsoft and then create one manually.
Then, follow the steps below.
Step 1. Insert the installation disc into your computer and boot from it.
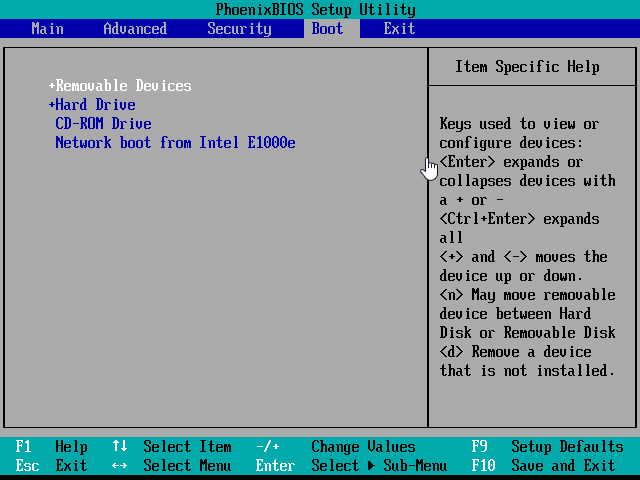
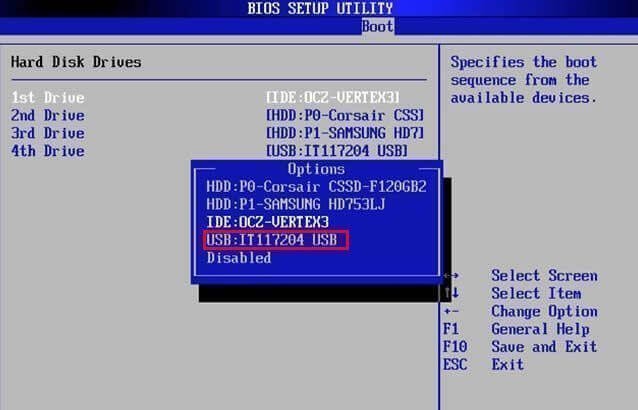
Restart your computer, press a specific key (usually F2 or ESC) on the initial screen and go to BIOS, select Boot option and move CD/DVD to the first place by clicking “+”, then press “F10” to boot your computer.
Step 2. Press a key when you see “Press any key to boot from CD or DVD”.
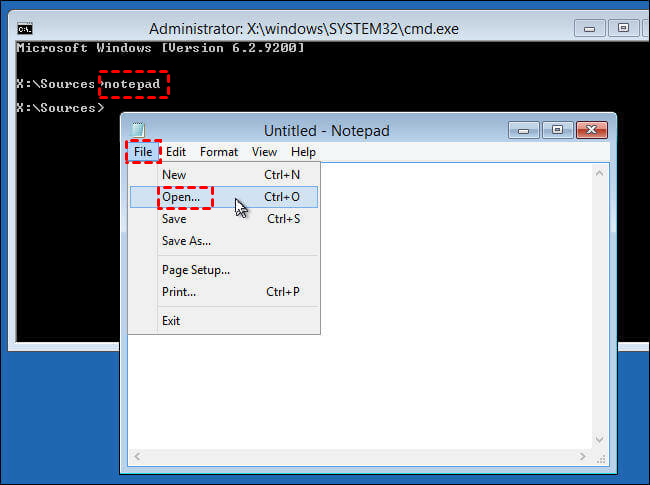
Step 3. In the first Windows Setup screen, press “Shift + F10” to open command prompt.
Step 4. Type “notepad” in the command prompt and hit “Enter”.
Step 5. Then, you will see a pop up window, click “File” and “Save as” to find your files.
Step 6. Plug your USB drive into computer and be sure it's recognized. Then, right-click the files you want to backup > click ”Send to” > select the USB drive as backup destination.
Smart way to backup files and folders automatically and easily
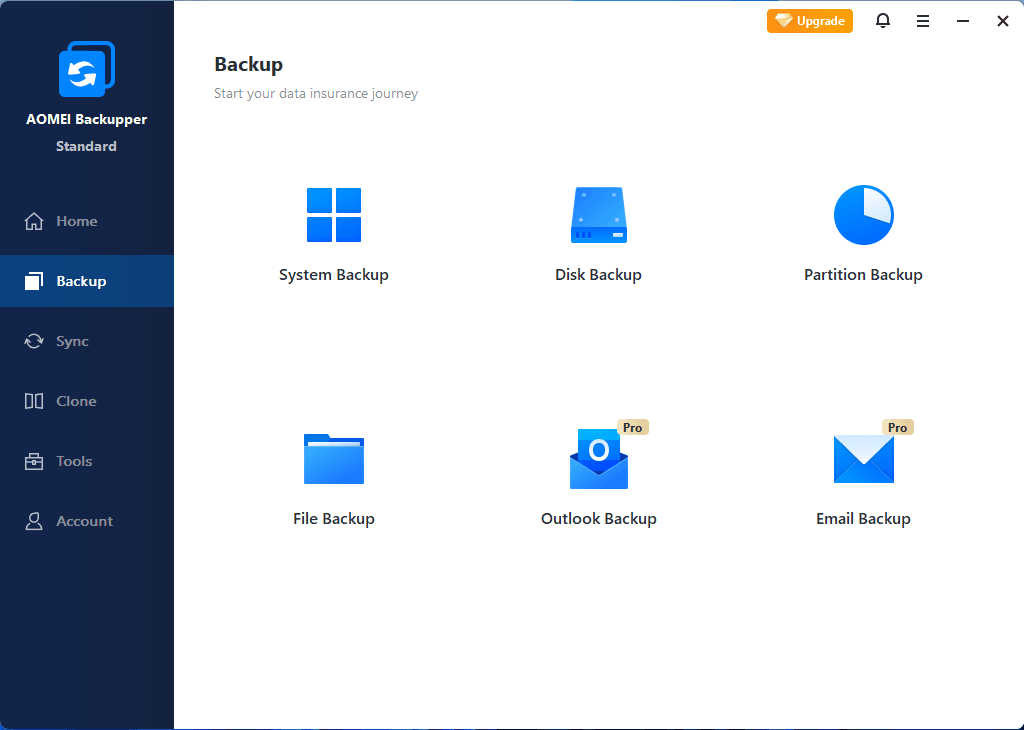
Here you will learn a smart way to backup files, even without booting into Windows 10. You will use free backup software - AOMEI Backupper Standard to operate this. And it not only supports file backup, but also system backup, disk backup, and partition backup. Thus, you can backup any items you want in this software. And either way, you can enjoy the following advantages:
- Backup files continuously: It supports daily, weekly, monthly, etc schedule backup, so you can backup any file with proper frequency. And you don't need to worry about data loss due to forgetting backups.
- Backup only changed files: By default, this software uses Incremental Backup as the default backup method, which backs up only changes. This will undoubtedly save much backup time and disk space for you while performing a scheduled task.
- Support multiple backup destinations: It's compatible with internal hard drives, external disks, USB drives, network drives, and more. If you have an AOMEI account, you are able to backup files to AOMEI Cloud.
Why not give it a try right now? Click the download button below to install it on your computer. It supports Windows 11/10/8/7. For servers, try AOMEI Backupper Server.
Step 1. Launch free backup software AOMEI Backupper Standard, then select “Backup” and “File Backup” in order.

Step 2. Click "Select Source" >“Add File” or “Add Folder” to select files or folders to be backed up.

Step 3. Click where the arrow points to select a destination path for your files. If you want to copy files to external hard drive in Windows 10, you need to connect it in advance.

Step 4. You need to set more backup settings before clicking "Start Backup". To backup files and changes made later, enable daily/weekly/monthly, etc schedule backup.

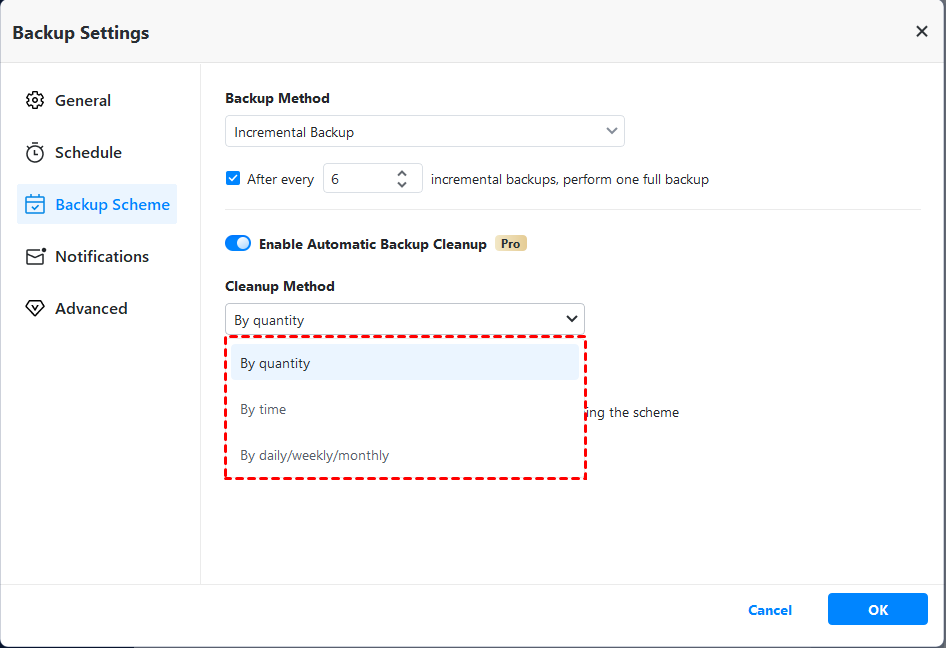
After setting a schedule task, this software will create a complete system backup and then 6 incremental backups, repeat this process until the backup disk is full.
To avoid this issue from the root, it's suggested to enable Backup Scheme and delete backup file automatically. You have 3 options: By quantity, By time, By daily/weekly/monthly. You need to upgrade now (5% off for one computer) before using it.
And the incremental backup has a high requirement for recovery, while the differential backup is much easier. For differences between them, learn my previous article: Incremental or Differential Backup.
Besides, you can still enable email notification during the backup process. Comment, split, compress the backup image, or select a backup mode, etc.

Backup data without booting into Windows 10
To backup files without booting into Windows 10, you need a bootable media to start Windows. This software provides you two useful ways, namely Create Bootable Media, and Recovery Environment (available in Pro version), you can choose one of them per your needs.
>> If you have extra storage device, such as, USB or CD/DVD, you can use Create Bootable Media.
>> If you don't have any storage device, you can use Recovery Environment. It allows you to add an entry to your computer, so you can directly boot from it without extra steps.
To create bootable USB, launch AOMEI Backupper Standard and then click Tools > Create Bootable Media. After that, you will be asked to select storage media and click Create to start the creation.

robocopy "C:\User\William" "H:\FileBackup" /XA:SH
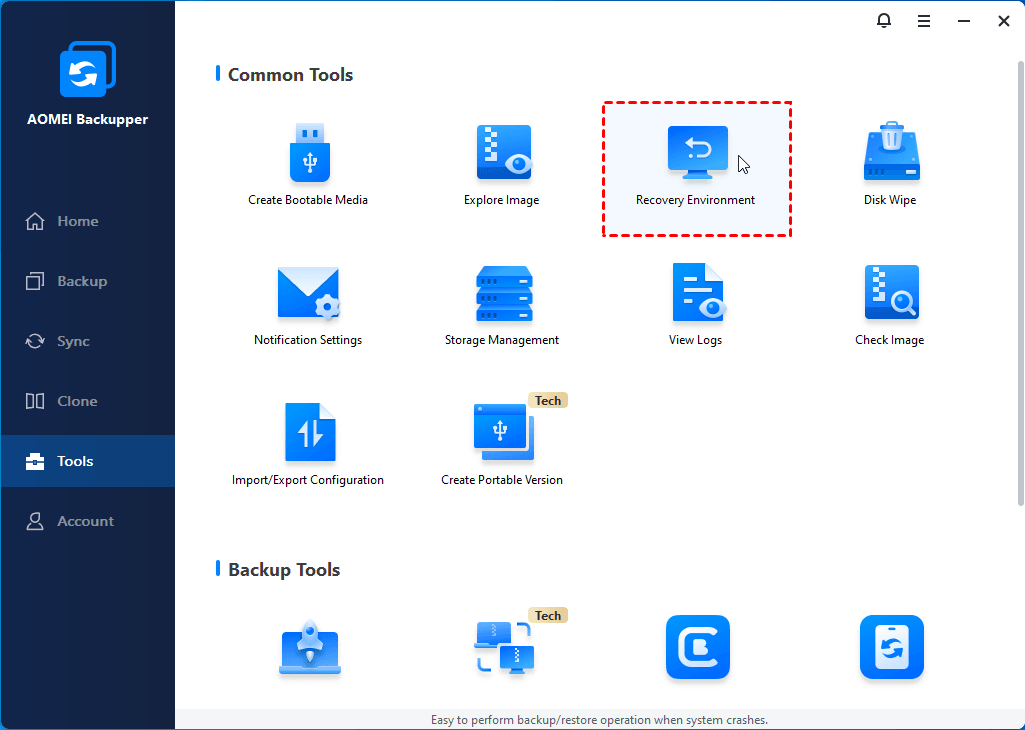
To create recovery environment, launch AOMEI Backupper Professional and go to the main page of Tools. Select Recovery Environment and tick the option Enable the boot option of AOMEI Backupper recovery environment. Then, you will be told that this entry will take effect upon next startup. Click OK, and it will start the creation.
To backup data without booting into Windows, you need to boot from bootable media or recovery environment. The steps are:
If you create bootable media, you need to change boot priority for your bootable USB or CD/DVD and boot from it.
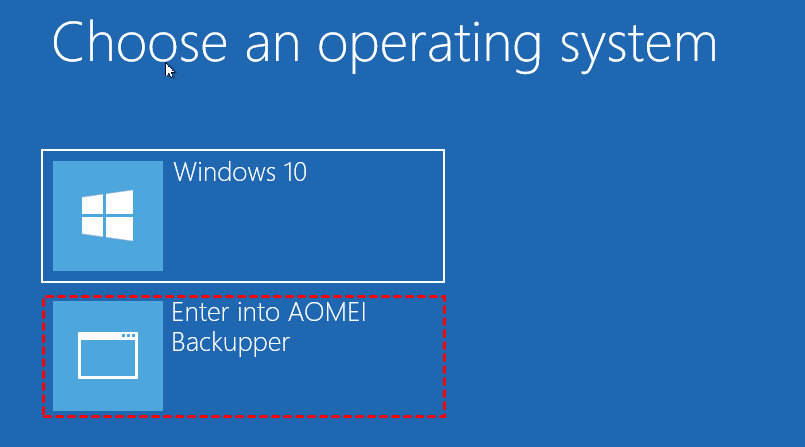
If you create a recovery environment, just start your computer as normal, select Enter into AOMEI Backupper.
Wait for a while, and you will see the main page of this software. Then, backup files as you are within Window 10.
Wrapping things up
You can choose to backup files from command prompt in Windows 10 with above ways if you like this way. If you just want to have this task done automatically, you can absolutely choose the simpler way - using free backup software AOMEI Backupper Standard and it only backup changed files since last backup by default if you set it as a scheduled task. Besides, it still allows you to backup data without booting Windows 10, whether it's bootable or not.
And its advanced version allows you to delete old backups regularly, which do a big favor of relieving the pressure of insufficient disk space. And it provides you with a safer backup method - Differential Backup. It backs up changes since last full backup, which greatly reduce data loss between two full backups, and it requires only one full backup plus any differential backup for recovery. For unlimited PCs and servers, try AOMEI Backupper TechPlus edition. All in all, it's worth trying.

