How to Copy Files Using Command Prompt in Windows 7 Guide
Learn how to copy files using Command Prompt in Windows 7 including command line copy file and other simple methods to help you get it done in seconds. You can pick any one of these ways to make the command line copy.
By Lily Updated on December 16, 2024
“Can someone help me write a command line for loop or batch file with a for loop to move all files from one location to another, putting each file in its same-named parent directory? The command has to work on a file level only and can't copy whole folders.”
If you're facing a situation like the one described in the Reddit post, don't worry. Follow this guide for a simple and efficient tutorial using the command line copy file. If you're not familiar with technical stuff and find it hard to use CMD commands, don't worry. You can use reliable PC file sync software, to make things easier.
Benefit from Command Prompt Copy Files
Copying files with the command line has some advantages compared to the traditional way of file copying:
⚡Speed: Command line copy file allows for quick and efficient file copying, especially for advanced users who are comfortable with command-line interfaces. It saves the time of manually copying and pasting.
🦾Customization: It provides more options for customization compared to traditional file copying methods, allowing users to specify parameters like file attributes, source and destination directories, and more.
💻Automation: Command line copy files can be scripted and automated, enabling users to create batch files for repetitive tasks or complex file management operations. It supports unattended tasks while copying.
📂Accessibility: Command line copy file is a built-in feature of Windows, making it readily available for users without the need for additional software installations.
Unlike some sorts of data backup with CMD, it is a little bit fiddly to copy each file manually, especially when these files are stored in different locations. If they are placed in the same partition or volume, it would be more convenient to back up the entire partition.
Anyway, you may have other reasons to do a file copy in Command Prompt. However, the most important thing is to figure out how to perform command prompt copy files.

How to Copy Files Using Command Prompt in Windows 7
Below, you'll find two methods for copying and pasting files using CMD, each serving different needs. Consider your specific requirements and preferences to select the method that best fits your situation. Whether you're looking for simplicity or advanced features, these methods offer flexibility and efficiency for managing your files through Command Prompt.
If you want an easier way to copy files from one location to another, try AOMEI Backupper.
Method 1: Copy Specific File via “Copy” Command
1. Press Windows + R key combination (or click Start) to start Run.
2. Type cmd and hit OK in the box to launch Command Prompt.
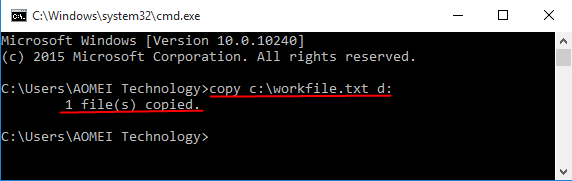
3. At the prompt, type copy c:\workfile.txt d: and press Enter to copy the file named “workfile.txt” on the root of C drive to D drive root.
Tips:
You can copy certain file extensions from one drive to another:
To copy a specific file from your C: drive to your D: drive, use the command: copy c:\myfile.txt d:
If you want to copy all text files from your current directory to the D: drive, use the command: copy *.txt d:
If you're in a different directory and want to copy a file from your D: drive to your current directory, use the command: copy d:\example.xls
This method also applies to copying files using Command Prompt in Windows 10.
Method 2: Copy the Directory and Contents Using the “XCopy” Command
It would be better to copy folders with the help of the XCopy command in this method.
1. Open a Command Prompt as instructed.
2. Input xcopy c:\workfile d:\test and press Enter to copy a directory and contents in “workfile” to “test”.
Tips:
· To copy a directory with a space in the name, you need to surround it with quotes. For example, type xcopy c:\workfile “d:\test new”.
· By default, the basic XCopy command only copies files in the directory you specify as the source directory. You must use the /E option to copy subdirectories within the source directory as well.
· If you need to copy a single file in Command Prompt, simply use the Copy command. However, if you want to copy an entire directory along with all its contents, then the Xcopy command is your best bet.
With these two methods, it is quite easy to make the copy command using the command line copy file. Nevertheless, those methods are convenient for some special groups of Windows users who are familiar with command-line operations. For the majority of users, that is a little complex. In addition, the XCopy command refuses to work sometimes. That’s why so many people are looking for XCopy alternatives on the Internet.
Is there a simpler way to copy files from one location to another in Windows 7? The answer is positive. AOMEI Backupper Professional is reliable file sync software that is designed for all Windows systems. And I'll introduce the detailed steps in the next part.
Easier Way to Copy Files in Windows 7/8/10/11 (GUI-based)🔥
Here you will copy files in Windows 7, 8, 10, and 11 with a professional file sync software - AOMEI Backupper. Below are some advantages of it:
✦ All-in-one sync solutions: With it, you can sync files from source to destination with Basic Sync, Mirror Sync, Real-Time Sync, or sync files on both sides with the Two-Way Sync feature.
✦ Automatic sync: You are able to sync files/folders in Daily, Weekly, Monthly, Event-trigger, and USB plug-in mode.
✦ Various sync locations: You can sync files to external hard drives, USB flash drives, NAS devices cloud drives, etc.
For advanced users, the software also provides a way to backup or clone hard disk, system drive, and partition/volume in Command Prompt. You can also do a system restore from Command Prompt when the need ever arises in the future.
How to Copy Files/Folders in Windows 7 Step by Step
1. Download AOMEI Backupper, install it, and start it. Connect the external storage to your Windows 7 if necessary.
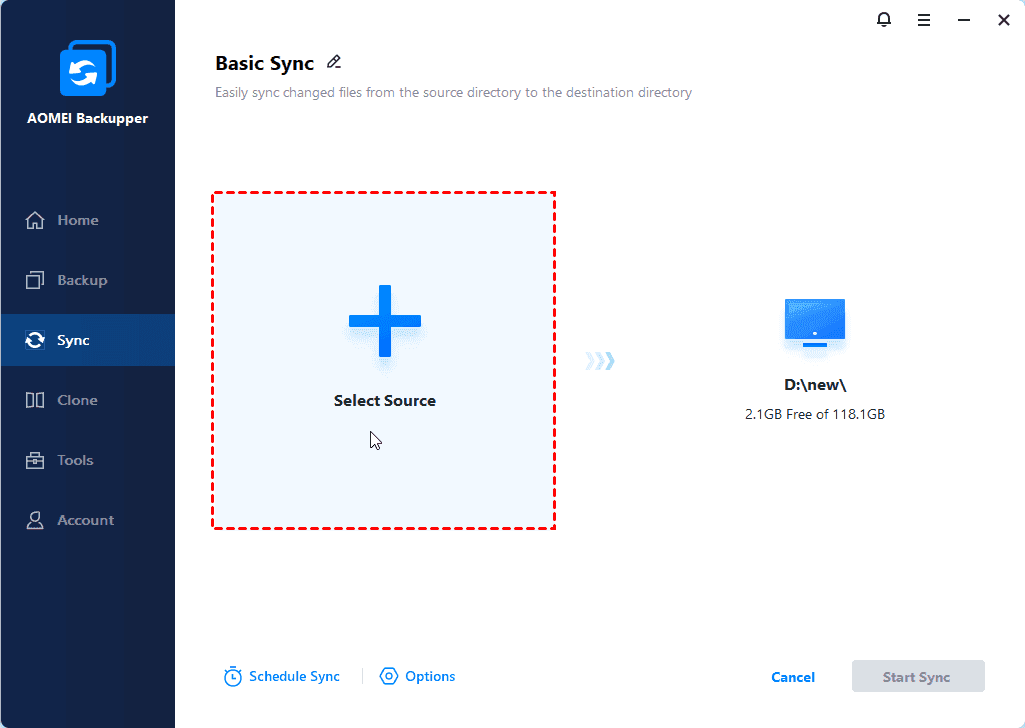
2. Click Sync and select Basic Sync.

3. Edit the task name if you want to. Then, choose the files or folders you’d like to copy by clicking Add Folder. You can add multiple folders to synchronize them at a time.
4. Choose the destination path you’d like to copy to. You are allowed to copy files to OneDrive or other cloud storage, network drive, NAS, external disk, etc.
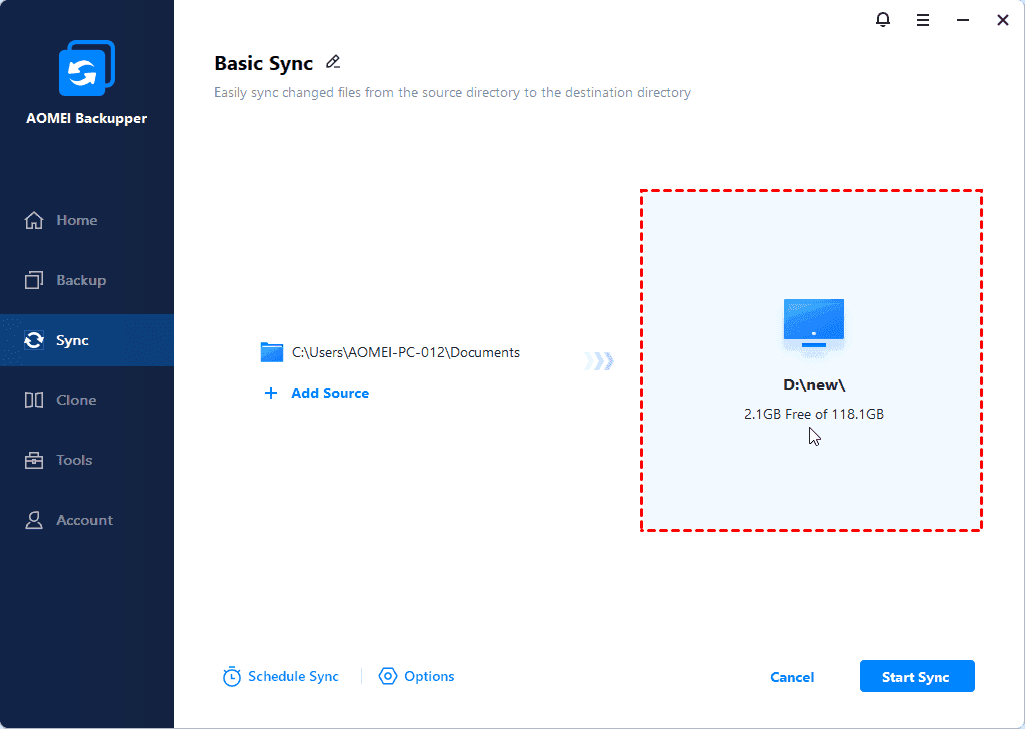
5. Click Start Sync to copy files in Windows 7.
Options: comment on the task and set email notification here. If you are running a file backup task, you’ll be able to encrypt the backup image, split the image, and compress the image in this option.
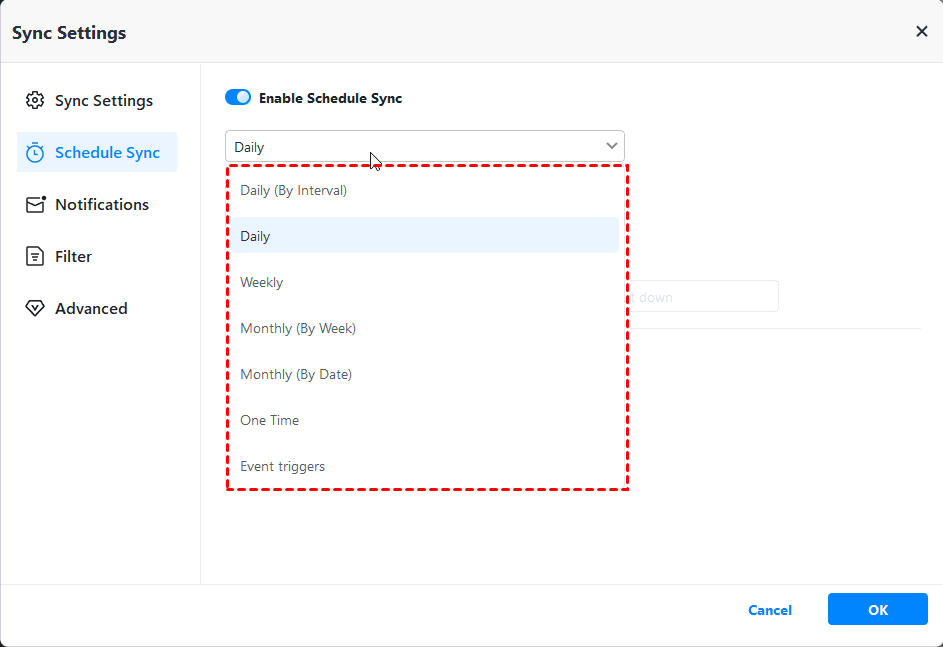
Schedule Sync: choose synchronization schedule type from Daily, Weekly, Monthly, Event triggers, and USB plug-in here. The program will run the missed task at the next system startup by default if you set up a scheduled task.
✍Helpful Tips:
- To get a list of the files that have been synced, please go to Home > find the sync task > select Properties from the expanded menu > click on the Source tab.

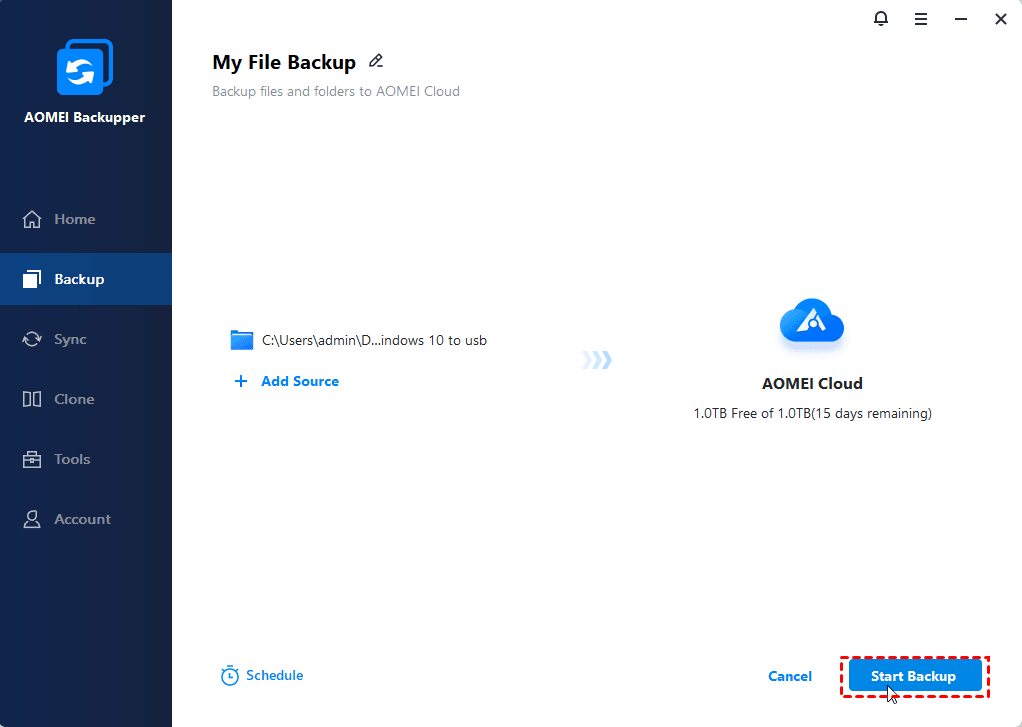
- If you want to backup to a cloud drive, you can create a cloud backup with AOMEI Cloud, a cloud drive provided by AOMEI Tech, which offers free users 1TB of cloud storage space from the date you sign up until 15 days.
FAQs
1. How can I copy a file using the command line?
To command line copy file in the Terminal app on your Mac, simply use the cp command. If you want to copy an entire folder and everything inside it, add the -R flag to the command.
2. What does the cp command do in CMD?
The cp command in CMD copies the source file specified by the SourceFile parameter to the destination file specified by the TargetFile parameter. If the destination file already exists, cp will overwrite its contents, but it won't change its mode, owner, or group.
3. How do I copy a file to another directory using DOS?
In DOS, you can use the XCOPY command to copy files or groups of files to and from directories. This command is especially handy for copying data between fixed disks. Simply specify the source file(s) followed by the target file(s) to execute the copy operation.
Summary
Two available ways how to copy files using Command Prompt in Windows 7 are presented in this article. Choose the most helpful one based on your situation. However, it's quite difficult for amateur users to understand command syntax and parameters to command line copy file.
In this case, you can use third-party file sync software to easily copy files in Windows 7/8/10/11 with a few clicks, no syntax, and no command prompt. It allows you to schedule sync files in different sync intervals or use event triggers. Also, you can backup files to a USB flash drive automatically with its USB plug-in feature.
Besides, you can still move the hard drive to a new computer in Windows 7 by backing up the entire disk and restoring it to its original location or a new hard drive. Its Technician edition allows you to protect unlimited computers within your company, deploy/restore system image files on server-side computers to multiple client-side computers over a network, etc.

