How to Use Robocopy in Windows 10 to Copy Files & Folders
Windows Robocopy is a handy tool for transferring files. Learn the simple guide to using Robocopy in Windows 10. Additionally, you can download free software that makes file transfers even easier.
By Delia Updated on April 18, 2024
The traditional "copy and paste" function built into Microsoft Windows has some limitations. It handles simple tasks reasonably well, such as moving a document from one directory to another, but lacks the advanced features in the workplace. For example, the copy-and-paste operation does not include any advanced recovery features, so it does not allow for recovery after a brief network interruption. Particularly when copying entire directories, it's an all-or-nothing situation.
Overview of Robocopy in Windows 10
As a user, you may get tired of manually copying the same directories every single time or transferring files via a transit device. These old-fashioned methods are not only time-consuming but can also cause problems, e.g. files corruption, and data loss. Therefore, it's better to transfer files with the file copy program - Windows Robocopy.
Windows Robocopy (also known as Robust File Copy) is a Windows command-line file replication utility. It was initially included in the Windows Server 2003 Resource Kit Tools and is now integrated into Windows Vista, Windows 7, and later versions of Windows systems. Considering all the advanced features mentioned above and more, Windows Robocopy supports more critical file-copying tasks, making your work truly simplified. Additionally, Windows Robocopy allows you to preserve all relevant file information, including dates and timestamps, security access control lists (ACLs), and more.
It functionally replaces Xcopy with more than 80 switches. In a nutshell, it enables you to do the following:
- Copy/transfer files between computers over a network.
- Copy or mirror directories anywhere the computer has access.
- Copy drives to another location.
Before Windows Vista, Robocopy acted as an individual utility. But now it sits on a high pedestal in the system32 directory on every Windows installation. Robocopy supports multi-threaded mode, that is, you can copy multiple files at the same time with multi-threaded enabled.
Above all, while copying files correctly, it also preserves their original attributes and timestamps.
One easier way than Robocopy
Automatically copy files & folders between local folders, external drives, network locations, cloud services, etc. Read more »
How to transfer files over a network using Windows Robocopy
As an extremely versatile program, Windows Rococopy is often used to transfer files over a network. So here’s a quick guide on how to perform this task. The task is a two-step process. Users should first enable file sharing on the source computer. Then use the Robocopy in the destination device to transfer files over the network. Get a stepwise Robocopy tutorial below.
Stage 1: Configure file sharing on the source computer
Step 1. Open File Explorer to find the folder you want to share.
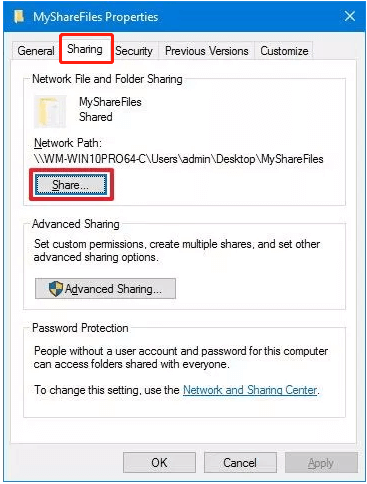
Step 2. Right click the folder and then choose Properties.

Step 3. Click Sharing and Share subsequently.
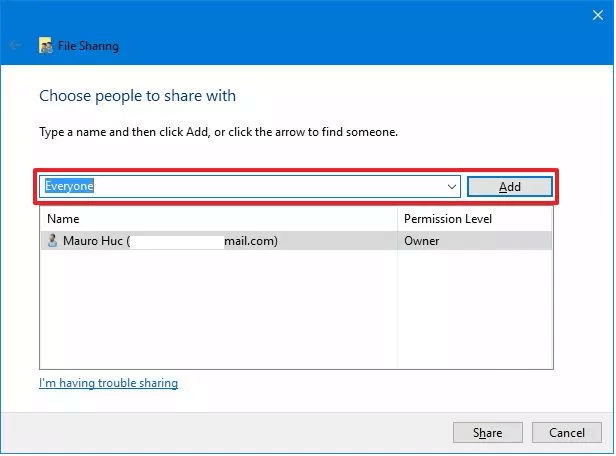
Step 4. Select the Everyone group from the drop-down menu. Then click Add.
Step 5. Select the type of sharing permissions you want the folder to have. Then click Share to continue.
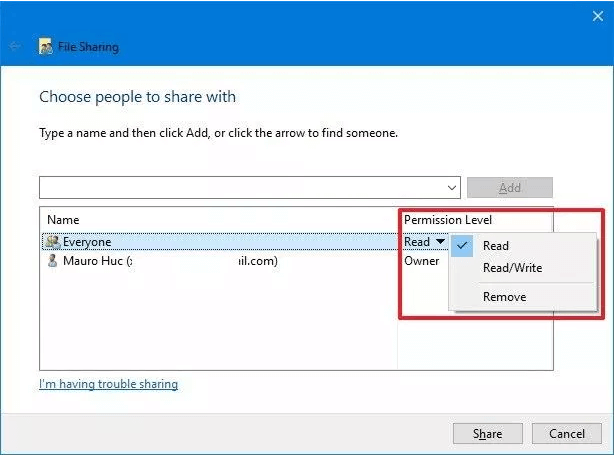
*Read: users can view and open the sharing files.
*Read/Write: users are allowed to view, open, modify and delete the sharing files.
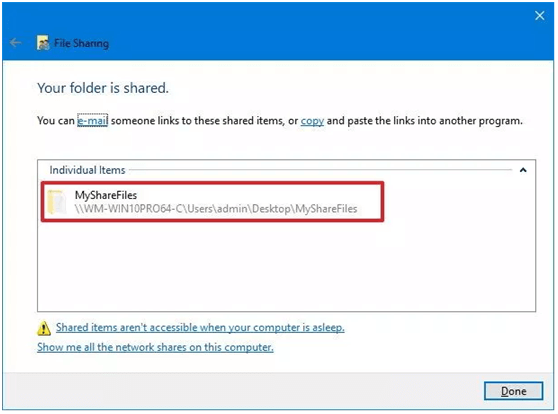
Step 6. Note the network path of the folder that other users will need to access the sharing files over the network. Then click Done.
Step 7. Wait for the sharing progress to be completed. Then click Close.
Tips:
-
Please remember the IP address of your source computer. If you don’t know your IP address, you can go Settings > Network & Internet > Wi-Fi or Ethernet to view the information.
-
It is reported that file sharing often goes wrong. Refer to Windows 10 file sharing not working – how to resolve, if you have any questions.
Stage 2: Use Robocopy in the destination device to copy files
Once file sharing is successfully configured on the source computer, you can copy sharing files using Robocopy in the destination device. Let’s take a closer look at the necessary steps to use Robocopy in Windows.
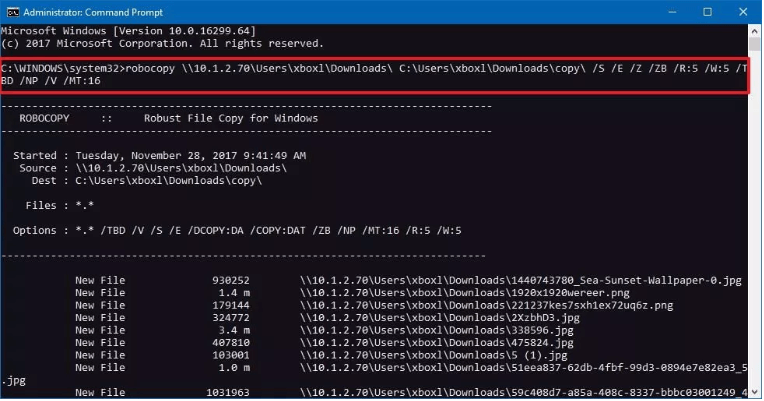
Step 1. Press Windows logo key + X at the same time. Then select Command Prompt (Admin) from the list.
Step 2. Type the following command and then press Enter.
robocopy \\source-device-ip\path to share folder C:\destination-device\path to store folder /S /E /Z /ZB /R:5 /W:5 /TBD /NP /V /MT:16
Here's an example:
robocopy \\10.1.2.70\Users\xbox1\Downloads\ C:\Users\xbox1\Downloads\copy\ /S /E /Z /ZB /R:5 /W:5 /TBD /NP /V /MT:16
-
/S - Copy subdirectories (excludes empty directories).
-
/E - Copy subdirectories (includes empty directories).
-
/Z - Copy files in restartable mode.
-
/ZB- Use restartable mode. Turn to backup mode, if access is denied.
-
/R:5 - Retry 5 times (change the number by your needs, the default value is 1 million).
-
/W:5 - Wait 5 seconds before retrying (you can specify a different number, default value is 30 seconds).
-
/TBD - Wait for the share names to be defined by the system (retry error 67).
-
/NP - Copying progress will not be displayed.
-
/V - Produce verbose output, showing skipped files.
-
/MT:16 - Create multi-threaded copies with 16 threads (you can replace 16 with an integer between 1 and 128, the default value is 8).
Tips:
-
The above steps also work with Robocopy in Windows 7.
-
Open files are not supported by this program.
You may not be able to endure these long and complex instructions. Care must be taken when using Windows Robocopy command-line, as you have no chance to step back. Besides, some users find Robocopy not copying files during the operation. To transfer files easily and efficiently, you might require a Robocopy alternative.
Windows Robocopy Challenges
Robocopy is great for copying files and folders in Windows, but it comes with some challenges:
✍ Limited to Windows: It can't copy to Linux, Mac, or other systems.
✍ Complexity: It takes time to learn Robocopy's commands and using it through the command line can be tough.
✍ Bugs: Robocopy sometimes has issues, and scripting with it can be tricky.
✍ No real-time copying: You have to start Windows Robocopy manually, and it doesn't copy changes as they happen.
Best free alternative to Robocopy in Windows 10
You deserve the best free Windows Robocopy download alternative – AOMEI Backupper Standard. This freeware is designed with a user-friendly GUI, which makes it easier to operate than Robocopy.
- It includes the features of file backup and file sync, which can image or copy files to a network, NAS device, or internal/external hard drive in a few simple steps.
- Open files can also be copied without effort.
- Except for copying multiple files simultaneously, tasks can be scheduled as daily, weekly or monthly.
- You can enable email notifications to see if your operation is completed successfully.
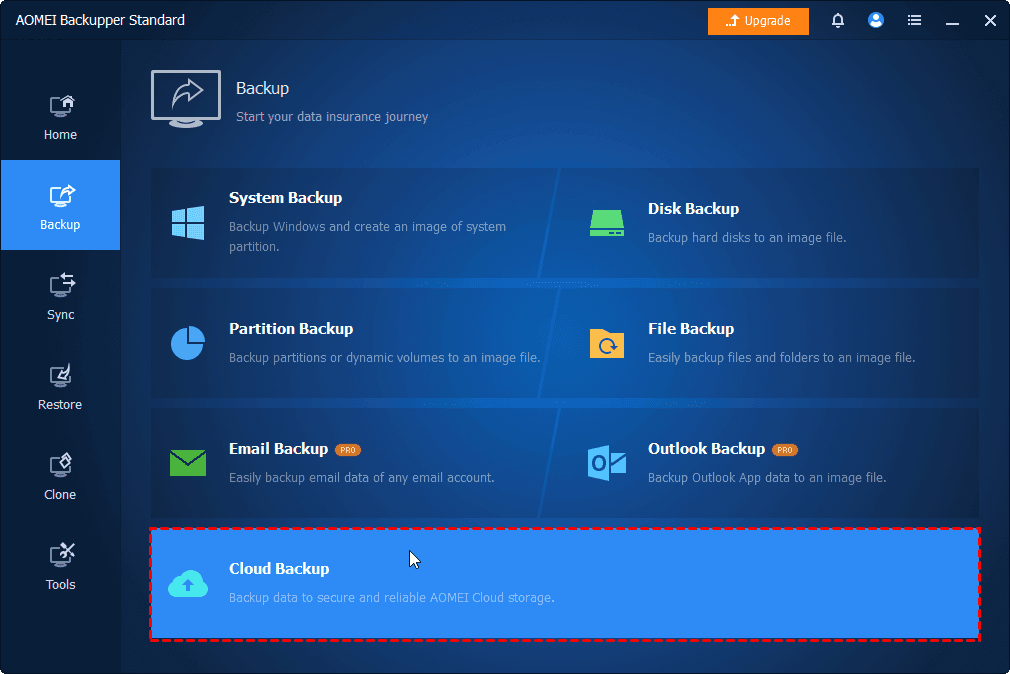
Go download this freeware and get started! To transfer files through the network, click Sync > Basic Sync. Then specify source folders and destination path according to your situation.

If you want to transfer files through cloud storage, you can try the Cloud Backup feature in AOMEI Backupper. It offers you 1TB free storage for 15 days after you sign up for an AOMEI account.
Why AOMEI Backupper Instead of Windows Robocopy?
AOMEI Backupper offers a better option compared to Windows Robocopy, especially for big businesses. Here's why:
Easy to use: With a user-friendly interface, you can easily set up and manage all file copying, syncing, and moving tasks.
Real-time syncing: It updates files instantly, no matter where they are in the world.
Handles large-scale tasks: It can manage huge file systems with millions of files of different sizes.
Automation: You can automate all file tasks using a complete REST API, integrating them into your workflows effortlessly.
Potential Windows Robocopy Bugs
Windows Robocopy has some issues, like getting stuck in endless loops when copying folders with a junction or reparse points in Windows NTFS. Another problem occurs when mirroring files and folders on systems older than Windows Vista. If a folder isn't processed correctly, Robocopy can get stuck in infinite loops, requiring manual intervention to fix.
Additionally, Windows Robocopy lacks visual progress tracking for multithreading. This means users can't easily monitor the progress of copy jobs, especially with large files, making real-time synchronization challenging.
With AOMEI Backupper, you get a user-friendly graphical interface that allows you to monitor the progress of all operations in real time, making file syncing easier and more efficient.
FAQs about Windows Robocopy
1. Does Windows 11 have Robocopy?
Robocopy (robust file copy) is a Windows 11 built-in tool that lets users synchronize and copy files from one location to another
2. Is Robocopy faster than a normal copy?
Is robocopy faster than Windows 10 copy? Yes. Robocopy is fast, reliable, and very useful for sysadmins and others who need to controllably copy large structures
3. Is Robocopy multithreaded?
Regarding the '-MT' option in Robocopy, it is used to enable multi-threaded copying, which can significantly improve performance.
4. Why is Robocopy slow?
In order to sync your files, Robocopy must scan your entire file directory to identify file changes to replicate. The larger your files and/or the more files you have in your directory, the longer it will take to scan and sync.
Bottom Line
This article gives a detailed introduction to Robocopy in Windows 10. Although this program can be used to transfer files over a network, it involves a complicated and time-consuming process. So I recommend the best free Robocopy alternative – AOMEI Backupper Standard to you. It’s powerful and easy to use.
It is embedded with many other practical features like system backup, disk backup, partition backup, and disk clone. If you are running Windows Server 2022/2019/2016/2012, then AOMEI Backupper Server is suitable for you.

