Copy Only Newer Files: XCopy or Robocopy or Easier Ways (2026)
You can use Xcopy or Robocopy copy only newer files without problems by learning its syntax, options, and commonly used examples. In addition, you still can use GUI-based file sync or backup software.
By Ivy Updated on December 29, 2025
The need: XCopy copy only new or modified files
Xcopy is a command line utility for copying multiple files or entire directory trees from one directory to another and for copying files across a network. Also, you are allowed to copy only new or changed files with it. And it is used in Windows 7/8/10/11 and Windows Server 2012/2016/2019/2022/2025.
Copying only changed files with XCopy saves much time and disk space, thus many users are willing to only copy updated files. Below is an example from it. In addition, many users use Robocopy to copy only new or modified files as it has more options.
“I copy my files from Windows 10 to Server 2022 with the following command, xcopy C:\source X:\destination /s, but it copies everything. I just want to use XCopy command to copy only newer files, because these files are very large. It’s time-consuming. Is there a way to specifically just copy new or updated files without specifying a date? Any suggestion will be appreciated” – Reddit
Copy only new or changed files with or without XCopy or Robocopy
To copy only newer files in Windows 10, XCopy or Robocopy is a good choice for high-level users to perform batch operations. And It is able to backup only changed files instead of all files, even without booting into Windows.
But the problem is you need to execute this operation manually every time, which may make you feel tired and time-consuming. And it's not user-friendly to most users for its high requirement. Thus, in this article, except for XCopy or Robocopy, I'll introduce you to two easier ways to copy only new or changed files.
You need an all-in-one backup software - AOMEI Backupper Server to help you out. All the operations are based on an intuitive interface, so you can easily understand and use it like a professional. It provides you with 2 helpful ways to achieve this goal and you can choose to copy files with its original structure or compress it to an image file.
👉Easier Ways to copy only newer files in Windows
Use XCopy to copy only newer files
Before using XCopy to copy only changed files, you need to learn the syntax and some parameters you will use.
Xcopy [source] [destination][/w] [/p] [/c] [/v] [/q] [/f] [/l] [/g] [/d [:MM-DD-YYYY]] [/u] [/i] [/s [/e]] [/t] [/k] [/r] [/h] [{/a | /m}] [/n] [/o] [/x] [/exclude:FileName1[+[FileName2]][+[FileName3]] [{/y | /-y}] [/z] [/b] [/j]
-
/S Copies directories and subdirectories, unless they are empty. If you omit/s,xcopyworks within a single directory.
-
/YSuppresses prompting to confirm that you want to overwrite an existing destination file.
-
/I If in doubt always assume the destination is a folder. e.g. when the destination does not exist.
-
/E Copy folders and subfolders, including Empty folders.
-
/D:mm-dd-yyyy Copies source files changed on or after the specified date only.If you do not include aMM-DD-YYYYvalue,xcopycopies allSourcefiles that are newer than existingDestinationfiles.
-
For more options, you can type xcopy /? for all the help or referto xcopy command in Microsoft.
- This first option will copy files that do not exist in the destination folder if you use the /d parameter without specifying a date. To avoid it, you could add the /u switch.
- The second option will ignore the new directories by default. To copy everything, including new directories, you should add the /e switch.
Now, see below and learn the detailed steps. Note that if there are spaces in your directory names, you need to use quotes.
Step 1. Type cmd in the search box and select it.
Step 2. Type XCopy commands to copy only new or changed files. Please remember to replace the source and target path with your own. Below are some common used examples:
Example 1: Copy only updated files that are not in the destination folder.
- set SourceDir=D:\Source
- set TargetDir=K:\Target
- xcopy %SourceDir% %TargetDir% /s /d
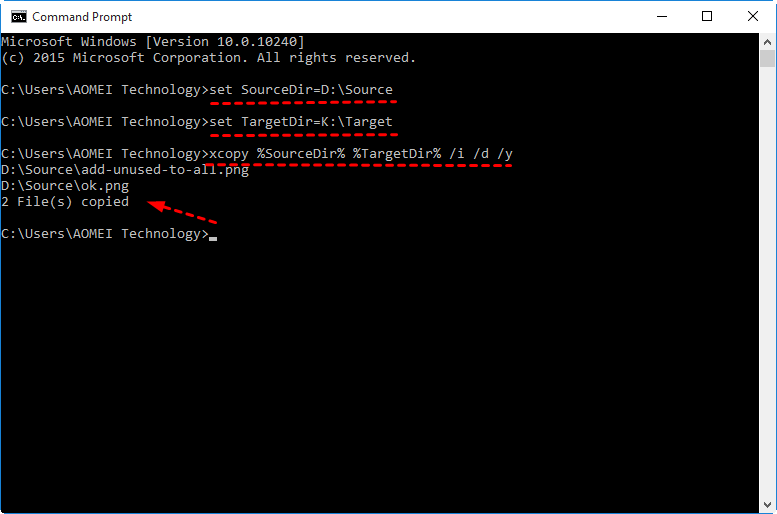
Example 2: Copy only changed files without new directories.
- set SourceDir=D:\Source
- set TargetDir=K:\Target
- xcopy %SourceDir% %TargetDir% /i /d /y
Example 3: Copy changed files already exists in the destination path.
- set SourceDir=D:\Source
- set TargetDir=K:\Target
- xcopy %SourceDir% %TargetDir% /s /d /u
Example 4: Copy everything including the new directory.
- Set SourceDir=”D:\Source\copy files”
- Set TargetDir=”K:\Target\files copied”
- xcopy %SourceDir% %TargetDir% /i /d /y /e

Step 3. Type exit and hit Enter to leave this window.
Use Robocopy to copy only new files
Robocopy can also help you copy only new files, but it has more options than Xcopy and is considered as a good alternative. Before you use it, please learn the syntax and options you may use.
robocopy [source][destination][[file][ ...]] [options]
-
/XO: is used to exclude older files, and usually done with theparameter"/maxage: n".
-
/maxage: n: indicates that the farthest modification time or the specific date, the file whose modification time or dateis older than this will not be copied.
-
/XC: Exlude changed files.
-
/XN: Exlude newer files.
-
/XN: Exlude newer files.
-
/XD dirs [dirs]: Exlude directories matching given names and paths.
-
/S: Copy subdirectories, excluding empty ones
-
/Z: Restartable mode
-
/fft: Make the modify time comparison more tolerant(2 seconds granularity)
-
/Mir: Mirrora directory tree
-
For more options, you can type robocopy /? for all the help or refer to the Robocopy command in Microsoft.
- To copy only changed files with Robocopy, you have two options, namely using maxage: n or /XO/maxage: n.
- Some users say that they don't want to create all the subfolders on the target disk if there are no new files in them. In this case, you need to add an extra switch /S to exclude the empty folder.
Then, let's go through the following steps to copy only new files:
Step 1. Open the command prompt with administrator priority.
Step 2. Type Robocopy commands to copy only new or changed files. Please remember to replace the source and target path with your own. Below are some commonly used examples:
Example 1: Copy only newer or added files.
- robocopy D:\folder1 E:\folder2 / maxage:7
or
- robocopy D:\folder1 E:\folder2 /XO /maxage:7

Example 1: Copy new files while excluding an empty folder.
- robocopy D:\folder1 E:\folder2 /s /maxage:7
or
- robocopy D:\folder1 E:\folder2 /XO /s /maxage:7
Easier Ways to copy only newer files in Windows
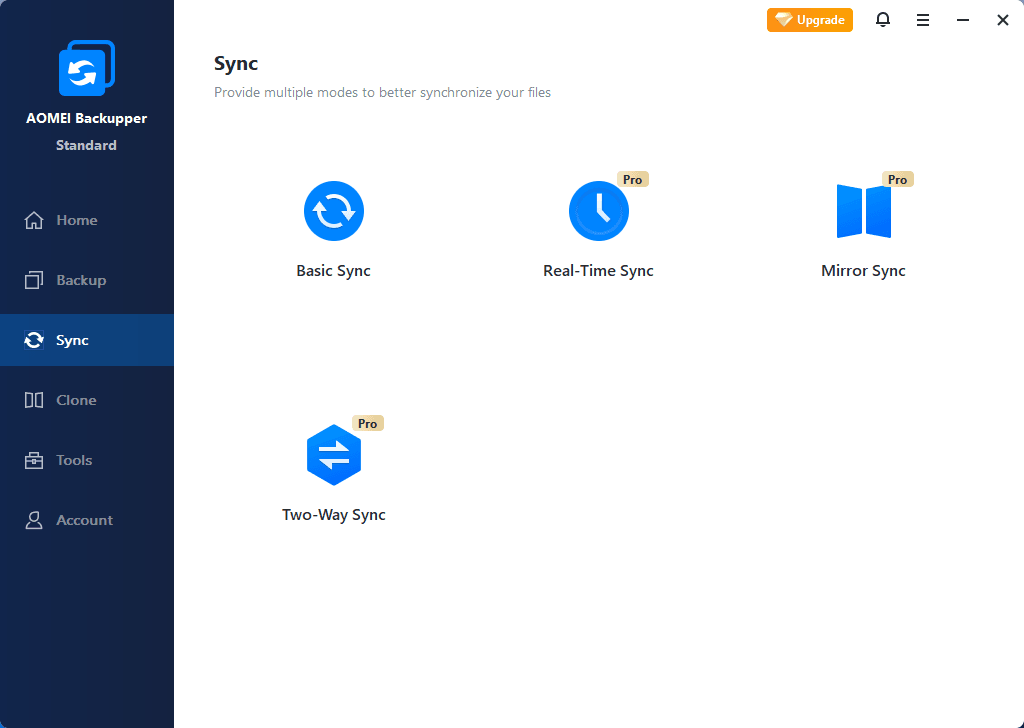
Here you will use professional file sync or backup software - AOMEI Backupper to copy only newer files automatically and easily. And it provides you with 2 easier ways to complete this task in Windows Server & PC, namely using Basic Sync or File Backup features.

- Easily backup everything to quickly restore whatever you want.
- 4 types of syncing modes to suit different needs,
- Automatically synchronize files between computers or other drives.
Basic Sync:
🥇best for file accessibility - It allows you to keep files just as in the original folder, and you can easily access or use them after syncing.
- Sync deleted files: By default, the basic sync does not sync deleted files from source folder to destination folder automatically. But you can set it in the Options,
- Multiple sync modes: basic sync, real-time sync, mirror sync, and two-way sync.
- Schedule sync: daily, weekly, monthly, event triggers, etc.
File Backup:
👍best for data security - It will compress all the files into an image file, and you need to restore files from backup before using it. This greatly reduces data loss due to any unwanted access and the risk of files being corrupted or modified.
- Diversified choices: You can choose to backup individual files or the entire folder.
- Flexible options: By default, it will compress or split images into smaller ones.
- Schedule backup: daily, weekly, monthly, event trigger, etc.
- Incremental backup: It's enabled in a scheduled backup task automatically to backup only new or changed files.
#1. Sync only new or modified files just as it was
Here you will use the Sync feature to sync only changed files. It has 4 sync options and comes along with helpful features, such as, daily, weekly, month schedule sync. All of them has their own features, you can check details in the following box.
| Sync modes/Features | Basic Sync | Real-Time Sync | Mirror Sync | Two-Way Sync |
| Sync newly added or changed files. | Yes | Yes | Yes | Yes |
| Sync deleted files from source folder to destination folder automatically. | No | Yes | Yes | Yes |
| Sync changed files in real time. | No | Yes | No | No |
| Deleted newly added files or undo changes made in the destination folder. | No | No | Yes | No |
| Sync changes from source folder to destination folder, and vice versa. | No | No | No | Yes |
| Support schedule sync: daily, weekly, monthly, event triggers, etc. | Yes | No | Yes | Yes |
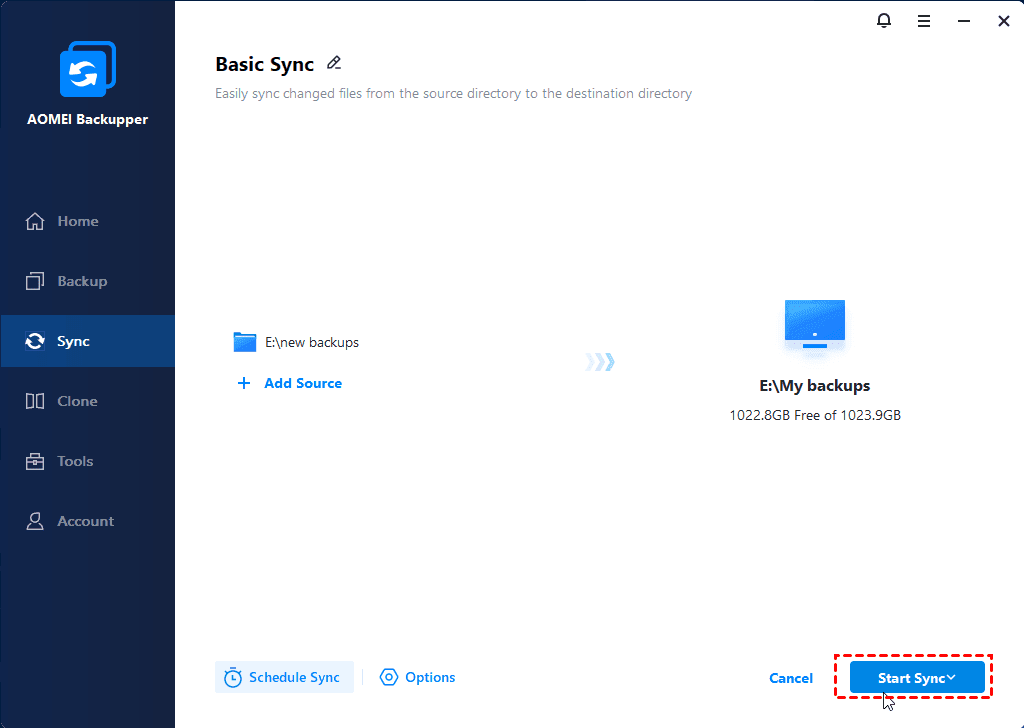
Then, go to the Sync tab and copy only newer files with one of them. Here, take Basic Sync as an example.
Step 1. Download AOMEI Backupper Server, install and launch it. Then, prepare an external hard drive or other storage as sync destination and connect it to your computer.
(PS: The free trial version can only be used within 30 days. To continuously protect data, please upgrade server trial now! 100$ off per one server computer.)
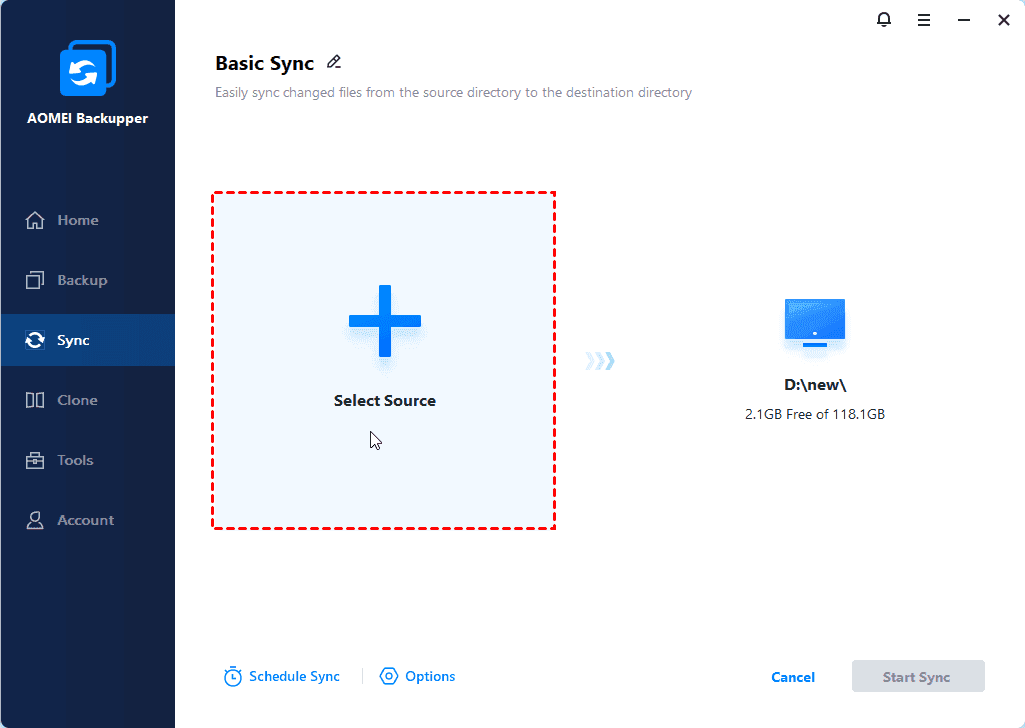
Step 2. Go to the Sync tab and select Basic Sync.

Step 3. Click Select Source to select folders containing all the files you want to sync. Then, select the sync destination by clicking the PC icon > This PC. You can also consider using a NAS or network share.
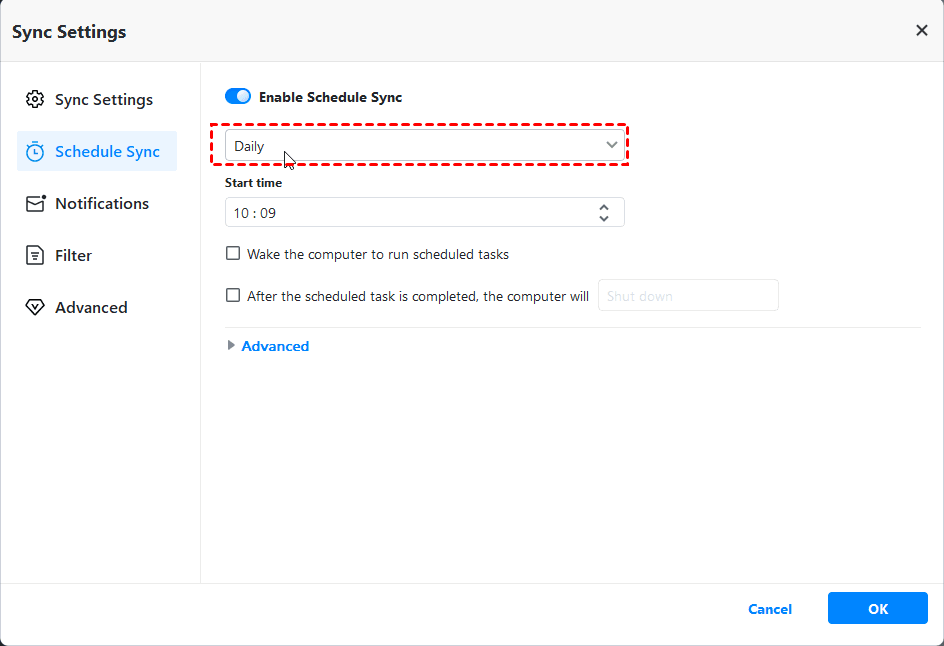
Step 4. Click Schedule and Enable Schedule Sync, then select Daily, Weekly, Monthly, etc. To set the sync task more precisely, you can specify the backup time or intervals in the following.
-
Event triggers: It helps when you want to sync files at system shutdown, system startup, user logon, user logoff, or USB plug in (e.g., sync files between computer and flash drive).
-
Wake the computer to run scheduled tasks: It allows you to wake up the computer 2 minutes before the scheduled task starts, without human intervention required.
-
Reconfigure the operation after the scheduled tasks: You can shut down or restart your computer after syncing, or simply put it into sleep or hibernate mode.
-
Sync the deletions in source directory to destination: By checking it in the Options, you can sync the deleted files as well.
Step 5. Confirm the operation and click Start Sync to sync all the files to the destination folder. Then, it will sync changed files next time.
#2. Safer way to copy only new or modified files
Except for Sync feature, you can still complete this task with the help of File Backup. It comes along with daily/weekly/monthly, etc. schedule backup as well as incremental or differential backup. By using it, you can still set precise backup time and intervals.
They are based on full backup, but not exactly the same. For differences, you can see from the comparison chart below.
| Full Backup | Differential Backup | Incremental Backup | |
| Backup Speed | Slowest | Moderate | Fastest |
| Storage Space | Most | Moderate | Least |
| Restoration Speed | Fastest | Moderate | Slowest |
Also, if you want to backup files during off-peak hours, you can wake computer from sleep or hibernate mode before the scheduled tasks start. And you can reconfigure the operation after scheduled tasks, to shut down or restart your computer, or put it into sleep or hibernate mode.
In the long run, you may worry about the backup disk being full one day. Fortunately, you can avoid this issue by deleting old backup image regularly with its Backup Scheme feature. Normal or High compression level, Intelligent sector backups also help with this. Then, see below and learn the specific steps.
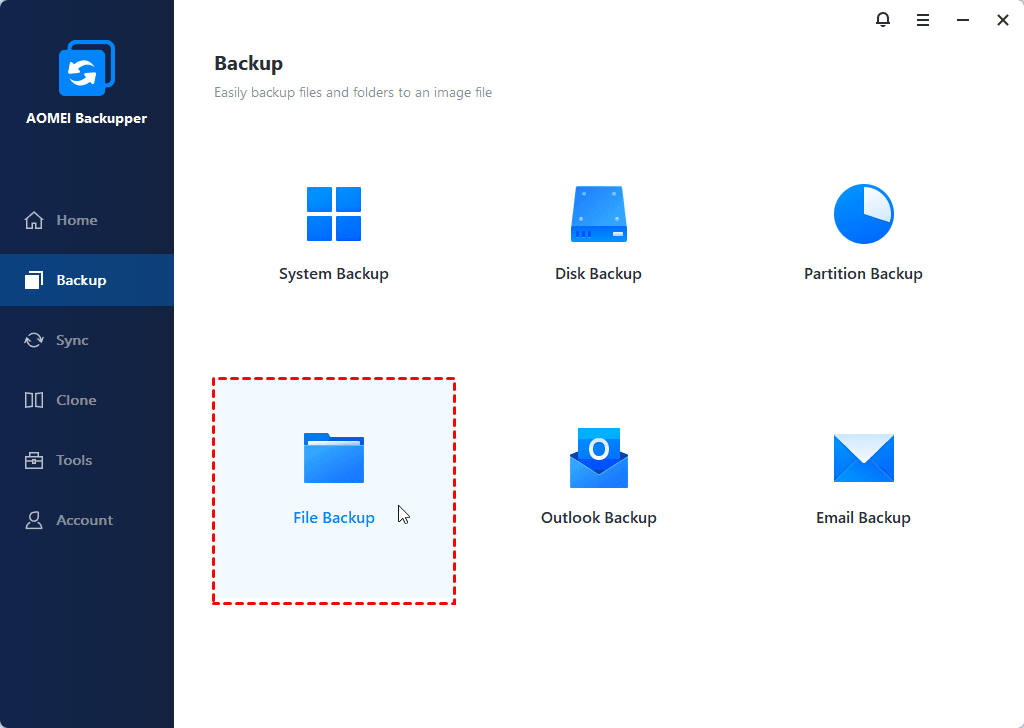
Step 1. Go to the Backup tab and select File Backup.
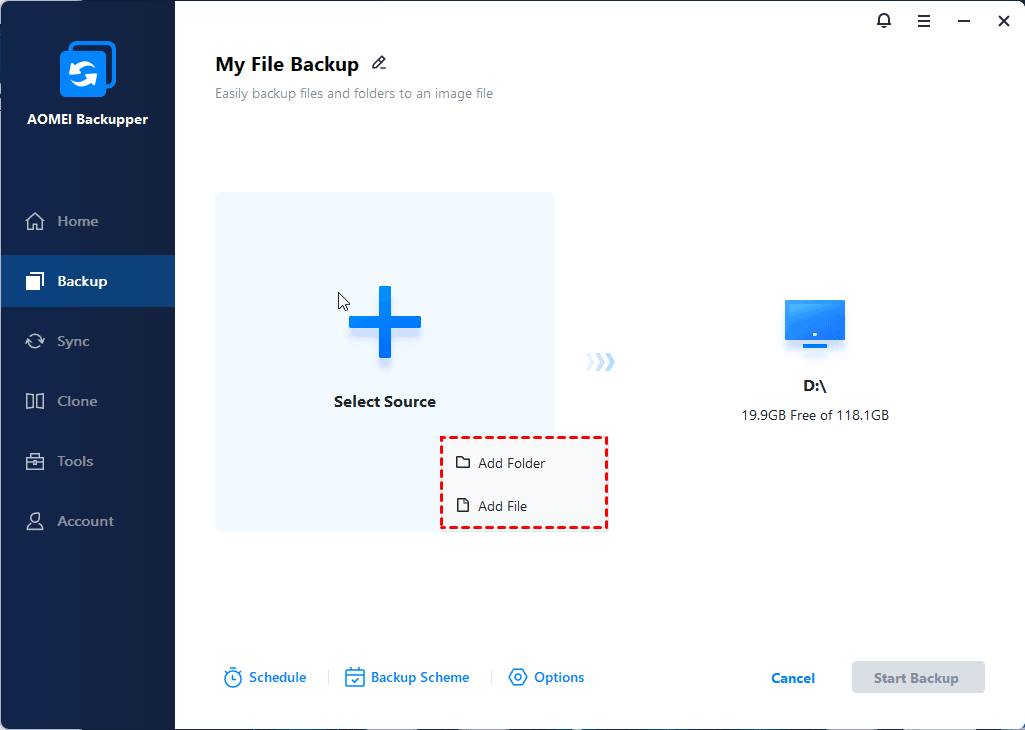
Step 2. Click Select Source > Add File or Add Folder to select the files or folders you want to backup and then click OK. Then, select the prepared storage device to store your image.
Step 3(Required). Click Schedule and select Daily, Weekly, Monthly, etc. Then, click Backup Scheme and select Incremental Backup or Differential Backup under the backup method option.

-
USB plug in: To backup your files flexibly and take them everywhere, you can create a schedule backup with "USB plug in" feature. It does not require any human interference.
-
Normal or High compression level: It can compress image file with a smaller one, thereby saving disk space. Note the high compression level requires more backup time.
-
Intelligent sector backup: It only backs up the used sectors of the file system.
-
Backup Scheme: It offers you 3 options to delete backup files, including By quantity, By time, and By daily/weekly/monthly.
Step 4. After that, confirm all the selected settings and click Start Backup. It will backup your files immediately and then backup only changed files next time.
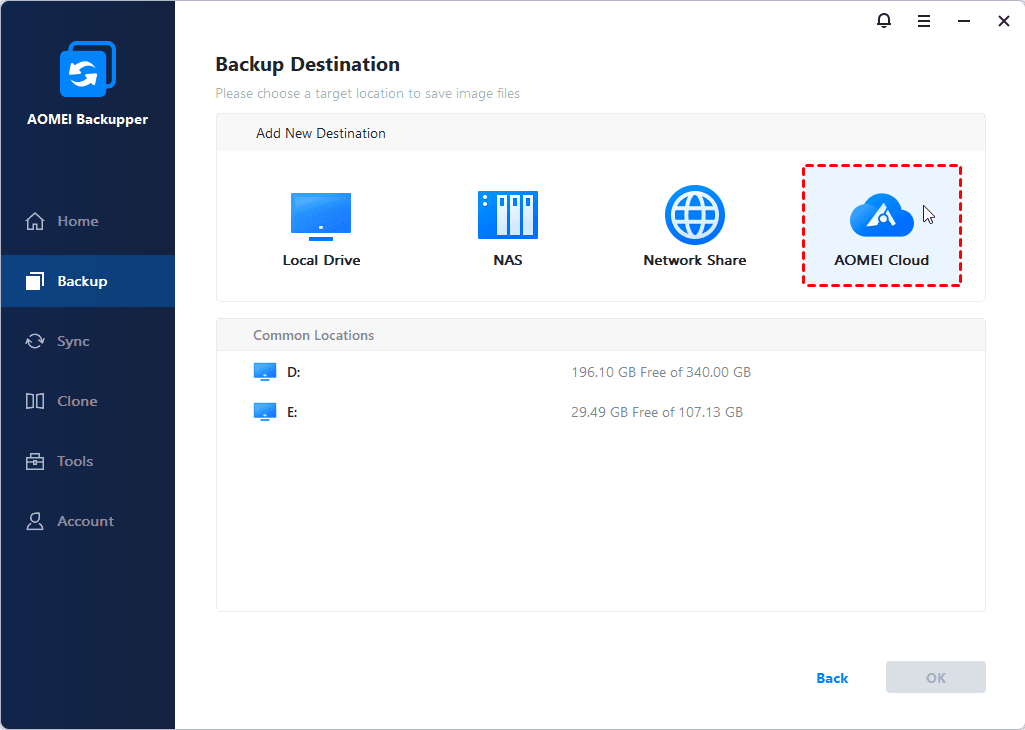
With either the Sync or Backup feature, you are able to copy files to multiple locations automatically. Among them, cloud drives are one of the most popular choices, but paradoxically, almost all cloud drives only offer a few gigabytes of free cloud storage, while users need to sync or back up a large number of files or folders. In this case, try Cloud Backup, you will get 1TB of cloud storage, with a trial period of 15 days.
🔥Hot: Windows Server 2025 now available
Windows Server 2025 was officially released on November 1, 2024, bringing several exciting updates. Here are some of the key highlights:
- Desktop Shell: The first time you sign in, the desktop shell adopts the sleek look and feel of Windows 11, offering a modern and familiar user interface.
- Bluetooth Support: Windows Server 2025 now includes Bluetooth functionality, making it easy to connect and pair devices like mice, keyboards, headsets, and audio devices.
- DTrace Integration: DTrace is now a native tool in Windows Server 2025, providing a powerful command-line utility for real-time system performance monitoring and troubleshooting.
- Email & Accounts: You can now manage Microsoft Entra ID, Microsoft accounts, and Work or School accounts directly in Windows Settings under Accounts > Email & Accounts. However, note that domain joining remains necessary for most configurations.
If you'd like to experience all these wonderful features, learn how to do Windows Server 2025 in-place upgrade here.
Conclusion
You can copy only newer files with XCopy or Robocopy, but it is really more suitable for technical people. For others, it's suggested to use professional file sync or backup software - AOMEI Backupper Standard. With it, you just need to click a few times on its prompted screen.
It allows you to make this task automatically with its daily, weekly, monthly event trigger or USB plug in schedule settings. You can choose to keep its original structure or compress it to an image file to avoid any unwanted access and malicious file corruption.
Believe me, it's one of the most powerful software to protect your data with its complete solution. To copy files from server to server within one company, you could use AOMEI Backupper TechPlus. Please download it to have a try right now!
Best sync or backup software for Windows Server.
FAQs on Command Prompt File Copy
1. Can I copy multiple files at once using Command Prompt?
Yes, you can copy multiple files at once using Command Prompt. Simply list all the source files separated by spaces after the `copy` command, followed by the destination directory. For example: `copy file1.txt file2.txt destination`.
2. What if I want to rename the copied file while copying in Command Prompt?
Command Prompt provides an option to rename files during the copy process. After specifying the source file(s) and destination location, you can add the new filename after the destination directory. For example: `copy example.txt destination\newname.txt`.
3. Are there any options to control the behavior of the file copy operation in Command Prompt?
Yes, Command Prompt offers various options to control the file copy operation. For instance, you can use `/Y` to suppress confirmation prompts when overwriting existing files, `/Z` to restart a copy operation if it fails, `/A` to only copy files with the archive attribute set, and many more. Type `copy /?` or `xcopy /?` in Command Prompt to see all available options and their descriptions.

