Best 3 Ways to Synchronize Files between Windows Servers
You can synchronize files or folders between Windows Servers with DFS replication or Robocopy if you want a free solution. Instead, AOMEI Backupper Server for advanced features and ease of operation.
By Ivy Updated on September 2, 2025
What is the best way to sync files between servers?
I have multiple server-based computers, but they are in different places. I need to use files on other computers frequently. Is it possible to synchronize files between Windows Servers for share? Any suggestion and comment are welcome.
- Question from Microsoft.com

Syncing files between two Windows Servers is not uncommon, in fact, many IT technicians or small and medium companies need to do this for file sharing and efficiency. There are different ways to sync files, from built-in role services DFS replication or Robocopy command line for free to third-party file sync software - AOMEI Backupper Server for more advanced features.
Why do you synchronize files between Windows Servers?
Before you start to sync folders between Windows Server 2012(R2)/2016/2019/2022 or all the previous versions, let's get the three main reasons.
-
Easy access to team files. This is the most common situation. If you have a work team or cooperate with a team, you need to see the files or folders of your team. Therefore, all the team members can get the required info in time and improve work efficient.
-
Track the latest changes. In a team, all members may modify, delete, or add files, so it's necessary to keep up with the changes in order not to lose any data due to not backing it up. Most of the time, all changes are unique and irrecoverable.
-
Other reasons. Data loss prevention(i,e, customer's info), file transfer, and centralized file management can still be a reason why you need to synchronize files between two Windows Servers or more.
Then, without further ado, let's start with Windows Server syncing folders. You will learn the third-party software with advanced features, and then the free solution to sync files. The first one is recommended, not only for advanced features but also because of its easy-to-use graphic user interface and operations.
👉 Windows Server sync folders via AOMEI Backupper (auto)🔥
👉 Windows Server file sync using DFS Replication (manual)
👉 Sync files between Windows Server by Robocopy (best for simple sync tasks)
Windows Server sync folders via AOMEI Backupper (auto)
AOMEI Backupper Server is a trust and reliable file sync software for server 2008/2012/2016/2019/2022 including the R2 version and Windows 7/8/8.1/10/11.
Thanks to its user-friendly interface, you can use it to easily sync files or folders between drives, USB flash drives, cloud storage (e.g.: sync file server with OneDrive), network share or NAS, and even two or multiple computers.
In addition, during the sync process, you can enjoy many excellent features:
👉 Sync files by preference:
You can sync files and their change from source to destination regularly, or keep your preferences, such as syncing files in real-time, deleting any unknown files or undoing changes made in the destination folder, or syncing changes in source or destination to the other side automatically.
👉 Schedule Sync:
You can sync files daily, weekly, monthly, etc., and then you don't need to worry about forgetting to sync someday. And more precisely, you can set the backup date, time, or intervals.
👉 Sync off-peak hour:
You can wake up your computer from sleep or hibernate mode with the Wake the computer to run scheduled tasks feature. This is especially useful when you don't want to sync files during working hours.
👉 Preconfigure the operation after sync tasks:
You can shut down, restart your computer, or put it into sleep or hibernate mode. It depends on your next move.
AOMEI Backupper Server can help you sync files between all Windows Server and PC systems. For unlimited PCs or servers, try the Technician or Technician Plus edition of AOMEI Backupper! And you don't even need to install it again and again if you create a portable version of it. Download it now!
Best Windows Server file sync software.
You can then follow the graphic tutorial to sync files between two Windows Servers in simple steps. Take Windows Server 2012 as an example:
How to sync folders between Windows Server 2012 over the network
Step 1. Create a shared folder.
To sync folders between Windows Server 2012, you need to use a shared folder as a middle-man and set access permission for other servers, so you can share files with them. If you don't know how to share it, please refer to this page: sync folders over network.
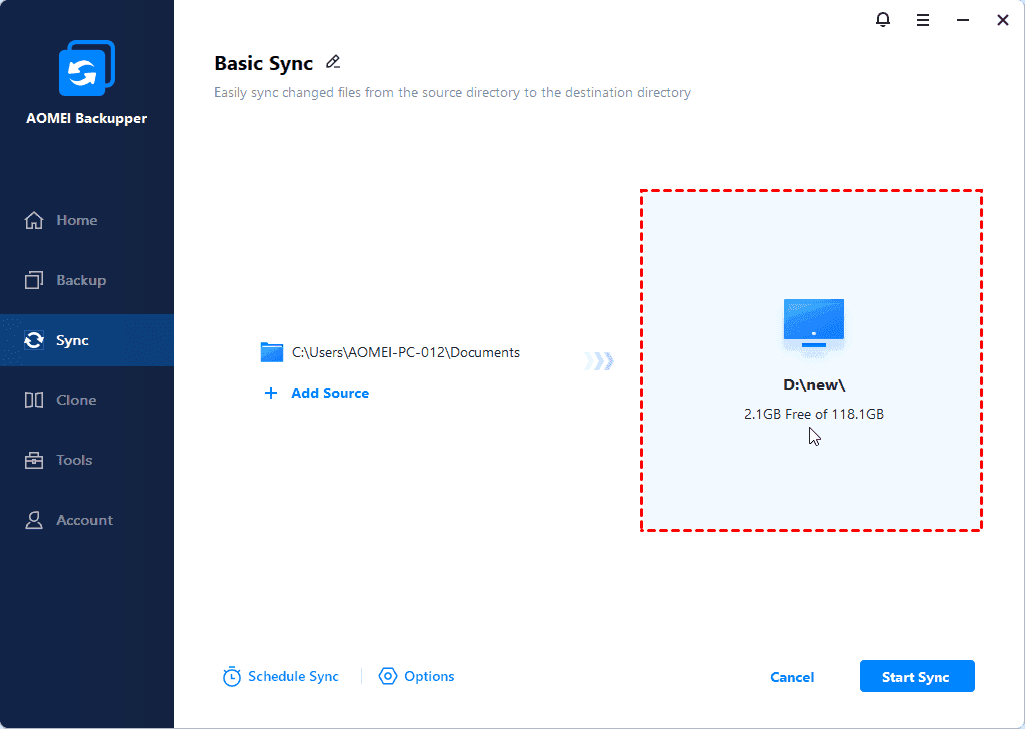
Step 2. Install and run AOMEI Backupper on the source computer. Then, select Basic Sync under the Sync tab.

-
Real-Time Sync: It will monitor and sync files and their changes in real-time, so you can reduce data loss as much as possible in a disaster.
-
Mirror Sync: It helps you to avoid arbitrarily adding, modifying, or deleting files in the destination folder.
-
Two Way Sync: It monitors changes in both source directory and destination, and syncs to the other side if any change is made in either one of them.
Step 3. Click Select Source to select the folders you want to sync.
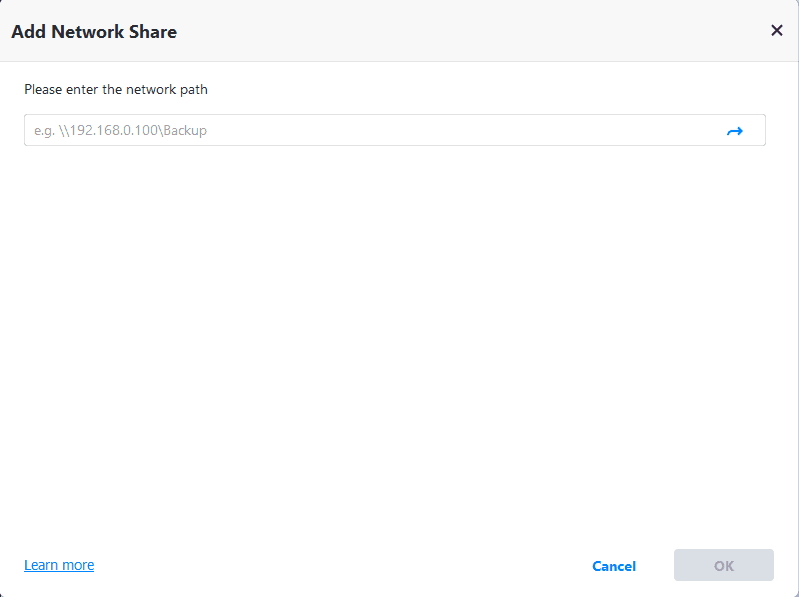
Step 4. Click the PC icon at the right side. Then, go to Network Share > click Add Network Share. Then, type the network path and select the shared folder you made before in the network location.
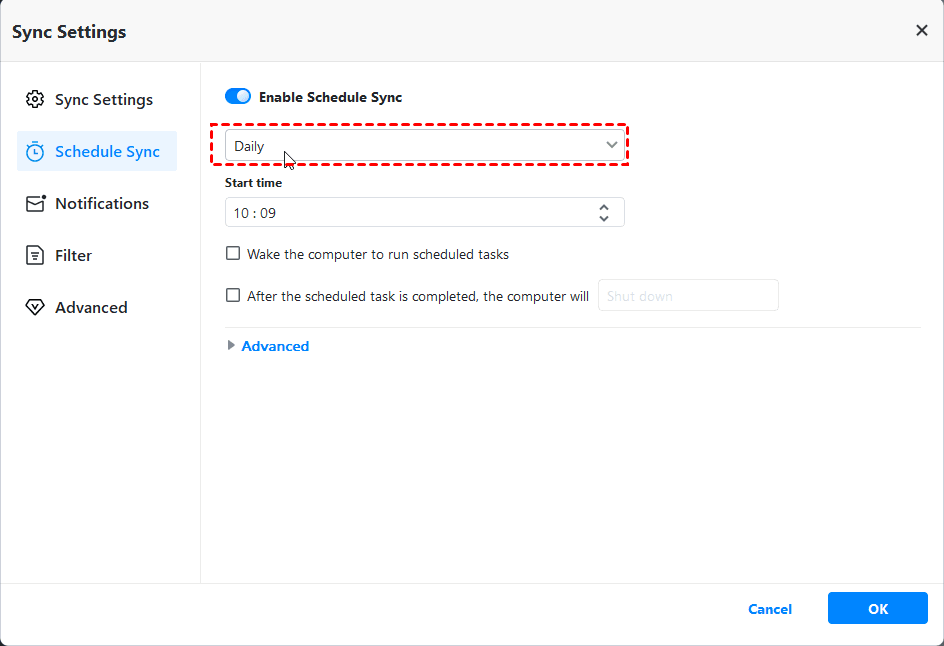
Step 5. Now, the sync task is almost done. To keep all the changes made later automatically, click Schedule Sync > Enable Schedule Sync and select One Time/Daily/Daily(Interval).
-
Weekly and Monthly Sync: Compared with daily sync, weekly sync, and monthly sync are less frequent. They ensure data security while using less disk space.
-
Event Triggers: You can sync files at a specific event, including system shutdown, user logoff, system startup, user logon, and USB plug in.
-
Wake up computers and reconfigure operation after sync: Both features do a big favor when you want to sync files during off-peak hours, without human intervention.
-
Sync the deletions in source directory to destination: By default, this Basic Sync feature does not sync deleted files automatically, but you can check this feature to ensure the deletions are synced together.
Step 6. Confirm the operations and click Start Sync to automatically sync folders between Windows Server 2012. Then, you can access the synced folders on the target computer by its network path.
🌟 Important: Don't modify the source folder name after syncing; otherwise, the sync task will fail the next time.
🧡 Bonus tip: backup server files to AOMEI Cloud
As cloud storage is becoming more and more popular, AOMEI offers users its own cloud - AOMEI Cloud. After you sign up for an AOMEI account, you can use 1TB of storage for free within 15 days.
Video tutorial (more intuitive)
Windows Server file sync using DFS Replication (manual)
DFS Replication is one of the role services in the File and Storage Services role. This technology was first introduced in Windows Server 2003 R2 and is retained in later versions, including Windows Server 2008/2008 R2/2012/2016/2019.
It uses a compression algorithm known as remote differential compression (RDC) to detect changes to the data in a file, then enables DFS Replication to replicate only the changed file blocks rather than the entire file. And it can resolve the administrative issue that XCopy and Robocopy cannot.
Although DFS replication is really complicated and has many limitations, many users still want to use it. It is completely free and more suitable for small and medium-sized company users who don't have much budget. If you are an administrator or the people who manage resources for the company, learn how to replicate files between Windows Servers using DFS Replication below:
Part 1: Install DFS replication for sync
DFS replication is not installed by default, so you need to install DFS replication and then perform folder replication in Windows Server 2012/2016/2019/2022/2025 and its R2 version effortlessly.
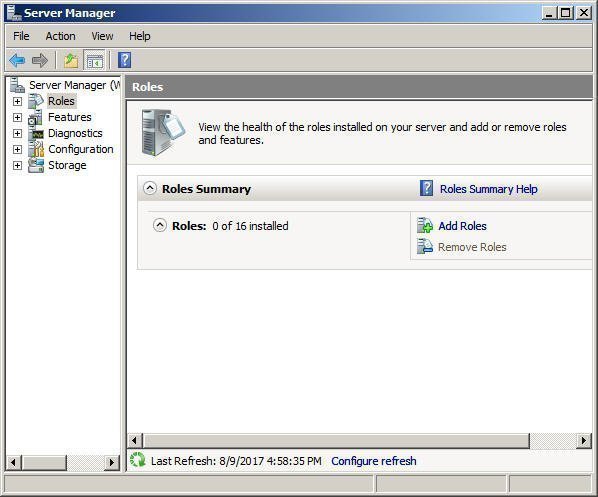
Step 1. Open Server Manager and click Role on the left panel > tag on Add Roles on the right panel.
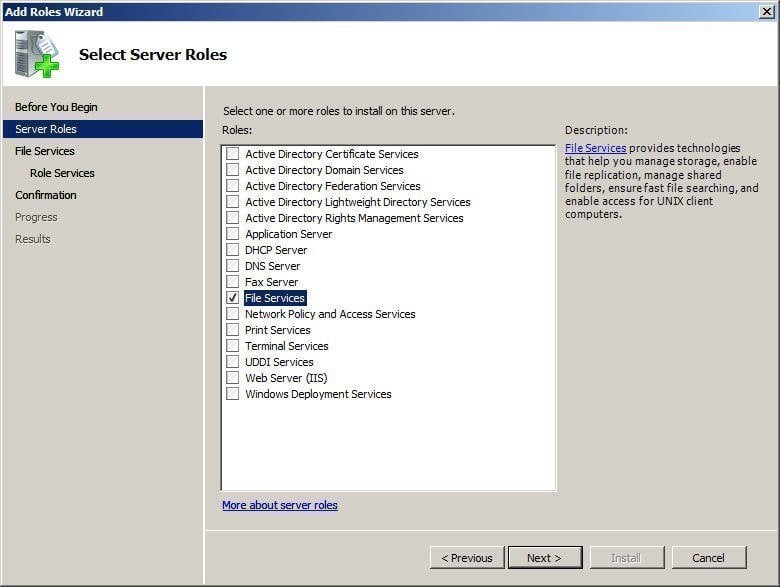
Step 2. Click Next on the Before You Begin page. Then, tick File Services role in the Service Roles page and click Next.
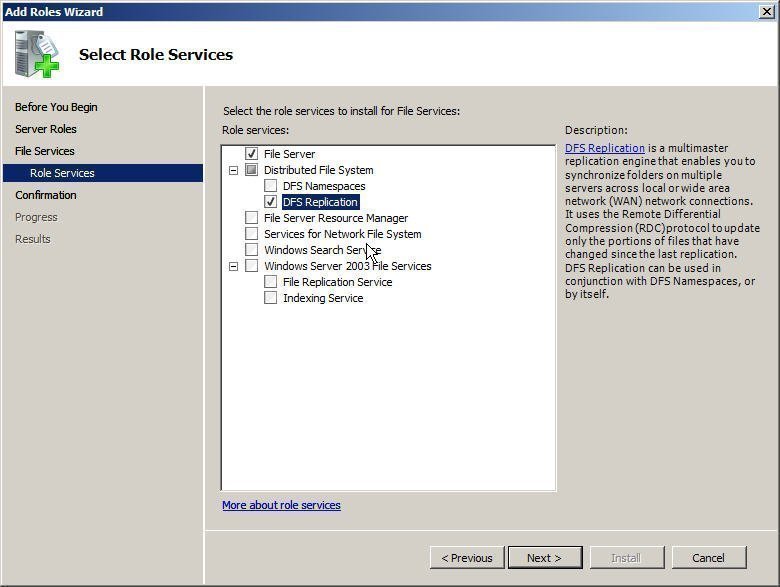
Step 3. Select DFS Replication role service and click Next.
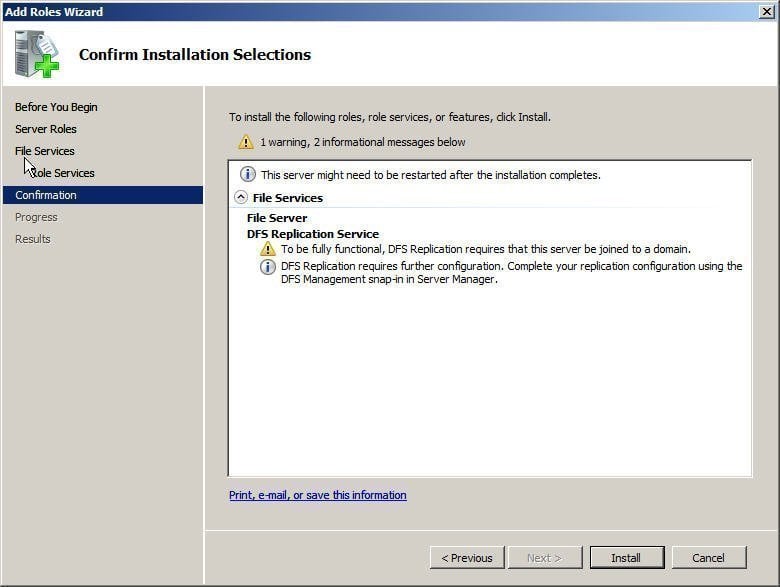
Step 4. Confirm this installation and click Install to ensure you want to install the selected roles, role services, or features.
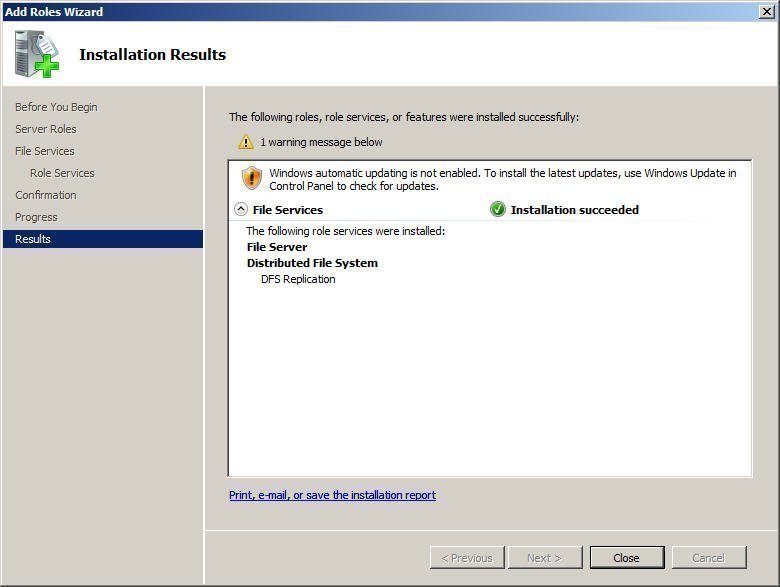
Step 5. Wait for a while, the installation process will be completed with the words "Installation succeeded" displayed, and then click Close to close this page.
Part 2: Configure DFS Replication and perform the first file replication
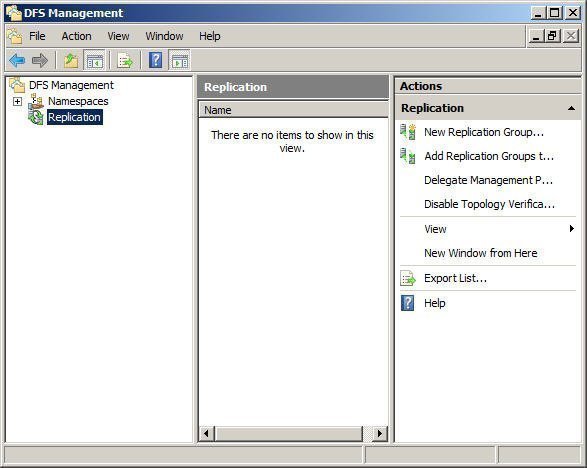
Step 1. Start new replication. Click Start -> Administrative Tools -> DFS Management subsequently, then Right click Replication and choose New Replication Group in the DFS Management console.
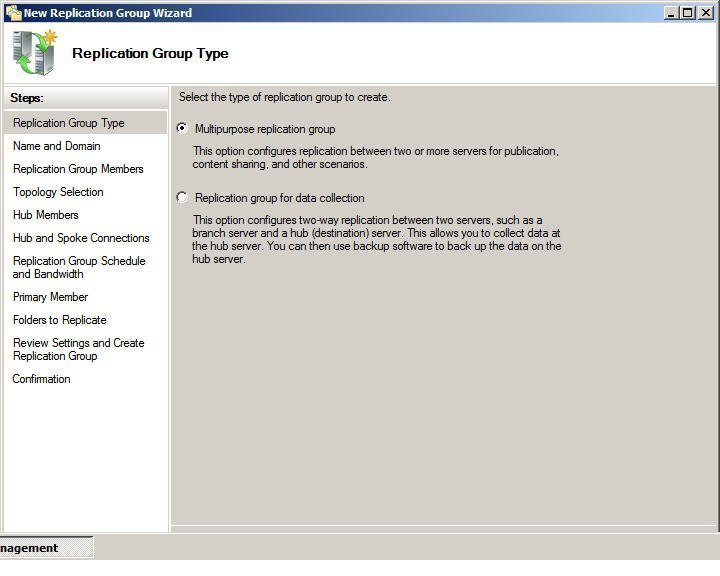
Step 2. Choose Replication Group Type.
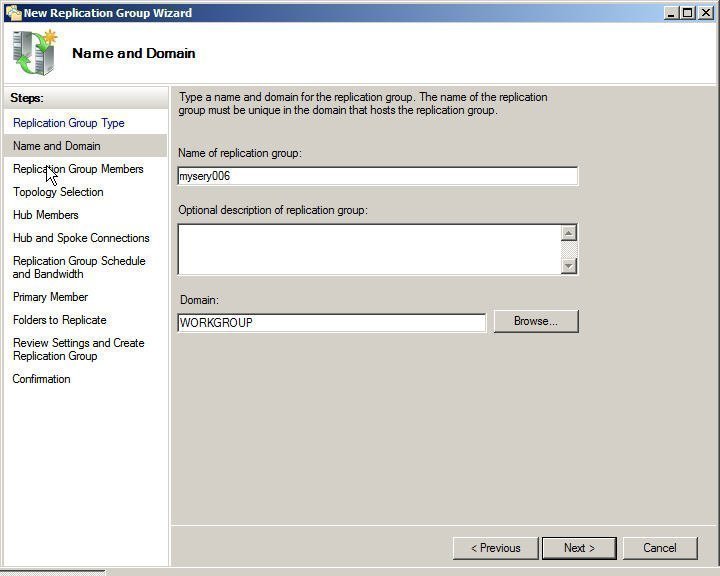
Step 3. Set name and domain for replication group.
Step 4. Add server computer you want to share files with.
Click Add and look up the servers in Active Directory, then select the servers you want to share files or folders and click Next.
Step 5. Select Full Mesh Topology.
This feature makes the shared files or folders stay synced among all of the servers regardless of where the files are updated.
-
You need at least three servers to execute this operation.
-
You will be noted to use Hub and spoke. However, there is no need to use it in most cases, so you can use it or not according to your situation.
Step 6. Choose full bandwidth to keep the files in sync all the time.
Step 7. Set a primary member.
The primary member is very useful during the first synchronization, it will first sync files in the Primary member if there are any conflicts, but only once. And then, all the files will be synchronized nearly instantaneously, because the Full mesh topology treats all servers as equals.
Step 8. Select files or folders you want to sync.
Click Add and you will enter a new window, then select the folders you want to replicate and click Next. You can use the default existing permissions because it works in most cases. However, you still can set custom permissions.
Step 9. Choose a local folder to store files or folders.
Now, you will see all the selected servers and you will be noted that the local path is not set and it's disabled. Then click Edit and select enabled as well as choose the local folder on the remote server.
Step 10. Review whatever you have selected and click Create to start the first initial replication. It may take 15 minutes or longer.
Sync files between Windows Servers by Robocopy
In addition to the above two ways, some users still use the Robocopy command line to synchronize files between Windows Servers. Note this tool is designed primarily for small, simple, and one-way sync tasks. If that's what you're thinking, give it a try:
Step 1. Create a shared folder on both servers.
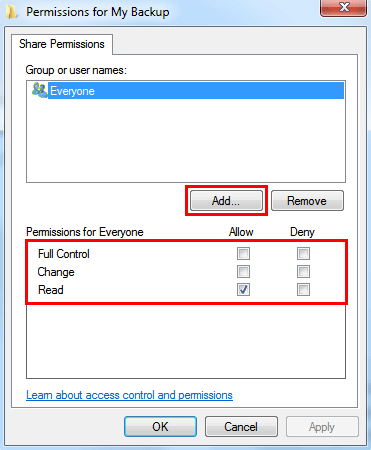
In a simple word, create a new folder > right-click it and select Properties > switch to the Sharing tab and click Share > Select everyone from the drop-down menu and click Add > Share.
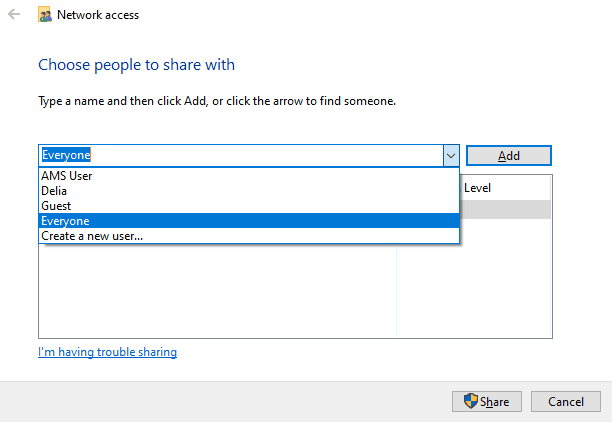
Then, go to the Advanced Sharing option, click it, and tick Share this folder > click Permission to set Full Control, Change, or Read permission. Afterward, repeat these steps on another server PC.
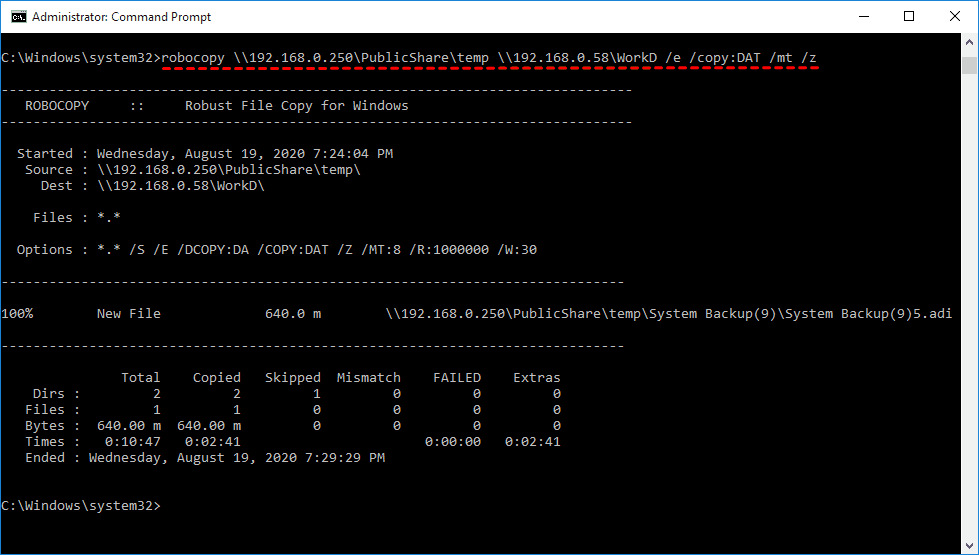
Step 2. Sync files between Windows Servers using the Robocopy command line. The syntax: robocopy [Source] [Destination] [(File)( ...)] [(Options)]
For example, to sync tmp folder from \\192.168.0.250\PublicShare\ to \\192.168.0.58\WorkD, type command line as follows:
robocopy \\192.168.0.250\PublicShare\temp \\192.168.0.58\WorkD /e /copy:DAT /mt /z
-
/copy:DAT: It will copy the source folder to the destination folder with D(Data), A(Attributes), T(Time stamps), and you could modify these copied files.
-
/mt: It will create multi-threaded copies with 8 threads.
-
/z: It will copy files in restartable mode, especially useful if the file synchronization task fails in the middle. If you think it reduces the Windows folder replication performance, replace it with the /J switch.
It's worth noting that Robocopy is best suitable for simple one-way file synchronization tasks. For more complex tasks, such as syncing larger files or a large number of files, or syncing to multiple servers, it will often fail or simply become unusable.
In addition, it will take a very long time in these complicated sync tasks. At the same time, it will not perform real-time sync. This would be a disaster for companies or organizations that rely on the latest version.
FAQs about syncing files between Servers and PCs
1. how to synchronize files between two computers in Windows 10
2. How do I share a folder between two Windows servers?
To share a folder between two Windows servers, you need to set up the shared folder and grant permissions to users using the other server. Below are the overall steps:
- Right-click the folder you want to share and select Properties.
- Go to the Sharing tab, and click on Advanced Sharing.
- In the new window, check Share this folder and click on Permissions.
- Click Add to add users using the other server and grant permission to it. It can be full, read, or write permission.
- Finally, click Apply and OK to confirm it.
3. How do I transfer files from old server to new server?
Conclusion
The best 3 methods above can help you to synchronize files between Windows Servers. By comparison, the first method is recommended due to its rich features and easy of operation. With it, you can sync files to your preferences and improve working efficiency by running it automatically.
Meanwhile, you can choose to backup files between Windows Servers to improve data security. It will compress all the data into an image file and require a restore before using it. This feature supports all the scheduled settings just like in Sync, and different methods to minimize disk space, such as incremental and differential backup, automatic backup cleanup, etc.
Best Windows Server file sync software.

