What Is One-way File Sync and How to Set it Up (2026)
This article illustrates the differences between one-way and two-way file sync as well as how to set the best one -way file sync step by step.
By Ivy Updated on December 29, 2025
If you want the best one-way file sync, you can directly go to the stepwise guide below.
One-way vs two-way file sync
File synchronization, also known as file sync, is to create an exact copy of files in different locations, such as, external hard drive, cloud storage, NAS, etc. Also, the newly added, changed or deleted files will be reflected to another location. Moreover, file sync can be one-way or two-way. Then, let's see them specifically.
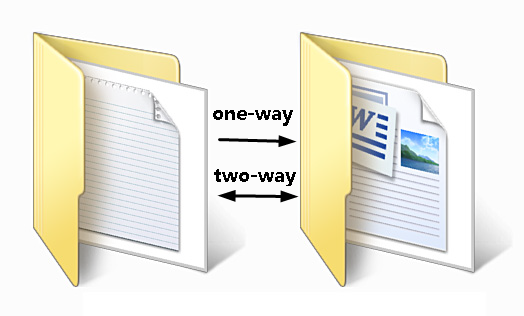
One-way file sync means you can only sync changes from source to destination. That's to say, if you manually edit files in the destination, it will not be transferred back to the source.
Two-way data synchronization refers to changes made in both source and target will be reflected. For example, if you add, edit, or delete a file from the source, the file will change accordingly in the target, and vice versa.
Why do you use one-way file sync?
Both file sync can supply users with up-to-date files. But why do we choose one-way file sync instead of two-way file sync? The following ideas are only for reference.
-
Always provide the latest files for users. Sometimes, users need to take their work home and complete the rest at home so as not to delay the use of documents. The files are always up-to-date and at your disposal.
-
Avoid conflict and improve work efficiency. If you work in a team, you and other members may want to access the accurate version. However, two-way file sync may result in conflicts or unupdated files, which may have a bad effect on work efficiency.
-
Avoid deleting files in the destination. If you want to delete files in the source and keep them still in the destination, the best way is to set up a one-way file sync. It only syncs changed files instead of deleted files.
What is the BEST one-way file sync?
Option 1: Sync Center
Sync Center may be a potential option for many users, especially for novices who don't want to spend a cent on software that is only used once. It's widely used in Windows 10 or 11 to sync network files locally by enabling offline files on the local computer. Meanwhile, the process can be manual and automatic.
However, some users report that Sync Center is not always working. For example, when you right-click the files or folders on a network drive, the always available offline is not showing up in the context menu.
Option 2: AOMEI Backupper Standard
AOMEI Backupper Standard, one of the best free one-way file sync software for Windows 7, 8, 10, and 11, is strongly recommended. Thanks to its clean interface and user-friendly design, all users even novices can understand it easily and quickly and use it like a professional. Here are some advantages of it.
- Sync files with multiple storage, such as hard drive, external disk, USB flash, network drive, cloud drive etc.
- Sync only newer or changed files: It will sync only changes after the first full backup. The deleted files will not be synced by default.
- Sync files automatically: Embedded with the Schedule Sync feature, you can perform automatic sync based on daily, weekly, and monthly. The shortest interval is hourly. Also, you can set it to off-peak hours, midnight, for instance.
- Set and forget schedule settings: In the scheduled task, it is capable of waking your computer 2 minutes before the scheduled task starts and shutting it down afterward. You can also enable its email notification to get the final result without waiting.
Set up one-way file sync in Windows via Sync Center
In this part, we will continue to talk about how to transfer files unidirectionally in Windows 7/8/10/11 with Sync Center.
Step 1. Go to Start Menu > Control panel > Sync Center, and click it to open a new window.
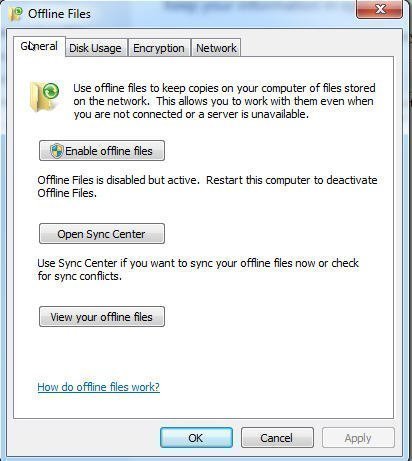
Step 2. Click Manage offline files and Enable offline files, then restart your computer to activate offline files. If you do not restart your computer, you cannot active offline files and use this feature.
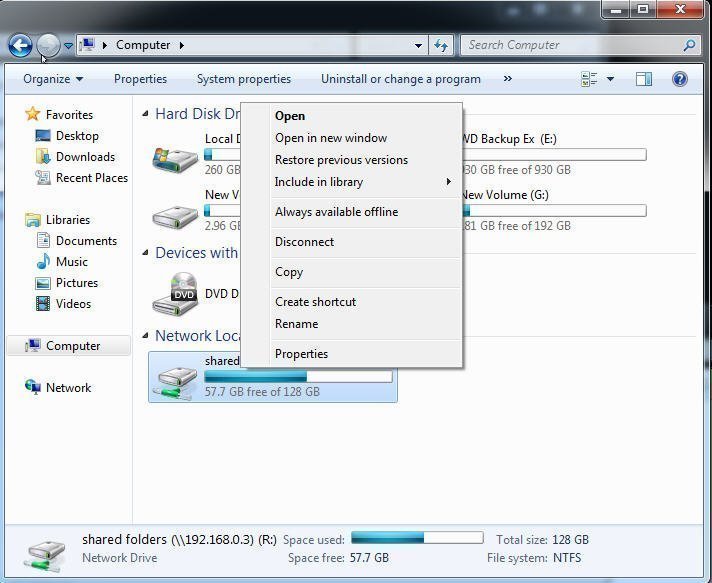
Step 3. Make your drive, files, or folders available offline, and sync them. Find the mapped network drive, directly right-click the drive (R: drive), or select the files and folders inside and tap on Always available offline. Then, select files or folders again and click Sync selected offline files.
Step 4. Check if the offline files are synced intact. Navigate to Sync Center and click View your offline files as shown in Step 2, or access your offline files via the offline files folder.
Notes:
• The offline files must be always available offline. If not, you cannot sync it.
• If you prefer to use command prompt, you can sync changes only with robocopy.
That's the entire process to sync offline files, but some users may need to sync files with another file sync software like AOMEI Backupper Standard. For example, you just want to make copies of local files on the computer and take them everywhere.
Also, you probably need different storage devices, such as USB drive, external hard drive, cloud storage like OneDrive, NAS etc. Please continue to see below and learn the detailed steps to sync files.
Schedule one-way file sync with AOMEI Backupper (BEST)
AOMEI Backupper does not come along with your computer, so you need to download and install it on the computer you want to sync files. For server users, try AOMEI Backupper Server!
Step 1. Launch AOMEI Backupper, click Sync and Basic Sync.

Step 2. Select files or folders you want to sync and the destination path. Click + Add Folder to select data on your computer, then select a destination path.
- To share it with your team member, you can sync files to network location or NAS. Click the inverted triangle and Add Share or NAS Device, then type the network path and select a shared folder on it.
- To take it home, you can sync files to external disk, USB flash drive or cloud storage. Click the folder-shaped button to find the device on your computer.

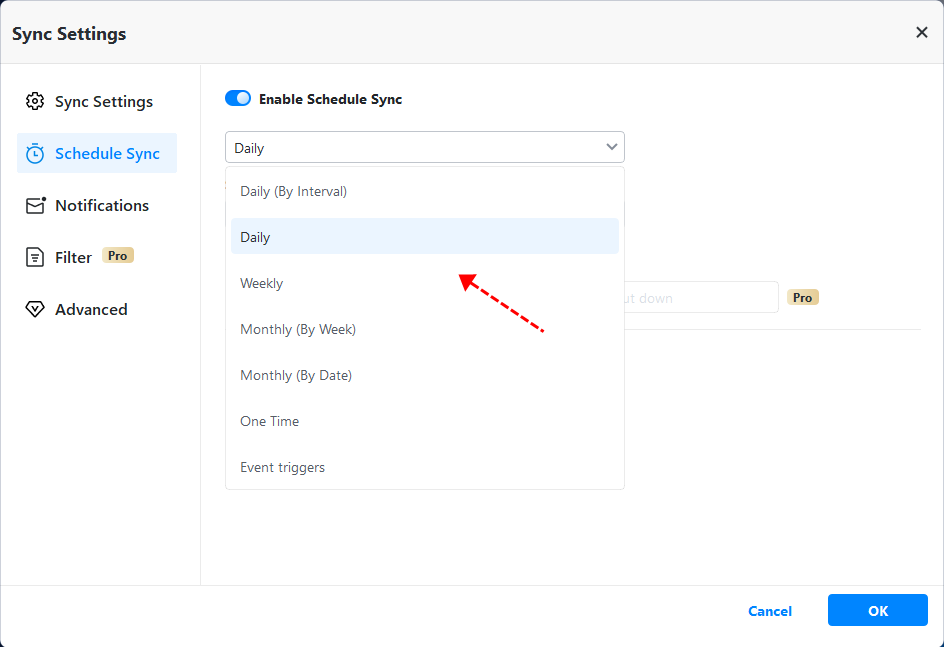
Step 3. Click Schedule Sync to customize sync settings and make it more flexible. You can enjoy Daily, Weekly, or Monthly, and further set hourly sync, Wake the computer to run scheduled task, After the scheduled ...., the computer will shut down. Then, click Start Sync to perform schedule one-way file sync.
More advanced features on the professional version:
• Event triggers: It allows you to sync files at specific events, such as, system shutdown, system startup, etc.
• USB plug in: Try this feature if you want to automatically sync files to USB flash drive when it's plugged in.
• Filter settings: It is capable of syncing files with only certain file extensions, thereby saving sync time and space.
• Different sync modes: "Two-Way Sync", "Real-Time Sync" and "Mirror Sync" are also included in this software. Select them based on sync direction, frequency, or whether you want to mirror files.
Wrapping things up
Both Sync Center and AOMEI Backupper can sync files, but they are different. If you want to sync network files to local drive, Sync Center is a great choice. But if you want the best one-way-file sync, try AOMEI Backupper Standard!
It is capable of syncing any files, whether it's local files or network files. In addition, you can sync files with different storage devices, which ensures you always have a valid file copy. And its schedule sync provides you with up-to-date files
More surprisingly, it is still a free Windows backup software with rich feature to protect your data. If you create an AOMEI account, you are able to backup files to AOMEI Cloud. It offers you 1TB free storage for 15 days after you sign up for an AOMEI account.

