Restore Windows Server 2012 Backup from Network Location Safely
If you have trouble performing Windows Server Backup 2012 restore from network location, please read this article patiently to get the way to restore system sucessfully.
By Ivy Updated on October 20, 2022
Quick Navigation:
Need help: Windows Server 2012 Backup restore from network location
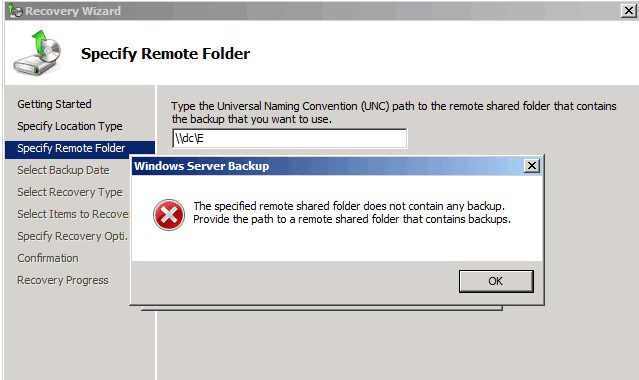
"I am having trouble in restoring Windows Server 2012 backup from network location with WSB. All the steps are normal. But when I enter the path of network shared folder, it says: "The specified remote share does not contain any backups. Provide a path to a remote shared folder that contains backups." Then, I check my path and make sure there is nothing wrong. Any thoughts? "
Why Windows Server backup 2012 restore from network location fail?
For this backup and restore problem, there are some possible reasons and coresponding solutions.
-
Your backup image is corrupted. If not, you could copy the WindowsImageBackup dir to a local disk and the folder location is \WindowsImageBackup\, then try the wbadmin restore catalog –backuptarget: and wbadmin get versions -backupTarget: commands.
-
You are not using the root folder of the backup path. eg: You create a backup on \\server\share but use \\server\share\WindowsImageBackup to restore your server. Note that the WindowsImageBackup was created during the backup process, thus, it does not be the parent folder of your backup image.
-
You move it to another location, which misses the backup.
-
You don't configure iSCSI as a volume in the target computer. Not all users need to do this, but if you use NAS storage device via iSCSI connection, you need to do it.
-
The network share is protected with a user and password. Please use net use \\share /u: [user] [password] and retry the wbadmin start backup and wbadmin get versions -backuptarget:\\ commands.
If you still cannot restore Windows Server 2012 backup over network, try to perform system image recovery in the recovery environment. It requires an installa tion disc boot the computer.
How to restore Windows Server 2012 backup over network
Here, I’ll show you how to boot into recovery environment and restore Windows Server 2012 backup over network. If you use iSCSI connection, please configure it as a volume in the Server Manager.
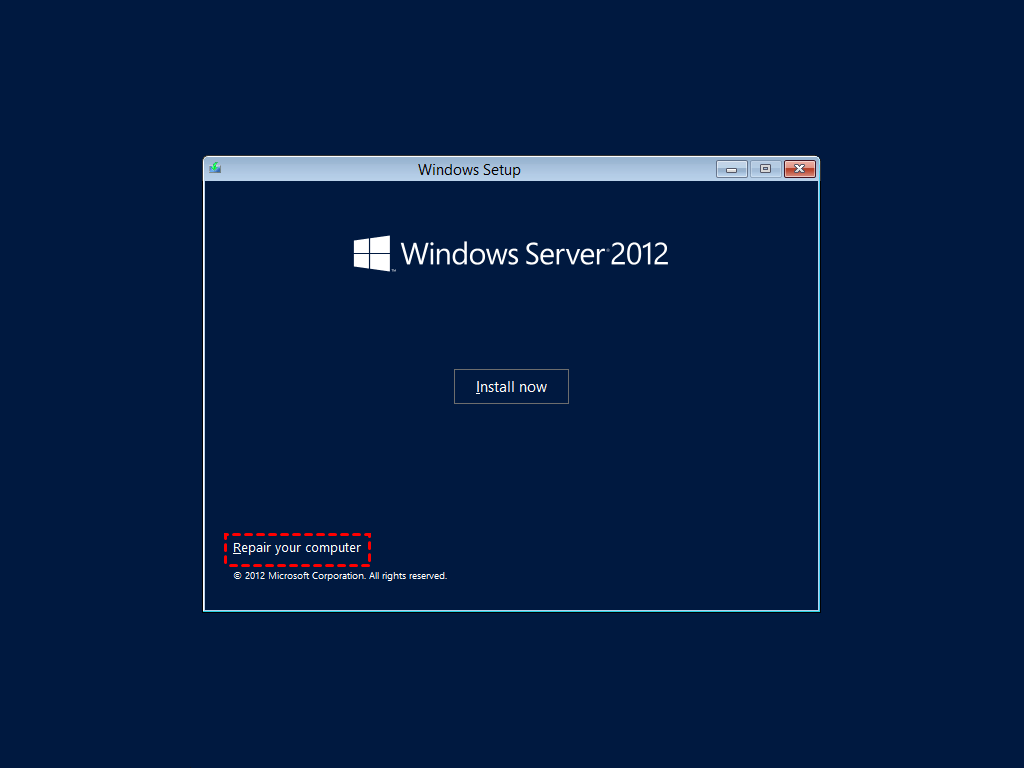
Step 1. Start your computer using the Windows Server 2012 installation disc. Please change the boot order to CD/DVD in BIOS at first.
Step 2. In the initial Windows Setup window, click Next. Then, click Repair your computer > Troubleshoot > System Image Recovery.
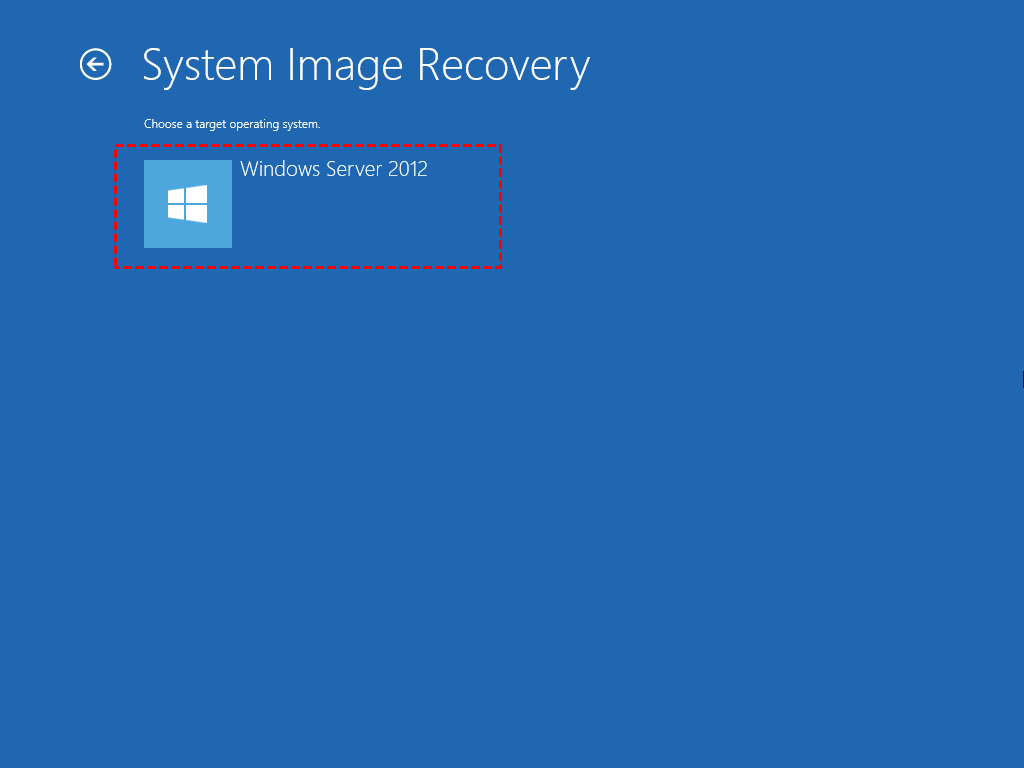
Step 3. Select the target operating system, here is Windows Server 2012.
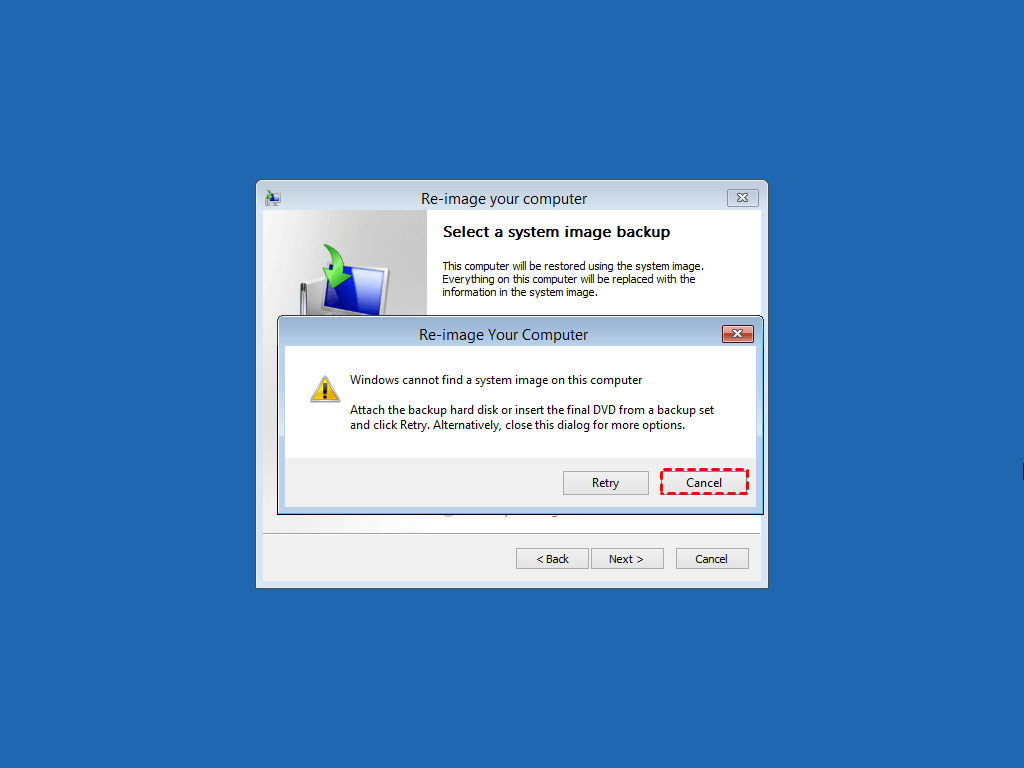
Step 4. In the Reimage your computer, you will receive Windows cannot find a system image on this computer error, since your backup is on the network location. Just click Cancel and click Next.
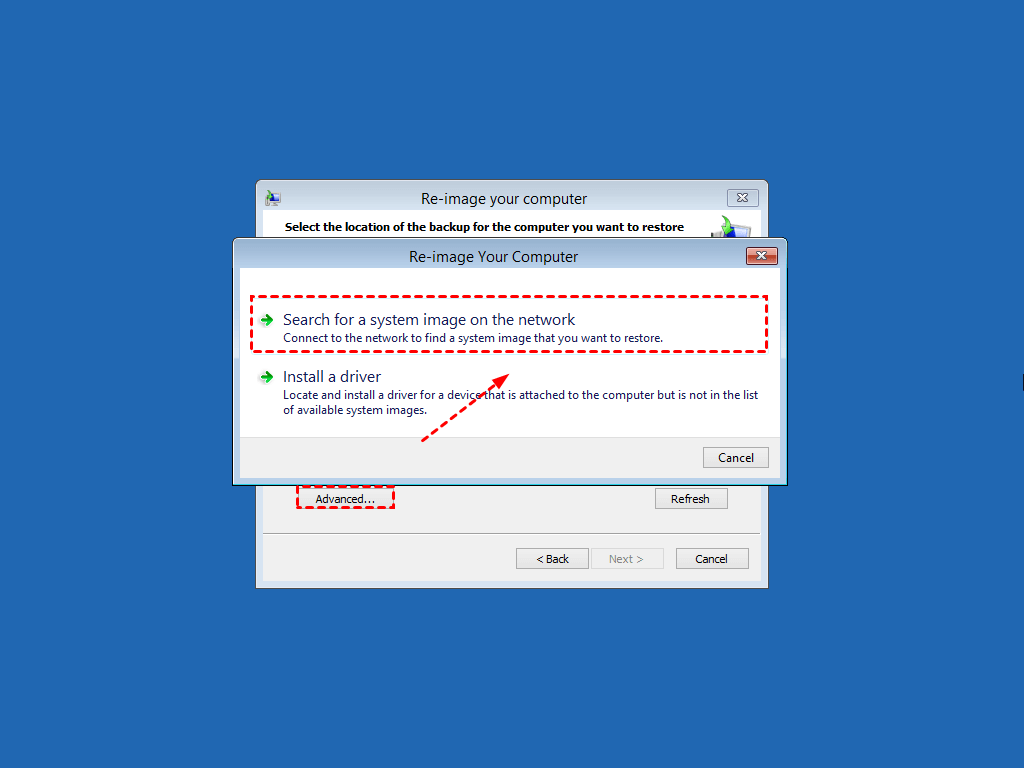
Step 5. After that, you will be asked to choose the location containing backup you want to restore, click Advanced and select “Search for a system image on the network ”.
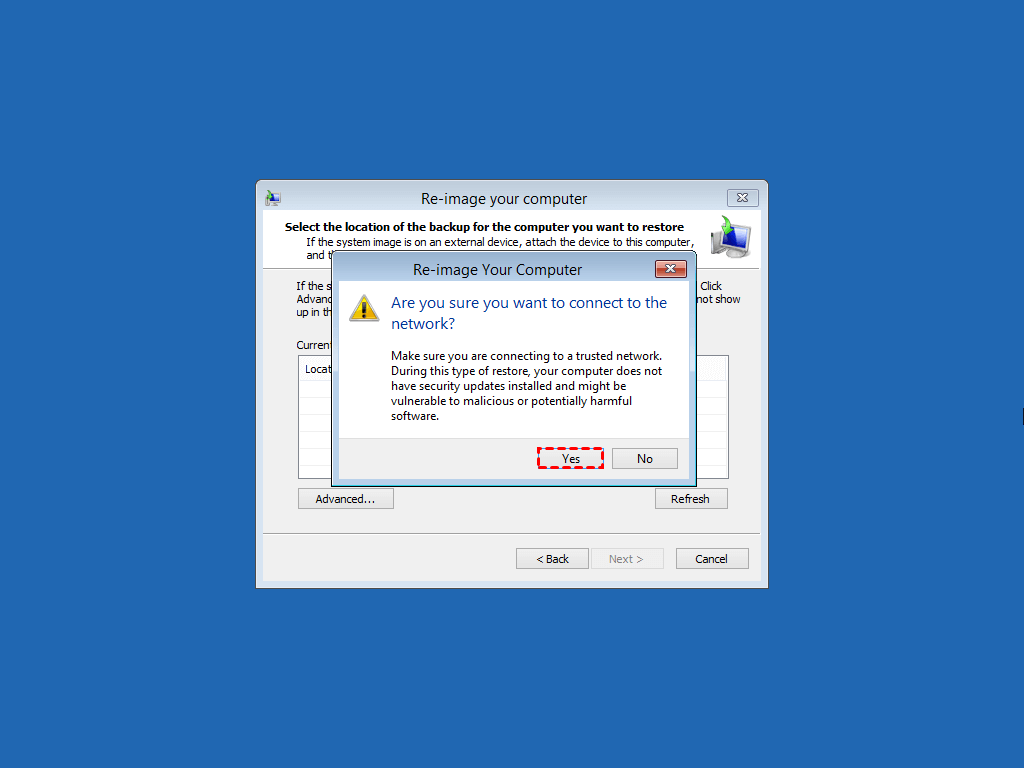
Step 6. Then, click Yes to confirm that you want to connect to network and type the path of network shared folder which contain a system image, it should be \\server\share instead of \\server\share\WindowsImageBackup. If you are asked, type username and password.
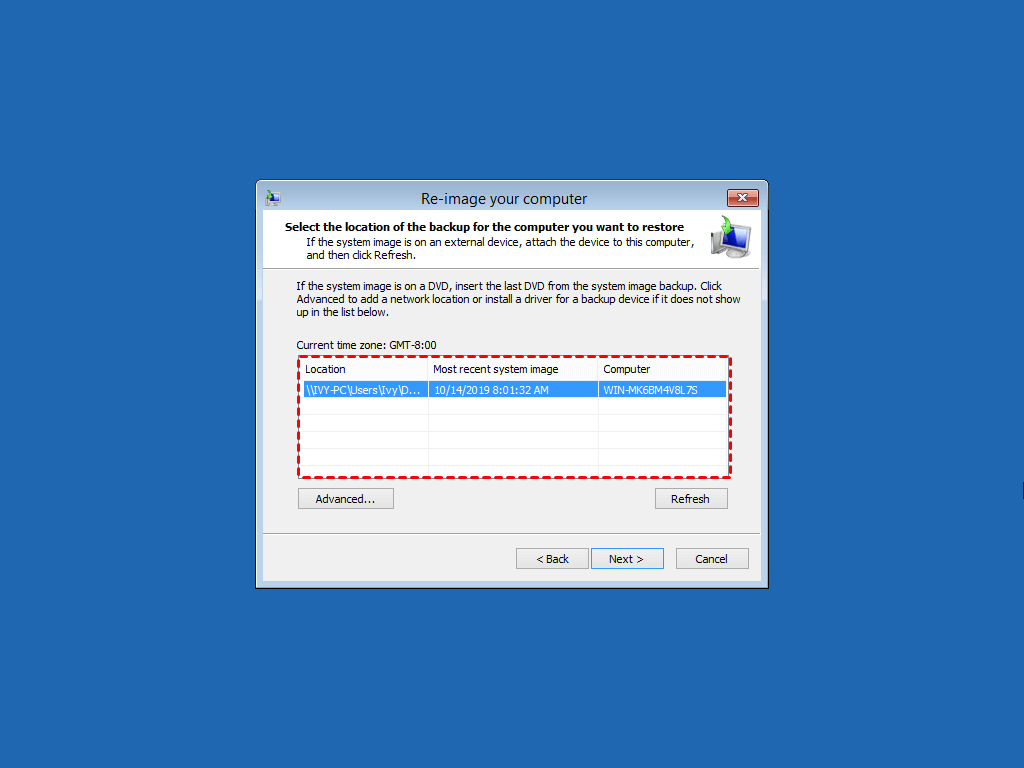
Step 7. Select the image and click Next. Then, follow the on-screen instructions to finish the rest of steps.
Easier way to restore Windows Server 2012 backup from network location
Except for Windows Server Backup, there are many useful backup software for Windows Server 2012, AOMEI Backupper Server, for example, and it can help you backup and restore Windows Server 2012 backup to another machine, even with different hardware.
Not only Windows Server 2012, but also applies to previous version, such as, Windows Server 2003/2008/2008 R2, and advanced version, including Windows Server 2012 R2/2016(R2)/2019/2022. And Windows 11/10/8/7 is also supported. Also, here some obvious advantages of this software:
- It supports all kinds of backup solutions, namely, File Backup, Cloud Backup, System Backup, Disk Backup and Partition Backup.
- It supports automatic backup, such as, daily, weekly, monthly, event trigges and USB plug in.
- By default, the backup method is incremental backup, which help you save much backup time and disk space by backing up only changed files. Also, you can use advanced backup method - differential backup to keep track of changes in time.
- It supports restoring backup from or to external hard drive, USB flash drive, NAS storage device or network location, etc.
- It supports restoring image to a computer with different hardware and ensure secure boot. On advanced editions, you still can deploy system image to multiple computers simultaneously.
Then, how to restore backup over network in Windows Server 2012 sucessfully? Please make preparations and follow the steps below carefully:
- Download AOMEI Backupper Server and install it on your server computer. It has a 30-day free trial, so you don't need to pay for it before you make a final decision.
- If you don't have a backup created by AOMEI Backupper, you could create system image backup for Windows Server 2012 in another working computer and save it to a network location. To make it more convenient, you can choose to backup Windows Server 2012 to external hard drive.
- If your computer fails, it's suggested to create a bootable media as well, which could help you start it. For multiple computers, try image deployment software - AOMEI Image Deploy.
Detailed steps to restore Windows Server 2012 from network location:
Step 1. Set boot priority for your bootable media in BIOS and start from it. Wait until you see the interface of AOMEI Backupper Server. Click Select Image File in the main page.

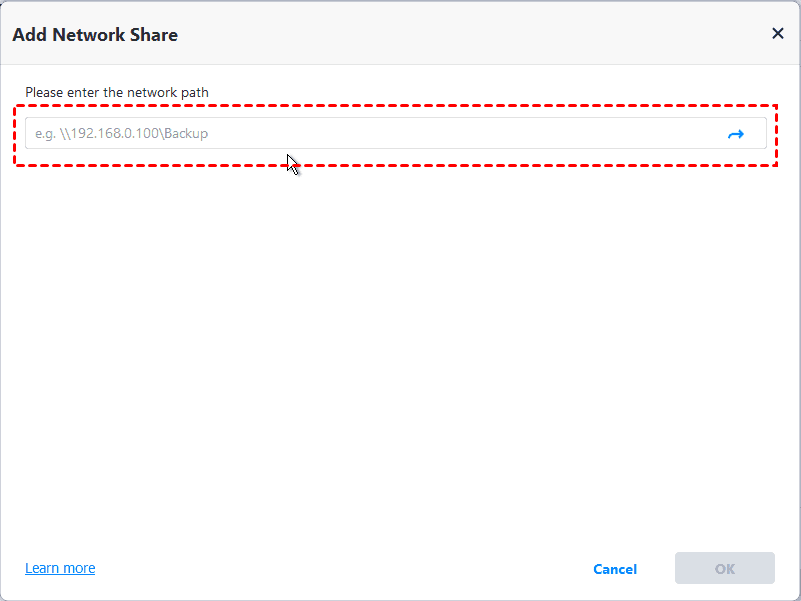
Step 2. Click Share/NAS in the pop-up window.
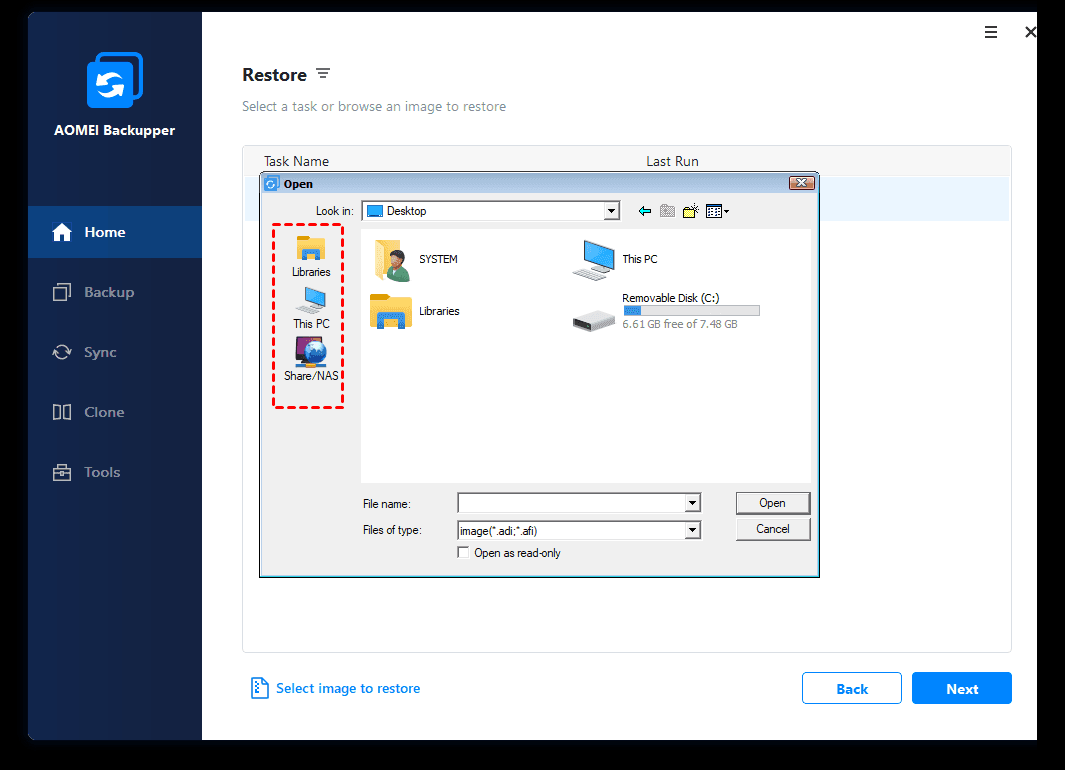
Then, Click Add Share or NAS Devices and then type network path, username, password.
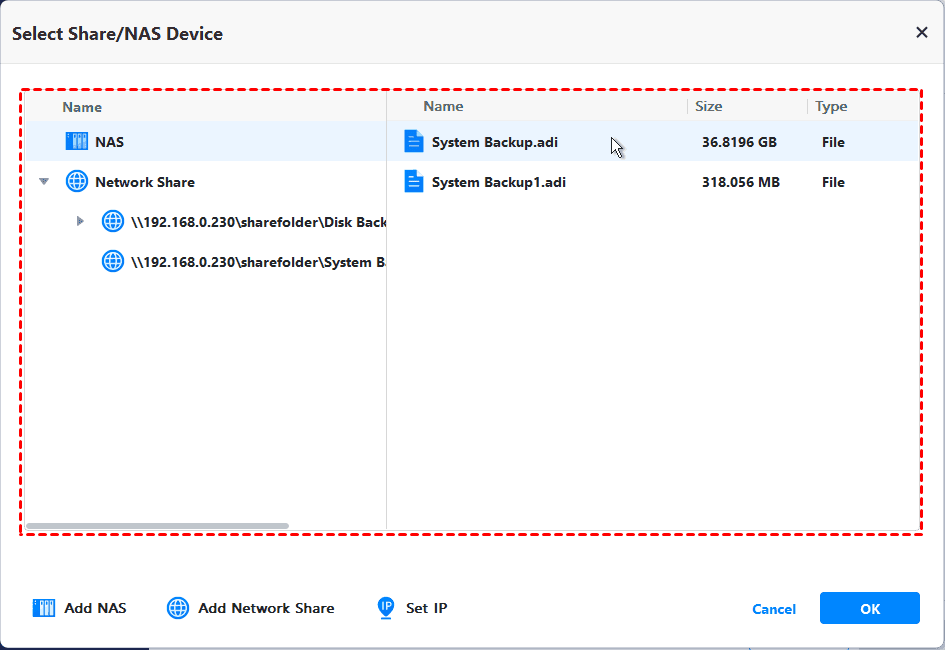
Step 3. Select the system image in the network path.
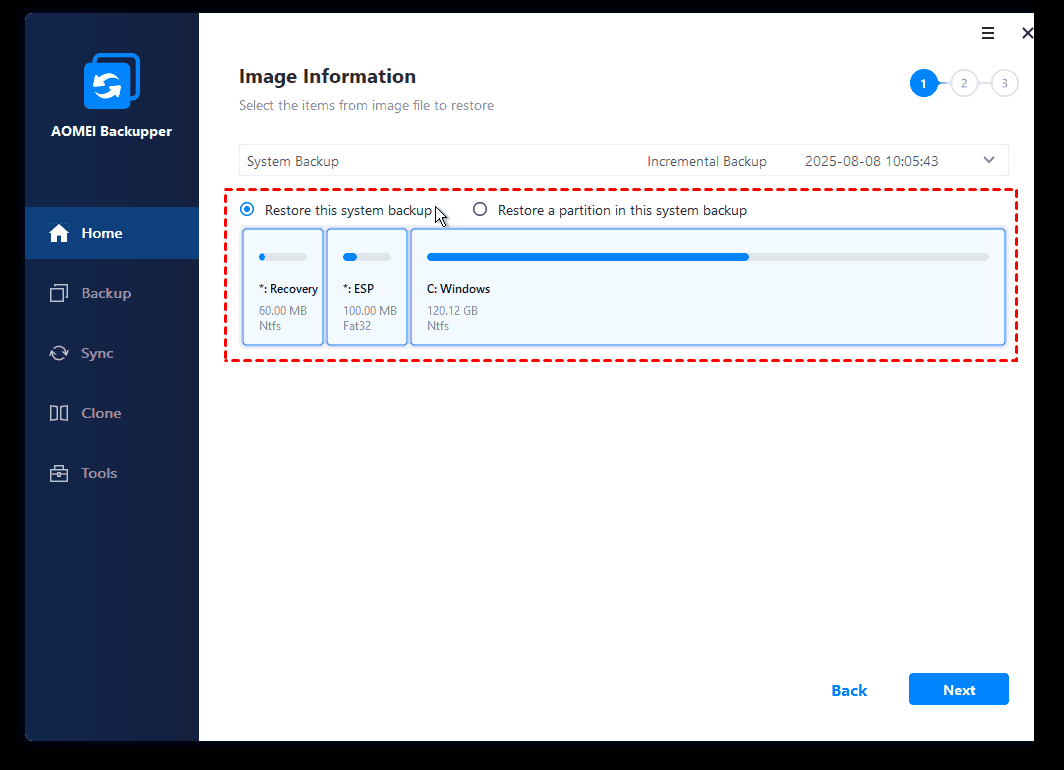
Step 4. Tick Restore this system backup and Restore System to other location, then click Next.
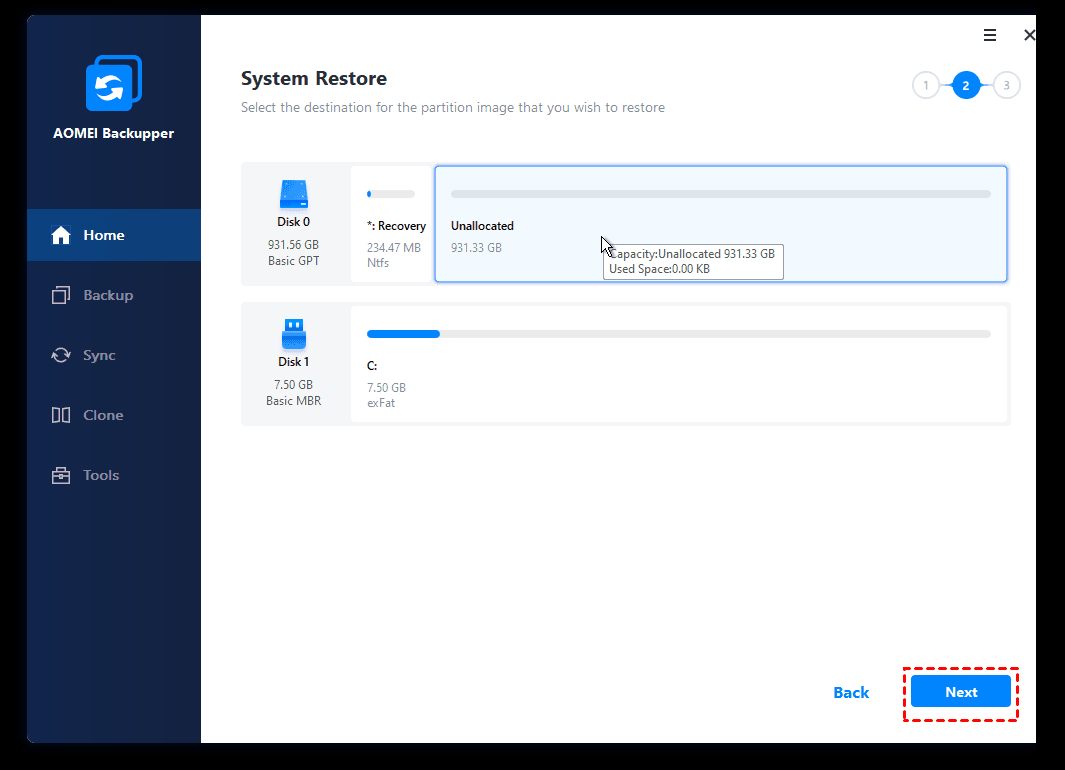
Step 5. Select a location to receive the backup image and click Next.
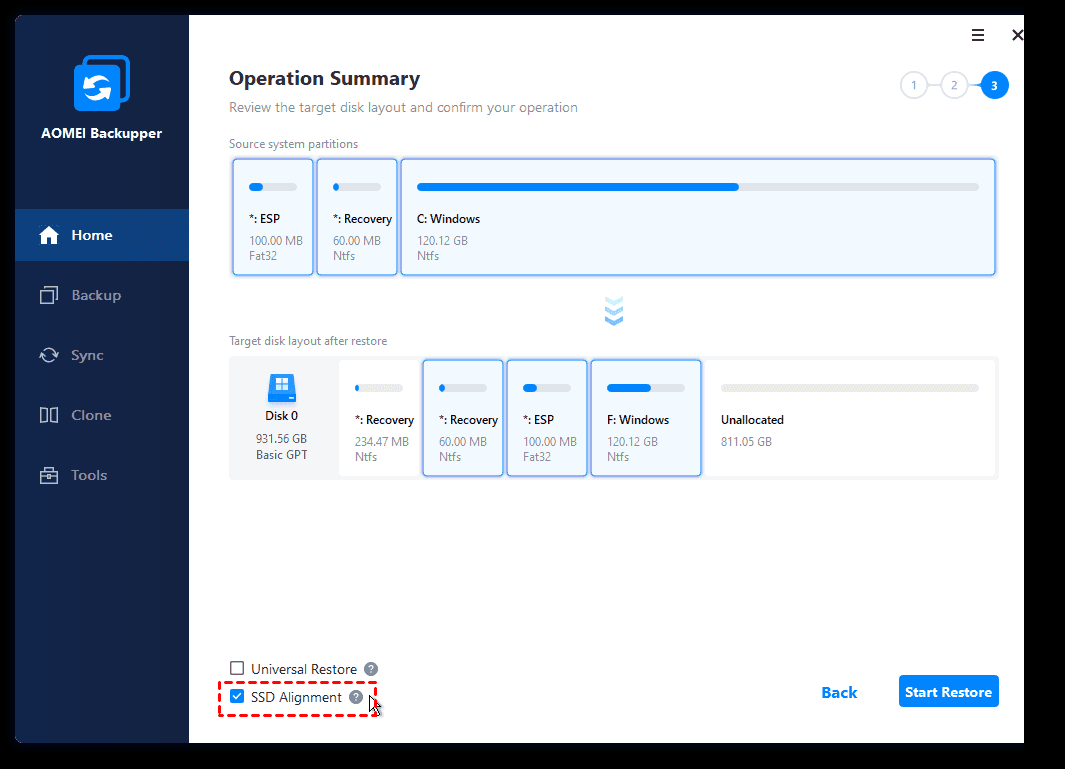
Step 6. If your target drive is SSD, please tick SSD Alignment to accelerate the writing and reading speed of SSDs. If the target computer use different motherboard or CPU, tick Universal Restore and click Start Restore to restore Windows Server 2012 backup from network location sucessfully.
Tips:
- If you want to restore system to multiple computers, even with different hardware, try AOMEI Image Deploy tool. It's available on AOMEI Backupper TechPlus edition.
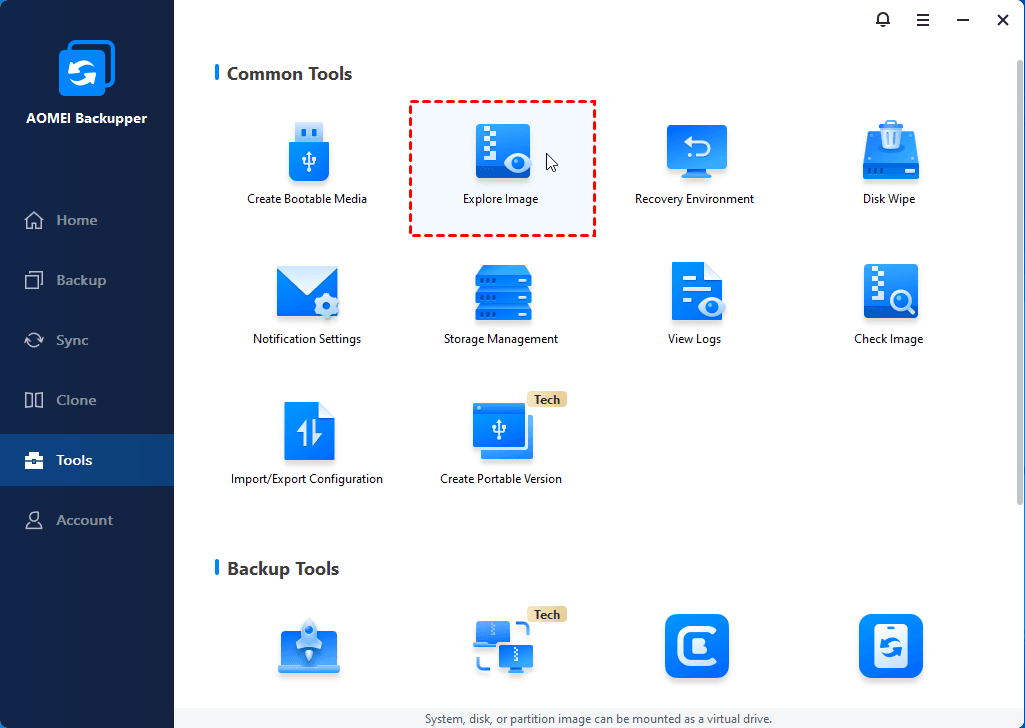
- For Windows Server backup restore individual files, you could try Explore Image feature. It enables you to mount backup image, even if it is not a file backup, and copy files you want to another location.
Further reading: Windows Server 2012 end of life
The life of Windows 2012 is coming to end on Oct 2023, and it's not strange, since Microsoft wants to focus more on the new operating system and provides more innovations for Windows Server users. However, once Windows Server 2012 ends of life, you will not receive security updates from Microsoft, and your server computer more vulnerable because of virus attacks, system crashes, lower security, etc.
If you are currently using Windows Server 2012, before it finally ends, you need to decide if you want to upgrade Windows Server 2012 to 2016, 2019, or even 2022 and enjoy the latest features and security updates, or keep using Windows Server 2012.
>> If the answer is to upgrade, you need to choose how and to avoid any data loss, it's suggested to follow the in-place upgrade rule with the picture below. If you want to directly clean install Windows Server 2016, 2019, and 2022, please backup files in advance and then restore them on the new computer.

>> If you want to continue using server 2012, the most important thing is to ensure your system and data are safe. The best way is to image Windows Server 2012 to new hard drive with a professional server backup software - AOMEI Backupper Server. To ensure you always have a backup copy, it's suggested to schedule backup Windows Server 2012 and follow the 3-2-1 backup strategy.

Wrapping things up
If you have trouble restoring Windows Server 2012 Backup from network location, you can try the above suggestions. If it is still not working, you can perform system image recovery from recovery environment or use a professional server backup and restore software - AOMEI Backupper Server, which makes it much easier.
As long as you create a system image with this software, regardless of location, you can easily restore Windows Server 2012 backup, even with different hardware or it's unbootable. For IT technicians, you still both create a portable version (supported by AOMEI Backupper TechPlus) of this software and perform system restore on unlimited PCs and servers.

