Continuous Backup Explanation and Best Practices (Full Guide)
Continuous backup is a backup scheme that auto saves each copy of changed data and avoid any unwanted data loss. If you want to adopt continuous data protection on Windows 11, 10, 8, 7, try this continuous backup software.
By Jonna Updated on August 28, 2025
What is Continuous Backup & Why Use It?
Continuous backup, also known as continuous data protection (CDP), is an advanced backup scheme that auto saves each copy of your changed data on a tight schedule or in real-time.
Continuous backup is a time-honored concept that has long been adopted by some Windows backup software and is still in use today. Compared to traditional data backup solutions, CDP has some obvious advantages:
1️⃣The backup is auto executed; you don't need to set up a manual backup every time, nor worry about data loss.
2️⃣For frequently modified data, you can keep different copies of it and revert to any old version when needed.
In the following article, I'll introduce how to achieve continuous backup in Windows 11/10/8/7.
How to Implement Continuous Data Protection in Windows 10/8/7
When you search for continuous backup in Google, most of the results are probably 3rd-party continuous backup software. This is because the backup utilities that come with Windows cannot achieve continuous or real-time backup. It does allow you to schedule backup folders or volumes, but the features are very limited, both in schedule options, backup speed, and success rate.
For example, in Windows Backup and Restore, you can't set continuous backup more frequently than once a day; in File History, you can only backup files to external drive. And in System Image Backup, there's no schedule option.
Therefore, if you want to set up a backup schedule flexibly or do real-time backup that executes automatically when any change is captured, it's recommended to perform CDP with specialist continuous backup software. If you simply need an automatic file backup solution, then the built-in backup tools, such as File History, may be enough.
Best Continuous Backup Software for Real-Time Data Protection
To set up continuous backup more flexibly and adopt tight protection for your computer data in Windows, an effective continuous backup software is necessary. AOMEI Backupper Professional, for example, is a complete backup & restore software to help you realize Windows continuous data protection.

- It supports all Windows OS, including Windows 11/10/8.1/8/7/Vista, and devices such as internal/external hard drive, USB, network, cloud drive. If you have an AOMEI account, you can also backup files to AOMEI Cloud.
- It enables you to create a schedule backup to auto backup files, partitions, system or even the disk flexibly. The options include Daily (By Interval), Daily, Weekly, Monthly (By Week), Monthly (By Date), One Time, and Event triggers (like USB plug in, startup & shutdown). You can also further set up the specific time points and intervals.
- It provides Real-Time Sync feature to continuous backup changed files in real-time.
- In addition, there are Clone features to help you migrate Windows to another drive, and some practical Tools such as creating bootable media or disk wiping.
You could download the 30-day free trial to have a try!
*There's also a completely free Standard edition that contains basic schedule options. If you are running Windows Server, then you can choose the Server edition. Check edition comparison for details.
How to Continuously Backup Changed Files in Real-Time
If you don't feel like creating a schedule and want to backup changed files in real-time, then Real-Time Sync may suit your needs better. It's available in AOMEI Backupper Professional and enables you to automatically sync files or folders from source directory to target directory once changes are detected.
- Tips:
- According to your needs, you can also choose Two-Way Sync which will sync changes in the source or target directory to the other side, or Mirror Sync, which will keep the data in the target directory exactly the same as the source.
- Note the real-time sync won't keep different versions of your changed data (only the latest version). If you want to do so, please refer to the next part to create automatic backup with tight schedule.
Steps to create continuous backups to external hard drive using AOMEI Backupper:
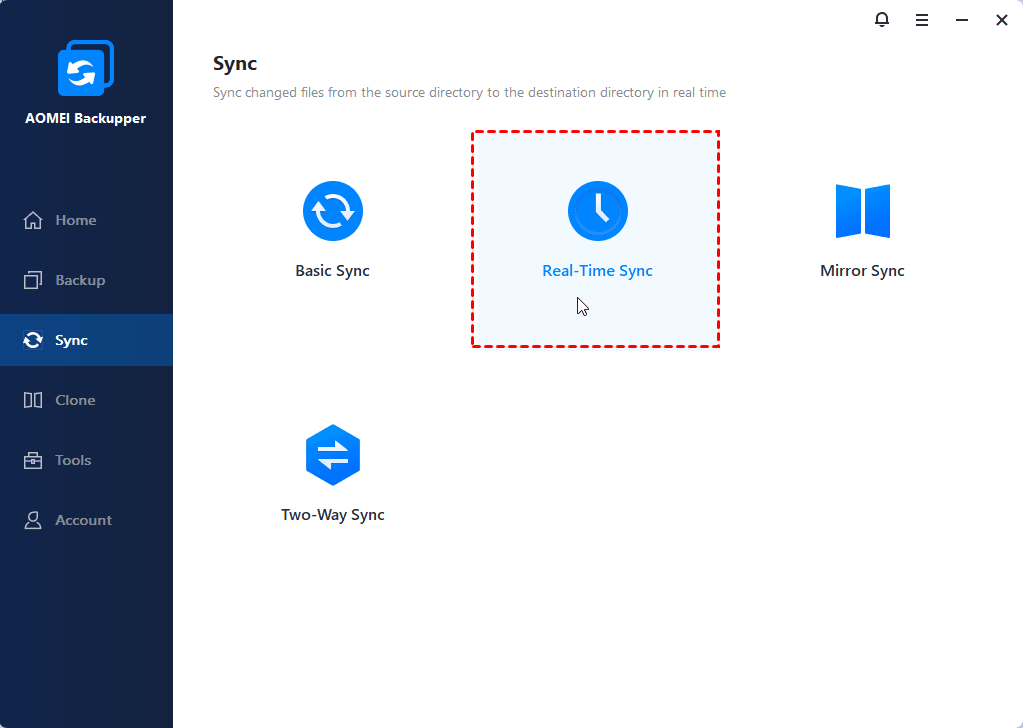
1. Navigate to the Sync tab, where you can find several options. Choose Real-Time Sync for continuous backup.
2. Click Select Source to specify the data you want to sync. You can click the + Add Source button to add multiple folders.
>> For data on NAS or network share, you can click Share/NAS button in the pop-up window.
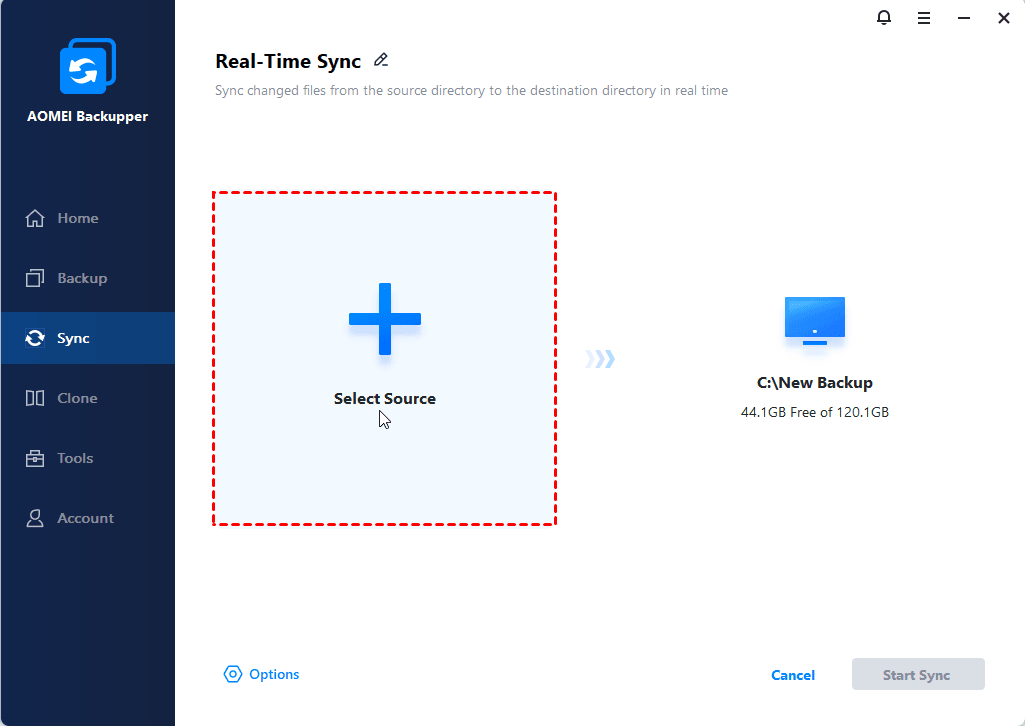
3. Select a destination directory. In addition to local disk, you can also sync to network, external hard drive, USB, etc.
>> To backup changed files to removable devices in real time, you need to keep the corresponding device always connected.
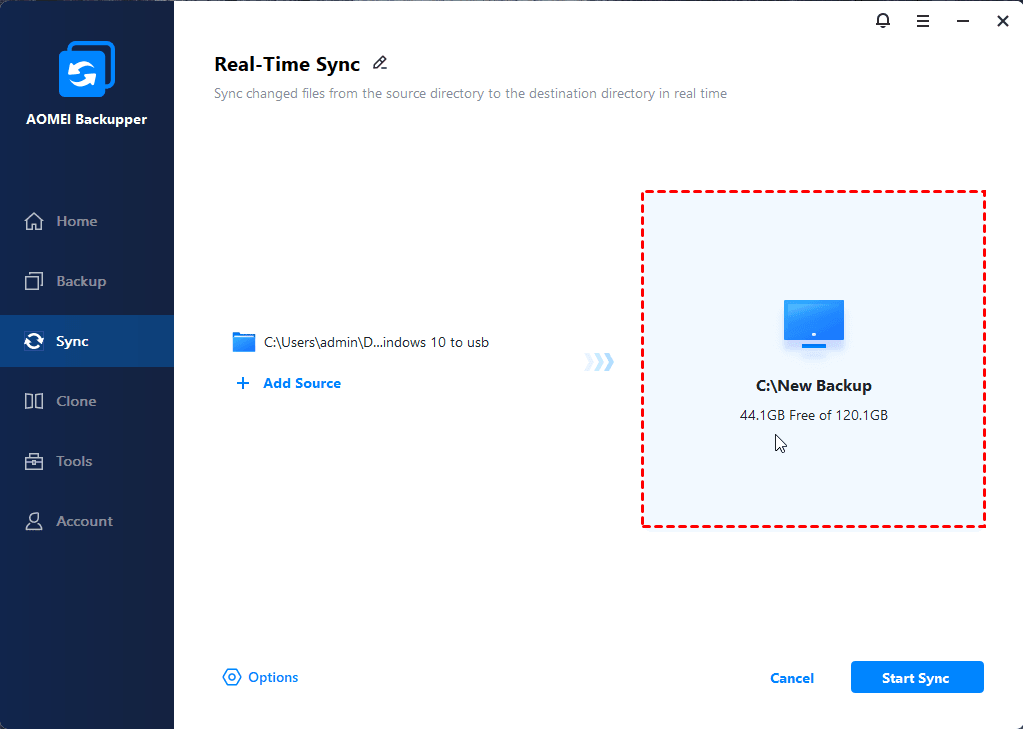
4. Click Start Sync and wait for the process to complete.
That’s it, your files are now under continuous data protection. Once there are changes detected in the source directory, they will be synchronized to the target directory in real time.
◆ What's the difference between Sync and Image Backup?
They are both effective data protection solutions and are both considered as backup in a broad sense. But a backup is usually a restorable image of the source data that can't be used directly, while sync will create an exact copy of the files with original format. With image backup, you could keep multiple copies of different versions. And with sync, you could directly access and use the copied data.
How to Continuously Backup Data with A Tight Schedule
The most common continuous backup may be an automatic backup with a reasonable schedule. It's achievable even with Windows' built-in utilities, but professional backup software such as AOMEI Backupper will offer you more flexible options, especially when you want to continuously protect an operating system like Windows 10.
Steps to create automatic backup with a tight schedule using AOMEI Backupper:
1. Go to the Backup tab, choose System Backup. Other backup types are also available.

2. Choose a destination while the system partitions are automatically selected as the source. Click on the destination box to choose Local Drive, NAS, Network Share or AOMEI Cloud (with 1TB of free trial storage available for 15 days).

3. Click Schedule to set up the continuous backup. You can choose daily, weekly, or monthly with intervals, and a specific time point, or make the task auto run when Event triggers (USB plug in, user logon/off, system startup/shutdown).
If you are worried about the accumulated image files of continuous backup filling up your storage space, you could use the Backup Scheme option to create a retention policy for auto deleting older backups.

4. Click Start Backup and wait for the progress to end.
The scheduled incremental or differential backup will backup only changed or newly added files each time. To restore the backup images of an earlier version from a continuous backup, just go to Home > Restore > select the backup task or click Select image to restore, then choose the image file at the time point you want to go back to.
✍Tips:
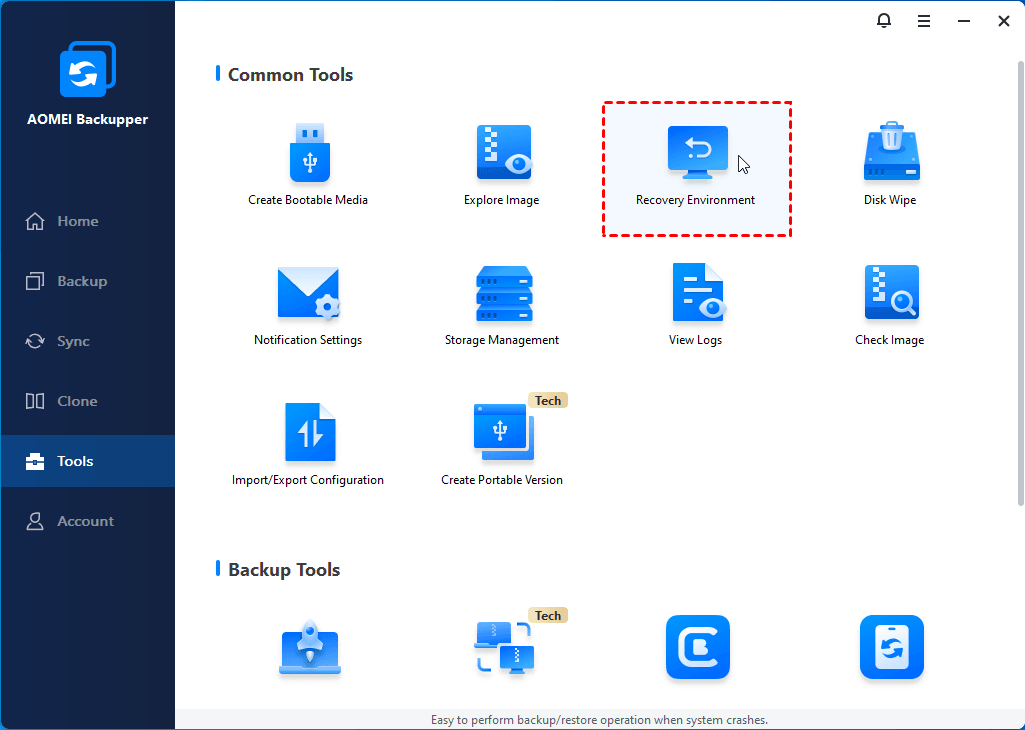
If your Windows computer won't boot, you need to boot your computer with the bootable disk you created earlier. If you don't have a bootable USB/CD/DVD, etc., you can create a recovery environment on your computer in advance. It will help you to boot your computer successfully and enter the software interface.
Schedule backup Windows data with built-in backup tools
Since Windows 8, you have several built-in options to perform schedule backups, and they do cover your basic data protection needs. Here are the approaches to creating scheduled backup tasks with them.
-
In Windows File History:
It applies to Windows 8/8.1/10/11 for automatic file backup. If you've got an external hard drive, and care most about some specific folders, then this is the way to go.
*The option to add folders has been removed in Windows 11, which means you can only backup the Users folders.
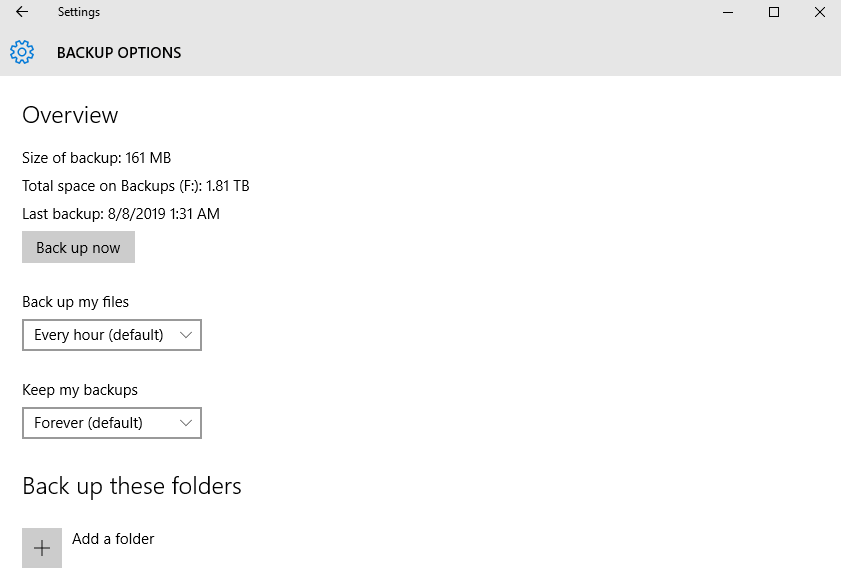
1. You can find it in Start > Settings > Update & Security > Backup, or directly type File History in the search bar.
2. Connect an external hard drive > Click Add a drive to select it > Click More options to choose the frequency (from hourly to daily).
-
In Windows Backup and Restore:
It applies to Windows 7/8/10/11 for folders & libraries or system image backup. If you want to create a system backup or even a bare metal backup, then you need to use it.

1. Search for it to enter Backup window > click Go to Backup and Restore (Windows 7)
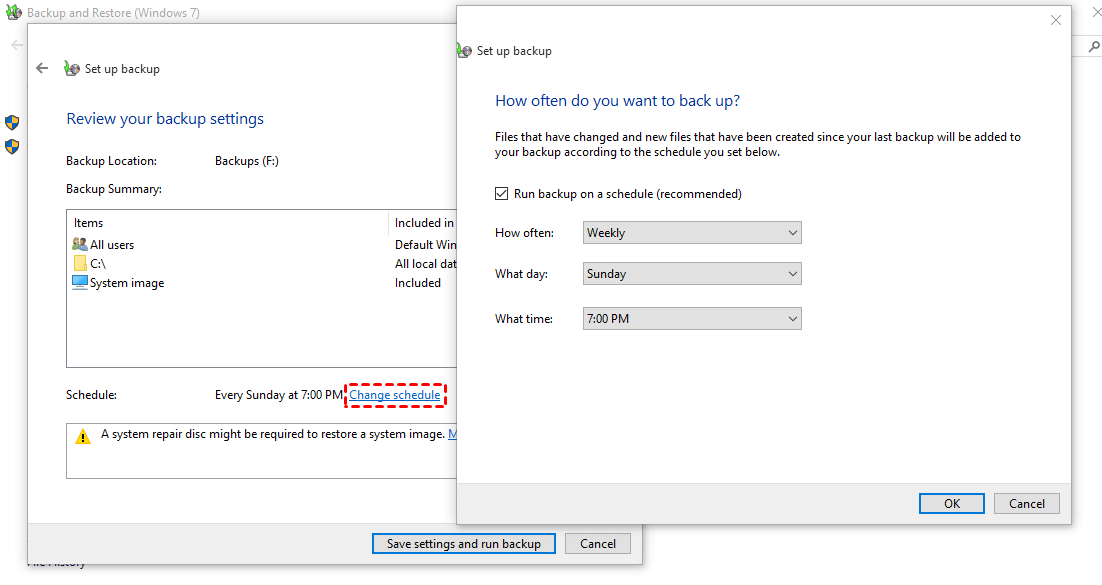
2. Click Set up backup > follow the wizard and click Change schedule in Review your backup settings page > Choose from Daily/Weekly/Monthly.
Conclusion
Continuous backup will automatically save your changed data with a schedule or in real time. In Windows 10/8/7, however, there are no built-in utilities that can provide effective and flexible continuous data protection, so you still need continuous backup software for this purpose.
Among a variety of Windows backup software on the market, AOMEI Backupper is a good choice as continuous backup software. Using it, you can perform scheduled backup or real-time sync to continuously protect your important data. What’s more, there are also clone features allowing you to migrate OS to another hard drive.

