Best Free OS Migration Software to Move OS to SSD Easily
Need free software to migrate OS in Windows 11, 10, 8, and 7? Read this detailed post to learn how to migrate OS to an SSD or HDD with two free OS migration tools.
By Lily Updated on August 28, 2025
Case: how do I migrate OS to SSD for free?
“What software does everyone use to migrate/transfer HDD to SSD or SSD to SSD but where the destination drive is smaller? I prefer to do this out of the machine instead of using a USB boot disk. Is there anything that works? Free or low cost would be nice.”
When you try to replace the hard drive with a larger HDD or smaller SSD, one inescapable problem is how to transfer OS to the new disk. Reinstalling Windows from scratch seems troublesome especially when you don't own an installation media, therefore, you could consider transferring the system with free OS migration software.

Option 1: Migrate OS to SSD with the best free OS migration software
When considering free OS migration software, AOMEI Backupper Standard stands out as the most popular choice due to its outstanding features. It offers a user-friendly, efficient way to transfer your system, applications, and data with minimal downtime or errors. It can also help to optimize SSD performance when moving OS to an SSD.

-
Schedule backup: Keeps multiple backups for users so that users can restore any previous version as needed.
-
Incremental or differential backup: Allows users to backup only changed files instead of creating a full backup every time. This can save a lot of time and disk space. (Differential backup is a paid feature.)
-
Multiple backup devices: Supports any disk that can be detected by Windows, such as an external hard drive, USB flash drive, cloud drive, or NAS.
-
Create bootable media: Restores system from a disc or USB drive when your Windows fails to boot.
-
Restore system image to smaller drive: Useful for users who want to migrate OS to a smaller SSD. The premise is the used space on the source disk is smaller than or equal to the destination disk.
To use OS migration software to migrate OS to SSD, you need to do some preparations first:
☛ You need to prepare a solid-state drive (SSD). It depends on where you want to migrate the OS to. Plug it into your computer and make sure that the SSD you prepared can be detected.
☛ Download AOMEI Backupper Standard, install it, and launch it. Use it to do system backup, and remember where you have stored the system image.
After all the things are done, follow the steps below and restore with free OS to SSD migration software.
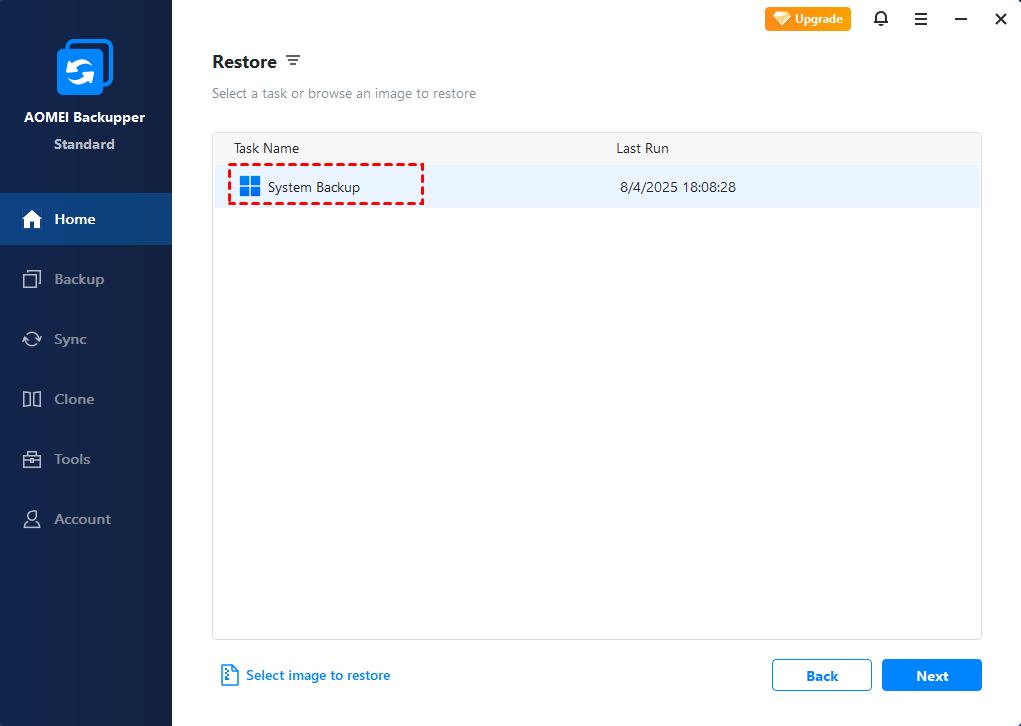
Step 1. Launch AOMEI Backupper Standard, click Restore on the Home page.
Step 2. Click the system backup task in the list and hit Next. If there is no backup task listed, you could click Select image to restore in the left bottom.
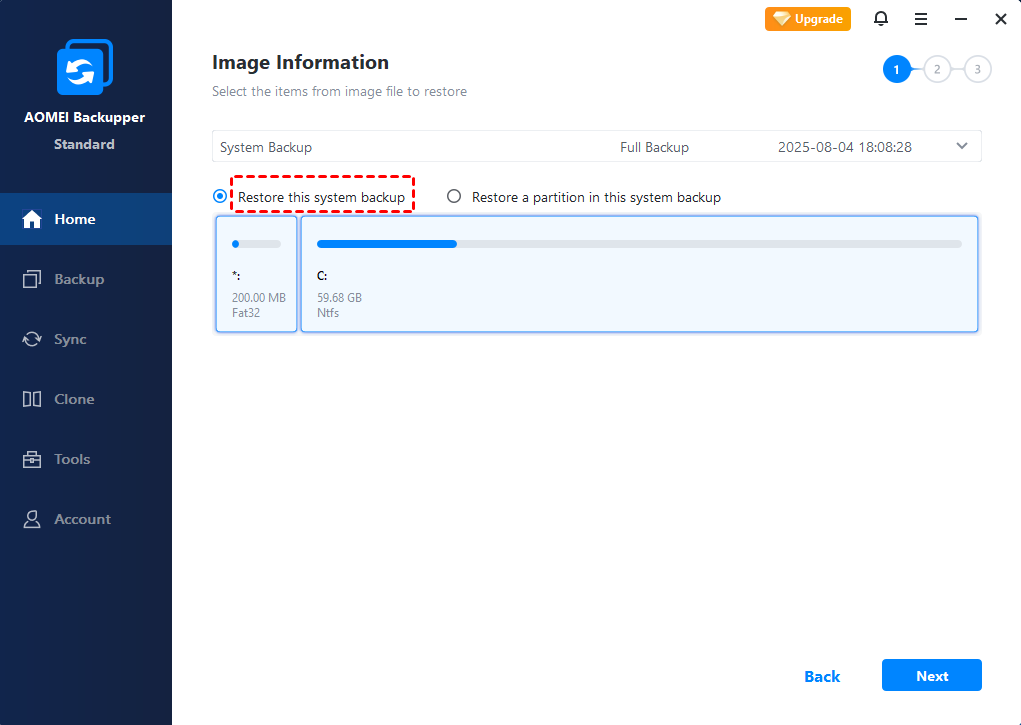
Step 3. Tick Restore this system backup and click Next.
Step 4. Tick Restore to a new location. Then, select SSD as the destination disk and click Next.

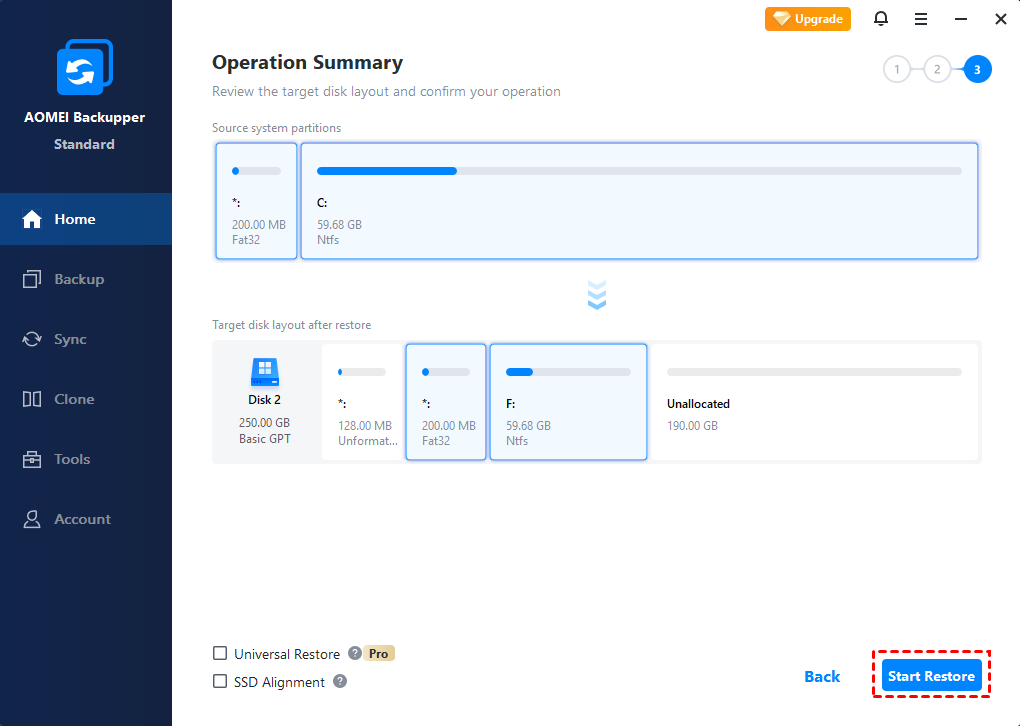
Step 5. Preview the operation summary and click Start Restore. When the progress reaches 100%, you can click OK to exit. So far, you already migrated OS to SSD successfully and you can boot from it directly.
Notes:
◆ If you want to restore the system to dissimilar hardware and make sure the computer can boot, please upgrade to AOMEI Backupper Professional and tick the Universal Restore option.
◆ If you are restoring to an SSD, you can check the box of SSD Alignment, which is designed for improving SSD's performance.
Boot the Windows operating system from the new drive
After transferring Windows from the original hard drive to a new one, you can set the new drive as the boot drive if both drives are installed.
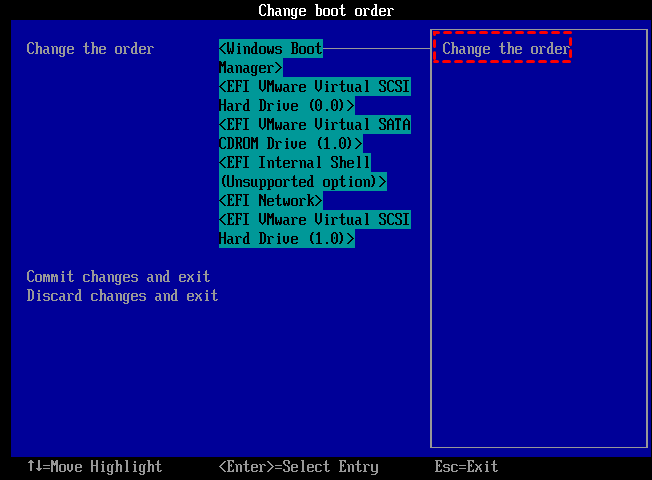
Step 1: Start your PC and press the function key during startup to enter the BIOS settings.
Step 2: In the Boot menu, select the new HDD or SSD as the boot drive and save the changes.
Step 3: Restart your computer to boot from the new drive.
Option 2: Migrate OS to SSD with built-in Backup and Restore
Backup and Restore is a built-in backup software introduced with Windows 7 and retained in Windows 8, 10, and 11. This tool allows users to create backups of their systems, ensuring that all essential data and settings are preserved. With Backup and Restore, you can easily recover your system to a previous state whenever needed, providing a reliable safety net against data loss. It's an essential feature for maintaining the integrity and security of your computer's operating system and files.
Before you start any operation, please do the following preparations first.
📌Create a system image backup with the Backup and Restore feature.
📌Get a hard disk or SSD as a destination disk. Please remember that the destination disk must be equal to or larger than the source disk, or the migration process will fail.
Then, see below and learn to migrate the OS to another disk.
Step 1. Type backup and restore in the search box and select it.
Step 2. Click Recover system settings or your computer under the recovery tab.

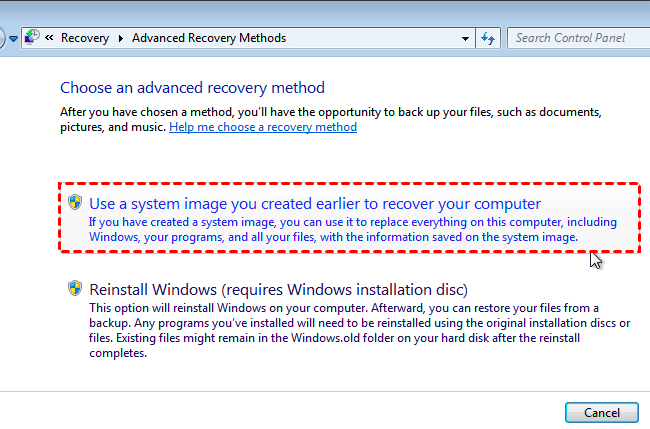
Step 3. Click Advanced Recovery Methods and select Use a system image you created earlier to recover your computer subsequently.
Step 4. Click Skip and Restart to get access to the System Recovery Options window.
Step 5. Select language and keyboard, then click Next. After that, Windows 7 will start to scan your hard drive for a system image.
Step 6. Select Use the latest available system image (recommended) or Select a system image, and click Next.

Step 7. Follow the on-screen instructions to finish the OS migration task.
💡Advanced way to migrate OS to SSD or larger HDD
Migrating OS via the backup and restore method involves many steps. If you want an easier way, you can try AOMEI Backupper Professional edition. It enables you to transfer OS to another drive directly without the restoration process. Follow the instructions below to run OS migration.
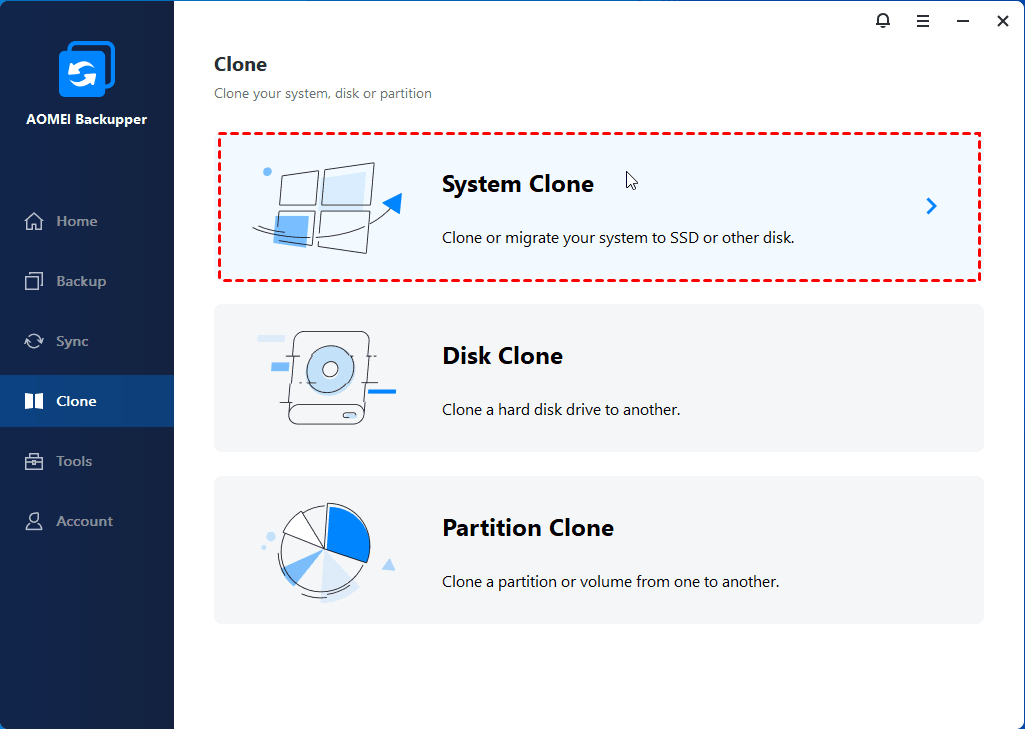
Step 1. Launch AOMEI Backupper. Navigate to the "Clone" tab and select "System Clone."
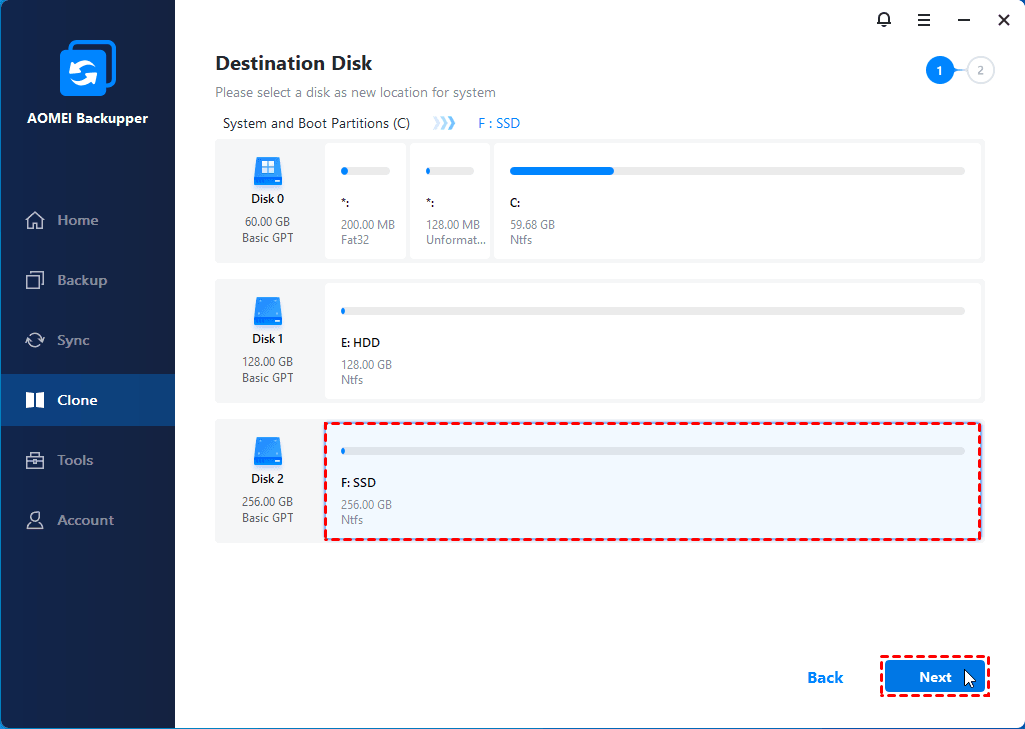
Step 2. Choose the new SSD as the destination partition. The software automatically selects all boot-related drives by default.
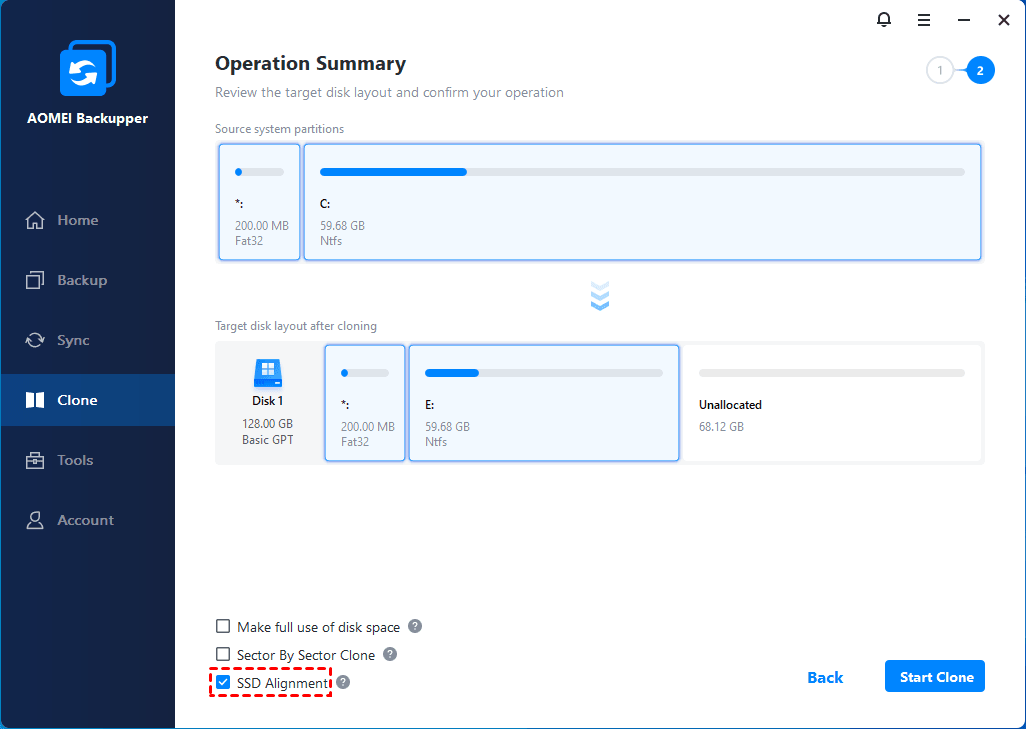
Step 3. Review the operations in the Operation Summary window. Click "Start Clone" to begin the system cloning process. Tick the "SSD Alignment" option to improve the read and write speed of the SSD.
Step 4. Wait until the cloning process reaches 100%. Click "OK" to exit the interface.
Bonus: Why need free OS migration software?
Free OS migration software, as the name suggests, is used to migrate OS to SSD or HDD for free. It can help users get more disk space and better performance while keeping a well-organized operating system, and save a lot of time installing a system. There are some scenarios when you may need it:
📌Ensures Seamless Transfer: After using OS migration software, you can transfer your system, applications, and data smoothly.
📌Install a new computer: When you get a new computer and want to keep the old operating system and applications, free OS migration software can help you out. Also, you don’t have to waste much time on installing systems and apps.
📌Upgrade hard drive: If you run out of disk space or your computer has poor performance, you could upgrade the hard drive to an SSD or larger HDD, and transfer the system with free OS migration software.
📌To get faster and better performance: If you are not satisfied with the speed of the current hard drive or the booting time, you can replace the HDD with an SSD.
📌Get a well-organized operating system: If you intend to add a hard disk to the computer and separate OS and personal data on different drives, you can simply move OS to a new disk without reinstalling everything.
FAQs about OS migration software
1. Can I migrate the OS for free?
Yes, you can migrate your OS for free. You can use the Windows built-in backup and restore tool or third-party software like AOMEI Backupper to transfer your OS to a new HDD or SSD without reinstalling Windows.
2. Is it difficult to migrate Windows OS to an SSD or HDD?
Migrating a Windows operating system to a different drive may seem daunting, but with the right tools, guidance, and careful preparation, it can be managed effectively.
3. Will I lose any data during the migration process?
There is a risk of data loss when migrating a Windows operating system from one drive to another, depending on the method and tools used. However, using tools like AOMEI Partition Assistant can simplify the process and help ensure data is transferred safely.
Drop it in the box
When your disk does not have enough space or you simply want better performance, free OS migration software like AOMEI Backupper Standard is a good choice for you to migrate OS to SSD.
It has excellent features to optimize backup and restore, like daily/weekly/monthly scheduled backup, image compression and splitting, SSD alignment, create bootable media, etc. If you try the AOMEI Backupper Technician Plus edition, you can even use the Image Deploy tool to deploy system images to multiple computers over a network.

