Deploy System Image to Multiple Computers Over Network [5 Steps]
Learn how to deploy a system or disk image to multiple computers on the same network with the best free OS image deployment software - AOMEI Image Deploy.
By Lily Updated on June 7, 2024
🌟 Key Takeaways:
👉 Free Image Deployment Software - AOMEI Image Deploy
👉 Preparation for Image Deployment
👉 Deploy OS Image over Network with AOMEI Image Deploy🔥
What is Image Deployment?
Image deployment involves customizing the operating system (OS), applications, drivers and settings on a single computer and creating an image of it, then automatically deploying this image to other computers. It is sometimes referred to as cloning as well, because the configuration of all computers is same after deployment. Image deployment enables you to efficiently and rapidly set up multiple computers which are configured the same way and with the same software.
The Advantages of Image Deployment
There are obvious reasons to deploy image in any size of organizations that need to configure multiple computers for the following advantages:
-
Save time and effort: manually setting up just a single computer can be a chore and take a sysadmin from a few hours to an entire day, in contrast, simultaneously deploying a standard image to all computers takes much less time and makes this task much easier.
-
Standardization: if you use image deployment, it ensures that all the computers are as close to identical as possible. However, if you perform installation and configuration one by one, each computer may be slightly different. Standard computer’s management and maintenance are a lot easier than disparate ones.
-
Rapid bare-metal installation: if your company ordered multiple new computers, as a sysadmin you want to install a customized OS, unique combination of software, and specially configured settings. Install the OS and the software on your source computer, tweak all the settings and create an image, and then deploy the image to all of your target computers with image deployment software.
Free Image Deployment Software - AOMEI Image Deploy
Most organizations know the advantages of image deployment solution and there are many OS deployment tools on the market for this task. However, some of them are extremely hard to use and some of them don’t support the latest technology. Besides, organizations received computers over the years from many manufacturers have different hardware make and model. Then, is there any easy-to-use and complete image deployment software?
Free AOMEI Image Deploy is your best image deployment software, which guides you through step-by-step wizards, with built-in universal restore technology, allowing users of any skill level to deploy image to multiple computers with identical or dissimilar hardware. What's more, this freeware supports all Windows operating systems, including Windows 11/10/8.1/8/7 and Windows Server 2003/2008 (R2)/2011/2012 (R2)/2016/2019/2022.
Download AOMEI Image Deploy on your PC or Server now!
2 Methods for Image Deployment with AOMEI Image Deploy
When using AOMEI Image Deploy (AID) to restore system to multiple computers at the same time, you need to select one computer as the server computer, and then install the AID software on the server computer. And identify all other computers that you want to deploy the image to as client computers.
Generally speaking, the server computer can be any PC or server machine, while the client computer is used as the computer that receives the system backup image without an operating system.
Please note that you need to prepare a system image backup or a disk backup without SID in advance, because backup file containing SID may cause incompatibility of the deployed computers. In this case, we advise you to first remove SID with sysprep and then deploy the image without SID. There are 2 methods for image deployment with the free image deployment software - AOMEI Image Deploy.
- Method 1: You need to download the image deployment software - AOMEI Image Deploy and the free backup software - AOMEI Backupper Standard to accomplish this task. This method needs to be operated on two different software separately.
- Method 2: If you don't want to download two software, then you can choose the all-in-one backup and restore software - AOMEI Backupper Technician or Technician Plus to complete the system backup and image deployment. In addition, you can also use various other functions on the software, including backup, restore, clone, create bootable disks, etc to protect your computer in all aspects.
The preparation and steps for the two methods are the same, so you can choose either method based on your own needs.
Note: The standalone AOMEI Image Deploy only supports BIOS boot while the integrated AOMEI Image Deploy in AOMEI Backupper Technician/Technician Plus supports both BIOS and UEFI boot.
Preparation for Image Deployment
Before deploying image to multiple computers, there are a few things that are necessary to confirm and prepare for AOMEI Image Deploy to run smoothly. Let's have a look.
-
You need to select a fully functioned machine running Windows PC system or Windows Server system as server computer, and the machines that need to be deployed are called client computers. Please check and make sure the server computer and all the client computers are on the same network segment of the same LAN.
-
Please confirm the NIC (also known as network adapter) in all the client computers supports PXE boot.
-
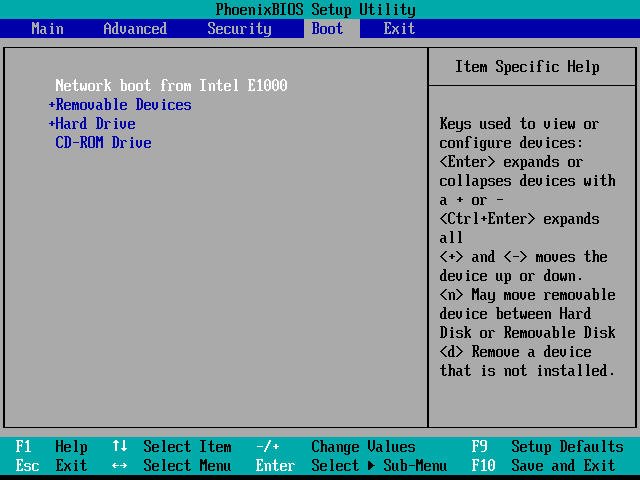
Start all the client computers and enter into BIOS to set the network boot (PXE boot) as the first boot device.

-
Please confirm the sequence number of the destination disks that are used for image deployment is the same. It is recommended to remove all other disks in the client computer but only keep the destination disk for image deployment.
-
Please confirm the Windows Recovery Environment (Windows RE) in the server computer system is complete. If it is incomplete or the system is older than Windows 7, please download Windows AIK/ADK. If you wouldn't like to download it, please choose a machine running Windows 7 or higher system as server computer.
-
Custom a machine's operating system (OS), applications, settings and data to be your desired configuration. Create a full system image backup or disk image backup on the machine with AOMEI Backupper. The machine can be the server computer or personal computer. But the system backup or disk backup image file must be saved to a NAS or network share folder which is on the same network segment of the same LAN as the server computer.
When all the requirements and preparations are ready, please follow the steps to deploy image to multiple computers.
Deploy OS Image over Network with AOMEI Image Deploy
Here, I'll take the first method as an example and show you how to deploy windows 10 image to multiple computers:
1. Install and launch AOMEI Image Deploy. To boot up the client computers, there are two ways to create bootable WinPE ISO.
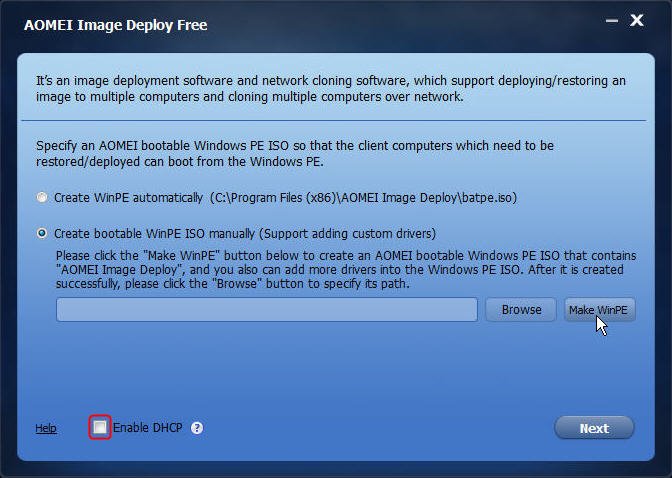
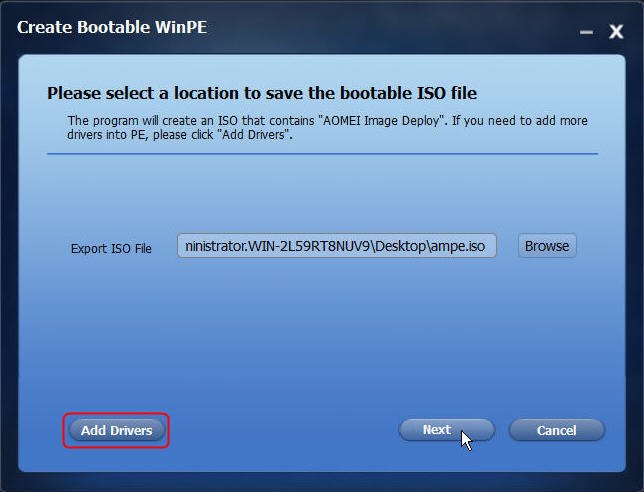
There may be a chance of drivers being incompatible with your hardware and the WinPE cannot start up the client computers. If so, please consider "Create bootable WinPE ISO manually" which allows you to add custom drivers into WinPE.
Note: To deploy Windows image over network, there must be a DHCP server in your LAN. If no, please tick the checkbox before "Enable DHCP".
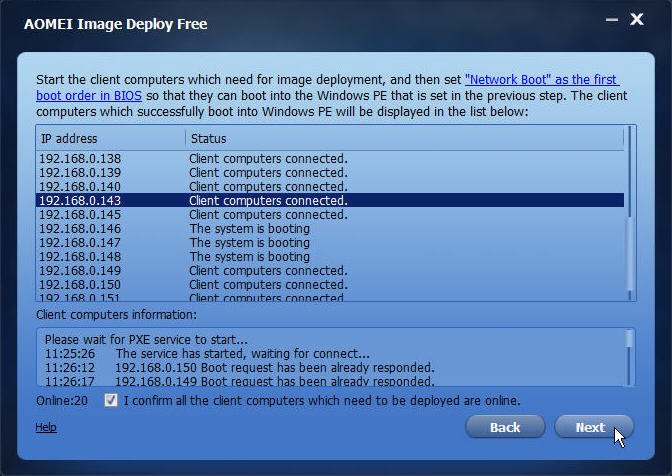
2. Once AOMEI Image Deploy shows "The service has started, waiting for connect...", start all the client computers. If all the settings are correct, the computers will boot into AOMEI Image Deploy recovery environment and each computer will display its booting progress as shown below:
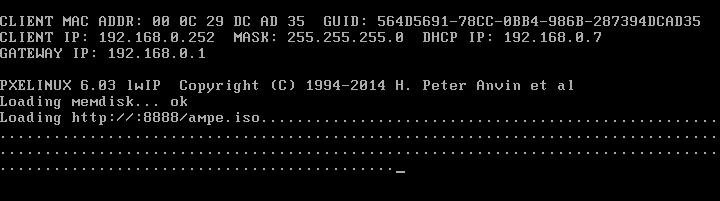
At the same time, the booting progress of each client computer (defined via IP address) will display on AOMEI Image Deploy. Once a client computer has successfully connected to the AOMEI Image Deploy service, it will show "Client computers connected".
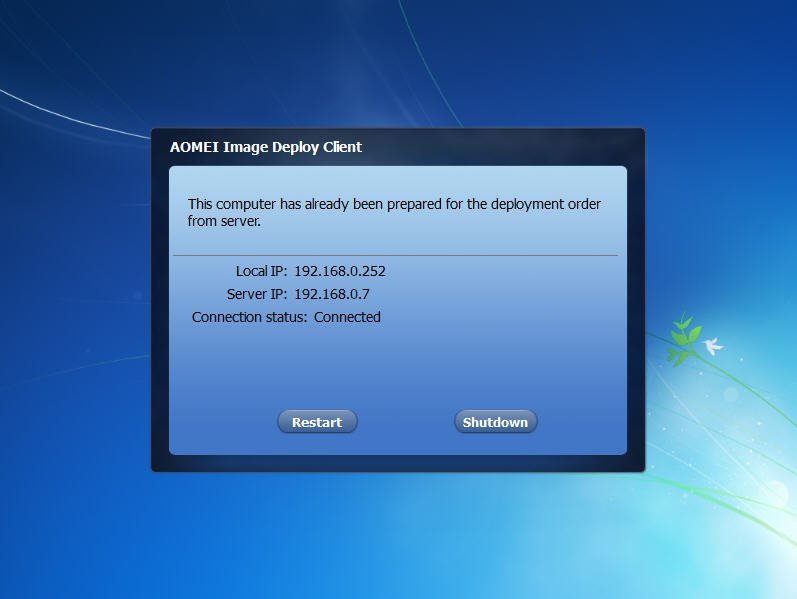
On the client computer, it will also show the local IP, server IP and connection status. When all the client computers have successfully connected to the AOMEI Image Deploy service, tick the checkbox before "I confirm all the client…" and click the "Next".
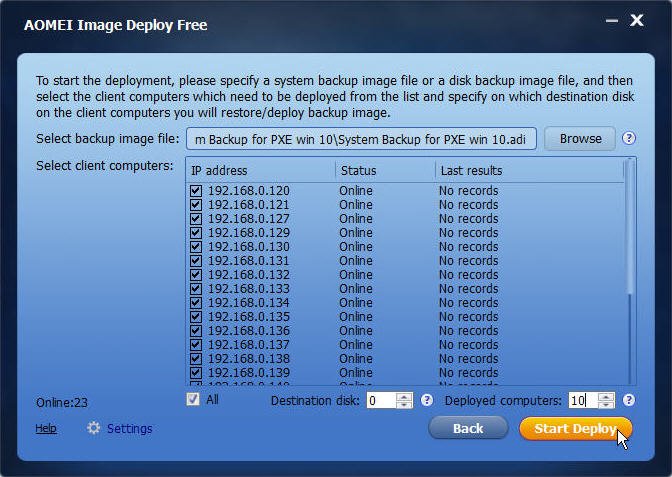
3. Here you need to specify the system/disk backup image you want to deploy and configure how to deploy it to the client computers.
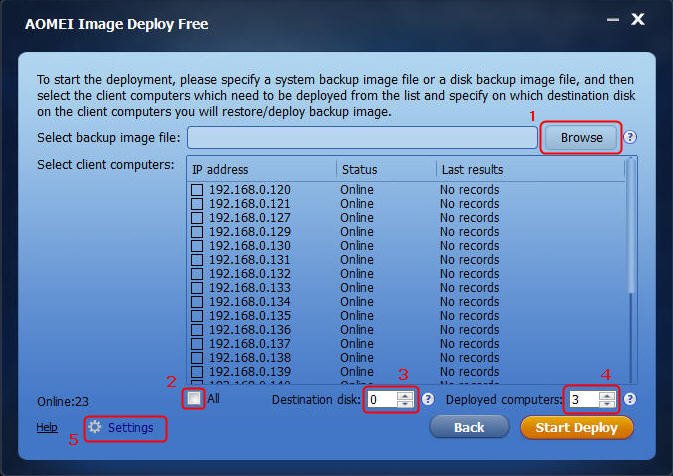
3.1 Click "Browse" to find the system backup or disk backup image file you have prepared, and then click "Add share or NAS device". In the pop-up window, enter the network or NAS path where the image file is stored. Then, select the image you want to deploy and click "OK".

3.2 Tick the checkbox before the computer (defined via IP address) on which to deploy the specified backup image, or tick the checkbox before "All" to select all the listed computers.
3.3 Input the destination disk number on which to deploy the specified backup image. Normally if there is only one disk in the computer, it is 0. If you are not sure, please remove other disks.
Note: Image deployment will overwrite the destination disk. Make sure that you are performing the deployment to the correct computer and to the correct destination disk on that computer.
3.4 Input every time how many computers will be deployed. The more computers you input, the slower the deployment speed will be.
3.5 Click "Settings" to preset client computers name and IP.
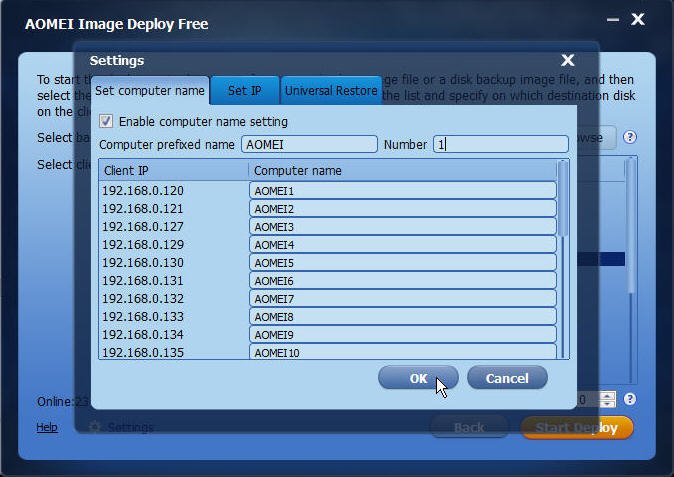
Tips:
👉 When you are setting IPs, it can be cumbersome and time-consuming to set them manually if you have multiple client computers to set up. You can upgrade to the Technician version to set up automatic IP assignment for all client computers.
👉 If the hardware of the client computers is different from the computer on which you create the image, you can enable "Universal Restore" (available in the Technician version).
4. Here takes Windows 10 system (OS) image deployment and 10 computers for deployment every time for example. If you confirm, click "Start Deploy" to deploy image to computers.
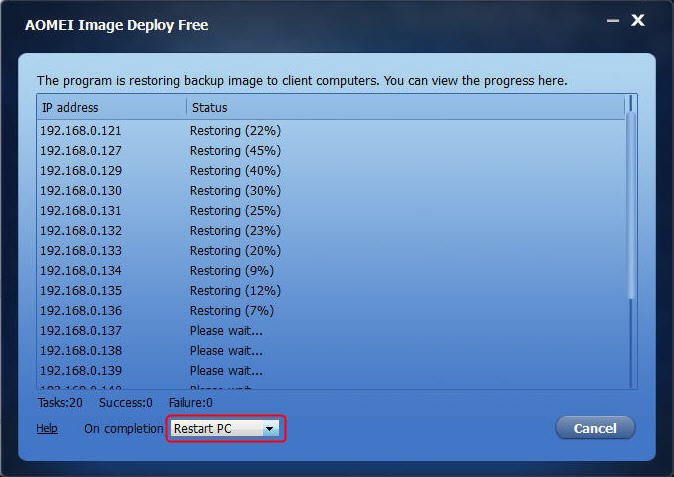
5. Here you can view the image deployment progress of each client computer. Besides, you can choose whether to shut down or restart the client computers after the deployment is completed.
The image deployment task has never been so easy. You just need to make sure that you haven't forgotten an important setting or an important piece of software, since any mistake you make will be cloned to all the client machines. If you support a large batch of computers, AOMEI Image Deploy is the best practice.

