How to Create a System Image Using Windows 7 Backup and Restore
This tutorial will show you how to create a system image using Windows 7 built-in Backup and Restore utility as well as powerful 3rd party software AOMEI Backupper step by step.
By Ivy Updated on October 18, 2022
Quick Navigation:
About “Create a system image” in Windows 7
Create a system image feature in Windows 7 Backup and Restore is a helpful feature in backing up system. Windows 7 Backup and Restore allows its user to create a system image, which is an exact copy of the entire drive.
This system image backup contains Windows OS and your system configurations, installed programs and created files. If the hard drive or system refuses to work, one can restore all contents of the computer via the system backup image.
When restoring from the backup image, a complete restore is performed. During this process, all current programs, system settings and files on the hard drive will be replaced. This system image contains only the drives that Windows needs to run. If you want to include other data drives, you can manually create a system image.
How to create a system image using Windows 7 utility
In the first place, please connect the external device if you want to store the backup image outside. It is suggested to store the system image separately from the running system so that it won’t be damaged if bad luck occurs.
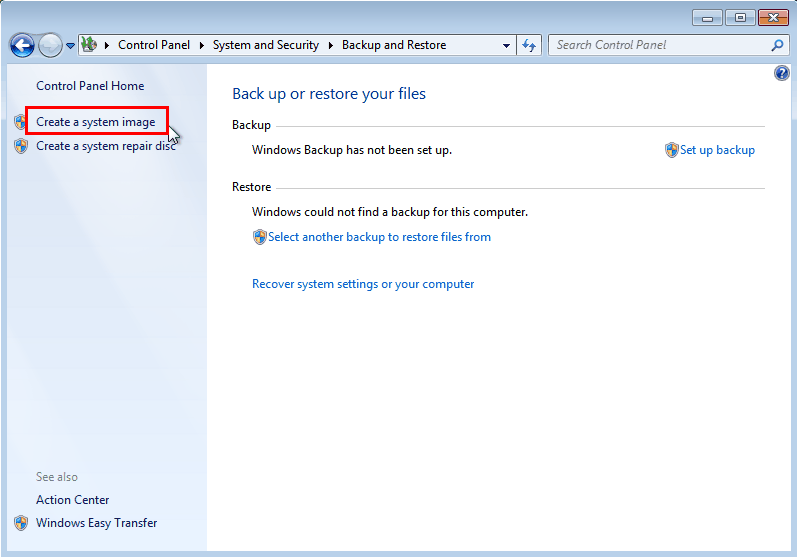
Next, access Windows 7 Backup and Restore “Create a system image” via Start > Control Panel > System and Security > Backup and Restore > Create a system image on the left pane.
Then, it will search for the device for a while and pop up the following window. Select the desire backup location. Here will take backup system to a new volume for example.

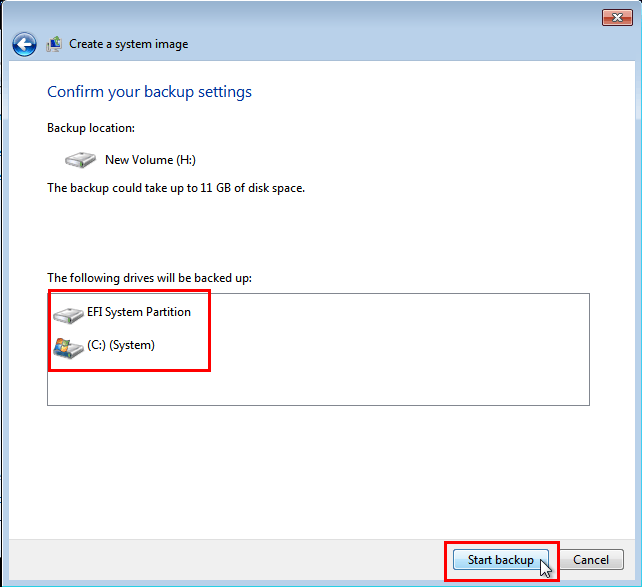
Finally, you need to confirm the backup settings. The backup contains the EFI System Partition and entire C drive including your installed applications and created personal files. Click Start backup.
Tips:
-
You need to format the hard drive to NTFS file system before you can use it as the backup storage.
-
If you choose network location as the backup storage, you can only create the latest backup image. All previous system images will be overwritten.
Problems of Windows 7 Backup and Restore
It is quite simple to create a system image by using Backup and Restore in Windows 7. There are some drawbacks of this feature that you cannot ignore.
-
As it claims in Windows Help, you cannot restore individual items from the entire system image. That is to say, you have to either restore the entire system image to get the files you need or backup system and personal files separately.
-
You cannot create a system image to USB flash drive using Windows 7 Backup and Restore. This may be because that Microsoft thinks the USB flash drive is somewhat not solid to store system image. This may be set at an early time so even if the USB drive improves a lot recently, you will still get the warning of “the drive is not a valid backup location” and cannot continue the backup. This is quite awful since USB drive is of much convenience.
-
You can create a system image on current hard disk and later copy it to USB drive to solve above problem. However, the system image is more vulnerable to unauthorized access on these removable devices if you don’t encrypt it.
Advanced software to create a system image - AOMEI Backupper
As you see, it is quite necessary to find an all-around Windows 7 Backup and Restore alternative. AOMEI Backupper Professional is such a backup utility with full backup solutions.
- You can use it to create a system image, create image of entire disk, or backup individual files as per your need.
- It offers you Full/Incremental/Differential backup types.
- You can schedule a backup to run daily, weekly, or monthly, etc.
- It will auto delete old backups if you set up Backup Scheme.
- You are allowed to encrypt the backup image during the process.
Let’s learn how to perform the system backup task in this software.
Steps to create a Windows 7 system image to USB drive
1. Download AOMEI Backupper Professional 30 days free trial.
2. Install and run AOMEI Backupper. Click Backup and then System Backup.

3. As you can see that the system drive C and the hidden EFI partition are selected by default. Now click the second bar to select USB drive as the destination path.

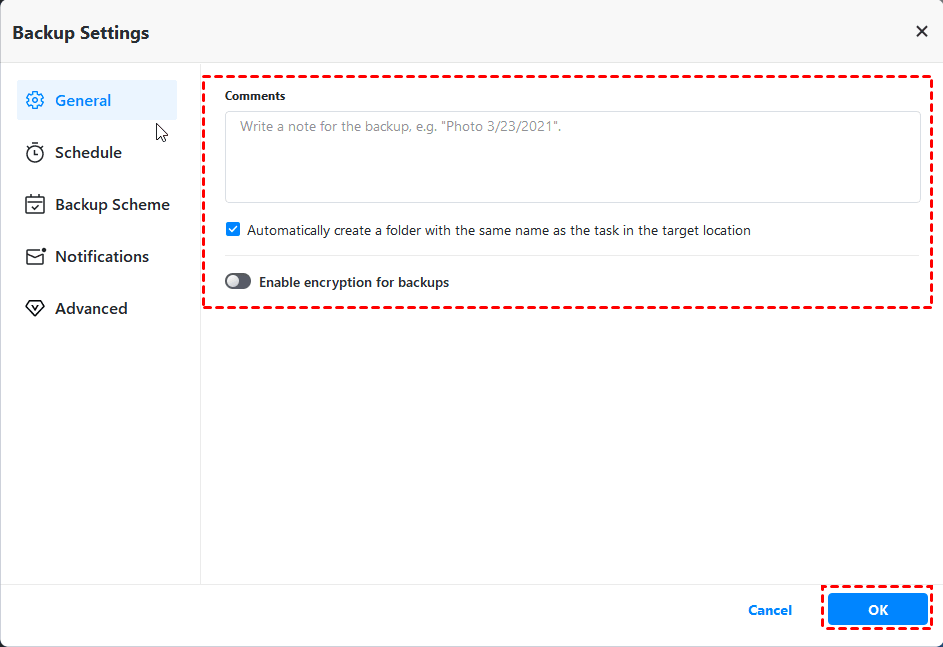
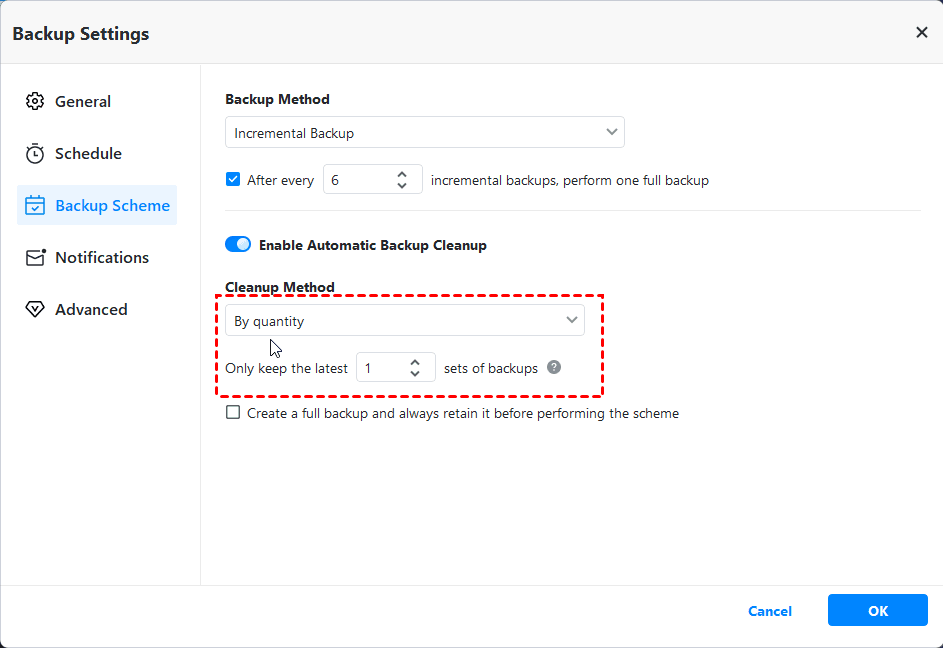
4. (Optional) Do more settings according to your situation.
- Options: you can set password encryption, email notification, image compression, etc.
- Schedule Backup: set backup frequency (Daily, Weekly, Monthly, Event-trigger and USB plug in).

- Backup Scheme: choose backup method (Full, Incremental, Differential) and set auto delete old backups.
5. Then click Start Backup.
Tip: For advanced users, AOMEI Backupper offers to create a system image via command line function with AMBackup.exe program.
Don’t you find it is quite easy to create a system image with the help of AOMEI Backupper? To be honest, both methods are fine yet the latter one safeguards more for your system. You can create a bootable USB drive in Tools to backup hard drive without booting Windows if the need ever arises. Also, you can transfer Windows 7 to a new hard drive using its Clone feature.

