2 Free Ways to Schedule Hourly Backup in Windows 10/8/7
How to perform hourly backup to protect critical or frequently modified data? File History is indeed an option for files and folders, but if you need to back up system, hard disk as well, or want a wider range of application, try Method 2.
By Delia Updated on December 11, 2024
Case: I want to perform Windows backup every hour
I would like to schedule a backup, where an incremental backup is performed every hour between 7am-7pm. How can I do this? Thanks in advance.
For some particularly important or sensitive data, weekly backup or even daily backup seem insufficient. Instead, you may need to run it every hour, every 2 hours, etc. But how can you perform hourly backup in Windows PC?
You probably know the built-in Backup and Restore utility, it enables you to schedule automatic backup in Windows 10/8/7, but the frequency can only reach up to daily. To back up every hour, please turn to the following methods.
Way 1. Hourly backup user folders in Windows 10/8 via File History
Since Windows 8, you can use File History (similar to Apple’s Time Machine) to auto back up personal files. You just need to select a target drive, then specify what to backup and how often to backup.
As you can see, this tool is quite convenient, but not perfect - the destination is limited to external drive or network location; the feature is mainly designed to back up user folders and cannot be used for system recovery. Moreover, sometimes you may find Windows 10 file history not backing up all files.
So let me sum up, if you are running Windows 10/8.1/8 and want to back up folders every hour to an external drive or network location, you can use File History.
If you want to protect really important files/system/entire PC, or schedule hourly backup in earlier OS, please turn to specialized backup software (Way 2) for better support.
The approaches to access File History in different OS:
In Windows 8: Control Panel > System and Security > File History
In Windows 8.1: Start screen > Search for “File History” directly
In Windows 10: Start > Settings > Update & Security > Backup > Back up using File History
Then, you can start to set up the backup. The following steps are based on Windows 10 as an example.
How to do hourly backup via File History:
1. Connect your external drive and click Add a drive to specify it as the target.
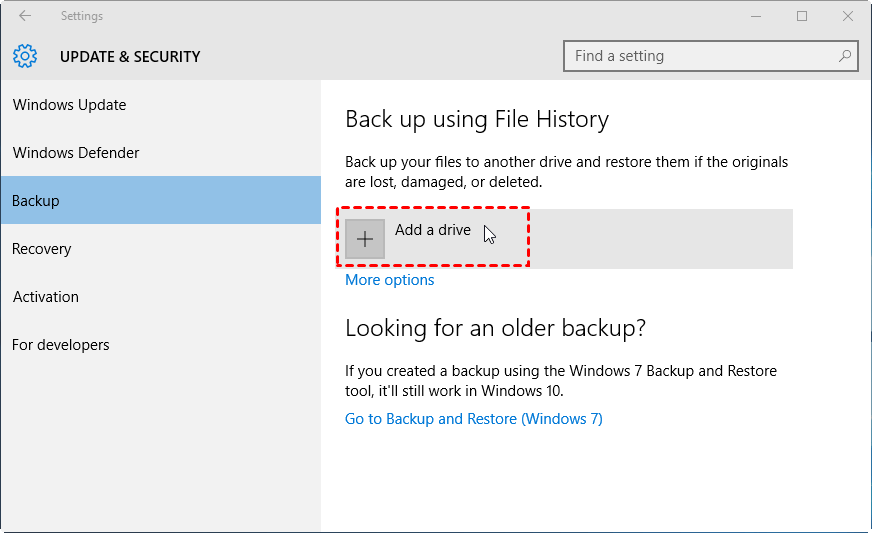
If you want to specify a network location manually, please go to More options > See advanced settings > Select drive > Add network location.

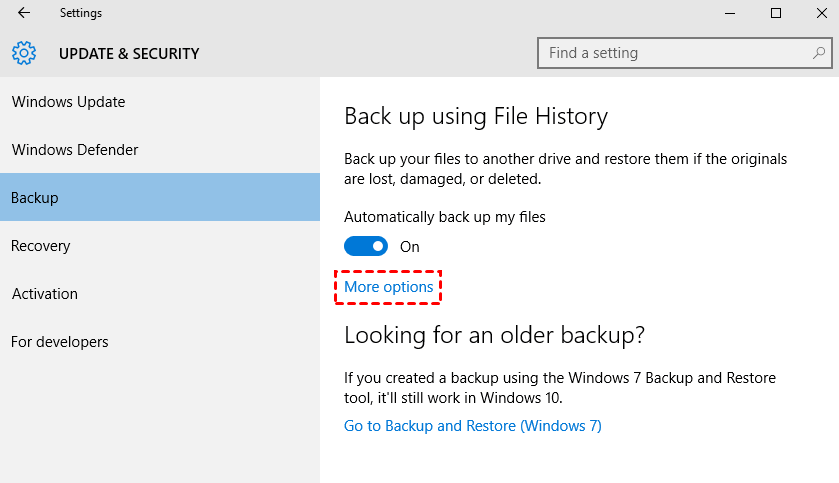
2. Toggle on Automatically back up my files and configure further settings in More options.
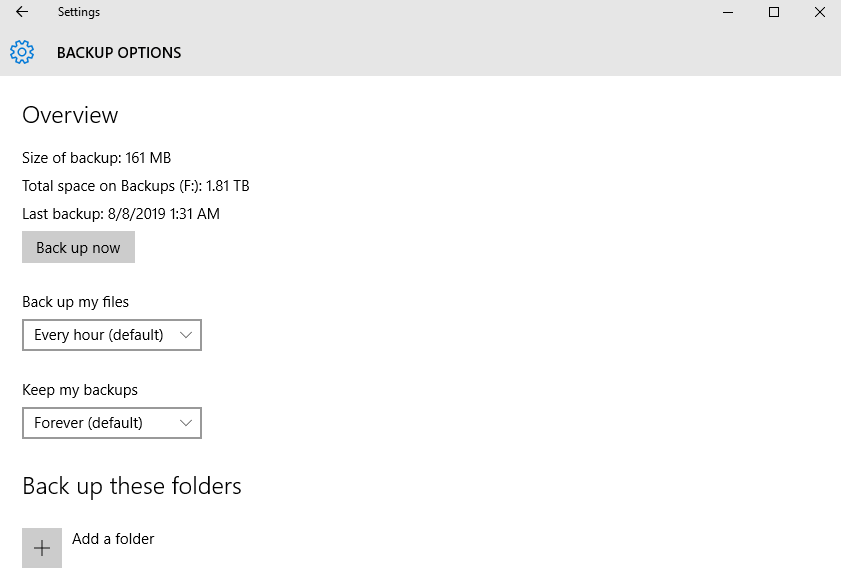
3. The default frequency is Every hour, you can also run it every 3 hours, every 30 minutes, etc. as you like. Meanwhile, you can choose how long to keep the backups.
In the next section, you can click Add a folder to specify additional folders you want to back up, or exclude folders you don’t want back up.
5. Now the backup is all set up. If you want to stop the backup or reset it from scratch, just click on Stop using drive below.
Way 2. Hourly backup files or OS in all Windows PC via freeware
AOMEI Backupper Standard is a powerful yet easy-to-use freeware. It applies for Windows 10/8.1/8/7/Vista/XP, and the supported target devices including internal/external drive, NAS/network share, USB, cloud service.
It includes file backup/cloud backup/partition backup/system backup/disk backup mode, and the complete schedule options enables you to set up backups every hour/2 hours/3 hours/etc. during a certain period of time.
In addition to full backup, you can also perform incremental and differential backup to copy only changed files.
AOMEI Backupper has different editions for different user groups, and the complete free Standard edition already contains the basic functions you need to perform hourly backup. Download it to have a try:
*If you want to back up Windows Server every hour, you can try the Server edition.
How to schedule hourly backup via AOMEI Backupper:
1. Launch the software, go to Backup tab and choose File Backup. If you want to back up the operating system, choose System Backup instead.

Tip: You can backup files to AOMEI Cloud with Cloud Backup feature. It offers you 1TB free storage in 15 days after you registry an AOMEI account.
2. Click Add Folder or Add File to select the data you want to back up.

3. Specify a destination. In addition to internal or external drive, you can also click on the small triangle to Select a network location or Select a cloud drive.

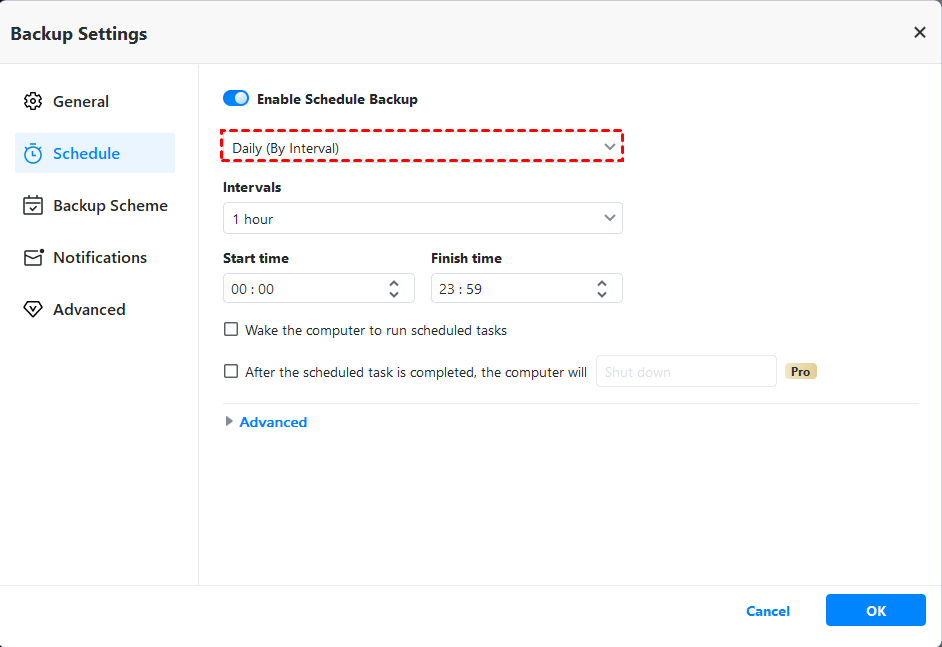
4. Click Schedule at the bottom. In the popping out window, keep the default selection of Daily and choose Intervals to specify the start time and finish time.
Then, select the backup frequency during this time period. Thus you can backup hourly from 00:00 - 23:59, or only during certain hours (like office hours).
You can also set up Weekly or Monthly backup, or upgrade Professional edition to unlock Event triggers (like startup or shutdown) and USB plug in backup.
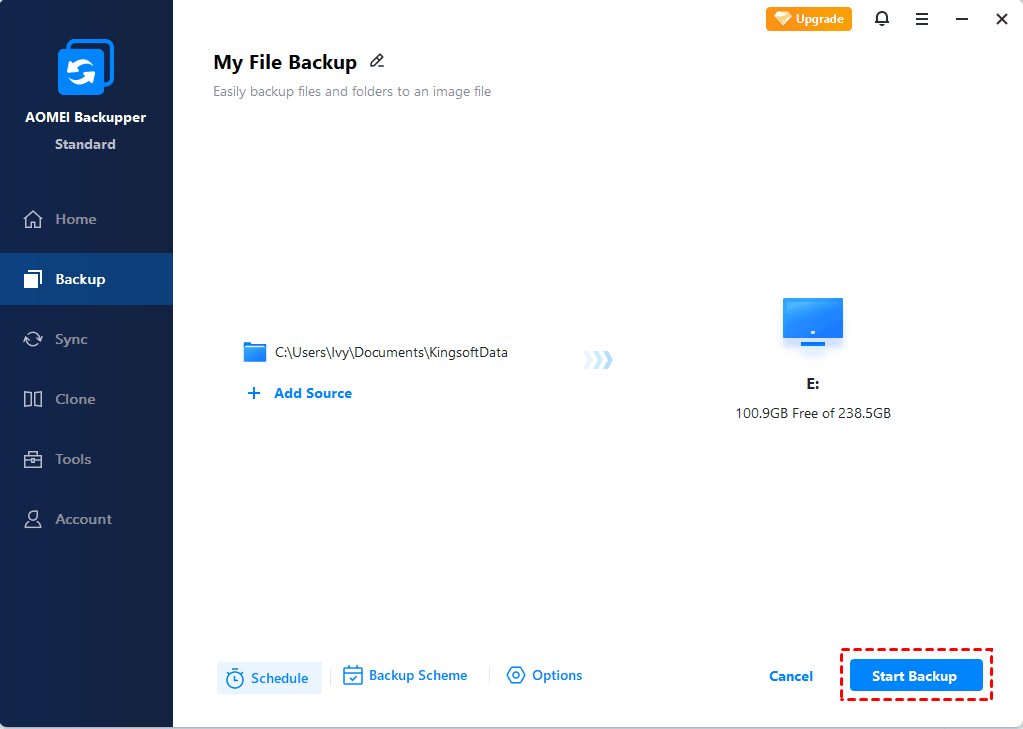
5. Click Start Backup to execute the task.
Other Useful Features:
◉ Select backup mode: Manual or scheduled full/incremental/differential backup. The scheduled differential backup is only available in Pro or higher editions.
◉ Auto deletion (advanced editions only): Set up a backup scheme to auto delete old backup images and therefore save your storage space.
◉ File filter (advanced editions only): Include or exclude files with certain extension in the source directory.
Summary
You could set up automatic backup with a tight schedule to protect critical data in Windows 10/8/7, e.g. hourly backup. To do this, AOMEI Backupper is a good helper with its complete schedule options. And if it’s still not frequent enough, you can perform continuous backup with the real time sync function.
Moreover, this tool includes a powerful disk clone feature. No matter you want to transfer the OS to new disk without reinstallng, or copy data from one hard drive to another, you can implement the operation with ease.

