How to Image a Computer/Laptop in Windows 11, 10, 8, 7
Want to image a computer in Windows 11/10/8/7 but do not know how? This article will show you how to image a PC in two methods.
By Lily Updated on August 28, 2025
What does it mean to image a computer?
Imaging a computer means to make an image backup for the whole hard drive, including the system, boot files, applications, and all the other files. When your hard drive crashes because of Windows update error, unstable drivers, malware, and virus attack, an image backup of your computer can help you to restore system and all your stuff back.
To image a laptop or desktop computer in Windows 11/10/8/7, Windows built-in Backup and Restore tool can help you make it while the whole process is kind of complicated. If you prefer an easier way, you can try third party backup software named AOMEI Backupper, just scroll down to Method 2 to learn more. And next, we will start to tell you how to image a computer with Windows Backup and Restore utility.
Method 1. Image a computer with Windows Backup and Restore utility
You can create image backup with Backup and Restore tool in Windows 11/10/7 or with System Image Backup in Windows 8.
Step 1. Open system image backup.
- Windows 7/10: Go to Start > type “backup” in the search box > click Backup and Restore > click Create a system image.
- Windows 8: Go to Start > type “file history” and click the File History entry > click System Image Backup > click Create a system image.
- Windows 11: Go to Settings -> System -> Storage -> Advanced Storage options > Backup options, then scroll down to Looking for an older backup and select Go to Backup and Restore (Windows 7). Click Create a system image.
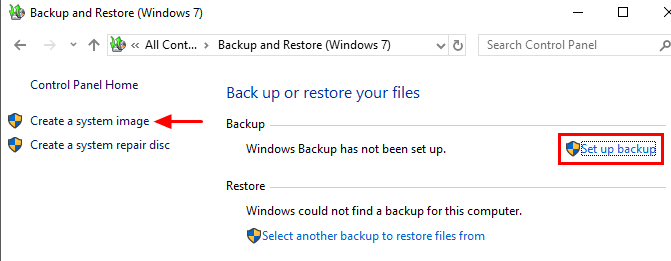
Note: There’s one option named “Set up backup”. You can also click it to create a system image. On this occasion, you can add other files that you want to backup besides the system.
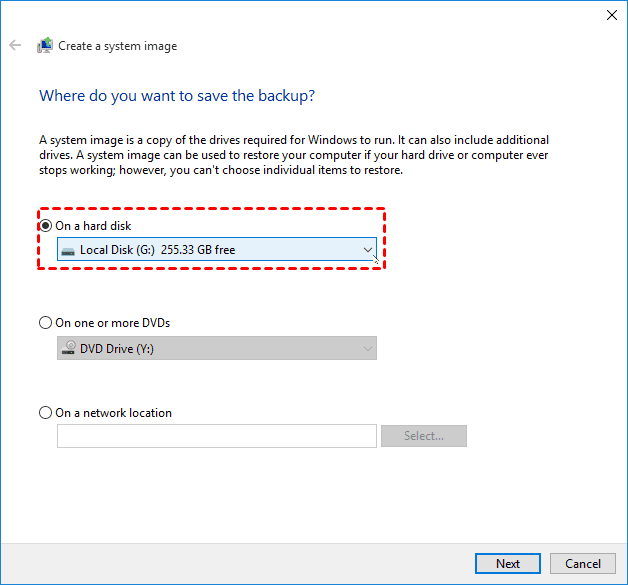
Step 2. Choose where to store the backup image, and click Next.
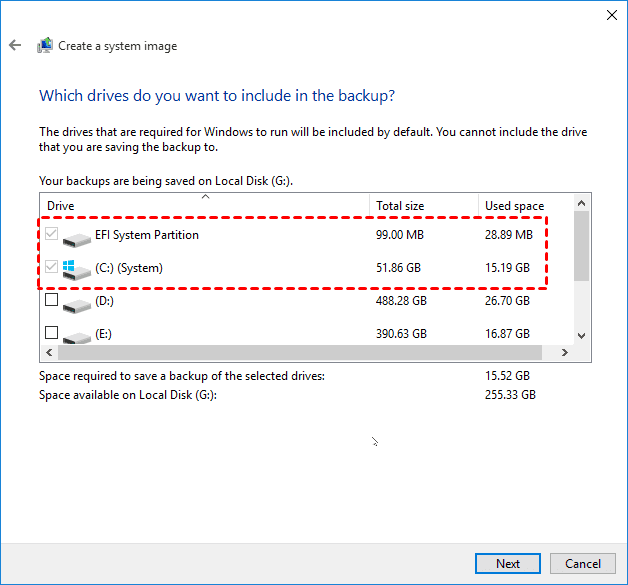
Step 3. Check all the hard drives and partitions you want to backup and click Next. The drives that are required for Windows to run are included by default.
Step 4. Confirm the settings and click Start backup.
When the backup is done, you'll be asked if you want to create a system repair disc (CD/DVD) to access the recovery options if your computer is unable to boot. If you do not have the CD-ROM device, you can choose to create Windows recovery disk with your USB flash drive instead.
Method 2. Image a computer hard drive with AOMEI Backupper Standard
Besides Windows backup tool, you can also use free backup software to image a laptop computer or desktop computer. AOMEI Backupper Standard is a powerful backup and recovery software that is totally free to use. Compared to Windows Backup and Restore utility, AOMEI Backupper has made it easier and more flexible to create an image backup.
-
It offers multiple backup types like system backup, disk backup, partition backup, and file backup. You can choose to image the whole hard drive or just the selected files you need.
-
It lets you set custom scheduled backup task: daily/weekly/monthly. And it’s possible to set up multiple backups.
-
It allows you to save the backup to your local disk, external hard drive or network shared folder, etc.
Learn how to image a laptop or PC with AOMEI Backupper Standard:
Step 1. Download, install and run this free backup tool.
Step 2. Click Backup and select Disk Backup. If you only want to include Windows system, you can choose System Backup instead.

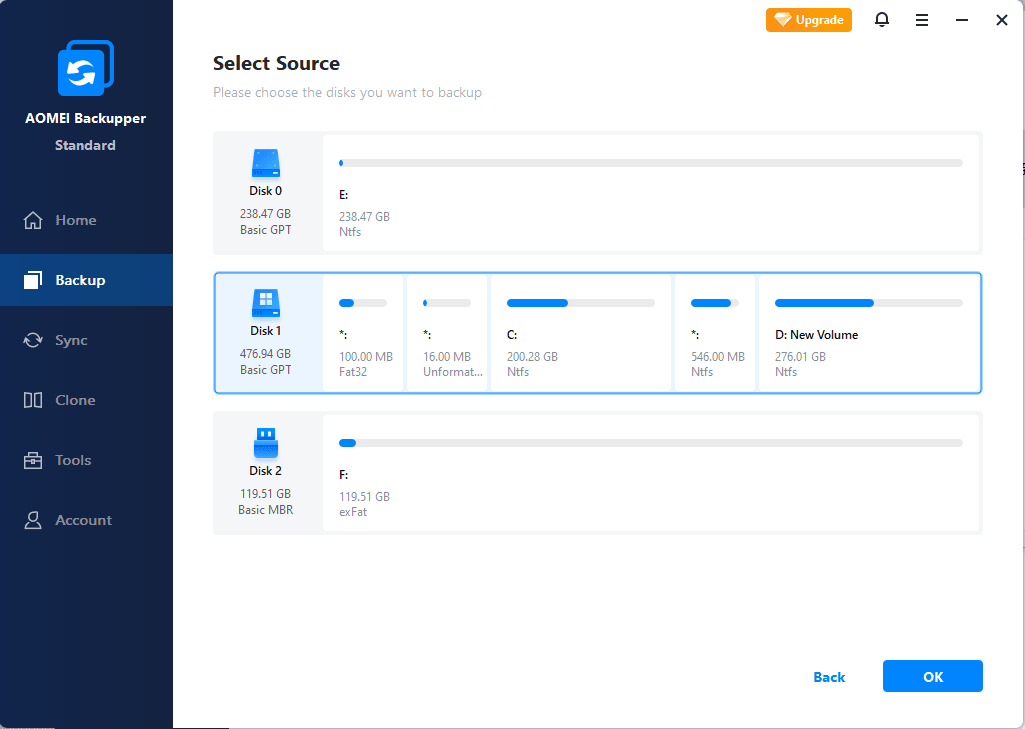
Step 3. Click Select Source to select the computer hard drive that you want to include in the backup. You can add several disks to be backed up at one time.

Step 4. Click the PC icon to select a destination path to save the image backup. You can select local hard drive, external hard drive, a partition, or a shared folder over NAS network.

Step 5. Click Start Backup to run the backup.
Notes:
👉 Options: you can click it to add comments for the system backup, enable email notification, select sector-by-sector backup or set compression level, etc.
👉 Schedule: click to set your own custom scheduled backup.
👉 Backup Scheme: it helps you to set up rules to delete older backups automatically so that there is enough space on your backup location. If you are interested, you can upgrade to AOMEI Backupper Professional to make it.
👉 When you need to restore the system, just go to Home > find the backup task > click more options and choose Restore to make it.
👉 In order to restore the backup when your computer is failed to boot, you can create a bootable media when the backup finishes.
Conclusion
Now you know how to image a computer in Windows 11/10/8/7. Compared to Windows Backup and Restore utility, AOMEI Backupper Standard can help you finish the job in an easier way.
In addition, if you want to replace the hard drive in the future, this software can also help you clone your computer hard drive to another one directly with its disk clone feature. Just give it a try by yourself now!

