Windows 10 Multiple Backups, 4 Ways Are Here
This article is written for Windows 10 multiple backups. Scroll down to learn more and here are 4 ways available.
By Ivy Updated on October 24, 2024
One backup is not enough
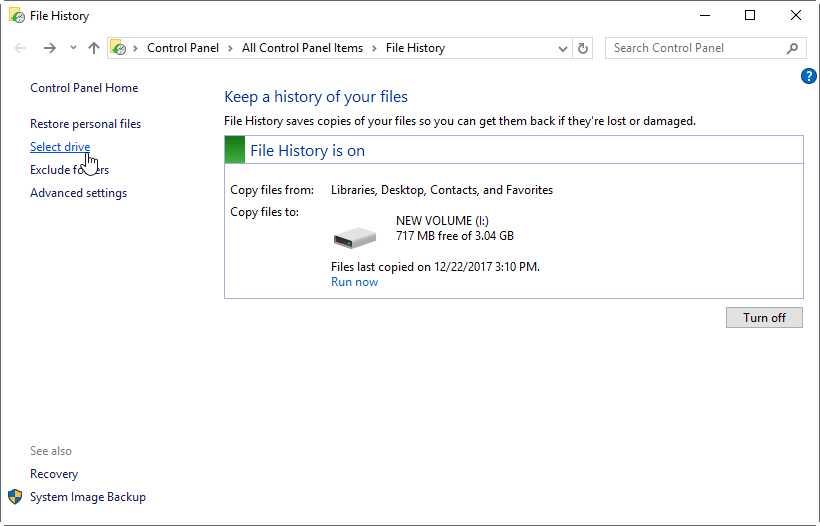
In Windows 10, you can use File History to save multiple versions of your files, and use Backup and Restore to create system image backup. However, no matter which tool you use, you can only have one backup task. You can only modify the backup task or delete the existing one to create a new one, but you cannot keep running multiple backups in Windows 10.
You may want to create a backup for personal files and another for system. Keeping one backup in a single location is also risky, because the backup drive may also fail. Therefore, you should save more than one backup, and it is even better to save the redundant backup on different locations.
Here in this guide, I’ll show you 3 methods to set up multiple backups in Windows 10. You can also have a try if you want Windows 10 backup to multiple drives, please go to the advanced way directly.
Three common ways to let Windows 10 keep multiple backups
To backup your data properly, you should save multiple backups on different locations. There are three ways to trick Windows 10 to save more backup tasks. The previous two ways will use Windows 10 backup utility, namely change backup location and backup files with different accounts. The third one is to set multiple backup schedules with Task Scheduler.
Method 1: Manually change backup location
After creating a backup with File History, you can connect another USB drive or network drive. Temporarily switch File History destination, and then File History will backup to the new location. After that, switch it backup to the original location.
You can also use this method to backup to multiple drives with File History.
Method 2: Use different user account
You can create multiple user accounts. Each user account, you can set File History to backup to a different external drive. When you want to backup to another drive, you can simply login to that corresponding user account.
Depending on how frequently you have configured the File History to run, the backup should happen automatically. Of course, you can also manually to start the File History backup on another drive.
Method 3: Windows 10 multiple scheduled backup with Task Scheduler
Always manually changing backup location or user account may be too annoying. Luckily, you can use Windows Task Scheduler to run multiple scheduled backup tasks automatically. You can set each scheduled backup with a different backup target location.
This will use Windows 10 WBadmin feature to run image backup. It is not a big deal if you do not know any Wbadmin commands.
You can refer the steps below to set up multiple scheduled backups in Windows 10.
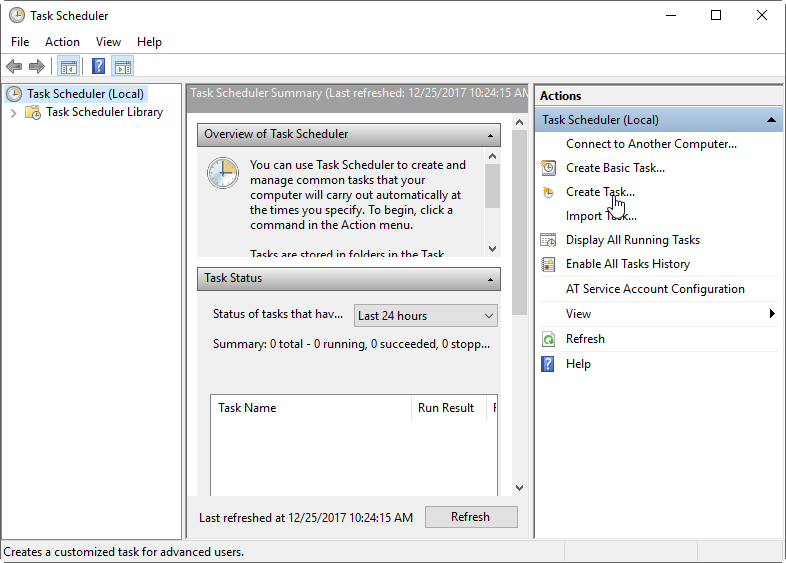
1. Press Windows + R to open a Run window. Then type “taskschd.msc” and press Enter to open Task Scheduler. You can also open Task Scheduler by search it from the Windows 10 search box.
2. Click Create Task to create a task. You can create as many tasks as you need.
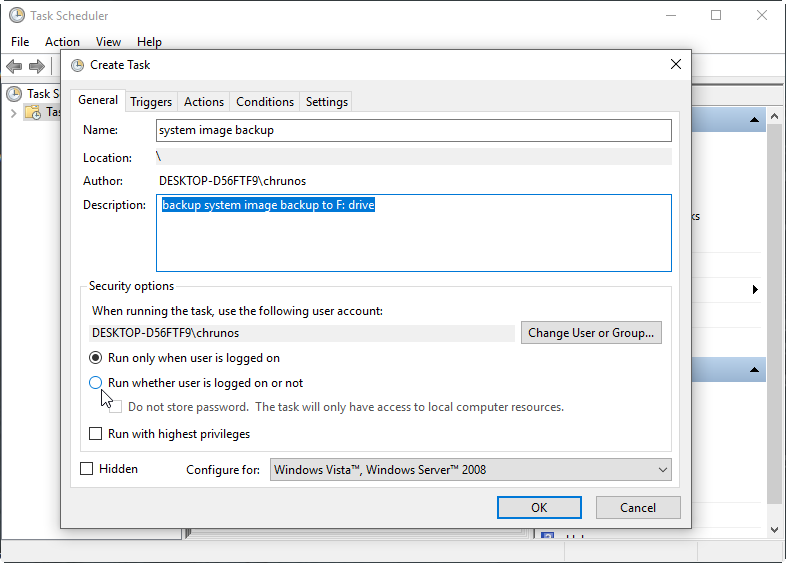
3. Under the General tab, write a task name and description (optional). Under Security option, check the option Run whether user is logged on (optional).
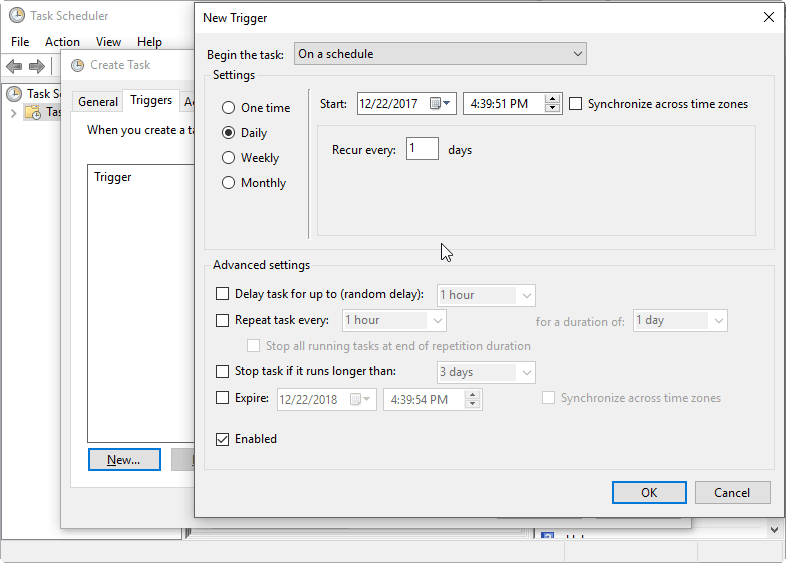
4. Click the Triggers tab, and click New to create a new trigger. From here, you can specify when to run the backup.
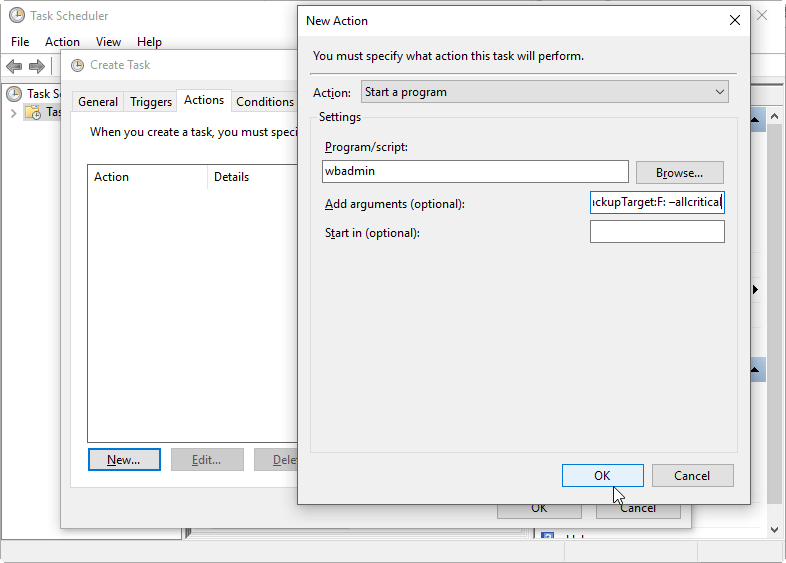
5. Click the Actions tab, and click New. Input “wbadmin” in the Program/script box, and type “start backup -backupTarget:F: –allcritical” (without quotes) in Add argument box. This command is to create a system image backup to F: drive. You can change the command parameters to create your custom backup.
6. Click OK to save this scheduled task. You can need to type in your user password to complete.
After that, you can repeat this process to create multiple backup tasks in Windows 10. If you not know wbadmin and do not want to dig in, then you should consider using free backup software for Windows 10.
Advanced way to create Windows 10 backup with multiple schedules
AOMEI Backupper Standard is a free Windows backup and restore tool, specially designed for Windows PC. It provides File Backup, System Backup, Disk Backup, and Partition Backup.
-
Multiple schedule backups. It lets you schedule automatic daily/weekly/daily backup easily. Scheduled backups are followed by incremental backups or differential backups to save backup disk space.
-
Supports multiple backup drives. You can let Windows 10 backup to multile drives, such as, internal hard drive, external hard drive, USB flash drive. Network share, NAS, etc.
What’s more, it provides more options to customers to backup task, such as email notification, and compression. Let’s see how easy you can use AOMEI Backupper to create multiple backups:
1. Download this free tool and run it on your computer. Click Backup and select one type of backup based on what you want to include in the backup. Here, System Backup it is.
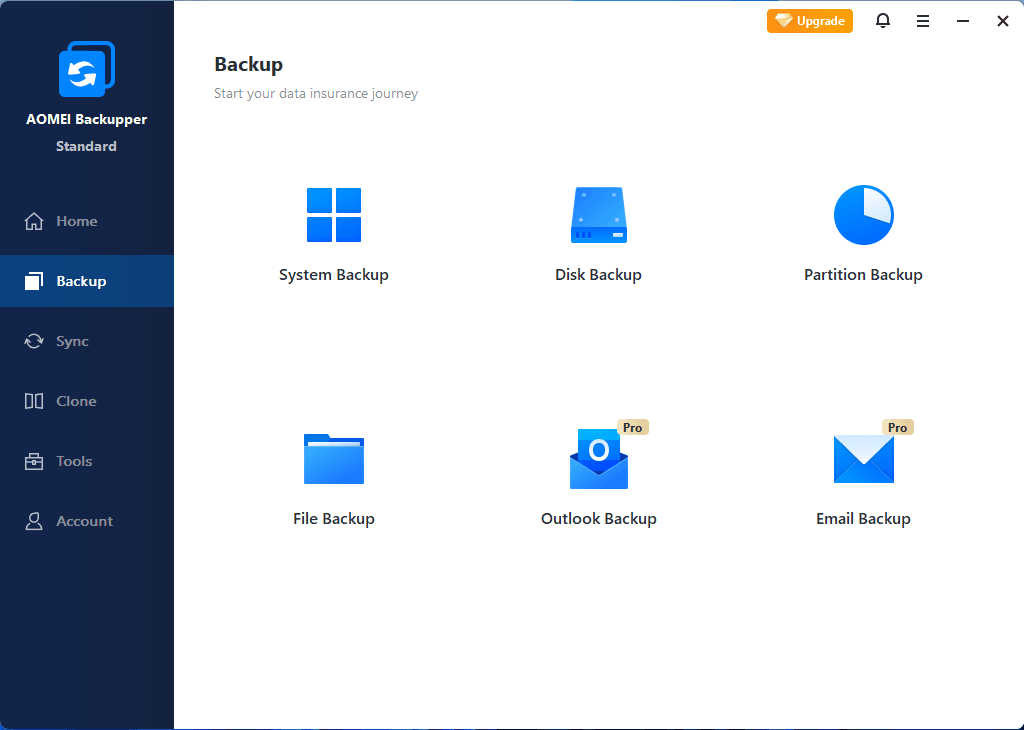
2. System Backup will automatically include the needed backup source for system restore. You just need to click the marked box to select a location for saving the image backup file. If you choose Disk Backup or File Backup, you need to specify backup source first.

3. Click Schedule Backup at the bottom to enable scheduled backup. You can run backups at a specified time daily, weekly, monthly.

4. To view and adjust other settings, you can click “Options”. After that, click “Start Backup” to start the backup.

Note: The Scheme will delete old image files automatically to save disk space for you. This function is available in advanced version, if you are interested in you can upgrade to higher version to explore more.
Conclusion
Now you know how to let Windows 10 backup to multiple drives. You can manually change the backup option, use different user account or use Windows Task Scheduler. However, to some degree, these three methods may be kind of annoying. If you prefer an efficient method, then AOMEI Backupper is the way to go.
AOMEI Backupper can not only help you create multiple scheduled backups to different locations but also offers various other powerful functions. For example, in case of system fails to boot, you can create a bootable disk with AOMEI Backupper, so you can use it to boot your computer and restore to previous state of Windows. Get the tool to enjoy a better way to protect your data and system!

