Complete Guide to Upgrade Windows Server 2019 to 2022
This article provides a guide on how to upgrade your server without data loss or system disruption. You'll find detailed, practical solutions for every stage. Learn the advantages of Windows Server 2022, how to handle compatibility issues, and tips for maintaining server integrity throughout the process.
By Sebastian Updated on September 5, 2025
Overview of Windows Server 2022
Upgrading a server is a critical task that demands precision and thorough planning. For organizations operating on Windows Server 2019, the decision to upgrade to Windows Server 2022 brings many benefits, such as enhanced security features, scalability, and support for modern hardware. In this guide, we’ll walk through every step required to upgrade Windows Server 2019 to 2022 successfully.
- Windows Server 2022 is more "cloud-friendly" and has all the features that Microsoft offers with Azure, and unlocks the potential with Windows Admin Center.
- Windows Server 2022 also has a new set of security features that sits at the core of Windows Server 2022 and is unlocked by having the right hardware under the hood, such as TPM 2.0.
- Besides, it still focuses on the container space, specifically Kubernetes which is the most powerful and popular container orchestration platform. It provides Active Directory identities for containers using group-managed service accounts.
How to Upgrade Windows Server 2019 to 2022 Step by Step
When comparing Windows Server 2022 to 2019, the newer version offers enhanced security, which is why many users are eager to try it. If you're unsure how to upgrade from Windows Server 2019 to 2022, keep reading for a step-by-step guide.
Before starting the in-place upgrade, it's important to prepare:
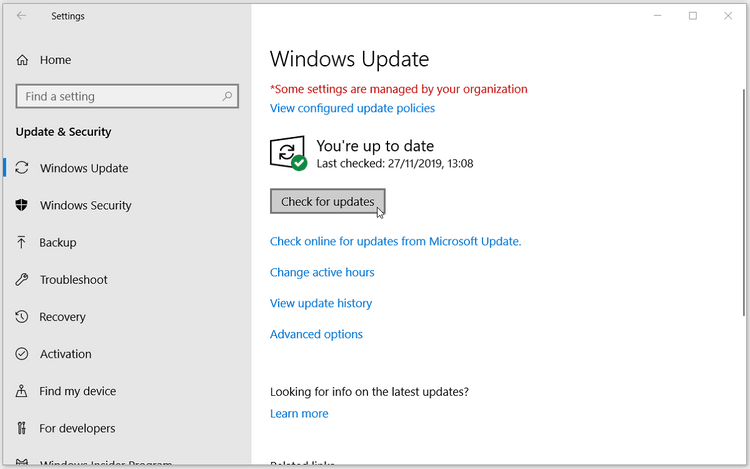
- First, make sure your current system is fully up to date. Head to Settings > Update & Security > Check for Updates. If it shows that your system is up to date, you can proceed. If updates are available, install them before moving forward with the upgrade process.
- Check the Windows Server 2022 system requirements and see if your computer meets them. Click here to learn more about the system requirements for installing Windows Server 2022.
- Backup Windows Server 2019 in advance before upgrading Windows Server 2019 to 2022 for free For detailed steps, you can refer to best way below.

Then, You can follow the steps below to start upgrading from Windows Server 2019 to Windows Server 2022.
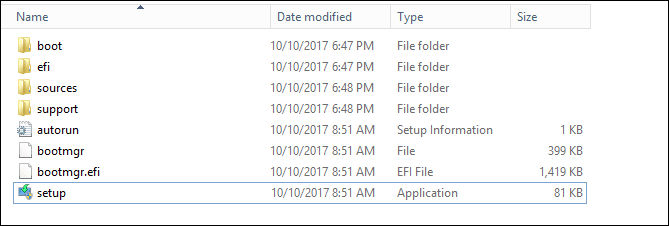
Step 1. Log in to Windows Server 2019 and download the media file from Microsoft, then double-click its Setup.exe file to update and install 2022.
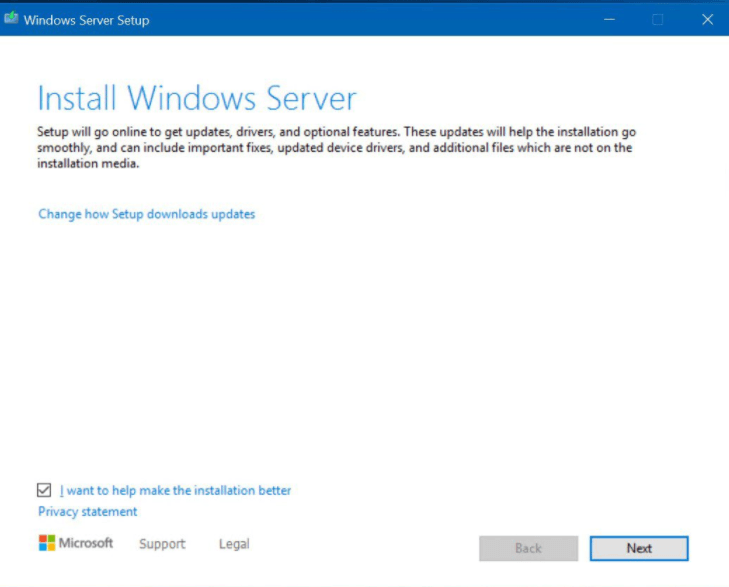
Step 2. In the Install Windows Server window, click Change how Setup downloads updates and then select Download updates, drivers and optional features. Click Next to continue.
Step 3. Input the product key of the current server and click Next.
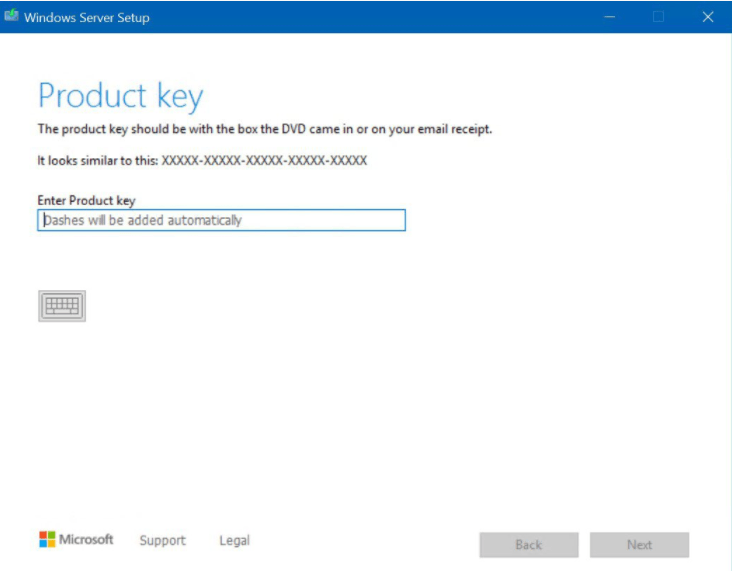
Tip: If you don't know theprocut key, just go to theWindows Server Product Key Boxand check the official mail. Since it is is is listed in the box and sent toyour official mail when you purchase the Windows server 2019.
Step 4. Select the edition of Windows Server 2022, which need to be the same as 2019, and then click Next.
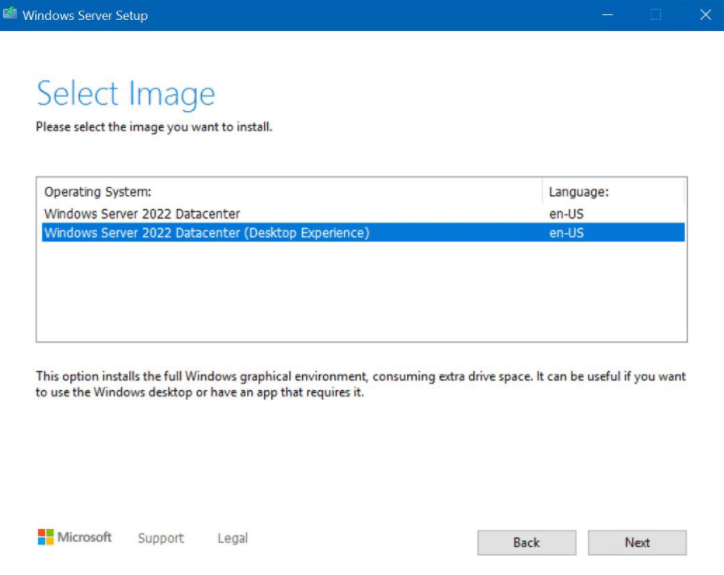
Note: The product key only activates the same version of operating system when you perform an in-place upgrade to new one.
Step 5. Read the Applicable notices and license terms then click Accept to move on.
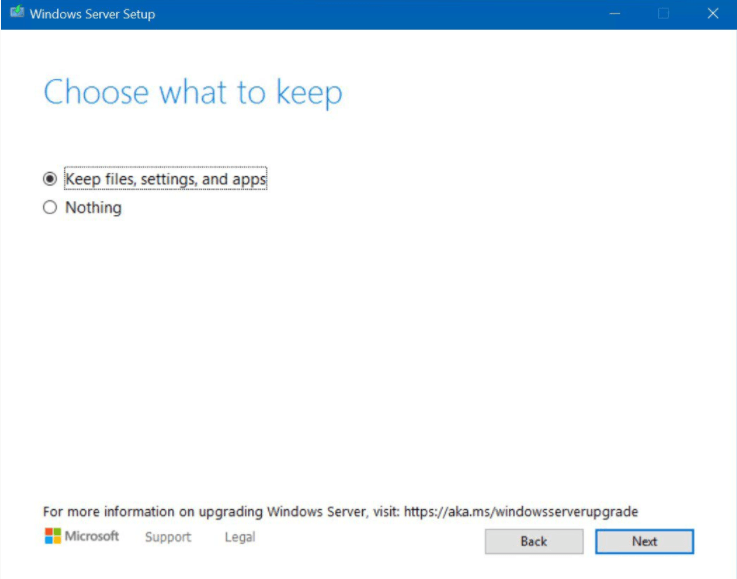
Step 6. Select Keep personal files and apps and then select Next. If you don’t choose the right version, the first option will be unavailable.
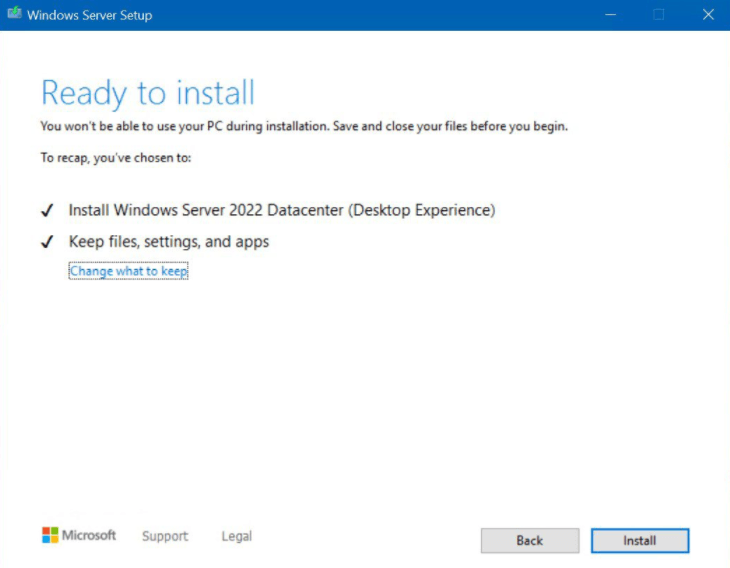
Step 7. After Windows Server Setup analyzes your device, it will prompt you to proceed with your upgrade by selecting Install.
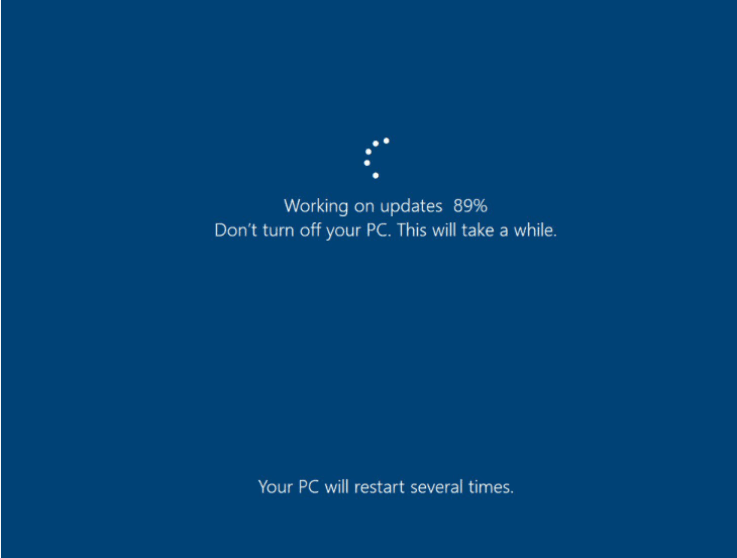
Step 8. The upgrade starts and the upgrade progress is displayed on the screen. After the process is completed, the server will restart.
Best Way to Protect Your Windows Server Safely
To keep your data safe, it’s crucial to back up your Windows Server whenever you make significant changes to your hard drive or operating system. Using reliable backup software ensures that if something goes wrong, you can restore your system to its previous state without losing any data.
AOMEI Backupper Server is a great tool for this purpose. It provides five different backup options to fit your needs, whether you want to back up the entire system, specific disks, partitions, files, folders, or even the cloud. Plus, it offers several advantages to make managing your backups easier.

-
Scheduled Backups: You can schedule automatic backups in Windows Server to run daily, weekly, monthly, or be triggered by specific events like connecting a USB drive.
-
Backup Methods: By default, the software uses incremental backup, which saves only the changes made since the last backup, conserving space. You can also choose differential backups for more comprehensive coverage.
-
Backup Destinations: You have several options for where to store your backups, including local disks, external hard drives, USB drives, CDs/DVDs, network drives, NAS devices, and cloud storage.
-
System Compatibility: This software works with various versions of Windows Server, including 2025, 2022, 2019, 2016, 2012 (R2).
Now, you can follow the graphic tutorial below to back up your Windows Server safely. To protect any computer, try to create a portable version (supported by the TechPlus edition) of this software and run it at any time.
Step 1. Download AOMEI Backupper Server, install it, and open it. You can click Backup > System Backup.

Step 2. You just need to select the backup destination to save the image backup for Windows Server. The related system partitions and boot-related partitions will be selected by default.

Step 3. Confirm your operations and click Start Backup to backup Windows Server and protect your data safely.

Notes:
- Options: You can add comments to backup tasks, encrypt files for extra security, and choose to split or compress your Windows Server 2022 backups. Email notifications can also be set up to keep you updated on backup status.
- Backup Schemes: Manage disk space by selecting from full, incremental, or differential backups. You can also automate cleanup by deleting older backups based on quantity, time, or daily/weekly/monthly intervals, helping you free up storage space efficiently.
- Besides, you can delete old backup images automatically with one of the clean-up methods to directly free up space.
Complete Data Protection for All Enterprise Data
An enterprise usually has more than one server that needs to be backed up. If you are looking for the ultimate way to protect all enterprise data from loss, AOMEI Cyber Backup is a great choice. It is a professional and easy-to-use enterprise backup software enabling users to backup all Windows Servers as well as PCs, VMs, and MS databases on a web console.
All data included: It supports Disk backup, partition backup, system backup, VMware Backup, Hyper-V, MS SQL backup, and so on.
Incremental Windows Backup: It supports incremental and differential backup to only backup newly added data or changed data to save time and space.
Role management: With the admin account, you can create more sub-accounts with different permissions for your team members to perform backup tasks.
Automatic task execution: Once you set up a backup schedule, later backup will run automatically in the background.
Here you can click the download button to install the AOMEI Cyber Backup Trial version for a 30-day free trial.
Step 1. Install, run, and log in AOMEI Cyber Backup. The default username and password are both "admin".
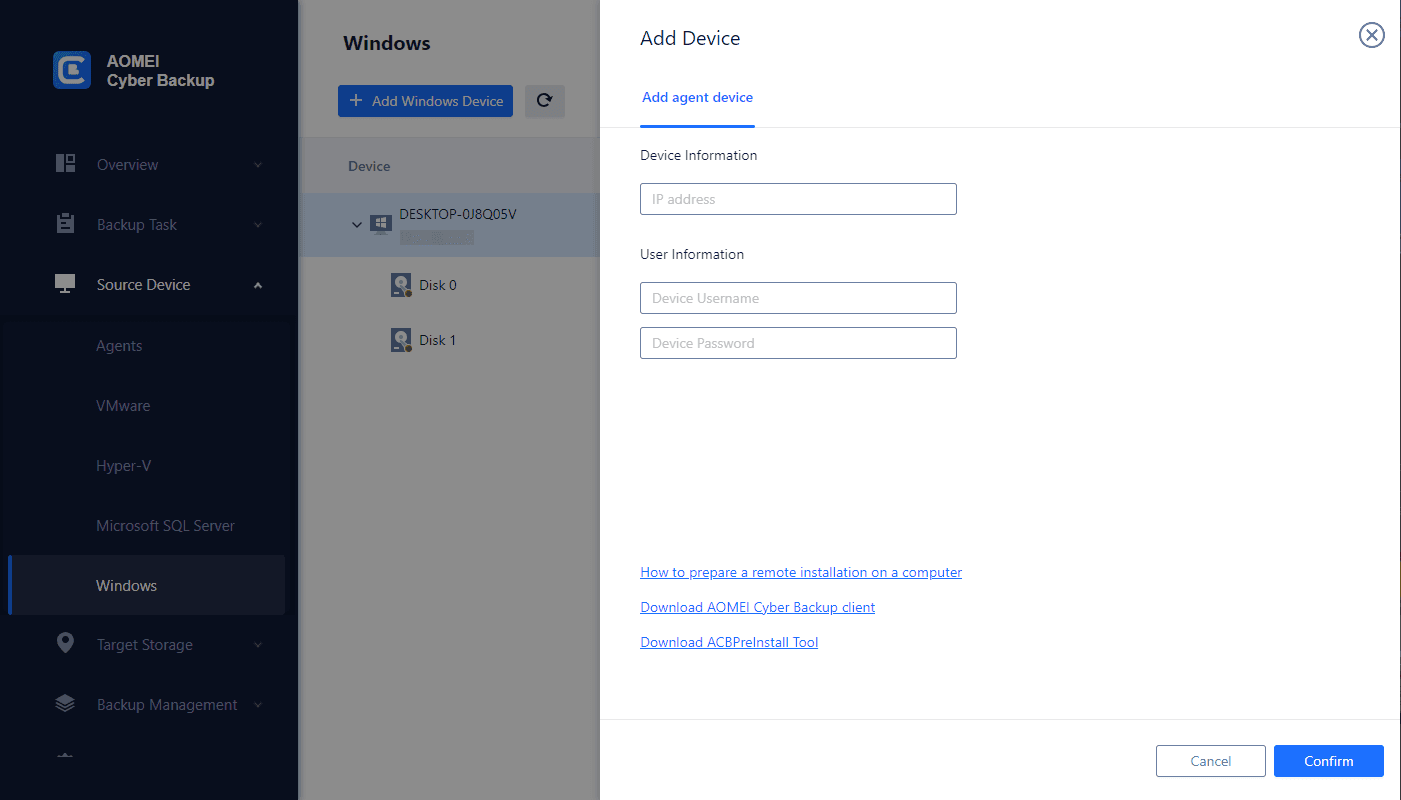
Step 2. On the AOMEI Cyber Backup interface, click Source Device on the left pane > Windows > Add Windows Device to add the device you want to backup.
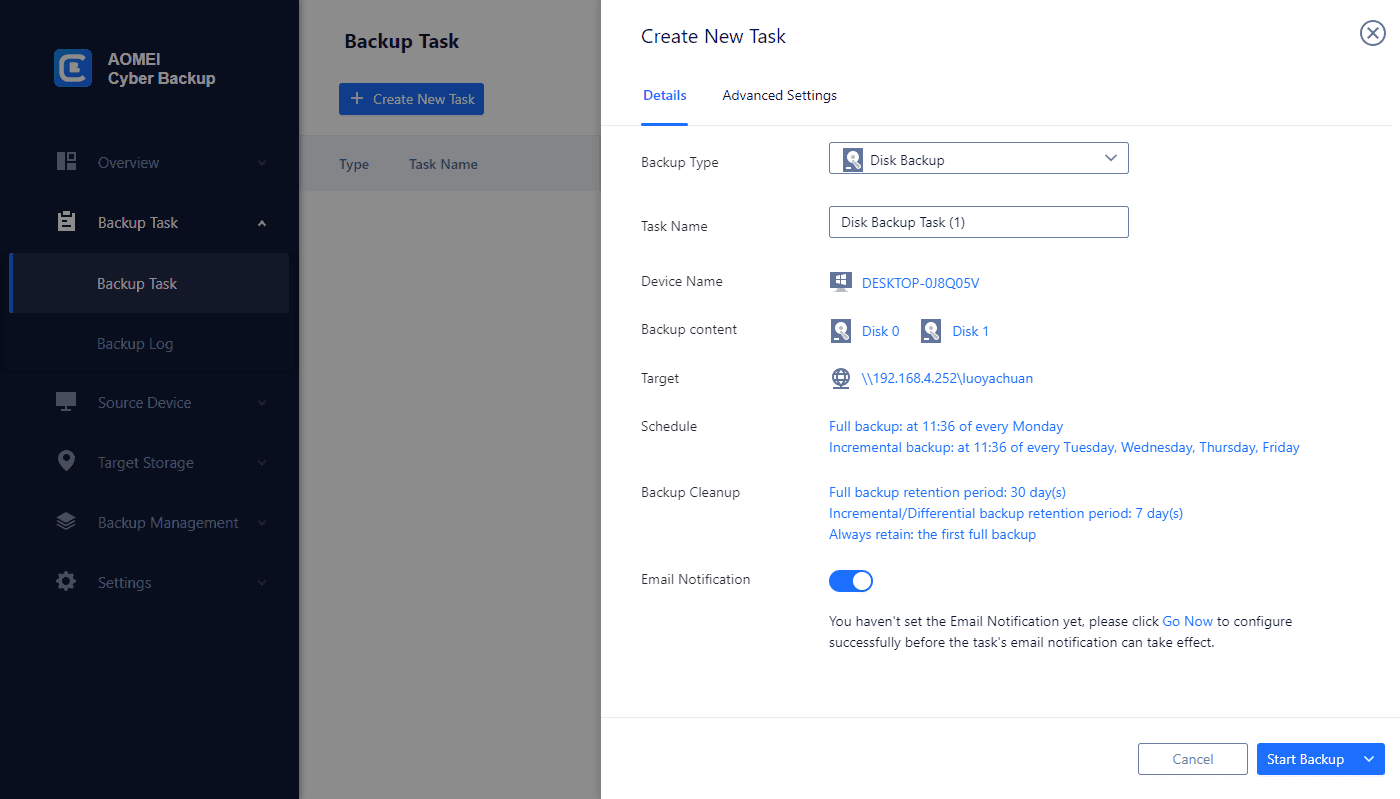
Step 3. Click Backup Task > + Create New Task. Choose a backup type, task name, target, and setup schedule, and other settings. Then click Start Backup button to execute.
FAQs on upgrading Windows Server 2019 to 2022
1. What are the benefits of upgrading from Windows Server 2019 to Windows Server 2022?
Answer: Upgrading to Windows Server 2022 offers several benefits, including improved security features, enhanced performance, better support for modern applications, and updated management tools. Additionally, it ensures compatibility with the latest hardware and software advancements.
2. What are the system requirements for upgrading to Windows Server 2022?
Answer: Before upgrading, ensure that your hardware meets the minimum system requirements for Windows Server 2022. These typically include processor specifications, RAM requirements, available disk space, and compatibility with specific hardware components such as network adapters and storage controllers.
3. What is the recommended upgrade path for transitioning from Windows Server 2019 to Windows Server 2022?
Answer: Microsoft typically provides guidance on the recommended upgrade path from one version to another. This guidance may include considerations for upgrading directly or via intermediate versions, depending on factors such as current server configurations, installed roles/features, and compatibility with third-party applications.
4. Is it possible to perform an in-place upgrade from Windows Server 2019 to Windows Server 2022?
Answer: Yes, an in-place upgrade allows you to upgrade your existing Windows Server 2019 installation to Windows Server 2022 without losing data or settings. However, it's essential to perform thorough backups and compatibility checks before proceeding with the upgrade to avoid potential issues.
5. What precautions should be taken before upgrading to Windows Server 2022?
Answer: Before initiating the upgrade process, it's crucial to perform comprehensive backups of your data and system configuration. Additionally, ensure that all critical applications and services are compatible with Windows Server 2022. Testing the upgrade in a controlled environment can help identify and address potential compatibility issues beforehand.
6. Are there any licensing considerations when upgrading to Windows Server 2022?
Answer: Depending on your licensing agreement with Microsoft, you may be eligible for free or discounted upgrades to Windows Server 2022. It's essential to review your licensing terms and consult with your licensing provider or Microsoft representative to understand any potential implications or requirements for the upgrade.
7. What post-upgrade steps should be taken to ensure a smooth transition to Windows Server 2022?
Answer: After completing the upgrade, it's advisable to perform thorough testing of critical services, applications, and functionalities to ensure everything works as expected. Additionally, review and update security settings, configure backup and recovery options, and monitor system performance closely in the initial period after the upgrade. Regularly installing updates and patches from Microsoft will also help maintain system security and stability.
Tips for a Successful Upgrade
-
Backup Your System: Never initiate an upgrade without a complete backup. Solutions like AOMEI Backupper provide reliable backup solutions that ensure a swift recovery if issues arise during the upgrade.
-
Verify Software Compatibility: Ensure that all third-party software and drivers are compatible with Windows Server 2022 to avoid post-upgrade issues.
-
Test in a Staging Environment: If possible, run the upgrade in a test environment before applying it to your production server. This helps identify any potential pitfalls before they impact critical systems.
-
Secured-Core Server: This is a feature in Windows Server 2022 that integrates hardware, firmware, and software protections to enhance security. It’s designed for high-security workloads, offering protection against advanced cyber threats.
-
Azure Hybrid Benefits: This refers to the capability of integrating on-premises servers with Azure for hybrid cloud management. Windows Server 2022 supports better connectivity with Azure, enabling backup, disaster recovery, and identity management.
-
In-Place Upgrade: This refers to upgrading an operating system while retaining the current settings, applications, and data. It’s ideal for organizations looking to avoid downtime and minimize system changes.
Summary
You can easily upgrade Windows Server 2019 to 2022 with a stepwise guide in this article, please follow the steps carefully. You need to create a backup image for Windows Server before and after this upgrade since it's a major change and you cannot afford to lose any data in it.
For backup software, AOMEI Backupper is a great choice. You can backup any items you want in its server edition and restore system to new hard drive or computer if necessary. To restore system image to multiple computers over network, try AOMEI Image Deploy in the techplus edition.