How to Schedule Automatic Backup in Windows Server 2016
To create a schedule to backup Windows Server 2016 automatically could save a lot of troubles. You don't need to worry about forgetting backup sometimes. Here you can find how to make it. The way to set weekly backup is also included.
By Lily Updated on April 18, 2025
Why create automatic server backup?
Windows Server 2016 users know that backing up Windows Server 2016 can prevent many disasters, such as system crash which can bring large damage to you, even the whole company. So, it is necessary to backup Windows Server in time to prevent the next accident.
However, making a backup day by day is a very tedious thing, and you may forget to do it sometimes. What if some bad things happen during the time when you forget to back up? The important data may be lost. Thus, you may ask whether there is a way to backup Windows Server 2016 automatically.
Fortunately, you can create Windows Server backup schedules. Windows Server has a built-in backup tool called Windows Server Backup. However, it only allows you to create one daily backup schedule. For anyone who wants to create multiple scheduled backup tasks, like a weekly backup for your OS and a monthly backup for the entire disk, you can turn to third-party tools that are introduced in Part 2 and Part 3.
Part 1. Create a schedule to backup Windows Server 2016 with the built-in tool
Although sometimes you may meet the Windows Server backup schedule not running problem, it’s still a method worth having a try. Before using it, you can check whether it is installed. If not, you need to install it first.
After installing Windows Server Backup, you can open it by clicking the Start menu, selecting Server Manager, and clicking Windows Server Backup at the bottom of the Tools expanded menu. Then, you can see Local Backup at the right side. There are two backup types, “Backup Schedule...” and “Backup Once...”.
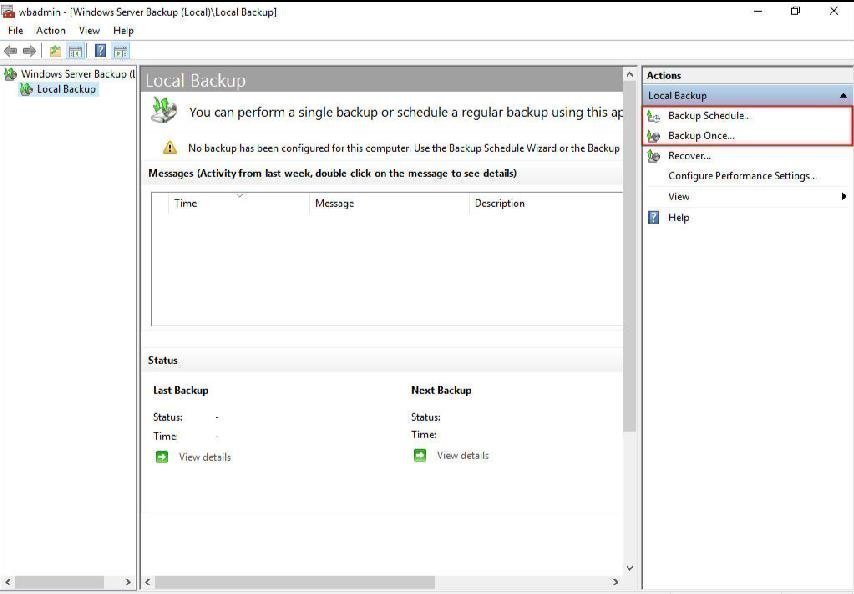
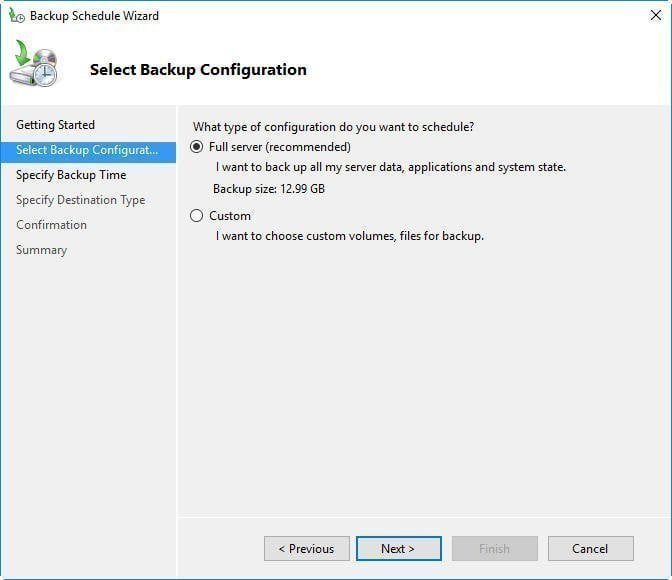
To make an automatic schedule backup for Windows Server 2016, select the “Backup Schedule...” to launch the Backup Schedule Wizard. Click Next to getting start. Then, you can choose to back up all the server data, applications and system state by Full server, or only custom volumes, files for backup by Custom. Here we recommend Full server. Click Next.
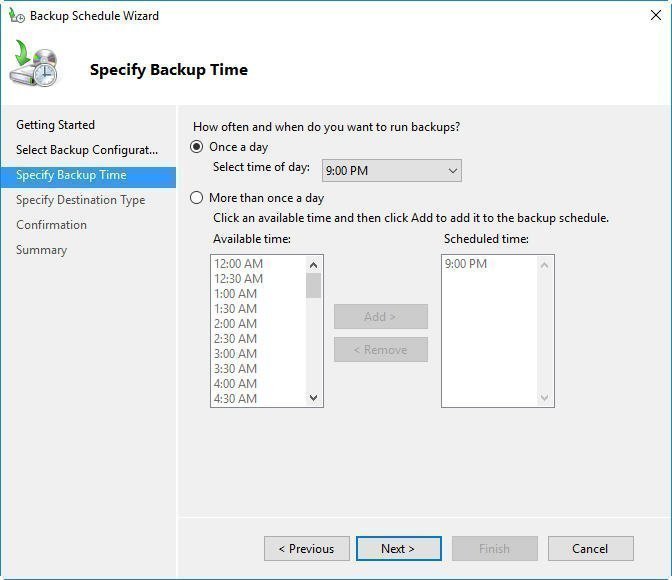
Then, you can set the backup time as you want in Specify Backup Time. Here you can set once a day or more than once a day.
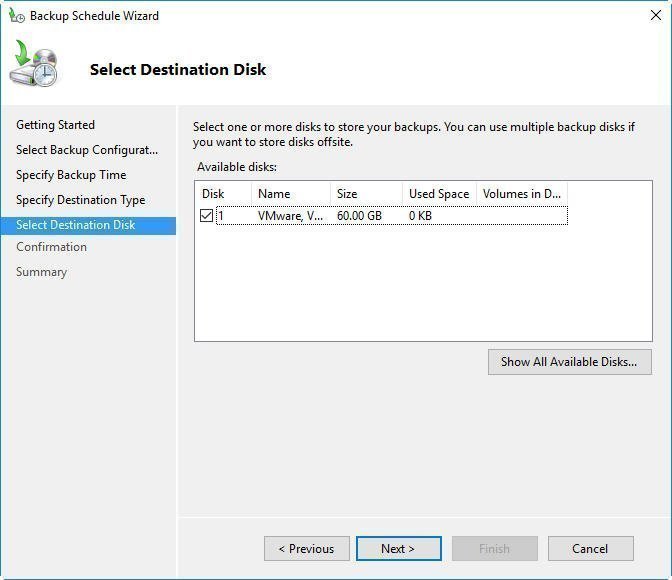
Then, you should choose a destination. You can schedule backup Windows Server 2016 to a hard disk, a volume, or even network. If you have more than one disk on your computer, you can select to back up to the other local disk and click Next.
You will move to the Confirmation step, you can see and confirm the operations here. If there is no problem, click Finish to submit.
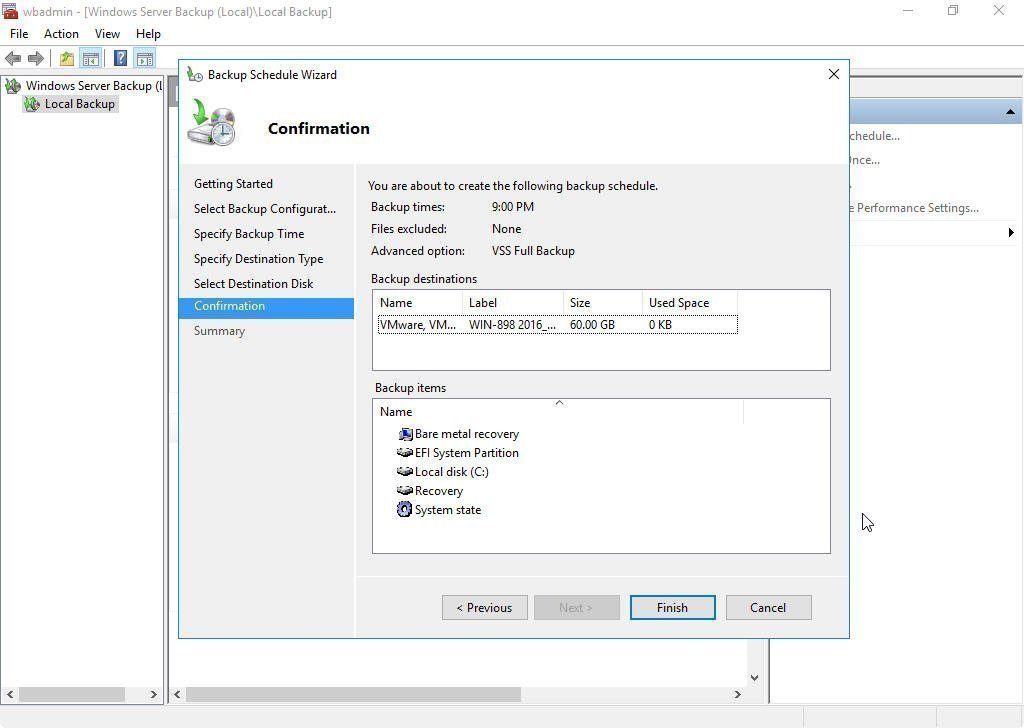
Finally, you can check the automatic schedule backup for Windows Server 2016 at the Summary. You may feel that using Windows Server Backup will take a lot of steps, which is so complex, and you may find that there are many limits of the schedule backup. For example, you can only perform a daily backup or more frequent backups.
If you want to create less frequent schedule backups for some personal reasons, Windows Server Backup could be helpless. Is there a more flexible way to schedule backup Windows Server 2016? Please keep reading.
Part 2. Create Windows Server 2016 backup schedule via AOMEI Backupper
AOMEI Backupper Server is a backup and restore software designed for all Windows Server systems, including Windows Server 2025/2022/2019/2016/2012 (R2). It is powerful and can do not just simple backups.
- It offers system backup, file backup, disk backup, and partition backup.
- It lets you configure multiple backup schedules like daily/weekly/monthly/event triggers.
- Apart from full backup, it supports incremental/differential backup that helps save space and time.
Compared with Windows Server Backup, AOMEI Backupper has many advantages, especially in the operation steps. I'll take creating Windows Server 2016 backup schedule weekly as an example. First, download AOMEI Backupper on your server.
Step 1. Install and launch the best server backup software. It will show you the simple GUI. Click System Backup under the Backup tab.

Step 2. The System Backup will select all the source parts by default, so you just need to select the destination place here. You can back them up to another local disk or volume, or backup to NAS/network drive. But be sure the disk or volume you use is formatted as NTFS.

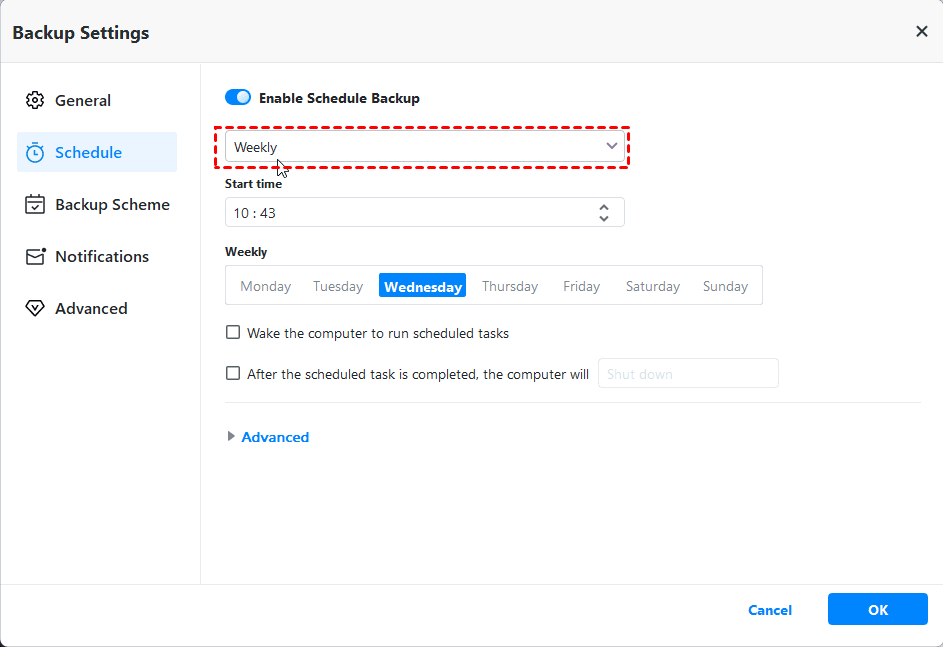
Step 3. After choosing the destination place, click Schedule Backup. It will pop out a window where you can set automatic backup. Choose Enable Schedule Backup > Weekly, and you can select the day(s) and the o’clock to run the backup.
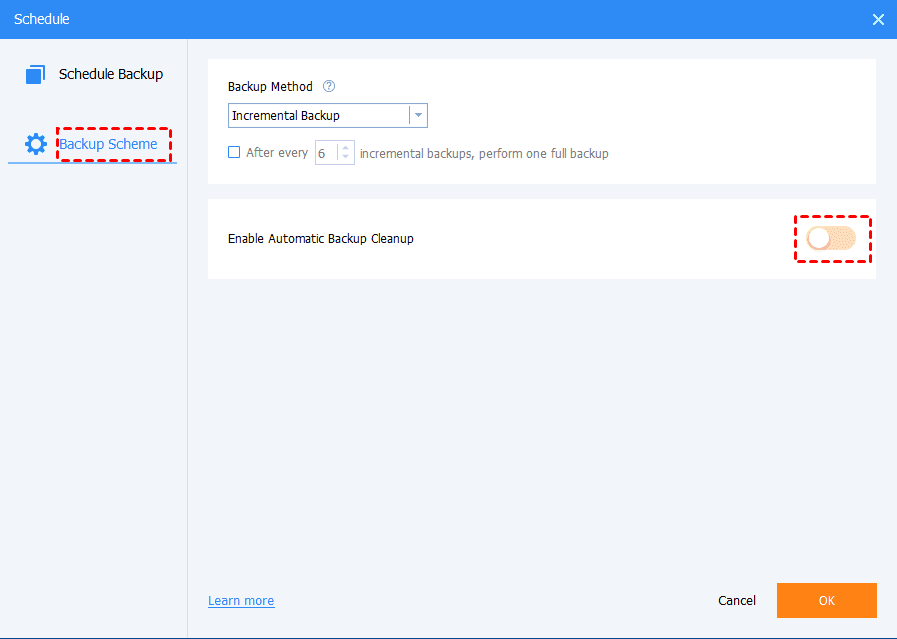
Step 4. (Optional) Click Backup Scheme in the Schedule window.
- Backup Method: you can set the scheduled backup to be performed as full, incremental or differential backup.
- Enable Automatic Backup Cleanup: choose a deletion mechanism to delete outdated backup images. This will help to release space on the backup destination drive.
Step 5. After all the settings, click Start Backup to start the progress.

Part 3. Auto backup Windows Server 2016 using AOMEI Cyber Backup
The best enterprise backup software - AOMEI Cyber Backup provides a convenient and reliable solution for centralized backup management of all Windows operating systems.
- It enables you to create system/disk/partition backup for a bunch of Windows PCs and Servers, supporting Windows 11/10/8.1/8/7 and Windows Server 2025/2022/2019/2016/2012 (R2).
- You are allowed to save backup images on a local disk, external hard drive, network share or NAS device, etc.
- You can schedule a backup task to run daily/weekly/monthly using the full/incremental/differential backup method.
Download this powerful enterprise backup software now and learn how to create automatic Server 2016 backup as follows.
Step 1. Install and run AOMEI Cyber Backup. The default username and password for AOMEI Cyber Backup are both "admin". Enter them and click Log in.
Step 2. Click Source Device > Windows > Add Windows Device to add the Windows Server 2016 device that you want to backup. You need to enter the IP address, username and password of it.
Step 3. Create a new backup task.
- Click Backup Task on the left menu bar and select Backup Task > Create New Task.
- In the Backup Type field, select System Backup.
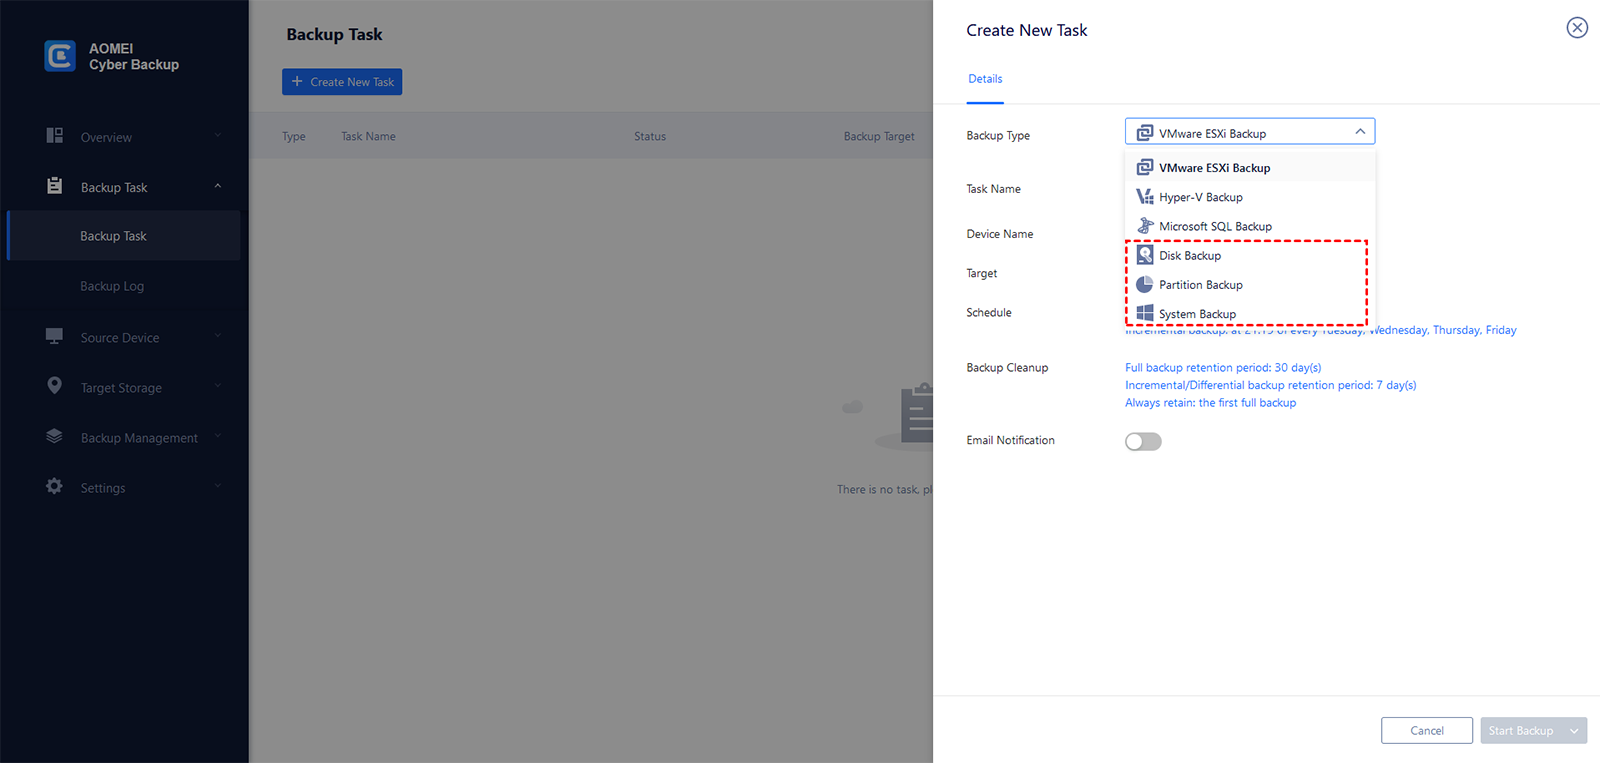
- In the Task Name field, set your desired task name.
- In the Device Name field, click Select + to select the device you just added.
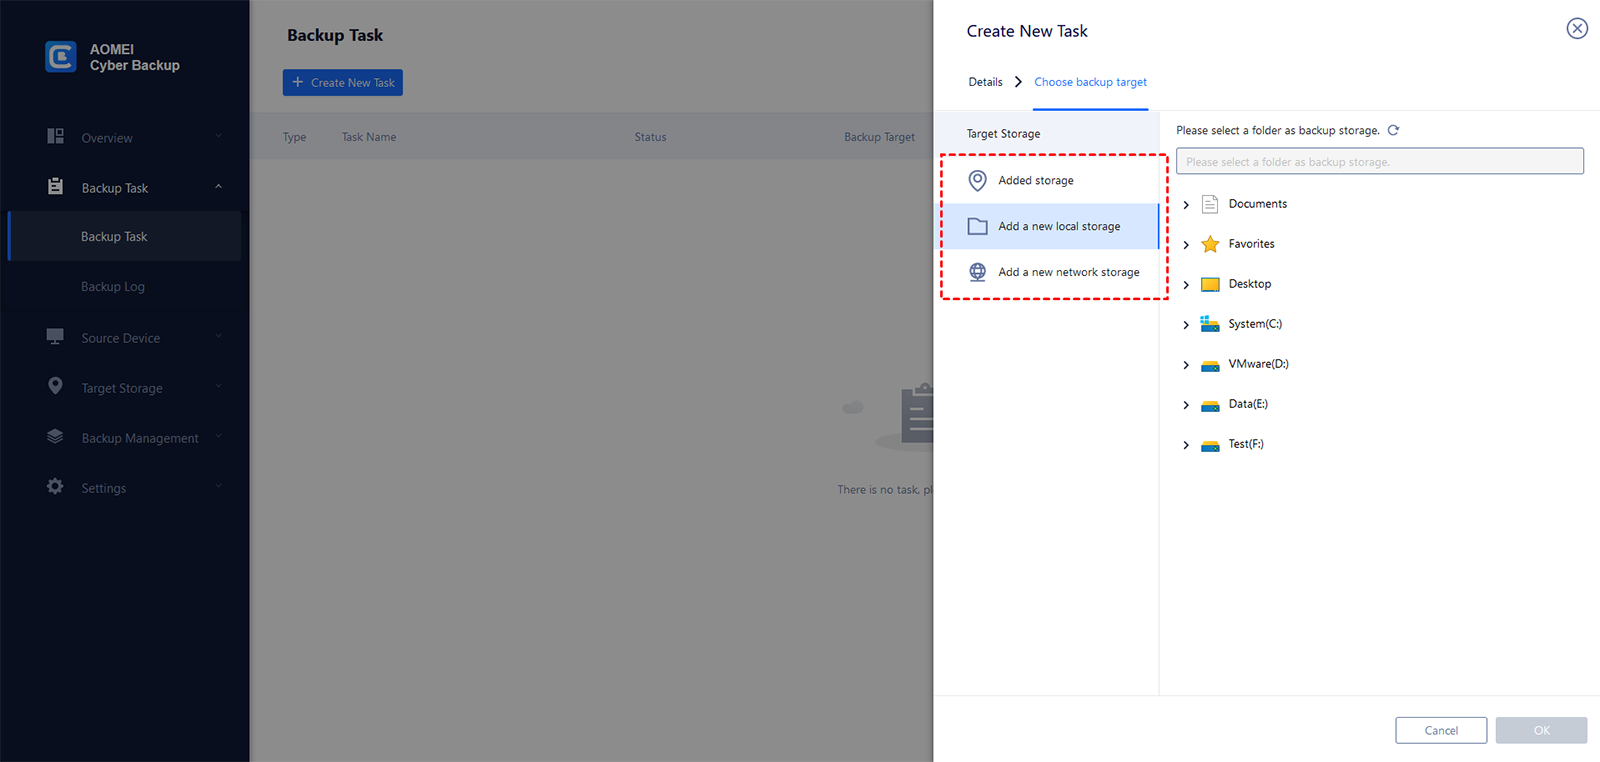
- In the Target field, click Select + and Add a new local storage or Add a new network storage to specify a destination path.
- In the Schedule field, change the backup method and schedule type as per your need.
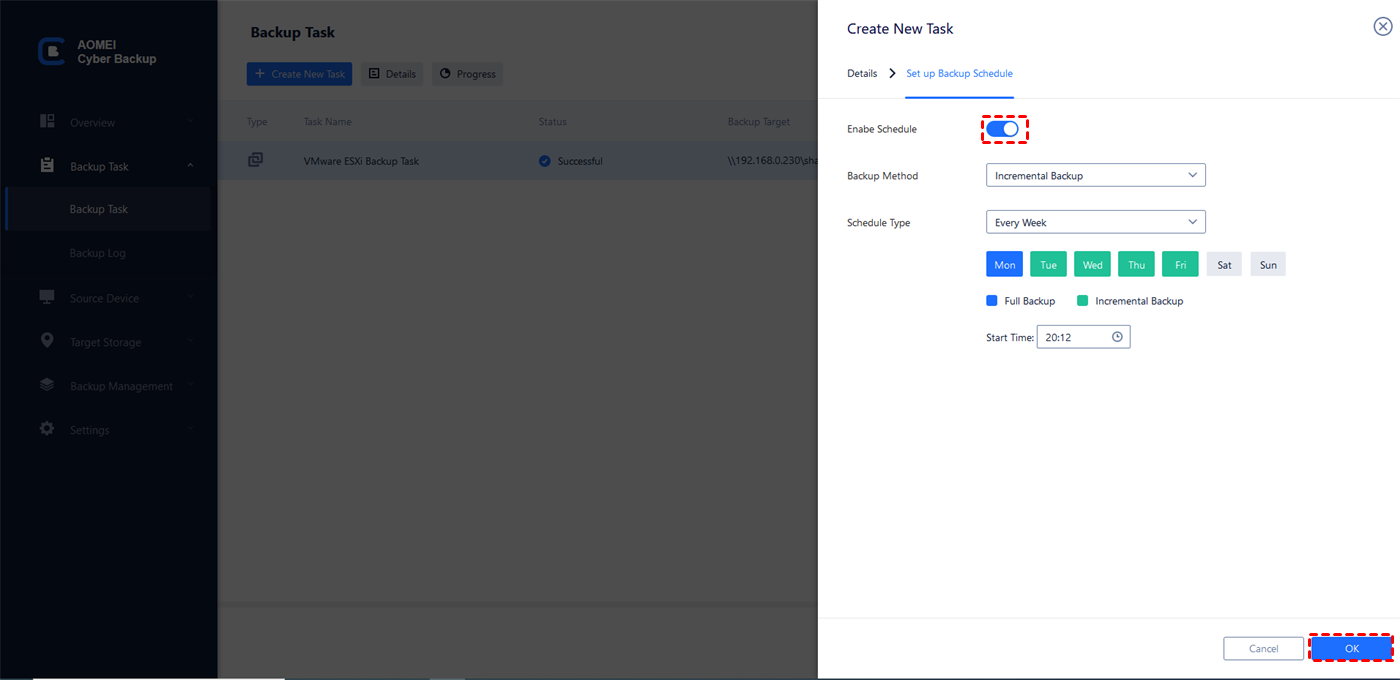
- Click Start Backup > Add the schedule and start backup now to launch the backup process.
Summary
You have learned three ways to create automatic server backup. Using AOMEI Backupper and AOMEI Cyber Backup, you can do less frequent backups according to your requirements. You don’t need to worry about data loss with backup images at hand.
What’s more, AOMEI Backupper has many other features like the PXE Boot Tool, which supports synchronous boot of multiple computers. To protect unlimited PCs and servers within your company, you may choose AOMEI Backupper Technician Plus. It offers unlimited billable technical services to clients. It also enables you to copy installation directory for portable version creation.

