Windows 11 File Sharing: How to Share a Folder on Network
Looking for how to perform Windows 11 file sharing? The network discovery and sharing function has been improved a little in Windows 11. Learn how to enable network discovery and file sharing in this article.
By Lily Updated on August 28, 2025
File sharing is the practice of distributing or providing access to digital media, such as computer programs, multimedia (audio, images and video), documents or electronic books. File sharing may be achieved in a number of ways.
For a long time in the past, USB flash drives or alike played a very important role in data transmission between computers. Nowadays, more and more users prefer to share files over network to reduce the risk of data corruption, because removable or portable devices are more susceptible to unauthorized access.
Simplify the process of regular file sharing with the best free file sync software.
How to turn on network discovery and file sharing in Windows 11
If you want to share a folder on network, you should first turn on “Network Discovery” and “File Sharing” in Windows 11.
Turn on Network Discovery in Windows 11
Turning on the "Network Discovery" setting will allow the computer to view other computers and devices on the same network. At the same time, it also allows other computers on the same network to see the computer. So, it is a requisite for file share on Windows 11. To enable Network Discovery, continue the steps below :
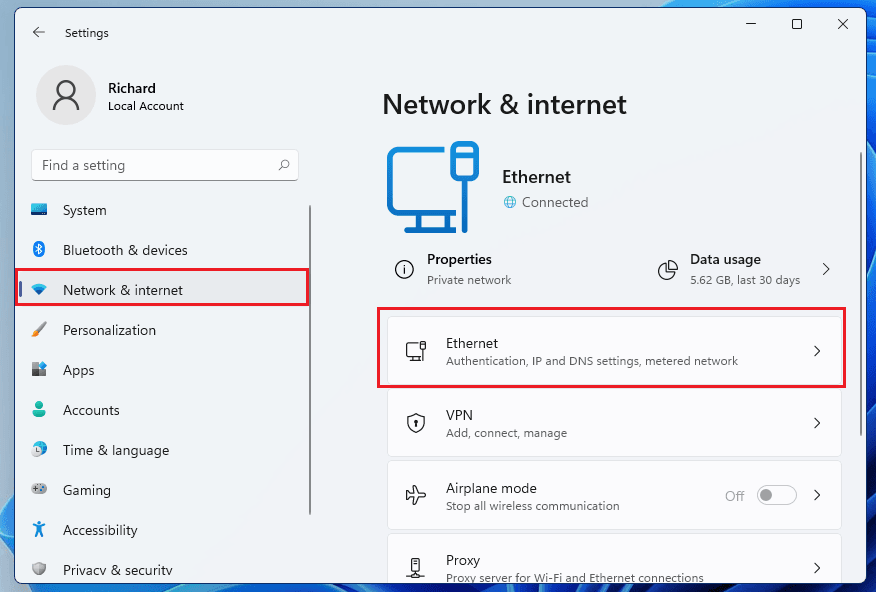
- Press Windows + I on the keyboard at the same time to open Settings (or click on Start and select Settings).

- In Windows Settings, click Network & internet, then select Ethernet on the right pane of your screen.
- In Ethernet settings pane, under Network profile type, choose Private.
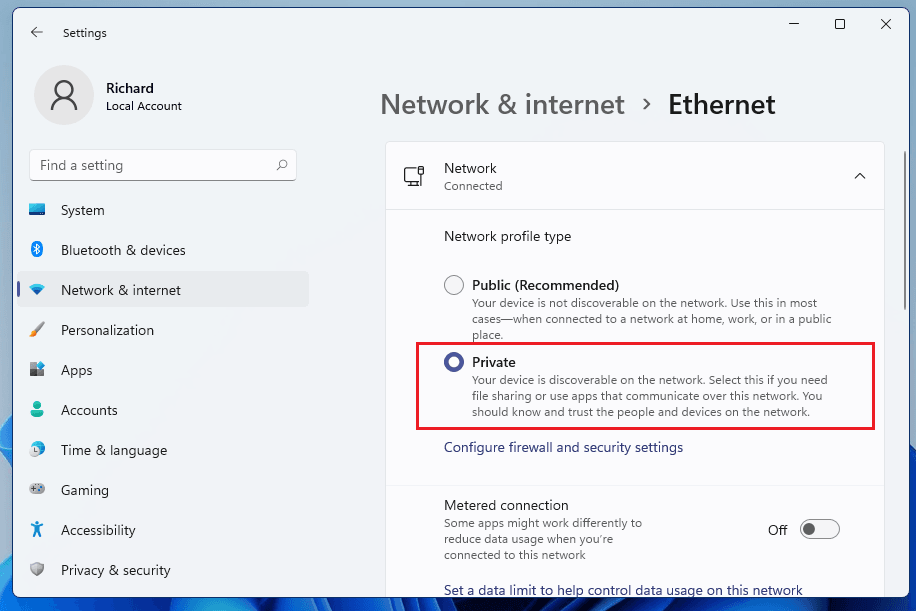
Tip✍: The Private profile will allow the discovery of devices in your network, which is suitable for home, work places and network that are trusted. If you choose Public profile, your device is not discoverable on the network.
- When you’re done, exit and network discovery should be enabled.
Turn on File Sharing in Windows 11
Turning on the "File and Printer Sharing" setting will allow other computers or devices to access the files, folders or printers you shared from this particular computer. To enable File Sharing in Windows 11, proceed with the following instructions:
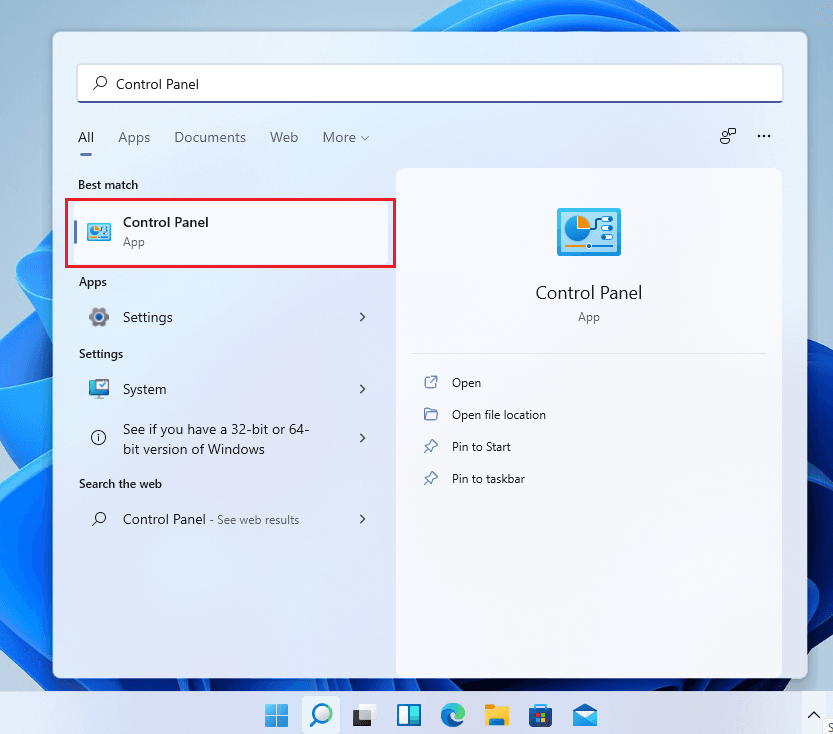
- Click on Start. Type Control Panel and click on the search result.
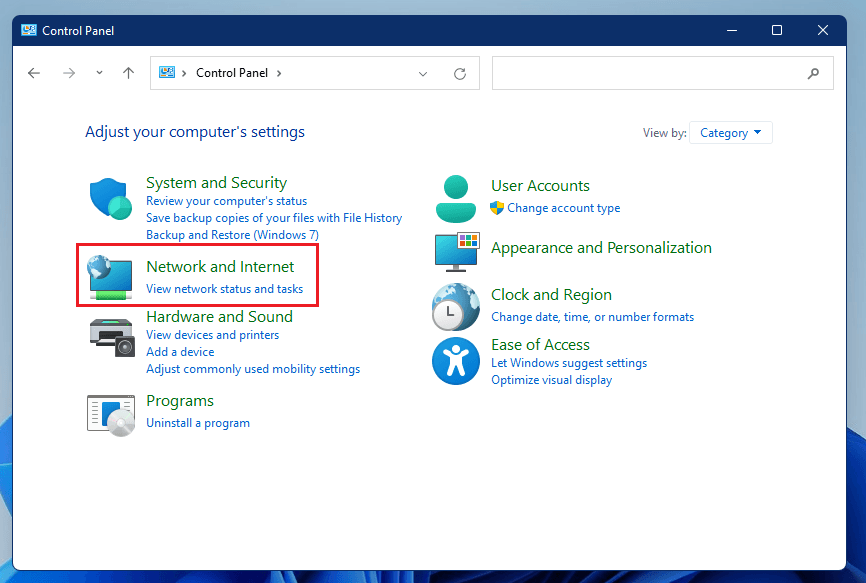
- In the Control Panel, select Network and Internet.
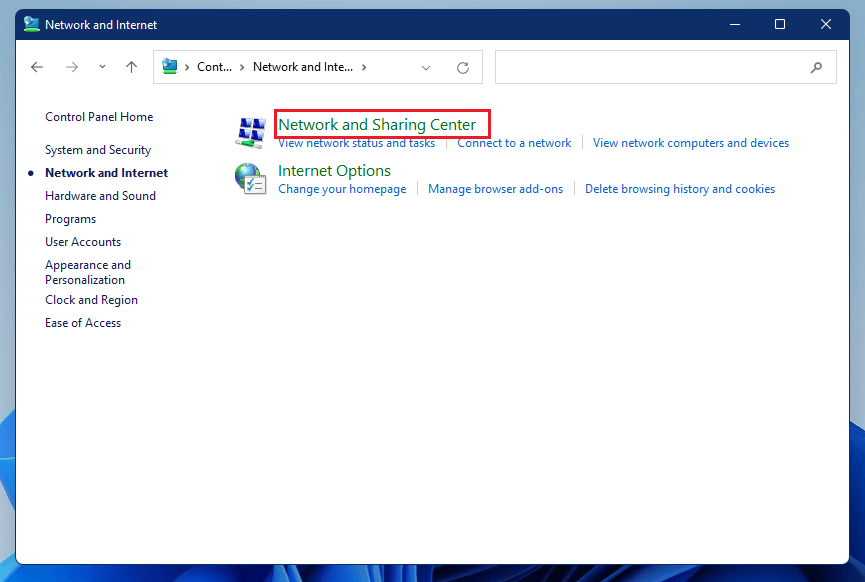
- Then select Network and Sharing Center.
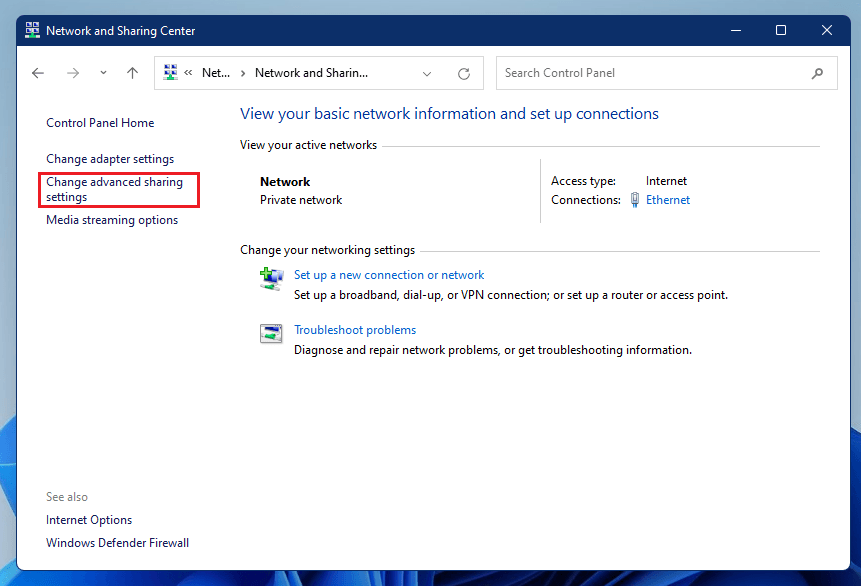
- Next, select Change advanced sharing settings.
- In the Advanced sharing settings, select Private (current profile) and Turn on file and printer sharing.
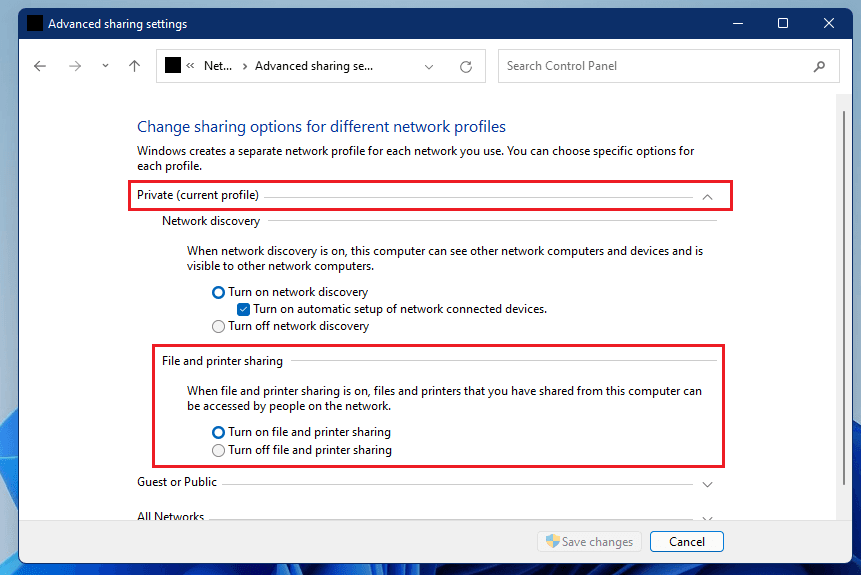
- Scroll down and expand All Networks. Check Turn on sharing so that everyone with network access can read and write files in the Public folders under Public folder sharing.
- Save your changes and exit.
Steps to share a folder on network in Windows 11
If there are other systems or users connected to the same network as you, you can easily share folders with them. Here is how you can do it to perform folder/file sharing over a network in Windows 11.
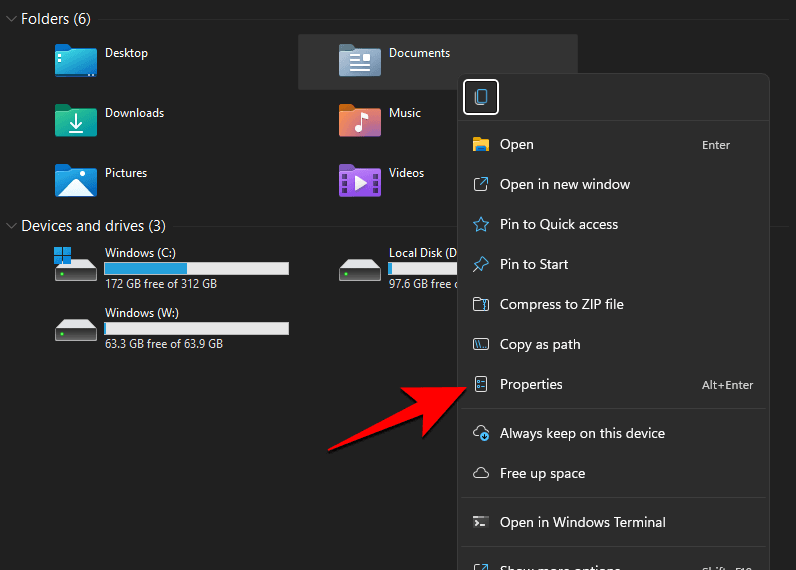
- Right-click the folder that you want to share and select Properties.
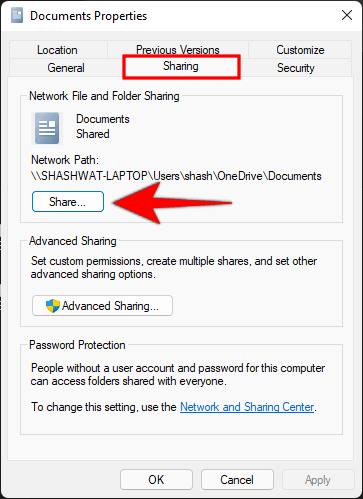
- In the Documents Properties, click on Share under the Sharing tab.
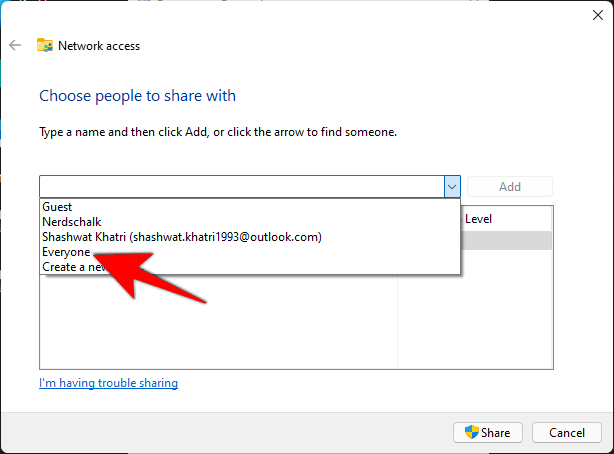
- Choose people you want to share with, and select Everyone on the drop-down menu.
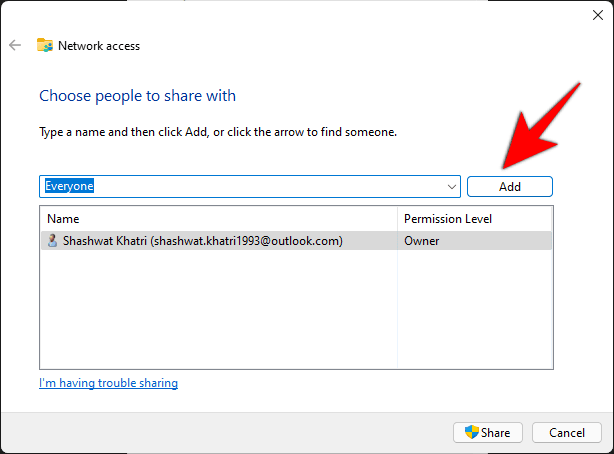
- Then click on Add to share this folder with everyone on the network.
- Now click Share.
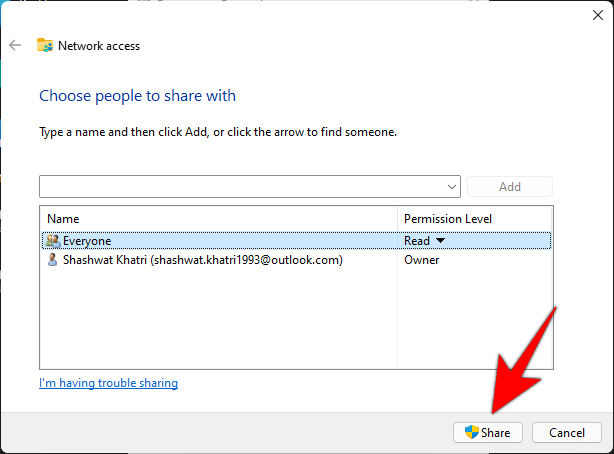
- Now your folder is shared and click Done to exit.
Change share permissions
It is easy to do Windows 11 file share. But the recipient may not have all the permissions to the folder and the files within it. To change that, follow the steps below:
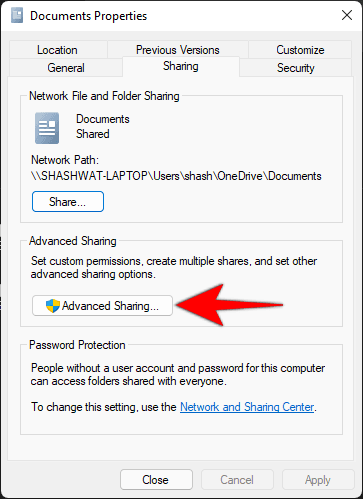
- Open the Document Properties of this shared folder. Click on Advanced Sharing.
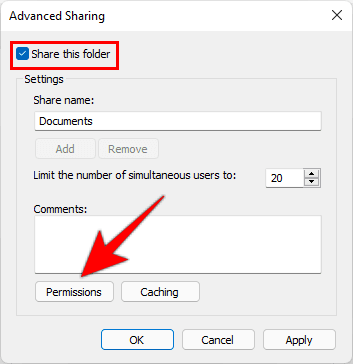
- Check the Share this folder option and click on Permissions.
- Change the permissions and click on OK on all open windows.
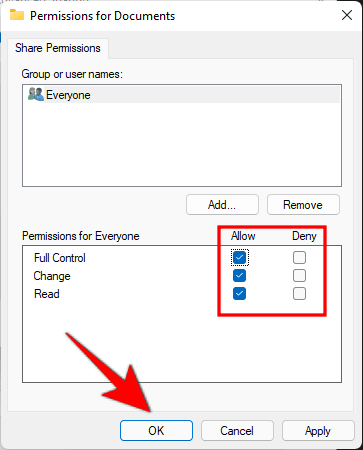
This folder will now be accessible to all those who are on the shared network.
Best free Windows 11 file sharing alternative
As a system that has just been released, we cannot predict the time for Windows 11 file sharing not working to happen. In order to be able to perform file sharing more safely and efficiently, I recommend you use the best free file sharing software - AOMEI Backupper.

-
It allows you to sync folders between different locations, such as from one folder/disk/computer to another folder/disk/computer. You can also sync folders to cloud storage, such as syncing files to Google Drive, OneDrive, Dropbox, etc.
-
It enables you to create automatic sync tasks with the Schedule Sync feature, which can help you get changes regularly by syncing files daily/weekly/monthly.
-
It enables you to sync multiple folders simultaneously, saving you from repetitive work.
Download and install this freeware right now. This tool allows you to achieve file sharing between Windows 10 and Windows 11, as well as transfer data between computers with the same OS. Learn how to do network sharing in Windows 11 via AOMEI Backupper below.
Note✍: Do not change the folder name of your source. Otherwise, AOMEI Backupper cannot sync it anymore.
Step 1. Launch AOMEI Backupper, click Sync on the left pane, and select Basic Sync.

Tips✍: Three other synchronization modes are also available in advanced editions.
✬ Real-Time Sync: This mode will automatically monitor the source directories that need to be synchronized in real-time.
✬ Mirror Sync: This mode always keeps the files between the source directory and the target directory the same. Any changed files in the target will be deleted.
✬ Two-Way Sync: Any changes in the source or destination directory will be synced with each other.
Step 2. Click Select Source to choose the folders you want to share. If you want to add more folders, you can click the + Add Source icon after adding the first folder.

Tip✍: If you want to exclude certain file types from selected folders, please use the Filter settings feature by clicking Options > Filter (available in AOMEI Backupper Professional or higher versions).

Step 3. Click the destination box to select and add your NAS or Network Share.
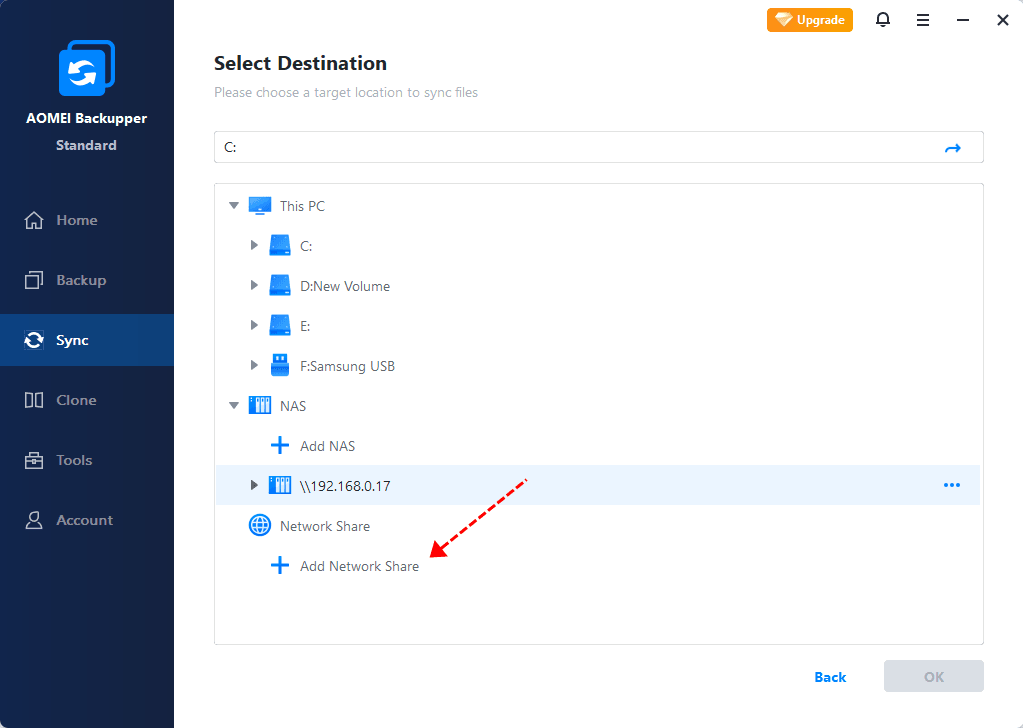
Step 4. In the pop-up window, type the network path or name of the target computer and choose a folder as the destination path, then hit OK.
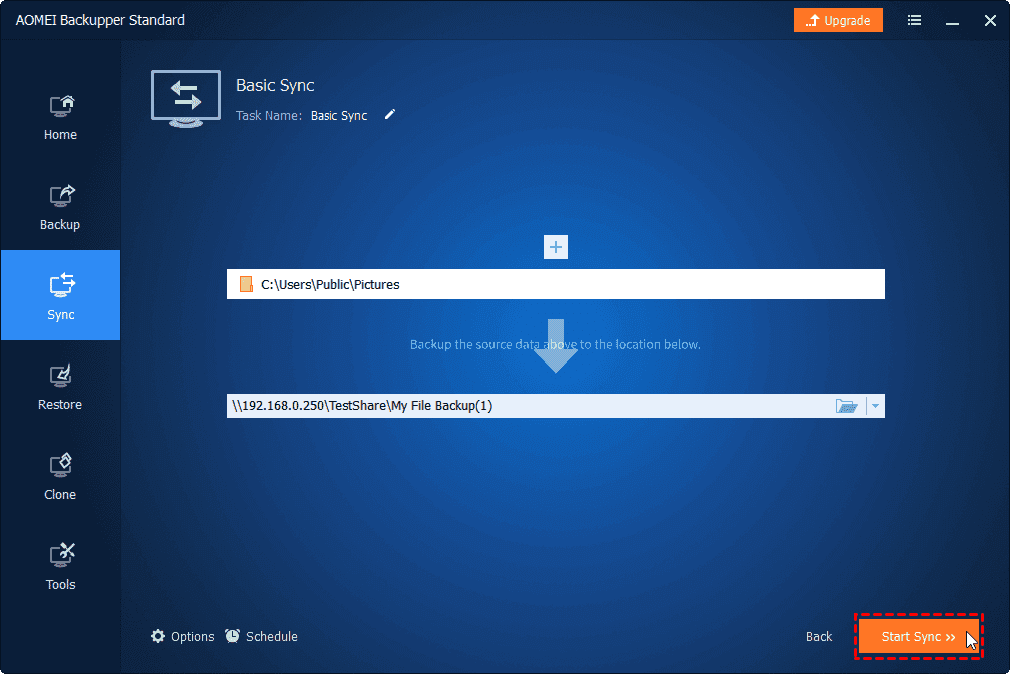
Step 5. Confirm all your settings and click on Start Sync to let Windows 11 share folders and files easily.
Tips✍:
✮ Schedule Sync: Seven modes are available for this software: Daily (By Interval), Daily, Weekly, Monthly (By Week), Monthly (By Date), One Time, Event triggers (like USB plug in).
✮ Options: You can write a comment for the task to distinguish this sync task from others easily. You can also enable email notifications to get informed of the operation results through emails.
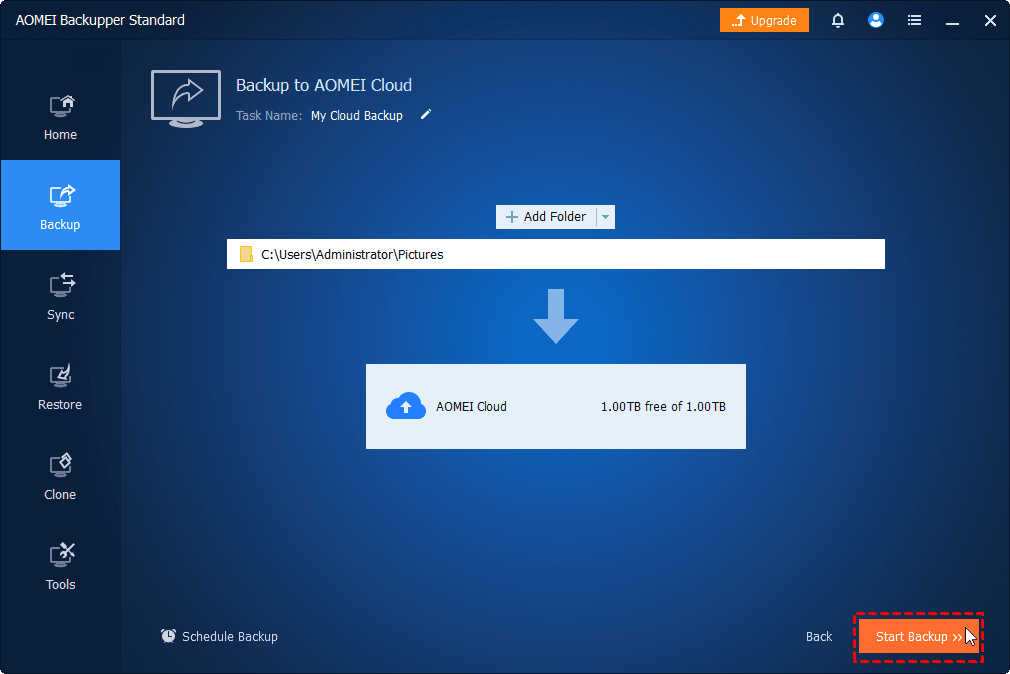
Except for sharing a folder on network via NAS device, you can still sync local folder to cloud drive like Google Drive. For free users with a few GB of cloud storage, it's suggested to backup files to AOMEI Cloud and you will get 1TB of free cloud storage 15 days after you sign up for an AOMEI account.
Benefits of file sharing over network
Some pros of file sharing over network are listed below:
♨ Save time
Users don't have to worry about sending files via email, uploading or downloading files, which can save them a lot of time. They can quickly access the data they need when they need it.
♨ Up-to-date file version
Unlike multiple versions of the same file with different information, all information is up-to-date and is always the latest version of the file. When changes are made to a shared file, they become available to all users immediately.
♨ Reduce costs
Files are shared directly through the Internet, companies or individuals do not need to purchase expensive equipment and machines to share files.
Fixed: Windows 11 file share not working
If you have enabled network and sharing features correctly, but Windows 11 network sharing is not working still, you can follow these steps to troubleshoot it:
👉Network Issues: You can check your network connection and firewall settings to make sure your computer involved in file sharing are connected to the same network.
👉Shared Folder Permissions: Check the permissions of the shared folder. Ensure that the user account you are using has the necessary permissions to access the shared resources.
👉Disable Password Protected Sharing: Windows 11 cannot access shared folder can be caused by password-protected sharing, resulting in the need of recipient credential for file access.
👉Windows updates: Ensure that your Windows 11 operating system is up to date. Sometimes, Microsoft releases updates that address networking issues.
Summary
After reading this article, you can learn how to perform Windows 11 file sharing with Windows built-in tool or its alternative. To avoid any network sharing problems with Windows 11 in the future, you can have a try on AOMEI Backupper. What’s more, it’s not just a reliable file sync software, but also the best backup and cloning tool that can meet all your needs for protecting your computer.
Windows 11 was released not long ago, and some users reported that there were some problems in the process of using the new system. As long as you have backed up computer before upgrading to Windows 11 via AOMEI Backupper, you will not be bothered by these problems.

