How to Use Rsync in Windows 10 | Tutorial and Alternative
Rsync, a powerful command-line tool, is a cornerstone of efficient file synchronization. This article delves into the intricacies of using Rsync on Windows 10, providing detailed instructions, solutions, and alternatives. This guide will walk you through the process step by step.
By Lily Updated on March 27, 2026
Can You Use Rsync in Windows 10?
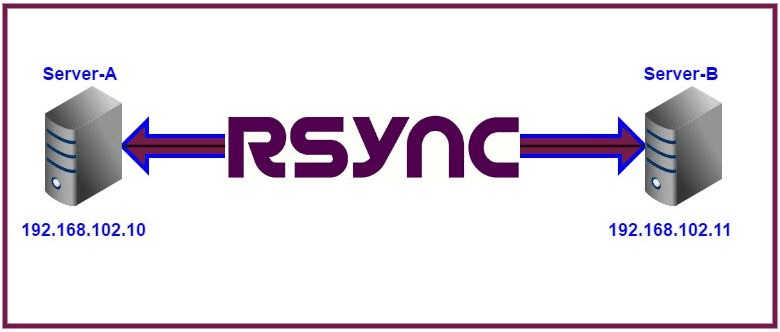
Rsync, short for Remote Sync, is a Linux-based utility renowned for its ability to synchronize files and directories across different locations, whether on the same device, across disks, or over a network. Traditionally used in Unix-like systems, Rsync has gained popularity for its efficiency in managing large volumes of data.
In Windows 10, you might have the same demand - copy files from one directory to another local directory, sync files from a local machine to a network server, or vice versa, thus you may want to use Rsync in Windows 10. But can it be effectively used in a Windows 10 environment? The short answer is yes, and this article will guide you through the process.
Linux is not hosted by Microsoft, so to run Linux commands on Windows 10, you need to do some preparations first, some of them may be complicated and time-consuming. Therefore, you could also consider using file sync software in Windows 10 or Windows 11 as an Rsync alternative.
Best free file sync software for personal use.

How to Run Rsync Command in Windows 10
There are several approaches to running Linux commands in Windows 10, one is to dual boot Linux and Windows, which allows you to choose which system to boot on startup, but it might be too much trouble especially when you are not trying to use Linux frequently.
Therefore, it’s recommended to install Windows Subsystem for Linux (WSL) on your computer. It works as a Windows utility and enables you to run Linux distribution in command line mode, which is a relatively easy way to use Windows 10 Rsync and applies to other Linux utilities as well. But if you don't want to install WSL, you can try running Rsync with Git Bash.
Here’s a further explanation of the 2 approaches:
♦ Method 1- Install WSL:
Follow this WSL Installation Guide provided by Microsoft to install Windows Subsystem for Linux on your Windows 10 computer. The detailed steps depend on your system versions.
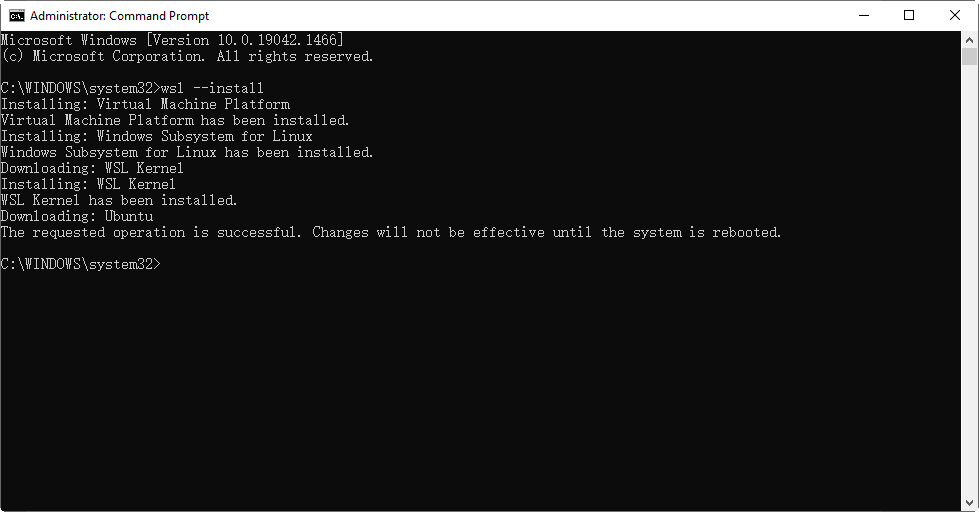
If you are running Win10 version 2004 and higher or Win11: You just need to open a command window (PowerShell or Command Prompt) as administrator, type the following command and press Enter:
wsl --install
This command will enable the required optional components, download the latest Linux kernel, set WSL 2 as your default, and install the Linux distribution for you. You can use WSL after restarting the computer.
The installed Linux distribution is Ubuntu by default. This can be changed using the -d flag.
- To change the distribution installed, enter: wsl --install -d [Distribution Name]. Replace [Distribution Name] with the name of the distribution you would like to install.
- To see a list of available Linux distributions available for download through the online store, enter: wsl --list --online or wsl -l -o.
- To install additional Linux distributions after the initial install, you may also use the command: wsl --install -d [Distribution Name].
If you are running older versions: You need to take a few more steps to manually install WSL. First, enter this command in PowerShell as Administrator:
dism.exe /online /enable-feature /featurename: Microsoft-Windows-Subsystem-Linux /all /norestart

Then you can either update to WSL 2 or continue using WSL 1. For the latter, you can now select a Linux distribution in Microsoft Store. Available options include Ubuntu, SUSE, Debian, Fedora, Pengwin, etc.

The first time you launch the Linux distribution, you'll be asked to wait for a few minutes till the files being stored on your computer. Also, you need to create a user account with password for the Linux distribution.
♦ Method 2 - Install Git for Winodws:
In addition to installing WSL and Linux distribution, you can also try using Rsync in Windows 10 by installing Git for Windows, which allows you to run Rsync command with Git Bash.

Now you can click here to find and download Rsync, and use zstd to extract it (by running command in Git Bash).
The next step is to move extracted files to the corresponding destination. For example:
- \rsync-3.2.2-1\usr\bin → C:\Program Files\Git\usr\bin
- \rsync-3.2.2-1\usr\lib → C:\Program Files\Git\usr\lib
- \rsync-3.2.2-1\usr\share → C:\Program Files\Git\usr\share
Then you should be able to use the Rsync command in Windows 10 via Git Bash.
Tip:
There's also a packaging of Rsync for Windows, called cwRsync. You can use it for remote file backup and sync in Windows 10 as well. But the free version of cwRsync Server is discontinued and the last free version is no longer directly available. For more details, you can view its official site.
Rsync Alternative in Windows 10 to Backup and Sync Files
As shown above, it’s not easy to install Rsync for Windows 10 even with the simplified approach. If you don’t have to use this utility and are open to other options, maybe a Windows-based program could save you a lot of hassle.
Then, what Rsync alternatives do you have in Windows?
| 💻Backup and Restore | The old Backup and Restore utility is slow and prone to errors, making it less reliable. It also doesn't offer much flexibility for customizing data backups. |
| 📂File History | File History offers a more straightforward setup for automatic folder backups, but it's limited in storage options, and Windows 11 doesn't allow adding personal folders. |
| 🔰AOMEI Backupper |
A more versatile tool lets you back up and sync files easily, supporting various storage options like internal/external drives, network locations, NAS, cloud drives, sync NAS to NAS, or USB. You can also schedule regular backups or sync tasks and perform incremental or differential backups to capture only the changed files. |
Here I will take AOMEI Backupper Standard as an example to show you how to sync files from local drive to cloud using Rsync Windows alternative. This freeware supports Windows 11/10/8/7, and the operation is really simple within an intuitive GUI.
You could download and install the completely free Standard version to try it out:
How to sync files in a Windows 10 computer to a cloud drive:
Step 1. Download and launch the Rsync Windows alternative, switch to the Sync tab, and select Basic Sync.
Advanced sync modes are available in the Professional+ edition:
☛ Real-Time Sync: Sync changed files from the source directory to the target directory in real-time.
☛ Mirror Sync: Always keep the files in the source directory exactly the same as the target directory.
☛ Two-Way Sync: Any changes made to the source or target directory will be synchronized to the other side.

Step 2. Edit the Task Name based on your needs. Click Select Source to select the folder you want to sync. You can click Add Source to add multiple folders.

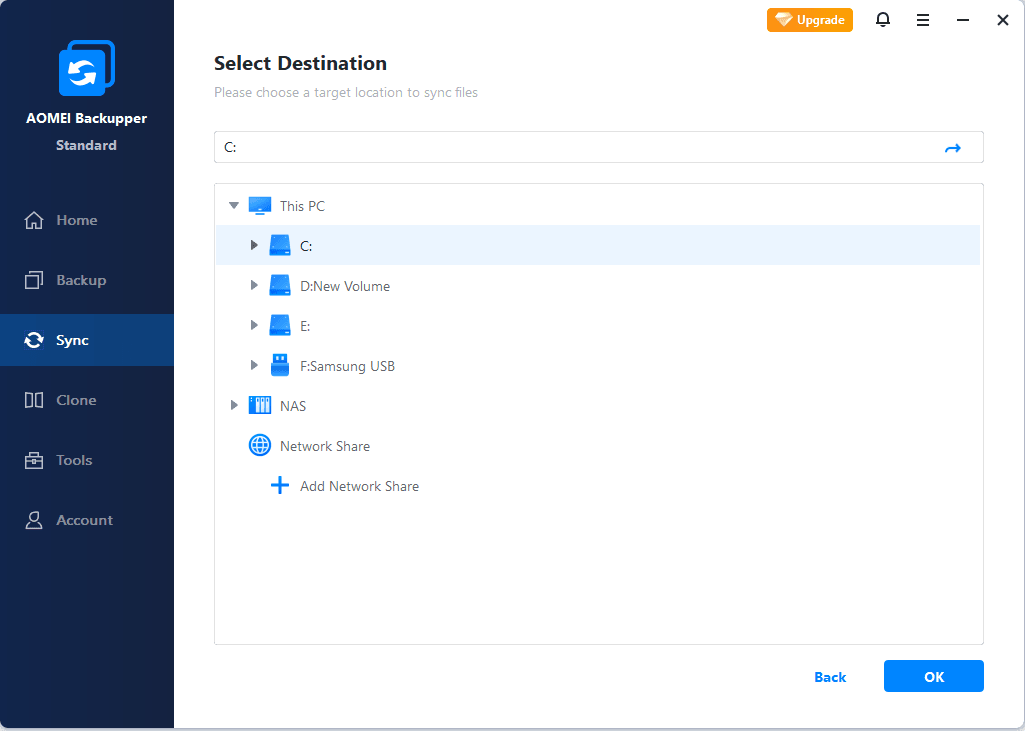
Step 3. Choose a destination path. To specify a network share/NAS, you could click the destination box and choose Network Share > Add Network Share or NAS > Add NAS accordingly.
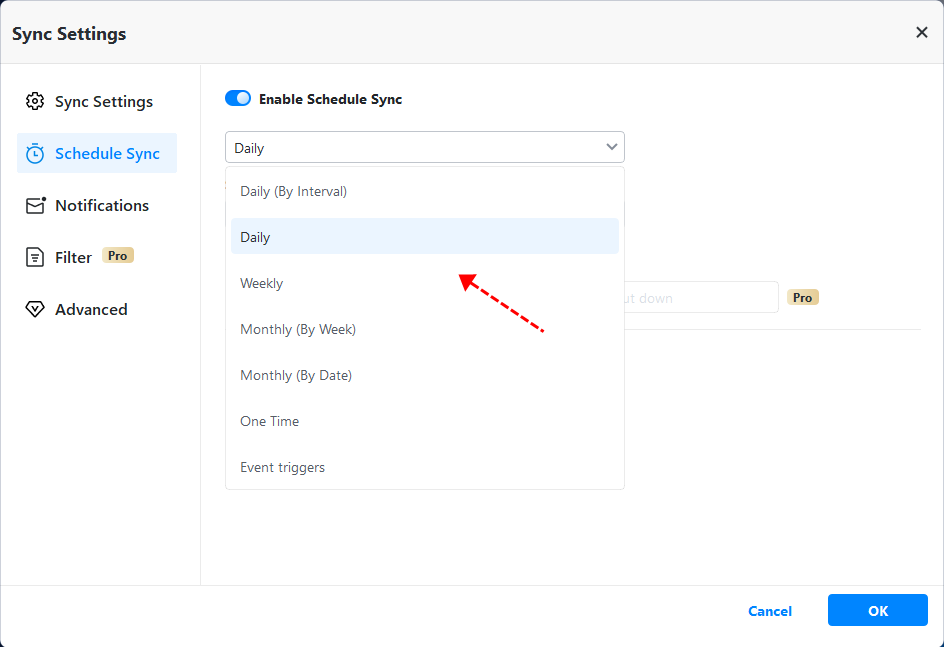
Step 4. (Optional) Click Schedule Sync to automatically execute the task based on daily, weekly, or monthly mode.
Step 5. Click Start Sync to begin file synchronization.
That’s it. After creating a scheduled sync task, you don’t need to set it up again. It will auto-run in the background without disturbing the job you are doing. At the same time, if your cloud drive does not have enough space, you can turn to cloud backup and AOMEI Cloud for help.
It requires you to sign up for an AOMEI account, you can then enjoy 1TB free cloud within 15 days and views the total space and used space after you log in. Besides, you can run the cloud backup task automatically.

To better meet your needs, you can also create multiple backup and sync tasks at the same time, and manage them in the Home tab easily.
Further Reading
Does Windows Server Have Rsync?
Windows Server does not come with rsync by default. Rsync is a popular utility commonly found in Unix-based operating systems, such as Linux and macOS. However, Windows users can still use rsync by installing third-party implementations or using alternative solutions with similar functionality.
Consider using AOMEI Backupper Server as an alternative. Tailored for server users, it offers comparable functionality and user-friendly operation for file synchronization tasks.
If you want to know how to use Rsync on Windows Server 2019, check this guide. Read more>>
Expert Tips for Using Rsync on Windows 10
-
Leverage SSH for Security: Always use SSH when syncing files over a network with Rsync. This ensures that your data is encrypted and protected from unauthorized access.
-
Test Configurations Before Large Transfers: Before using Rsync for significant tasks, especially over a network, test your setup with smaller files to ensure everything is configured correctly.
-
Automate Regular Syncs: Use Task Scheduler or scripts to automate your Rsync tasks. Regular synchronization ensures that your data remains current without requiring manual intervention.
FAQs about Rsync Windows 10
Q 1: Can I use Rsync on Windows 10 without installing additional software?
A 1: Rsync is not natively available on Windows 10. However, you can use it by installing tools like Windows Subsystem for Linux (WSL), Git Bash, or cwRsync, which provide the necessary environment to run Rsync commands. Without these tools, you cannot run Rsync directly on Windows.
Q 2: How does Rsync compare to Robocopy for file synchronization on Windows?
A 2: Both Rsync and Robocopy are powerful file synchronization tools, but they have different strengths. Rsync excels in incremental backups and network transfers, making it more efficient for large-scale data management across different systems. Robocopy, on the other hand, is a native Windows utility that offers robust file copying and synchronization features, especially within the Windows environment.
Q 3: What are the limitations of using Rsync on Windows 10?
A 3: The primary limitation is the lack of native support, meaning you need to install additional software like WSL or Git Bash to use Rsync. Additionally, Rsync's command-line interface may be challenging for users unfamiliar with Linux commands. There's also a learning curve associated with setting up Rsync over a network, particularly when configuring SSH keys for secure transfers.
Conclusion
As a handy command in Linux, Rsync is possible to be used in Windows 10, but the process is complicated and time-consuming. To back up and sync files locally and remotely, you could also use AOMEI Backupper in Windows 10 as an Rsync alternative.
In addition to the above-mentioned features, AOMEI Backupper integrates a Clone module allowing you to clone a disk, and therefore migrate HDD to SSD, move OS to another hard drive without reinstalling, or even clone a larger drive to a smaller drive, etc.

