How to Sync OneDrive to Computer in Windows 11/10 Flexibly
To sync OneDrive files to computer in Windows 10/8/7, the desktop app of OneDrive may be the most direct way, but it has some limitations in functionality and application range, so you can also try a more flexible solution.
Why sync OneDrive to computer
OneDrive, as a file hosting and synchronization service operated by Microsoft, offers a simple way to store and share all types of files with other people and devices on the internet. It allows anyone to access the data from anywhere, as long as the device is logged into the same account.
Usually, people would like to sync local PC to OneDrive for better data protection. But in some cases, you may also need to sync OneDrive files to a computer, for example:
- You want to view and edit the OneDrive files on another computer or even multiple devices easily
- You are working in a team and want to get updated files from a shared OneDrive account
- You want to keep a copy of OneDrive files in case anything unexpected happens to the cloud service...
Anyway, I’ll introduce 2 efficient ways to sync OneDrive files to your Windows PC.
Sync OneDrive to computer with desktop app
To make OneDrive sync to a computer, you need to install and set up the OneDrive app at first. If you are running Windows 8.1 or Windows 10, your computer should already have the OneDrive app installed, just search for OneDrive to open it. If you are running an older OS, you can download and install the desktop app manually.
Now, I'll give an example to sync OneDrive to a computer in Windows 10.
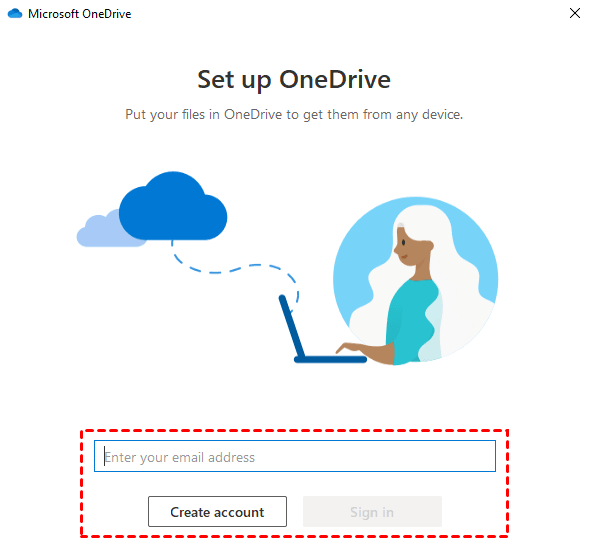
Step 1. If you've already got a Microsoft account, you can directly launch and sign in the desktop app. Otherwise, just sign up for an account on official site.
Step 2. On the Your OneDrive folder window, you can see the default location of OneDrive, and Change location if needed.
On the Your OneDrive is ready for you window, click Open my OneDrive folder to access it directly.
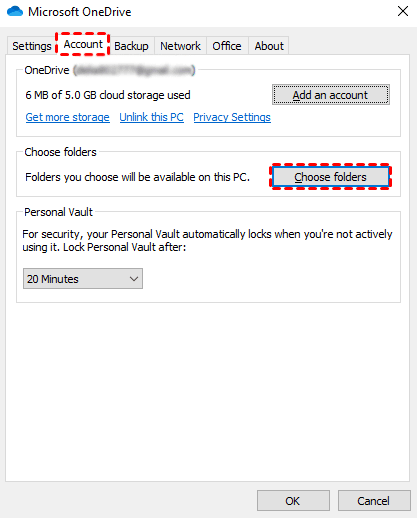
Step 3. Click on the OneDrive icon on the right side of taskbar, click Help & Settings > Settings > Account > Choose folders.
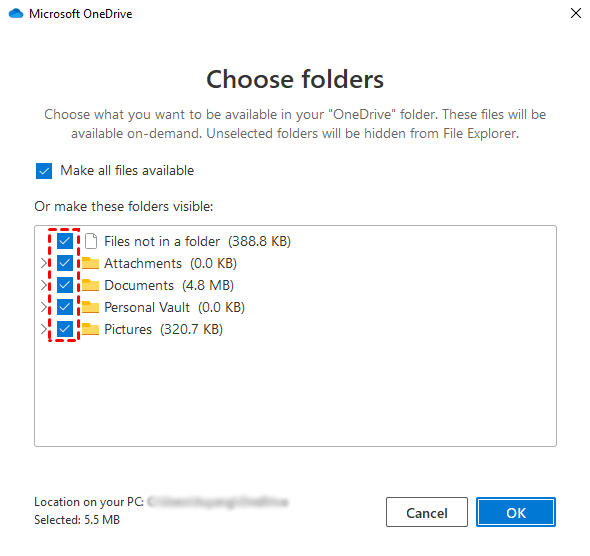
Step 4. Here you can check or uncheck the boxes in front of the folders to specify what you want to be available in your OneDrive folder. If you want to sync all these OneDrive folders to your computer, just select Make all files available.
If you want to auto sync local folders to OneDrive, just go to Help & Settings > Settings > Backup > Manage Backup and make your choice.
Thus you’ve made OneDrive sync to a computer. Quite simple, right? But please note:
The OneDrive folder can’t be counted as an extra copy of your OneDrive data, because it doesn’t take up the computer space and can’t be used offline (unless you choose Always keep on this device). If there’s any accident results in data loss on the cloud, your OneDrive folder will also be affected. Likewise, if you accidentally delete or modify the files in OneDrive folder, the changes will also be synchronized to the cloud drive.
Also, with the OneDrive desktop app, you can only sync Desktop, Documents and Pictures folder to OneDrive automatically. For other folders on the computer, you must drag them to the OneDrive folder manually.
What’s more, this app only works between OneDrive and computers, if you own more than one cloud drive or storage device, a 3rd party tool proving flexible file sync plans should be more effective.
Sync OneDrive files to PC flexibly via free software
AOMEI Backupper Standard is a powerful backup & sync program for Windows 11/10/8.1/8/7 computers. It can not only sync OneDrive files to PC or vice versa, but also supports external hard drives, USB drives, other cloud drives, NAS, etc. as the source or destination.
You can set up multiple sync tasks at the same time to organize your data and create different schedules to run them automatically. If you upgrade to Professional edition, you can sync any changes from source to target in real-time, or between two locations mutually.
Here’s an example of syncing OneDrive to computer in Windows 10:
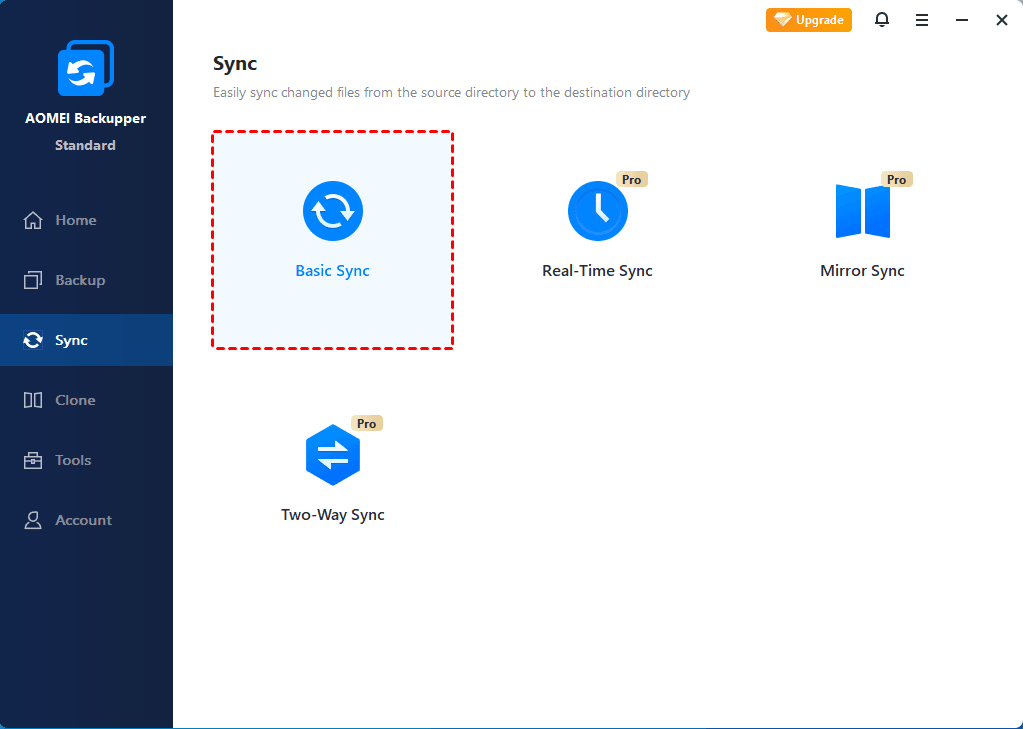
Step 1. Launch the free file sync software, click Sync on the left pane and choose Basic Sync.
Step 2. Click Add Folder, locate the OneDrive folder on your computer, and select the folder you want to sync. You can repeat this process to add multiple folders.
☛In the Pro edition, you can click the funnel icon on the right side of the select box to include or exclude the files with specific formats to sync.
Step 3. Choose anywhere on your computer as the target directory. Other destinations like removable devices or cloud drives are also available.
☛Network location: Hit the triangle beside the select box > Select a network location > Add Share or NAS Devices
☛Another cloud drive: Hit the triangle beside select box > Select a cloud drive
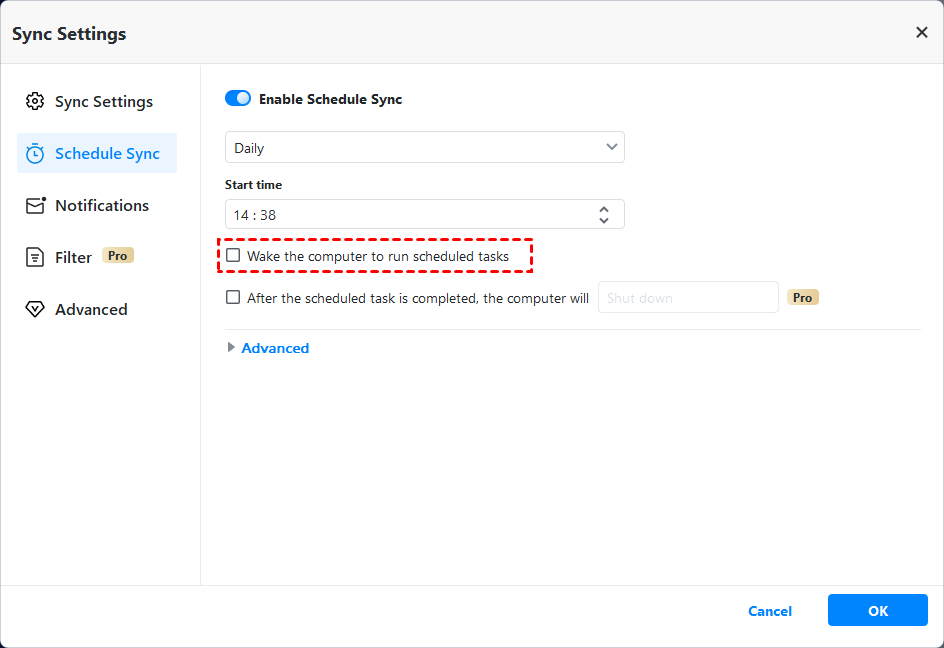
Step 4. You can Start Sync immediately, or create a Schedule to run the task automatically every day/week/month.
☛In the Pro edition, you can also set the schedule as Event triggers or USB plug in.
✎Tips:
-
If you want to sync local files to OneDrive, just select the source and target directory accordingly. With AOMEI Backupper, you can auto sync any files to OneDrive, not limited to Desktop, Documents, and Pictures folder.
-
If you want to copy OneDrive data to computer or other devices as a backup image, you can choose Backup > File Backup to create an image file, which takes less storage space but can’t be used directly.
✎Advanced Sync Modes:
In addition to scheduled automatic sync, you can choose 3 more modes in advanced editions. To explain them clearly, let’s assume the source directory is A and the destination folder is B.
◆ Real-Time Sync: Sync changed files from A to B in real-time. It doesn’t need a schedule and will run the task once the changes in A.
◆ Mirror Sync: Always keep the files in B exactly the same as A. Any changes made to B mistakenly will be erased at the next synchronization. It requires a schedule to run automatically.
◆ Two-Way Sync: Any changes made to A or B will be synchronized to the other side, both A to B and B to A. It also requires a schedule to run automatically.
Verdict
Syncing OneDrive to a computer helps you access updated cloud files easily and quickly. Meanwhile, syncing local folders to OneDrive is essential to avoid data loss caused by system or hard drive failures.
Although OneDrive allows you to accomplish these tasks with a desktop app, it has certain limitations. To arrange file sync between OneDrive and computers, or even between other cloud drives and removable devices, AOMEI Backupper Standard could be a more effective and flexible solution.
In addition to sync, this software also provides backup and clone features, allowing you to backup PC to cloud drive, external hard drive, NAS, etc., or transfer OS to another hard drive. If you own an AOMEI account, you can backup important files to AOMEI Cloud. Don't hesitate to try it out!
