How to Sync OneDrive in Windows 10 Automatically | 2 Ways
OneDrive auto sync is convenient. However, you may get stuck with OneDrive not syncing problem. Don't worry! You can find another easier way to sync Windows 10 to OneDrive.
By Lily Updated on August 31, 2023
OneDrive in Windows 10
OneDrive is a free and convenient cloud storage device embedded in Windows 10. Nowadays, more and more people would like to sync Windows 10 to OneDrive because of its prominent advantages.
Once you save files on it, you are able to get them from any PC, phone, or tablet. Also, you can use the files anytime, even when there is no Internet connection. Also, it is a good way to share files with others. Besides sharing files and data transfer, it also can be used as a backup plan. If any bad thing happens, you can recover files from OneDrive.
To help you make it, here in this guide, we will tell you how to sync OneDrive in Windows 10 step by step. And these steps also work for Windows 11. Then you can access files anywhere. In addition, you will also get an easier way to set automatic backup to OneDrive in Windows 10/11. Here we go.
![]()
Part 1. How to use OneDrive in Windows 10
OneDrive is very simple to use. There is a OneDrive folder that comes with OneDrive, you just need to drag and drop what you want to sync to this folder. This is the easiest way. When you need to sync all files and folders or batch selective sync, you can also set it up. Let’s see how to use OneDrive in Windows 10 and you can try the following steps if you are currently using Windows 11.
Step 1. Sign in OneDrive
1. Click Start and search for “OneDrive”, and then open it.
2. Enter your account and password to sign in.
Step 2. Choose location for your OneDrive folder
On the Your OneDrive folder window, you can see the default location of the OneDrive folder. Click Change location if needed.

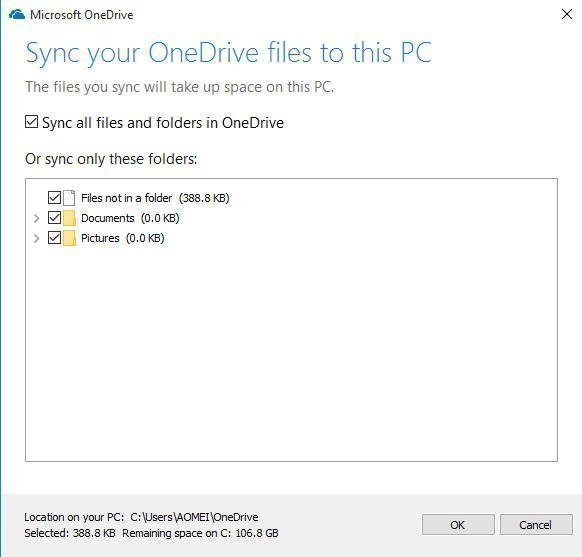
Step 3. Choose folders to sync from OneDrive to PC
When you first set up OneDrive on your Windows 10/11 system, you will be given the choice of which OneDrive folders will be synced to your PC.
Step 4. Upload files to OneDrive
If you want to add files to OneDrive, click Open my OneDrive folder. Then drag and drop/copy and paste the content into the OneDrive folder. If you want to access the OneDrive folder later, open This PC > find OneDrive in the left pane and click on it.

✎ Tips:
👉 To change the folders that will be synced from OneDrive to PC, find the OneDrive icon in the notification area in the lower right corner, right-click the icon and select Settings. Now, you are at Microsoft OneDrive Account, click Choose folders.

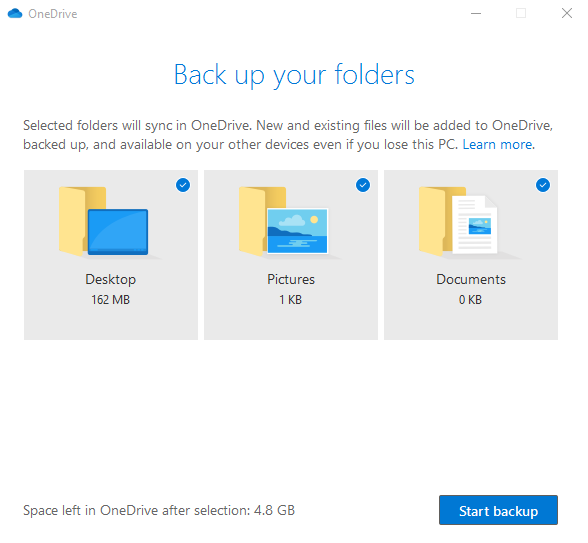
👉 There’s a feature that lets you backup your files in the Desktop, Documents, and Pictures folders to OneDrive, then they’re protected and available on other devices. If you turn it on, OneDrive will automatically keep these folders in sync.
1. Right-click the OneDrive icon and select Settings.
2. Go to the Backup tab and click Manage Backup.
3. Finally, click Start Backup to make it.
Fix OneDrive sync problem in Windows 10
Sometimes, you may meet Windows 10 OneDrive sync problems: you cannot sync files between your computer and OneDrive; OneDrive does not sync all files; OneDrive sync is slow and other OneDrive sync problems. You can try the following tips.
1. Check if your Internet is connected.
2. Verify if you have permissions to the file or folder you are trying to add.
3. Check if there are files and folders with the same name in the same location.
4. Any files that are over 10GB will not be synced. Reduce the size of any files that are over the limit.
If the above methods cannot help you solve the Windows 10 OneDrive sync problem, you can refer to the next part to learn a quick way to sync Windows 10 to OneDrive. And it's still used on Windows 11.
Part 2. Easier way to auto sync OneDrive in Windows 10/11🔥
In order to have a better and more successful experience in synchronization, you can also try a free OneDrive sync tool – AOMEI Backupper Standard. It is one of the best backup and sync software.
✦ You can either sync specific files and folders to cloud or backup PC to cloud.
✦ You can even sync open or running files.
✦ Various cloud drives are supported, including OneDrive, Dropbox, Box, SugarSync, hubiC and Cloudme.
✦ You are also allowed to backup to AOMEI Cloud. It offers you 1TB of free storage for 15 days after you sign up for an AOMEI account.
✦ The best part is that you can sync Windows 10 with OneDrive automatically: daily/weekly/monthly. Every time there are newly added files, you do not have to sync them manually.
✦ Besides Windows 10, this software also supports Windows 11/8.1/8/7/XP/Visa.
How to automatically sync Windows 11/10/8/7 to OneDrive
Note: To sync files to OneDrive with AOMEI Backupper, you have to download the OneDrive desktop app and log in to your Microsoft account first.
Step 1. Download AOMEI Backupper Standard and run this software.
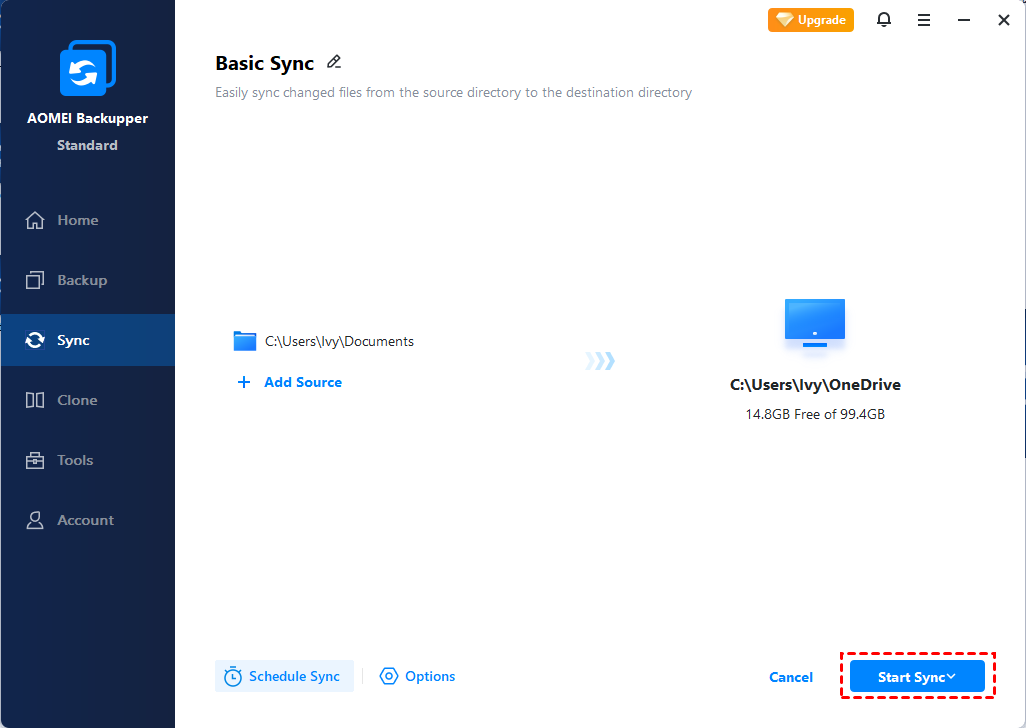
Step 2. Click Sync and select Basic Sync.

If you upgrade to a higher version, you can enjoy three advanced sync modes:
▶ Mirror Sync: this will keep the destination directory exactly the same as the source directory. Any extra files in the destination folder will be deleted.
▶ Real-Time Sync: this will immediately synchronize files to the destination folder when the tool detects all kinds of changes made in the source folder.
▶ Two-Way Sync: this will sync changes made in the source directory to the destination directory and vice versa.
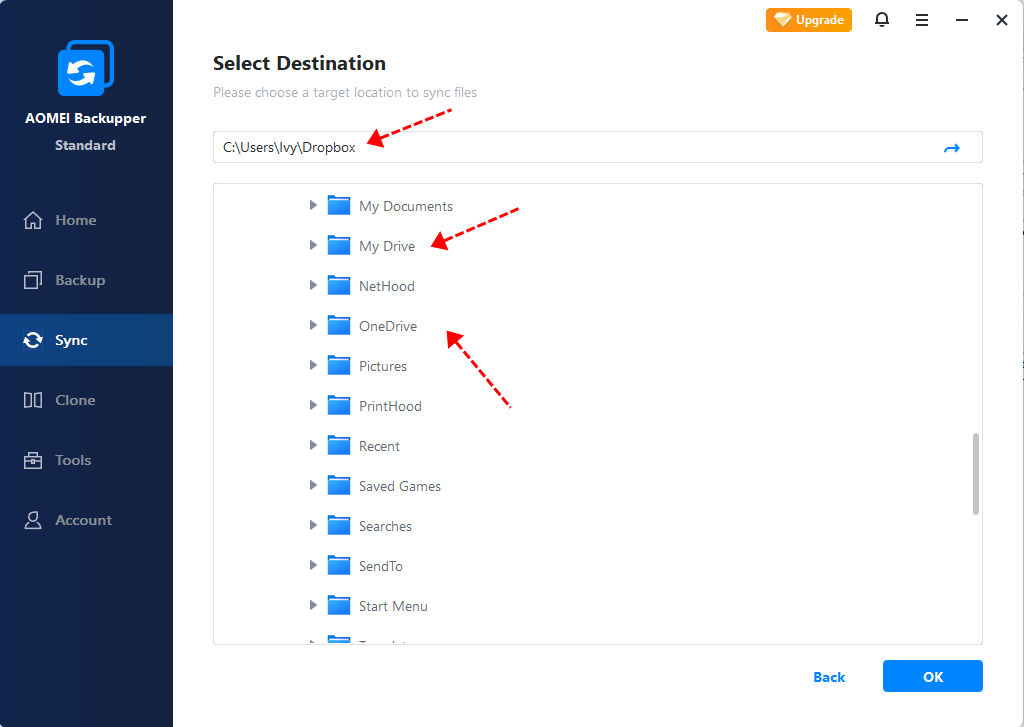
Step 3. Click Add Folder to select the folders you want to sync.

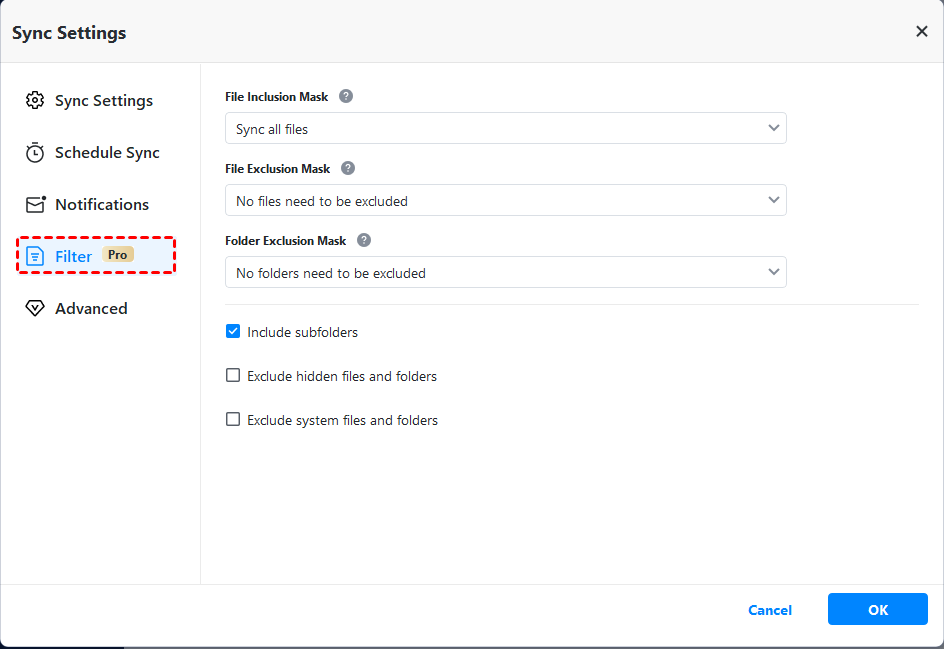
✍ Tip: You can click Filter Settings to include or exclude certain types of files. However, this feature is only available in the paid version. You can upgrade to the Professional version if needed.
Step 4. Click the drop-down menu and choose Select a cloud drive. Then select OneDrive as destination path, and click OK to confirm.
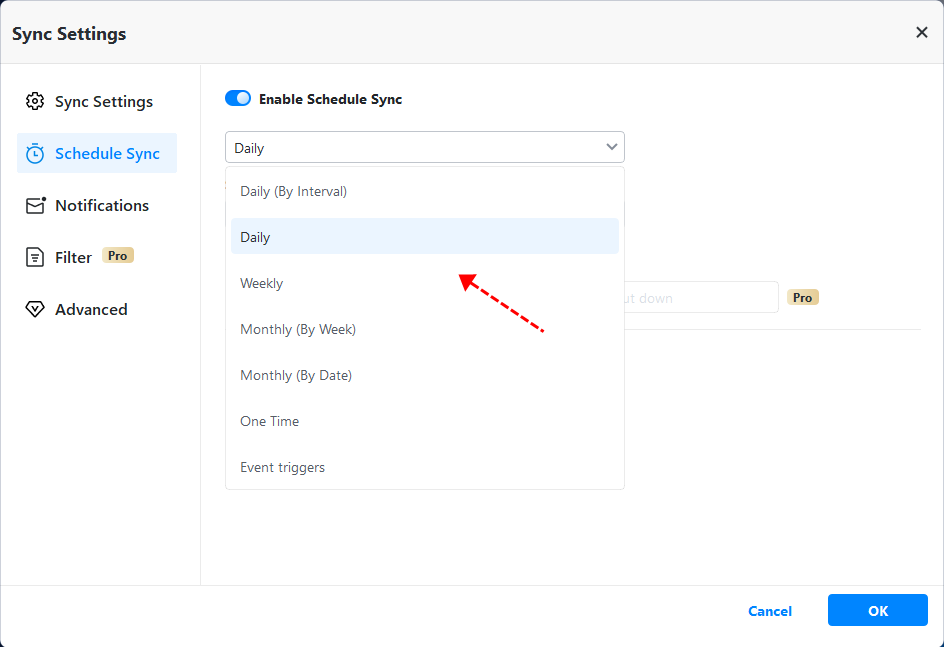
Step 5. Click Schedule Sync to automatically sync Windows 10 with OneDrive. By default, it will run the missed sync at the next system startup.
✍ Tip: You can click Options to write a unique comment so that you can find this sync task easily. You can also enable Email notification to notify you once the task is finished.
Step 6. After these have been set up, click Start Sync.
Conclusion
Now you how to sync OneDrive in Windows 10. As you can see, AOMEI Backupper offers a convenient way to perform OneDrive auto sync. Once you set up the file sync, you can just leave it alone and it will automatically sync files for you.
Besides, it offers various backup options to protect your computer. You can set scheduled backup tasks to backup your system, file, disk, and partition. Thus, when something goes wrong, you can restore your PC to earlier date that works well and also find the lost data as soon as possible.
The Server edition of AOMEI Backupper allows you to sync Windows Server with OneDrive. It also has PXE Boot Tool to help you boot multiple computers within LAN through the network. Try it now to discover more!

