2 Simple Ways to WHS 2011 Server Migration to New Hardware
You will learn how to easily and safely perform WHS 2011 migration to new hardware with built-in tool or 3rd party server backup software - AOMEI Backupper Server.
By Ivy Updated on December 11, 2024
When you buy a new server to replace the old server machine that is out of date, you may want to keep the old operating system, for example, Windows Home Server (WHS) 2011, that you are used to. And usually, the new server has different hardware. Therefore, here comes a question: how do I perform WHS 2011 server migration to new hardware simply and safely?
You may search this keyword online, but many of the articles are related to upgraded version, and there is almost no operation guide. Don't worry about too much, this article will show you two simple ways to migrate server to new hardware step by step without booting issues.
Assuming you already have a system backup created by built-in backup software, you can perform a server restore using it. If your computer is still working properly, you can choose to create a system image for WHS 2011 with 3rd party server backup software like AOMEI Backupper Server and then restore system image to server with dissimilar hardware. To be honest, it is simpler and safer. Here is a quick navigation for server migration:
-
Method 1: WHS 2011 Server Migration to New Hardware with built-in tool
-
Method 2: Migrate WHS 2011 to New Hardware with AOMEI Backupper Server
Method 1: WHS 2011 Server Migration to New Hardware with built-in tool
You should first create a full WHS 2011 server backup of the source server to an external hard drive or network location using the Set up Backup for this computer task in Dashboard, then follow the steps below to perform a server restore to dissimilar hardware. And the backup can be found in the Computers and Backup page of the Windows Home Server 2011 Dashboard.
Step 1. Connect the external drive containing system image backup and installation disc to the destination server computer. Then, restart your computer and boot from the disc. Press a key when you asked to press any key to boot from CD or DVD.
Step 2. Then, it will start to load files required for boot, please wait until you see the Installing Windows. Click "Repair an existing installation" to move on.

Step 3. Select a backup image and follow the on-screen instructions to finish the rest of steps. Click "Close" to restart your server when the process is complete.
Don’t forget to eject the DVD, otherwise the process may fail. Also, if you don't a WHS 2011 installcation disc or you lose it, you can turn to a 3rd party server backup software - AOMEI Backupper Server.
It is capable of creating a bootable USB to boot your server computer into recovery environment and then move WHS 2011 to another computer. And this software has clear interface and user-friendly design, very easy to use, even novice can use it smoothly. It could be a great choice if you want an easier way.
Method 2: Migrate WHS 2011 to New Hardware with AOMEI Backupper Server
The biggest problem of migrating WHS 201 TO New hardware is driver compatible issue, which may result in boot failure. But with the help of AOMEI Backupper Server, whether you want to move OS only or entire hard drive, this problem can be solved easily and quickly with its "Universal Restore" feature. For IT technicians or small and medium-size companies, you could use AOMEI Backupper Technician Plus.
Please note backup image is the gurantee of restoring server to new hardware without boot issues, you need to download AOMEI Backupper Server on the server computer you want to replace and then create a system image backup or disk image backup in advance.
Then, let's a have a closer look at this process. Please create a bootable media (USB drive or DVD) to boot the destination server if it's not bootable, or use AOMEI PXE boot feature in this software.
Step 1. Connect the drive containing the backup image of WSH 2011 as well as the target disk to store image and make sure it can be detected. Then, boot your computer from the bootable media or use PXE boot tool feature.
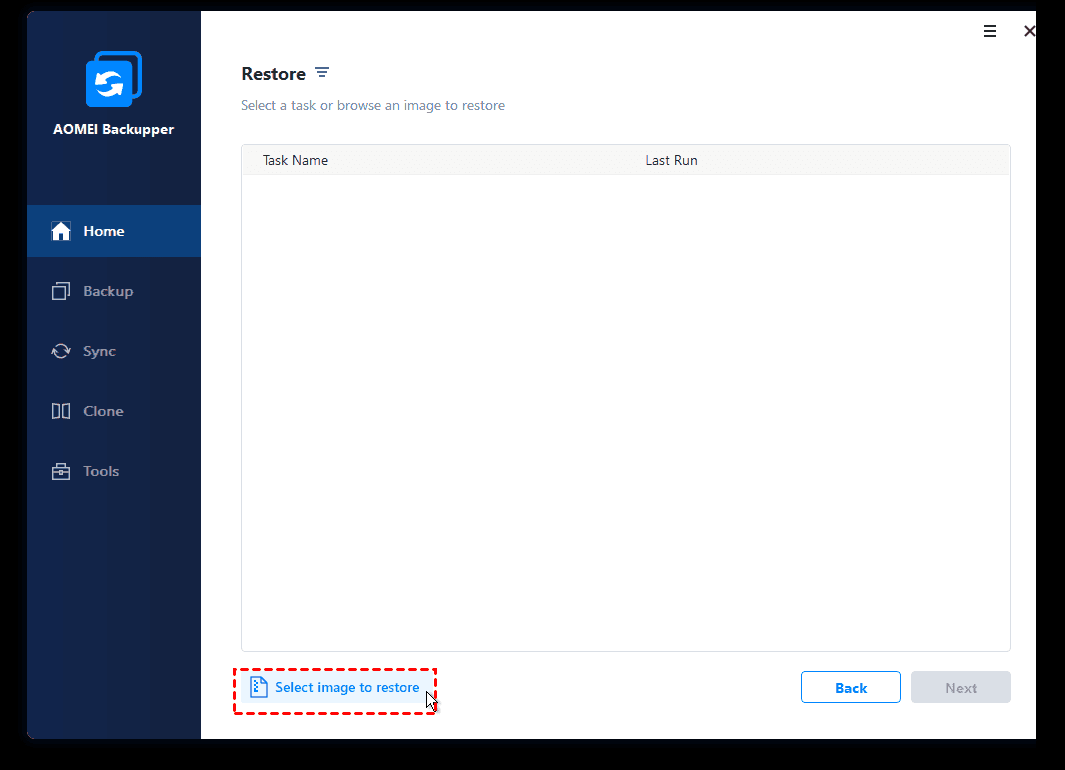
Step 2. Then, after loading, you will see the main page of server backup software - AOMEI Backupper Server. Click "Restore" and "Select Image File" to find the system image.
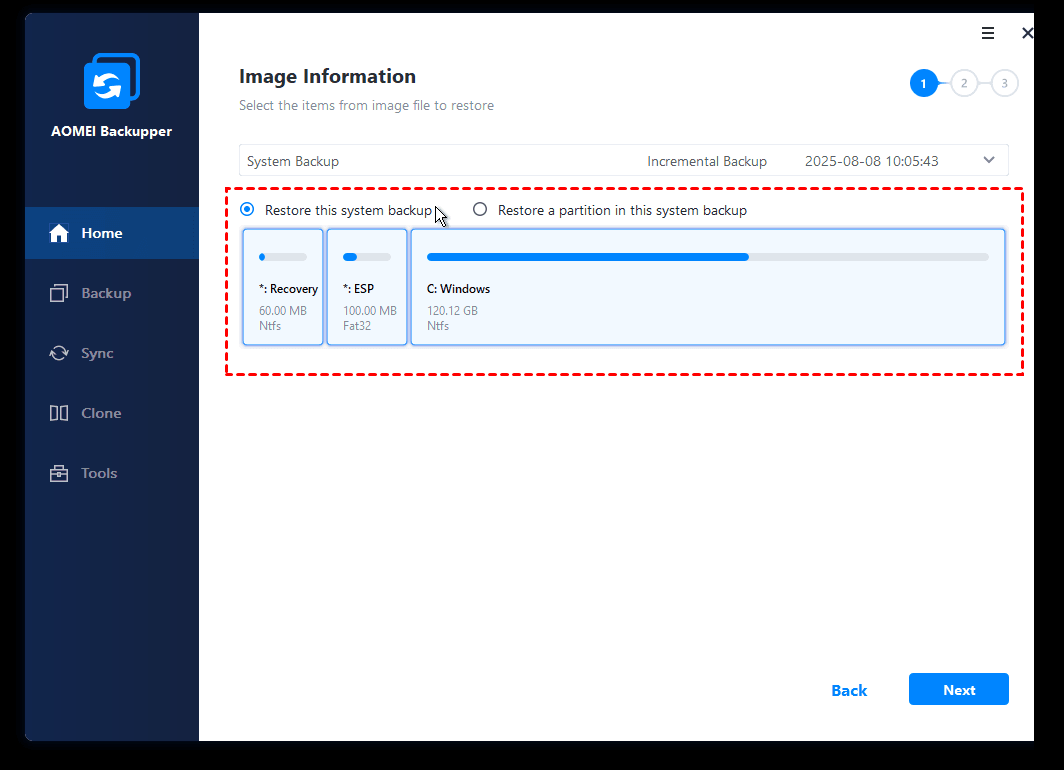
Step 3. Tick "Restore this system backup" and then "Restore system to other location". Then, click "Next".
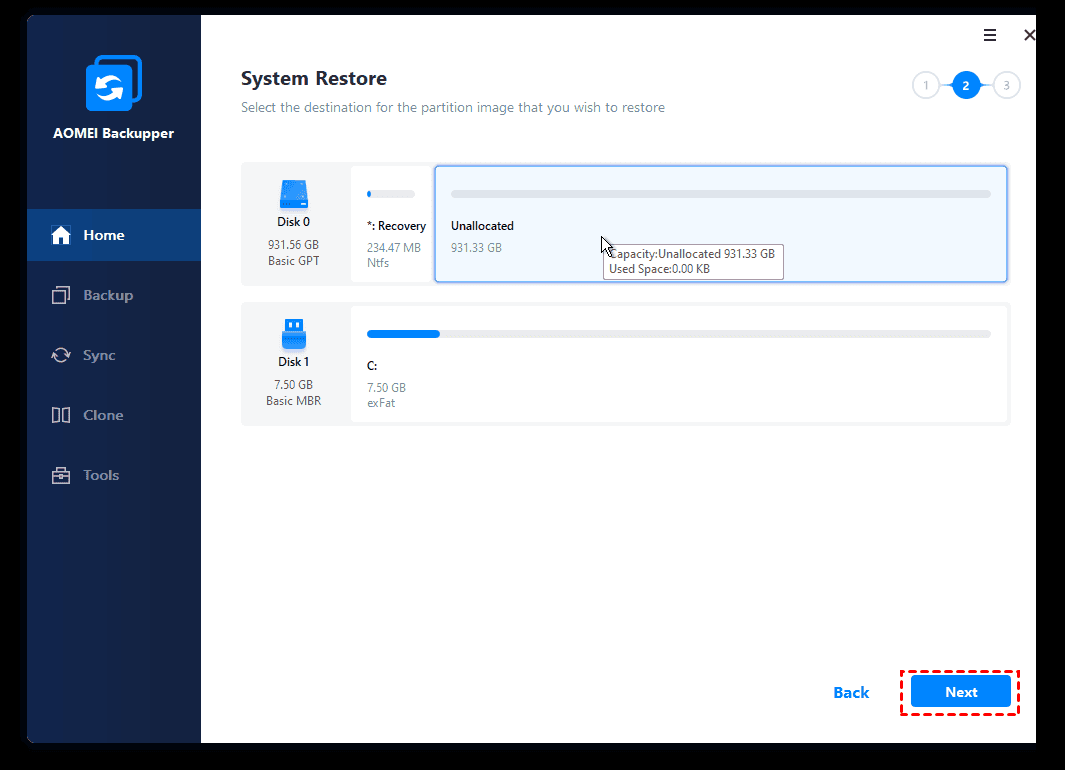
Step 5. Here you will see all the detected hard drive, select the drive you prepare to store the system image and then click "Next”. Then, you will be prompted that the target disk will be overwritten, so please backup important files in advance.
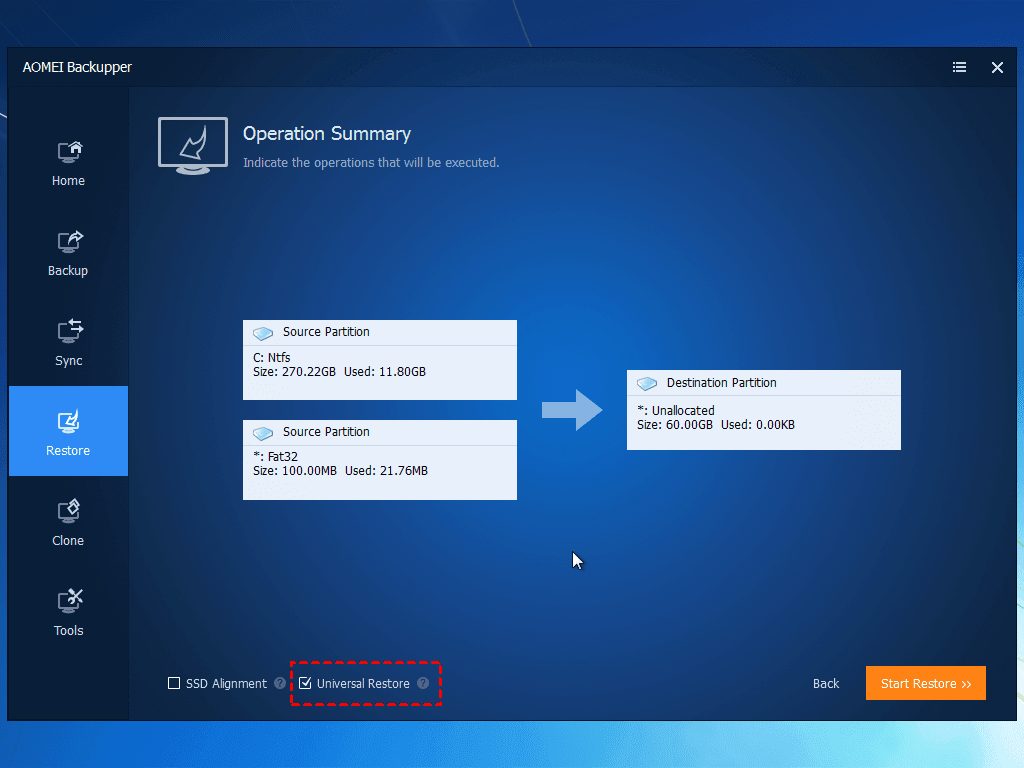
Step 6. Tick "Universal Restore” at the lower location to solve the drivers compatible issue. Tick "SSD Alignment" to boost the overall performance if the target disk is an SSD disk. Finally, click “Start Restore” to start the WHS 2011 server migration.
In a short while, WHS 2011 server migration to new hardware will be completed. Then, you can boot the new server computer and check if all the content are intact.
Also, it's suggested to keep AOMEI Backupper Server installed on your computer, you can use it to protect system and data continously by its complete backup and restore features, including system/disk/patition/file backup, daily/weekly/monthly schedule backup, incremental & differential backup, USB plug in, event triggers, universal restore, PXE boot tool, etc.

