[3 Ways] to Migrate Windows Server 2012 R2 to New Hardware
Here are 3 ways to migrate Windows Server 2012 R2 to new hardware for different situations. You could choose one way to follow according to your situation.
By Delia Updated on December 13, 2023
Scenario: I want to migrate Windows Server 2012 R2 to new server
I am running Windows Server 2012 R2 at my office. Nowadays, I have got a new server with a better configuration. It does not have the OS yet. Can I migrate Windows Server 2012 R2 to new hardware without losing any settings or data?

Why migrate Windows Server 2012 R2 to new hardware
Modern technology is changing rapidly and you won't always be stuck with the same equipment. For example, you may want to transfer your Windows Server 2012 (R2) to new hardware for the following reasons:
Server upgrade: Usually, there could be some hardware problems if your Windows Server machine is really old. And you may want to upgrade to a new server. However, reinstalling the operating system and other apps on the new server may be a troublesome thing for most of you. Therefore, you could migrate Windows Server 2012 R2 to new hardware directly.
Unify configuration: Sometimes, especially in companies, you may need to install the same system like Windows Server 2012 R2 and applications to many computers. As we all know, it will take a long time to install each of them one by one. So, migrating Windows Server 2012 R2 to other computers directly may be an easier way.
How to migrate Windows Server 2012 R2 to new hardware
Many users know the concept of system or disk cloning. When migrating Windows Server 2012 R2 to another disk on the same machine, using Windows Server migration tools would be the easiest option. But it's not as simple to migrate Windows Server to different machine - it also involves the compatibility of boot files on different hardware.
You may also think of bare-metal backups, which are a common means of data protection on Windows Server and can be used to recover a machine that has no system or the system has crashed. However, according to Microsoft, such backups are only guaranteed to restore the same physical machine, or different physical computers with the same hardware (same make, model and configuration).
Although some articles indicate that you can do AD forest recovery of different machines with a full server backup, it is highly likely to go wrong in practical applications. Therefore:
👉If you want to transfer Windows Server 2012 R2 to a machine with the same hardware, then you can just use the built-in Windows Server backup and system image recovery.
👉If you want to migrate Windows Server 2012 R2 to different hardware, it is recommended to use dedicated tools that support Universal Restore (restore system image to dissimilar hardware). It can resolve the boot issue.
In the following article, I will illustrate 3 methods to help you migrate Windows Server 2012 R2.
Way 1: Migrate Windows Server 2012 R2 via Windows Server Backup
Way 2: Migrate Windows Server to Dissimilar Hardware Securely🔥
Way 3: Migrate Windows Server to New Hardware Remotely👍
Way 1: Migrate Windows Server 2012 R2 via Windows Server Backup
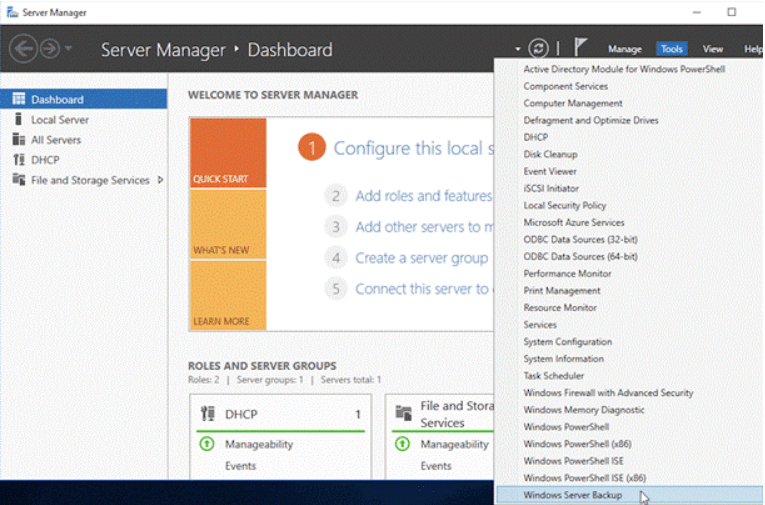
Windows Server has its built-in migration tool called Windows Server Backup. With it, you could create a system image and then restore image to your new hardware. If you don't have this tool on your computer, you can install Windows Server Backup first from Server Manager.
Steps to migrate Windows Server using Windows Server Backup
Here I will show you how to migrate Windows Server 2012 R2 with via the backup and restore way. Before restoration, you need to create a system image backup that includes everything you want to migrate, and complete some other preparations step by step.
✬Create Windows Server Backup
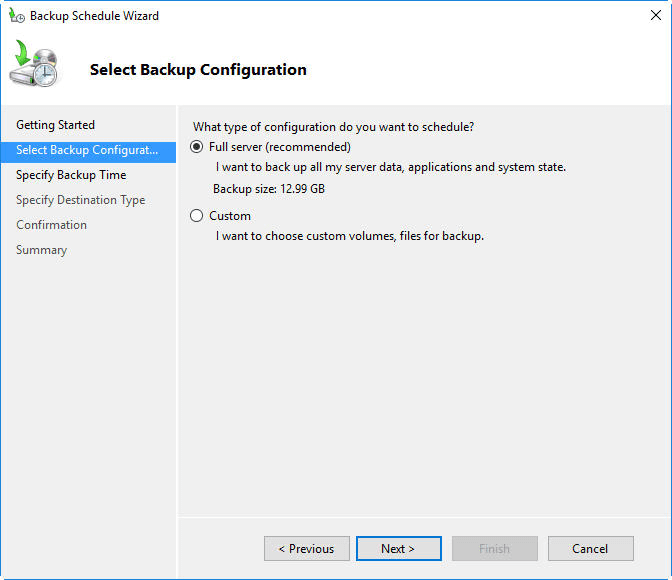
Use Windows Server Backup to create a full backup that can be used for bare metal recovery. To be specific, you can either select "Full server" in Select Backup Configuration, or select "Customize" -> "Bare metal recovery".
*Amont the two, Full server backup is anything in your system, and Bare metal backup is anything that is needed for your system's OS and its apps. Bare metal backup is included in Full server backup.
✬Prepare recovery disk or installation disk
To perform a system image recovery, you need a Windows Server recovery disk or installation disc of corresponding OS to access Windows Recovery Environment. For example, if you want to restore Windows Server 2012 R2, the recovery disk must be made in Windows Server 2012 R2.
*If the target machine has no system, you need to use Windows installation disk because system repair disc, because recovery drive won’t work on non-system computers.
✬Make sure the target drive has enough disk space
If you want to restore Windows Server to a new machine, the new hard drive needs to be in the same size or larger than the source disk.
✬Make sure the boot mode is correct
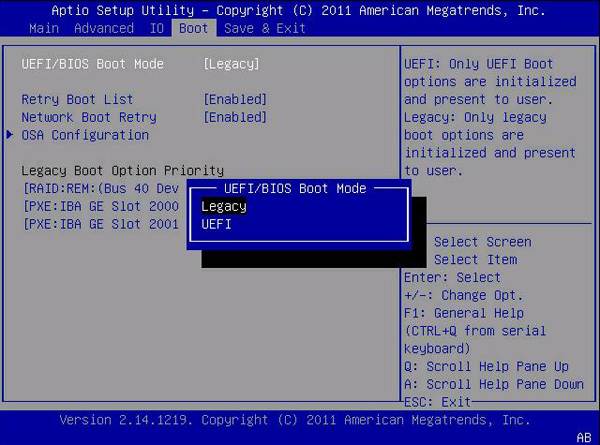
The target computer should have the same boot mode (Legacy/UEFI) as the source computer. Otherwise, you will likely receive errors during restoration.
You can boot into BIOS to ensure the boot mode is the same, or manually reconfigure it. If you change the boot mode, remember to convert disk into the corresponding partition style.
Steps to restore Windows Server 2012 R2 step-by-step:
1. Follow the wizard to create a full backup in Windows Server Backup.
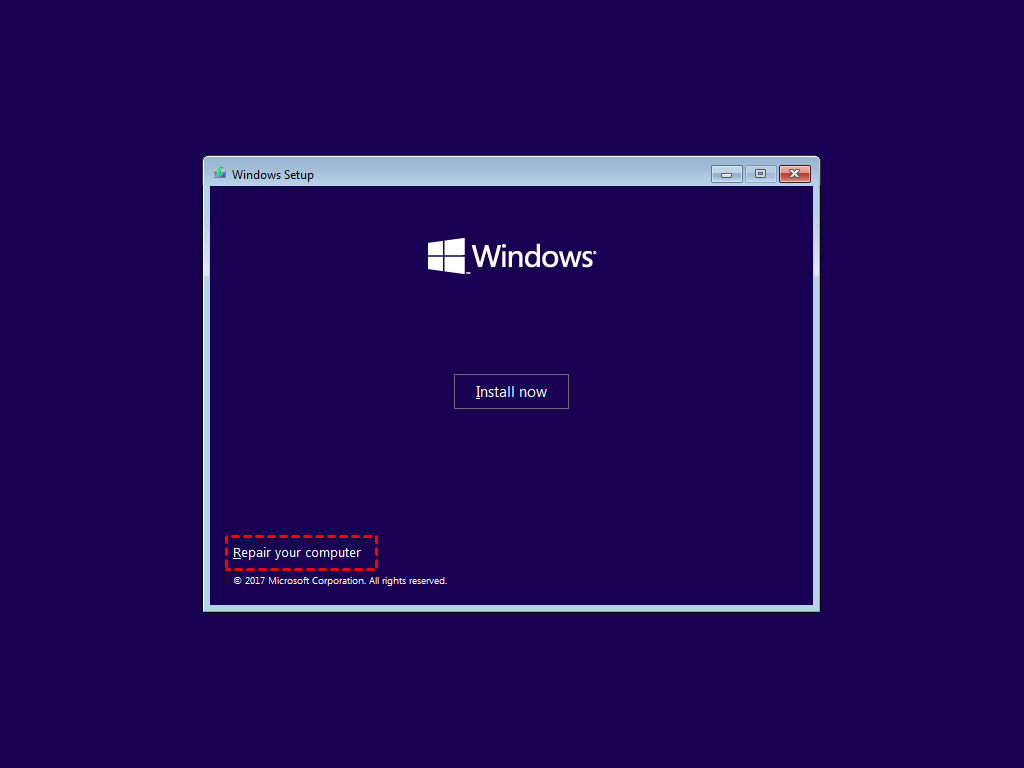
2. Boot your new server machine with a Windows Server 2012 R2 installation disk. Select Repair your computer at the lower-left corner.
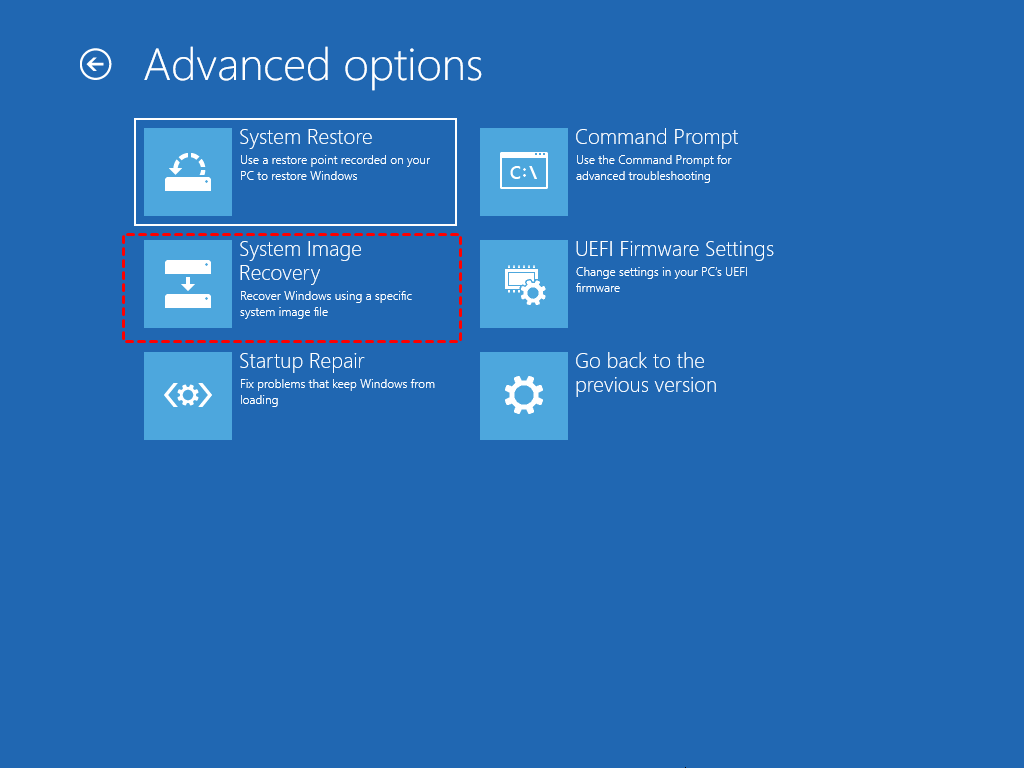
3. Select Troubleshoot > Advanced Options > System Image Recovery.
4. In the Re-image your computer screen, select the available system image to perform the restore.
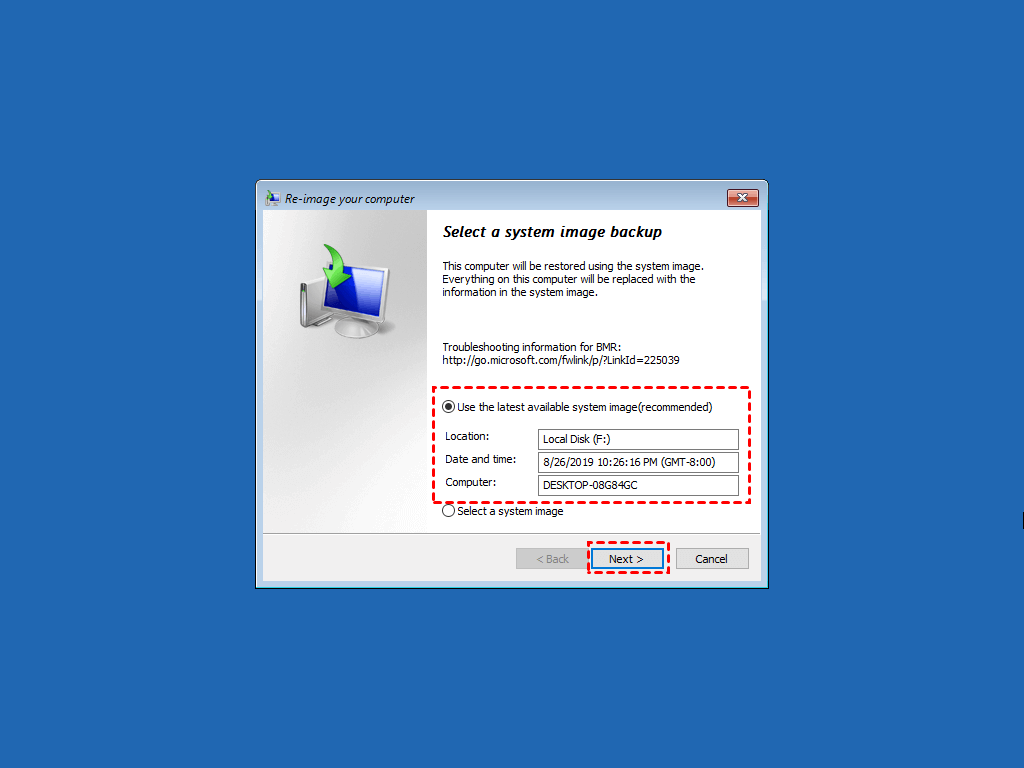
After restoring, you could boot the new Windows Server 2012 R2 machine. And system, settings, and installed programs are the same as the old machine.
Way 2: Migrate Windows Server to Dissimilar Hardware Securely
As said above, with Windows Server Backup, you can hardly transfer Windows Server to another server with different firmware. Also, it doesn't allow you to restore system image to a smaller disk. If you want more flexibility, and avoid errors such as system image restore fails because of UEFI/BIOS, you may consider using the professional Windows Server migration software - AOMEI Backupper Server.
It enables you to create a complete system or disk image very easily, and bare metal restore it to even smaller disk with the intelligent-sector technology.
With the specialized Universal Restore feature, you can also bare metal restore Windows Server to dissimilar hardware regardless of its firmware and partition style.
It helps you to create a recovery disk that can be used on any Windows computer for disaster recovery.
It supports all Windows Servers including Windows Server 2003, 2008, 2011, 2012, 2016, 2019, 2022 (including R2), Windows SBS 2003, 2008, 2011 and Windows 11, 10, 8.1, 8, 7, Vista, XP.
Download the 30-day free trial to give it a try:
Before migrating Windows Server 2012 R2, you need to do the following preparations:
✬You should create system image or disk image with AOMEI Backupper first before using it to restore system to new machine.

✬Using AOMEI Backupper bootable media or PXE boot tool to boot your target Windows Server machine. (If you need to open several destination computers, we suggest you boot from the Network Using PXE boot tool because it can open several destination computers on the same network). Here take PXE network booting for example.

Steps to migrate Windows Server using AOMEI Backupper:
Before restoring, you need to insert the boot media created to your computer and enter BIOS to make your computer boot from the bootable disk firstly. Then, AOMEI Backupper will automatically be loaded on your new computer. Then the main page of the software will pop up.
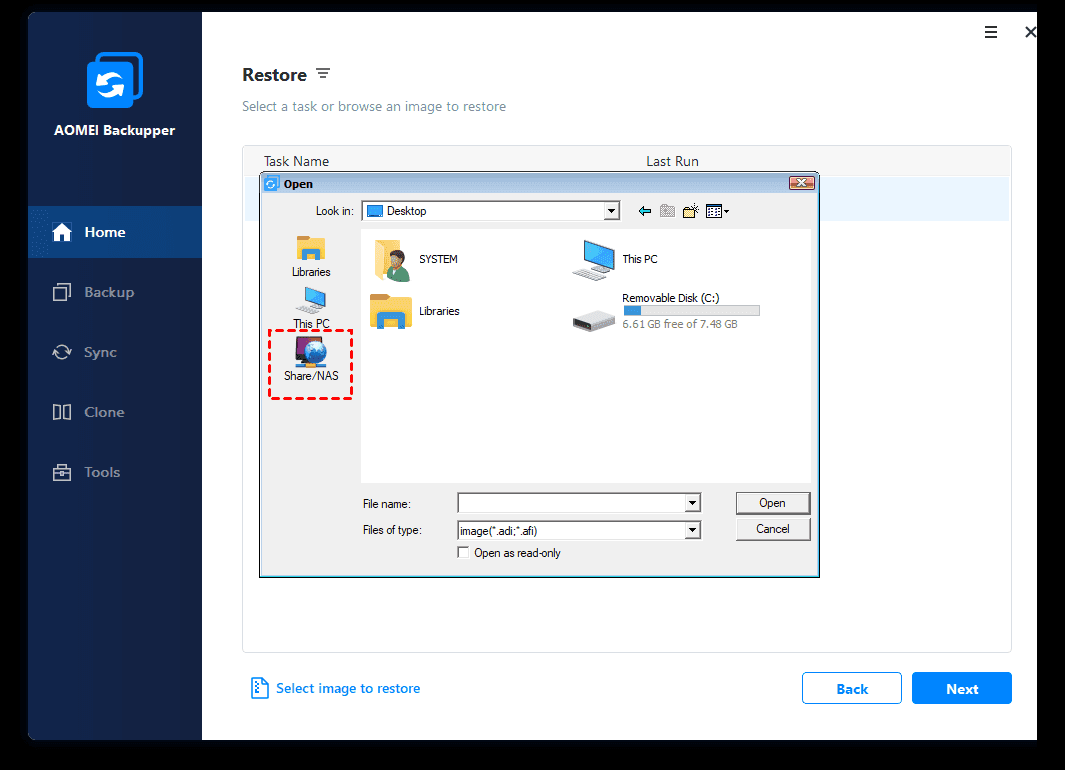
1. Click Restore and then click Select Image File to select the backup image you prepared before.

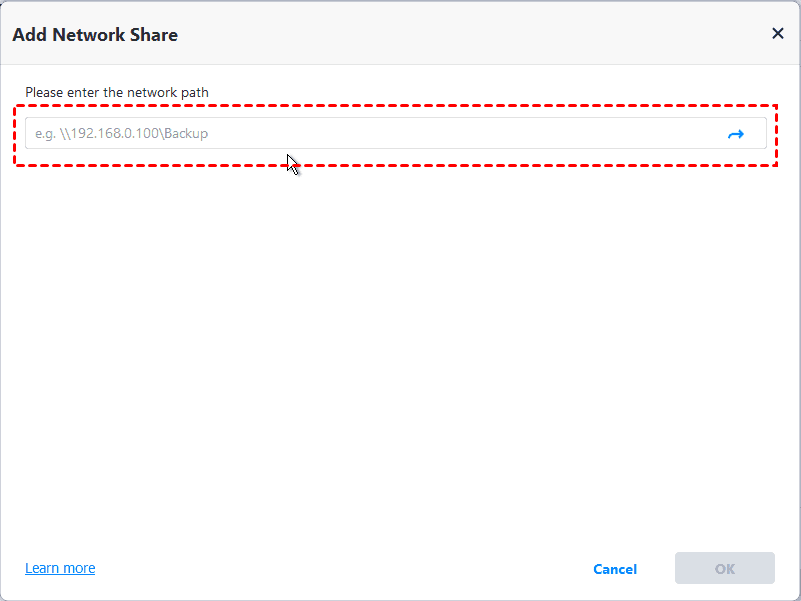
2. Click Share or NAS. Then, click Add Network Location.
3. Type display name, network path, user name, passwork and click OK to connect the path.
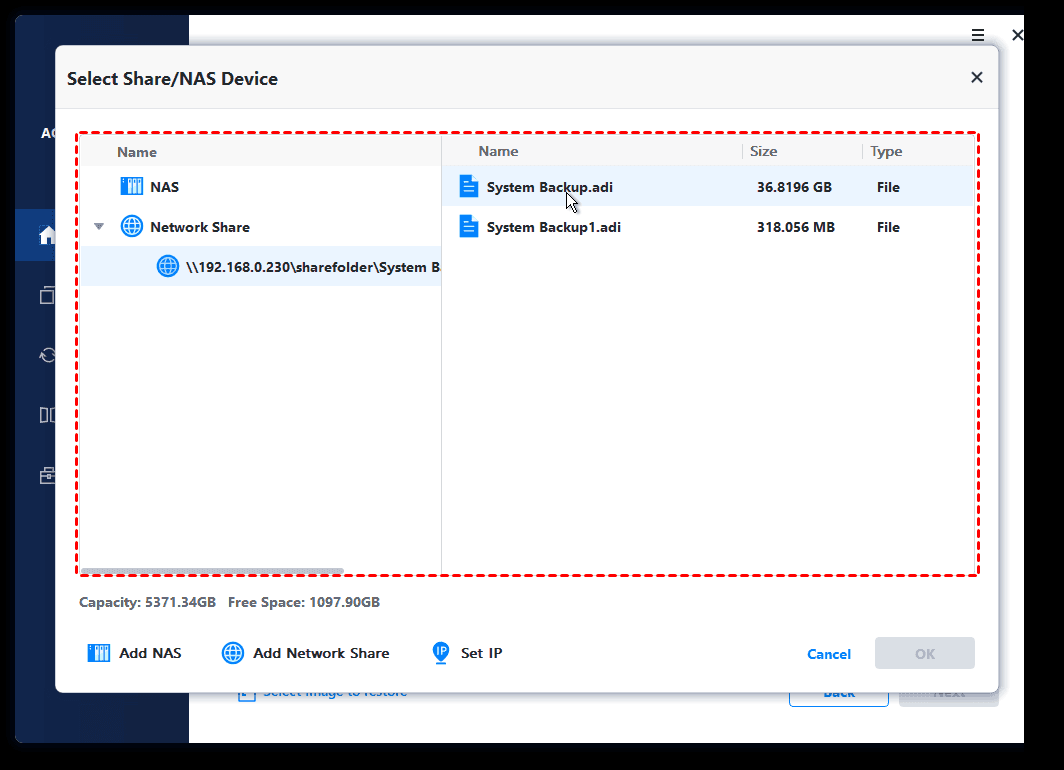
4. The select image in the network share or NAS path.
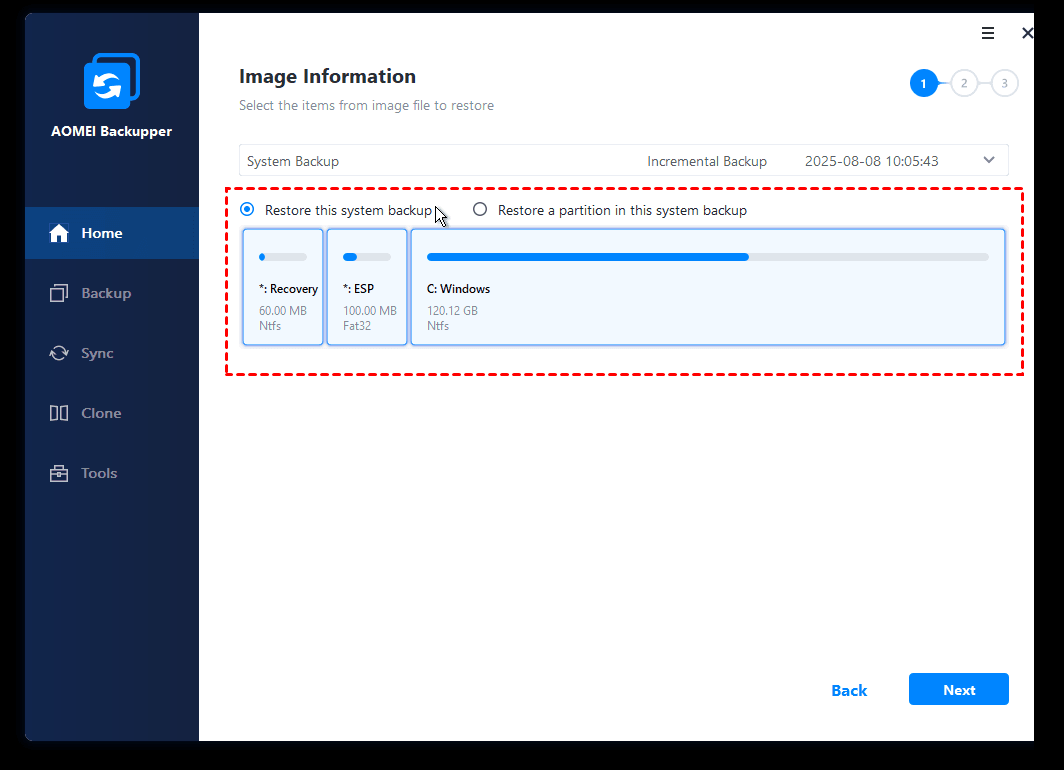
5. Select to restore entire backup or a part and click Next.
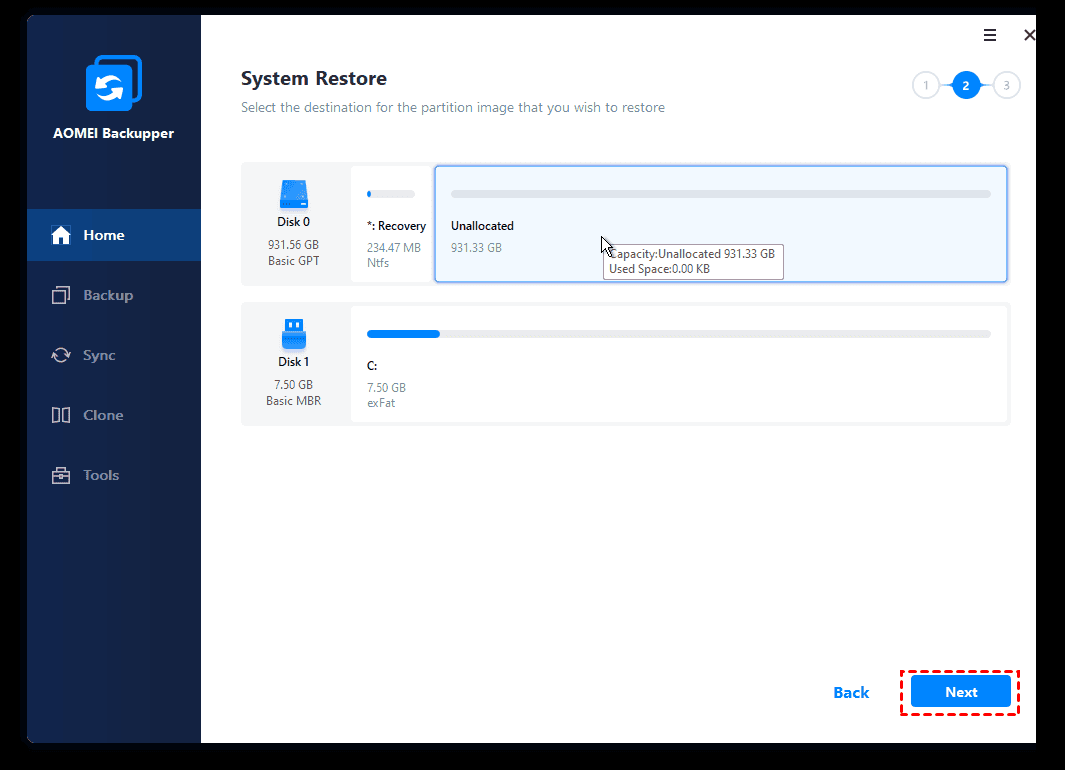
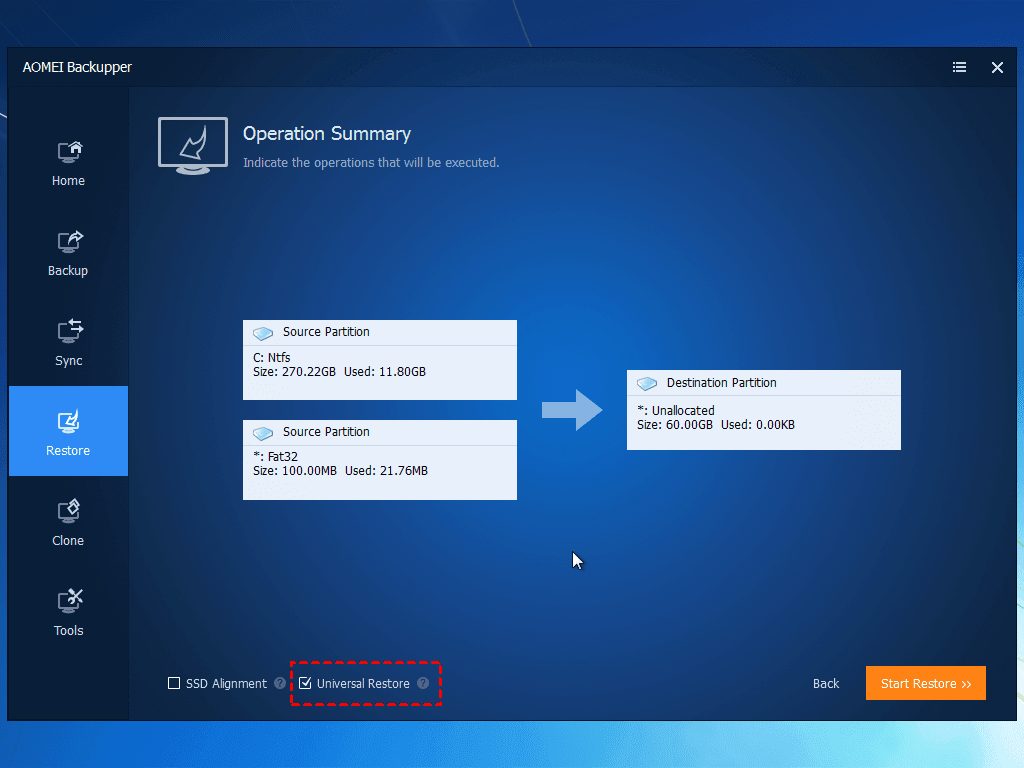
6. Select the destination disk on the new hardware to restore system image and then click Next.
7. Make sure the option Universal Restore is checked. Then click Start Restore to start to migrate Windows Server 2012 R2 to new hardware.
After the operation, Windows may need you enter registration code again, please make sure you remember it.
Way 3: Migrate Windows Server to New Hardware Remotely
If you don’t have a USB drive for bootable media creation, you can migrate Windows Server over network using the best enterprise backup software - AOMEI Cyber Backup. It provides a convenient and reliable solution for centralized backup management of all Windows operating systems.
- It enables you to create system/disk/partition backup for a bunch of Windows PCs and Servers from one central console.
- You can schedule a backup task to run daily/weekly/monthly using the full/incremental/differential backup method.
- You are allowed to restore the backup image to the same computer or another computer with dissimilar hardware.
- If your backup has multiple versions, you can choose to restore from any point you want.
Download this powerful enterprise backup software now to have a try!
Let’s say you have already created a system image with AOMEI Cyber Backup. Follow the steps below to migrate Windows Server 2012 R2 to new hardware.
1. Run and log in AOMEI Cyber Backup.
2. Click Source Device > Windows > Add Windows Device to add the target server device. You need to enter the IP address, username and password of it.
Note: You need to turn on the target device before you add it.
3. Start server migration.
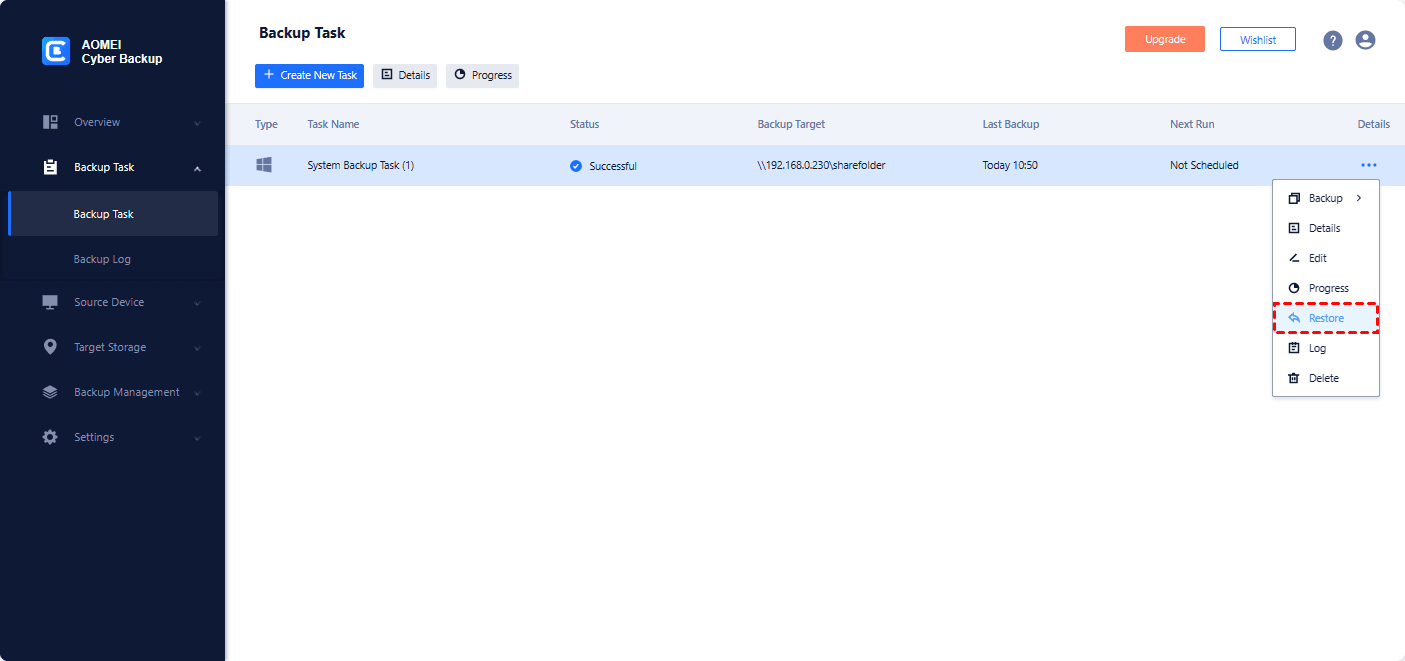
- Click Backup Task on the left menu bar and click the three dots icon on the system backup task you created before. Then select Restore.
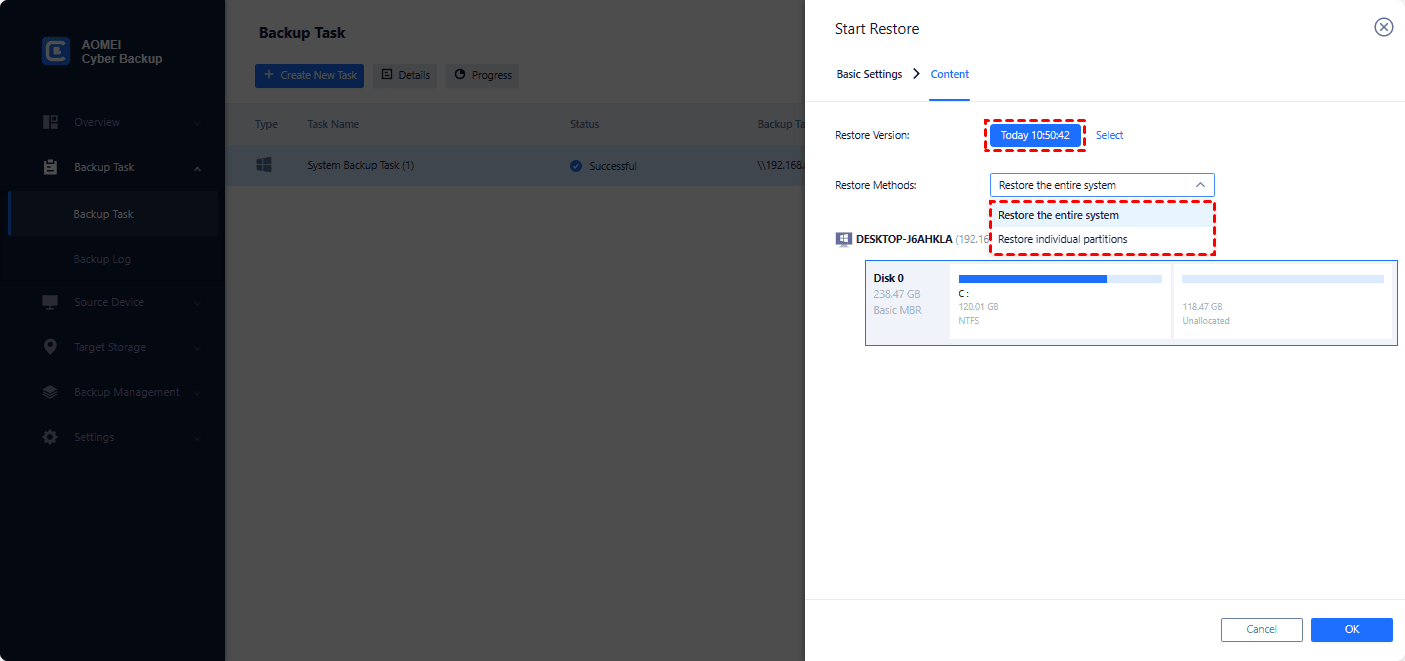
- Select the restore content, including the restore version and restore method. You may choose the latest version and Restore the entire system.
- Select the target location. Choose Restore to new location and select the target device and target disk.
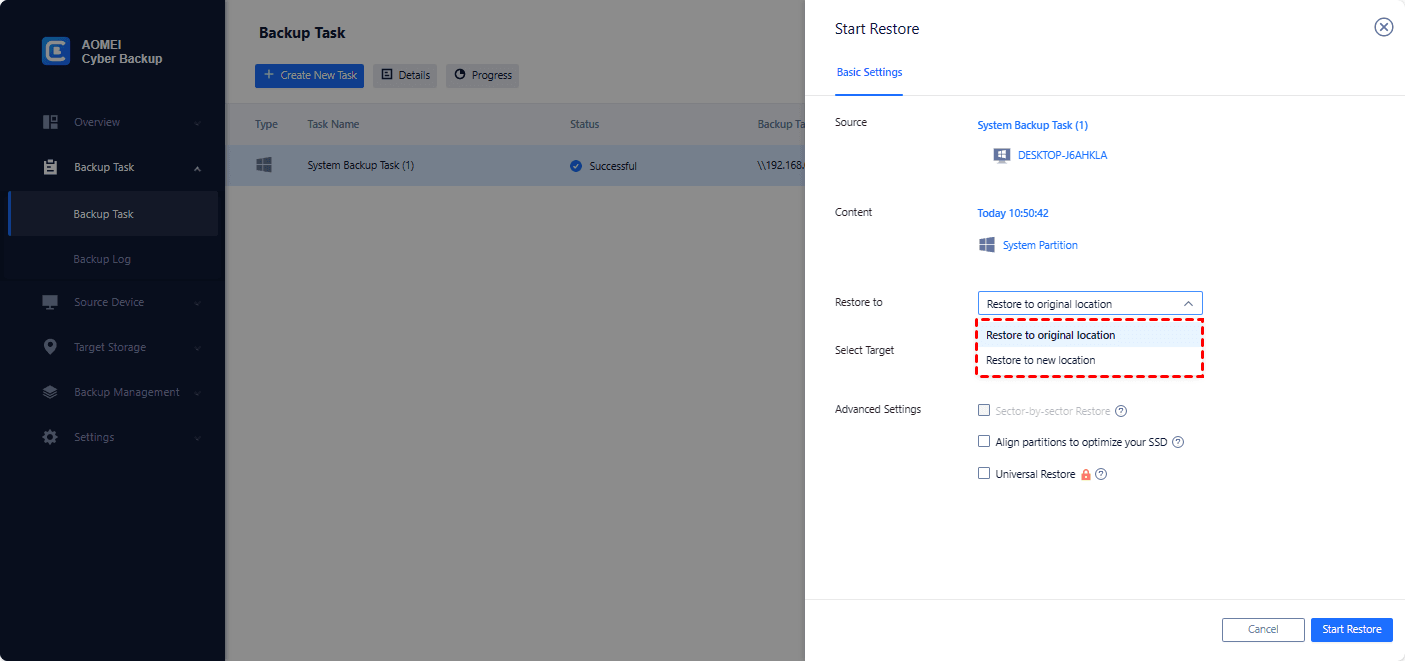
- Check the Universal Restore option to ensure a secure boot after recovery.
- Click Start Restore to launch the system recovery process.
If you don’t know how to choose between AOMEI Backupper and AOMEI Cyber Backup, check the comparison table on page Windows Server Backup.
Verdict
You have learned 3 ways to migrate Windows Server 2012 R2 to new hardware. It can be an easy job with AOMEI Backupper or AOMEI Cyber Backup. Besides migrating Windows Server 2012 R2, AOMEI Backupper also has many other useful functions like Disk Clone, System Clone, and File Sync, etc. All of these functions can help you transfer and protect your data.
In addition, if you want to protect unlimited PCs and servers within your company, you may choose AOMEI Backupper Technician Plus.

