[2 Ways] How to Transfer Purchases to New Apple ID
You must be unwilling to lose any purchases when creating a new Apple ID. In this guide, you can get two ways to transfer purchases to new Apple ID in very detail.
By Demi / Updated on May 14, 2026
Can I transfer iTunes purchases to another account?
Can I transfer iTunes purchases to another account
Hello all, I recently created a new Apple ID and would like to transfer my App Store and iTunes purchases from an old Apple ID. How can I accomplish this, or is this possible?
- Question from Apple Community
When you create a new Apple ID, you may find ways to easily transfer contacts from one Apple ID to another. However, things are not always as easy as you expect. For example, you may find that you aren’t allowed to transfer iTunes purchases to another account in the way you do to transfer files.
So, can you transfer purchases from one Apple ID to another? Yes, of course. Here in this guide, you can transfer purchases to a new one in two ways with a little patience.
Part 1. Transfer purchases to new Apple ID via Home Sharing
The first way you can transfer iTunes purchases to another account is to try iCloud Home Sharing, which allows you to share digital purchases with the members of your family. Therefore, you can set your new Apple ID as one of your family members to make it with the following steps.
How to enable and setup Family Sharing
Step 1. On your iPhone, go to Settings > Sign in with your previous Apple ID > Family Sharing > Set Up Your Family and follow the onscreen instruction. Note that you need to turn on the option to Share Purchases with Family.
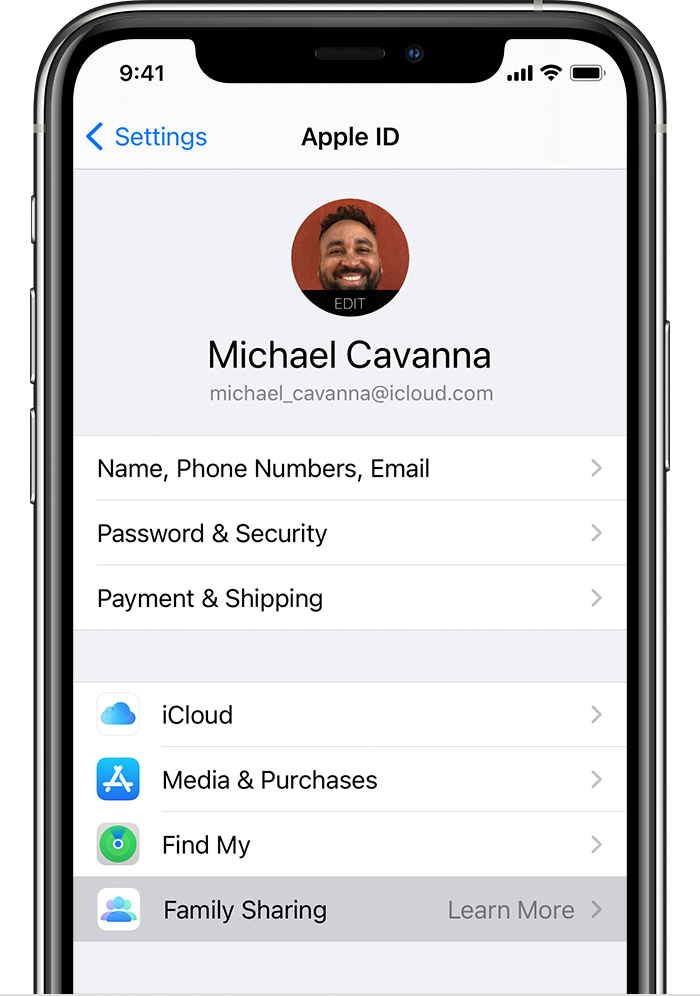
Step 2. To invite the new Apple ID as your family member, back to Family Sharing > Add Member > Enter the email address of your new Apple ID.
You can enter the password of your new Apple ID to accept the invitation, then follow the onscreen instructions.
Note:
• Home Sharing only allows you to share purchases with no more than five family members.
• You can be a part of only one family at a time.
How to download purchases to the new Apple ID
Now, go back to Settings to sign out the previous account and sign in with your new Apple ID. Let’s take transfer purchased apps to another Apple ID as an example.
Step 1. On App Store on your iPhone, tap your profile picture in the upper-right corner, then tap Purchased.
Step 2 Tap the name of your previous Apple ID to get the contents > Tap Download icon next to each app to download it.
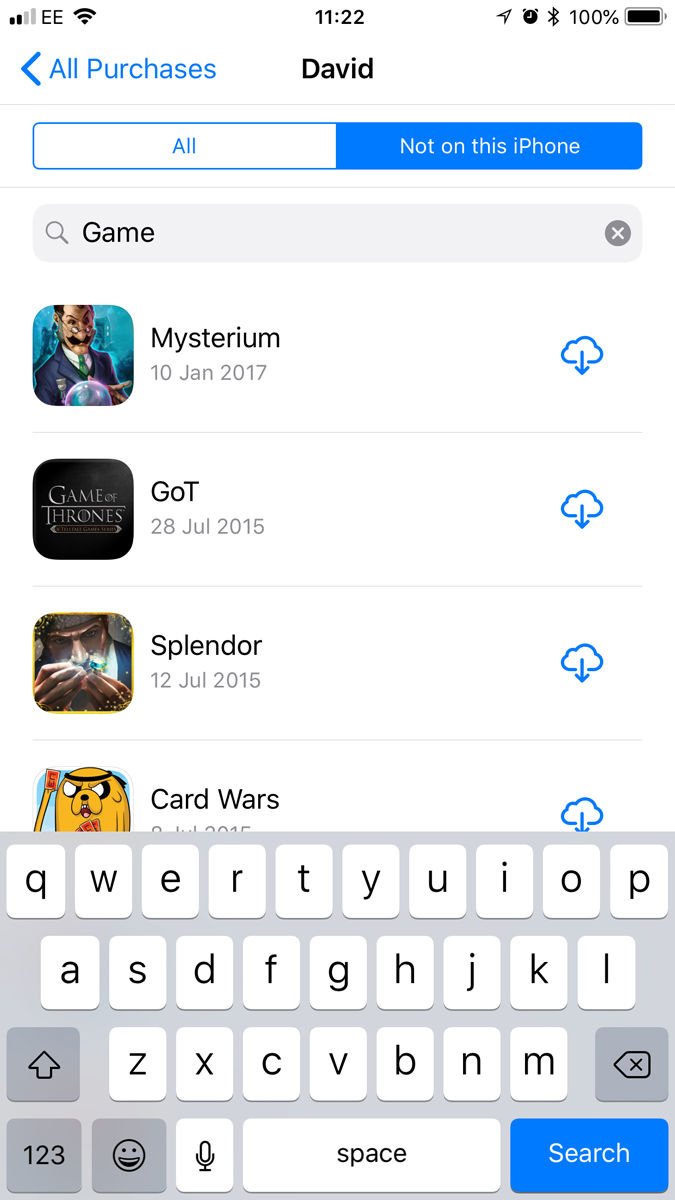
Note: Since all the items will still show their full price, to avoid paying for the items again, it’s more suggested to download them from the purchase page.
Part 2. Transfer purchases from one Apple ID to another with a powerful tool
Indeed, it’s kind of complicated to transfer purchases via Home Sharing. To make things simpler, it’s recommended you try FoneBackup, to transfer purchases from one Apple ID to another and backup your iPhone at the same time.
Features and advantages of FoneBackup
• Simple operation. It just requires a few clicks to finish the task with no effort via FoneBackup.
•Transfer types of items. FoneBackup can transfer not only all purchases to another Apple ID, like Apple Music subscription, but also applications (data files, preference), photos, contacts, call history, text messages, memos, calendars, Safari (history, bookmarks), as well as system settings.
• Wide compatibility. FoneBackup can support different models of iPhone, iPad, and iPod. It is perfectly compatible with versions of iOS, too.
Transfer all data to new Apple ID
Step 1. Click the icon below to download and install FoneBackup to your computer > Make sure you have signed in the previous Apple ID on your iPhone, and connect it to the computer.
Step 2. Run FoneBackup. Click Phone Backup on the left pane. Choose Full Backup on the right side of the window.
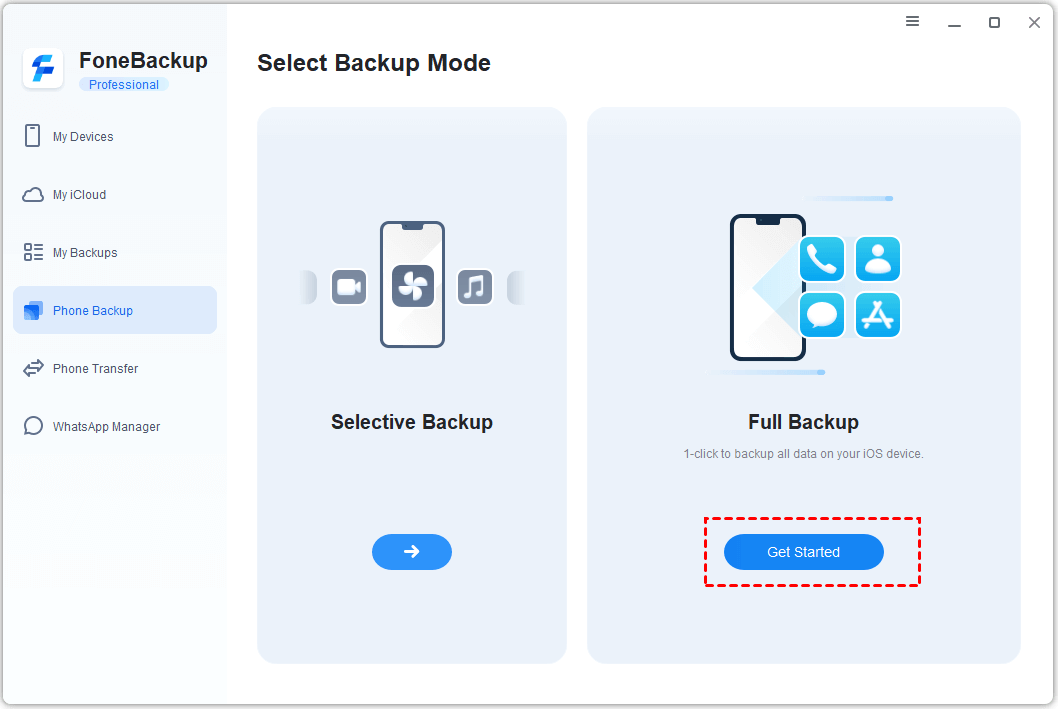
Warm tip: If you are logged into two Apple IDs on two different iPhones, you can also click iPhone to iPhone transfer feature to transfer data from iPhone to iPhone without backup.
Step 3. If necessary, enable Backup encryption to protect the privacy of your backup files, then click Start Backup.
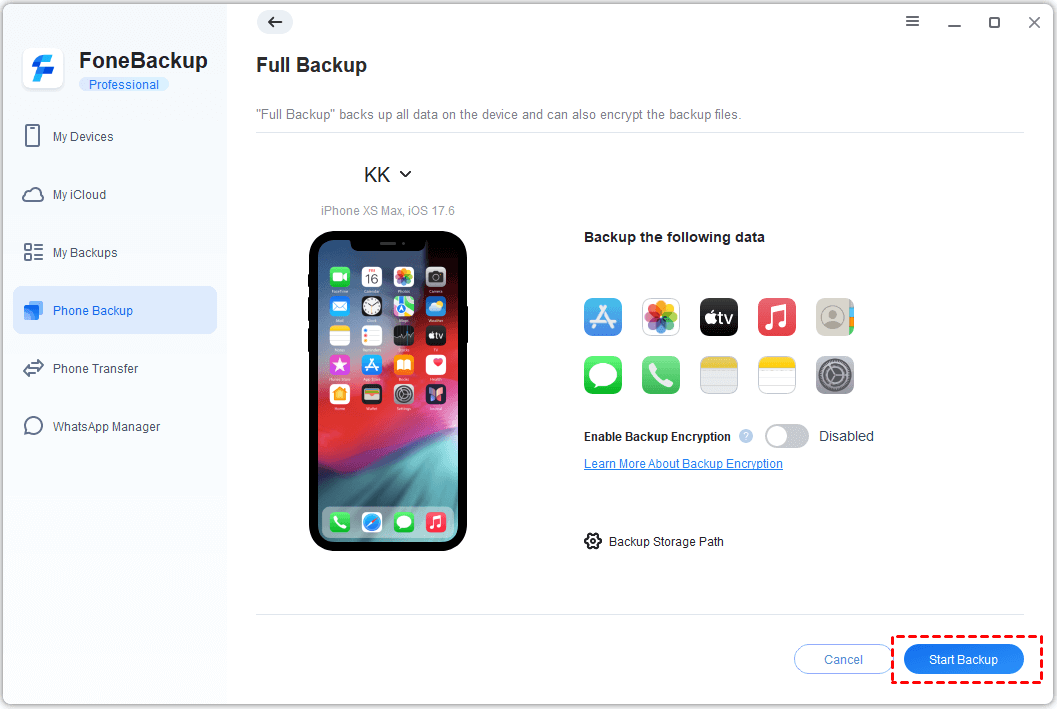
When it is over, you can unplug your iPhone, sign out the previous Apple ID and sign in with the new one. Then, connect your iPhone to the computer again to get all purchases to your new Apple account.
Step 4. On the FoneBackup, Choose My Backups. Choose the backup you just created, and tap Restore icon.
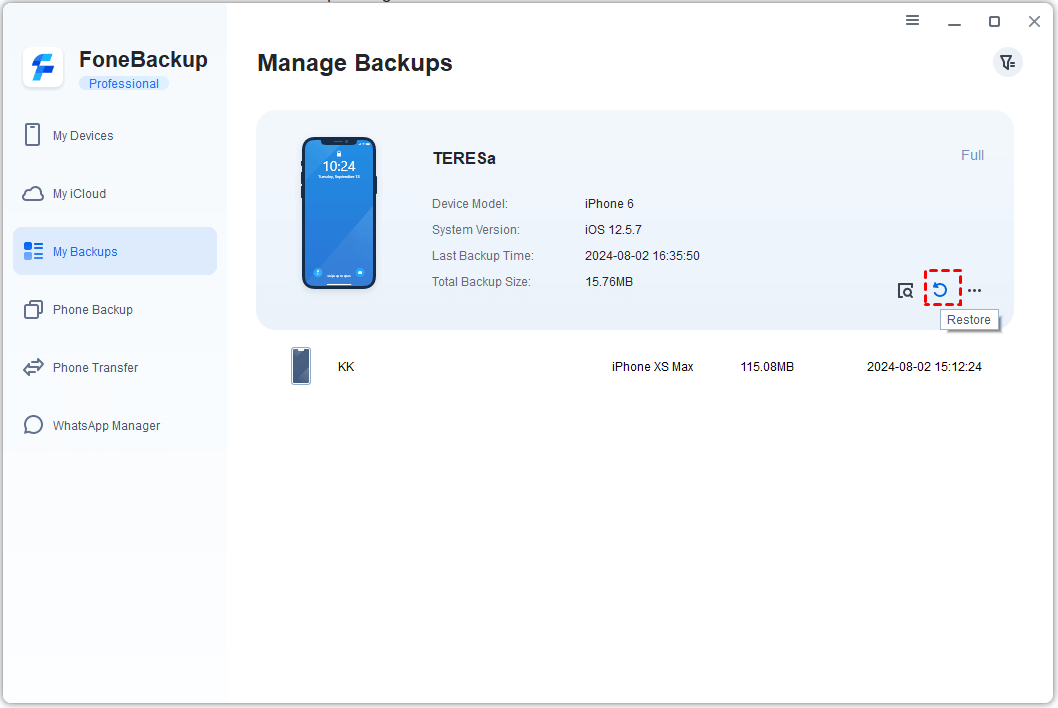
Note:
• The corresponding data on your iPhone will be overwritten after restoring from full backup.
• Make sure your iPhone has enough space to remain to save the full backup file.
Transfer purchases from one Apple ID to another selectively
Just in case you want to transfer selective files to the new Apple ID, you can choose iPhone to PC function to transfer music from iPhone to computer no matter if it is purchased or non-purchased.
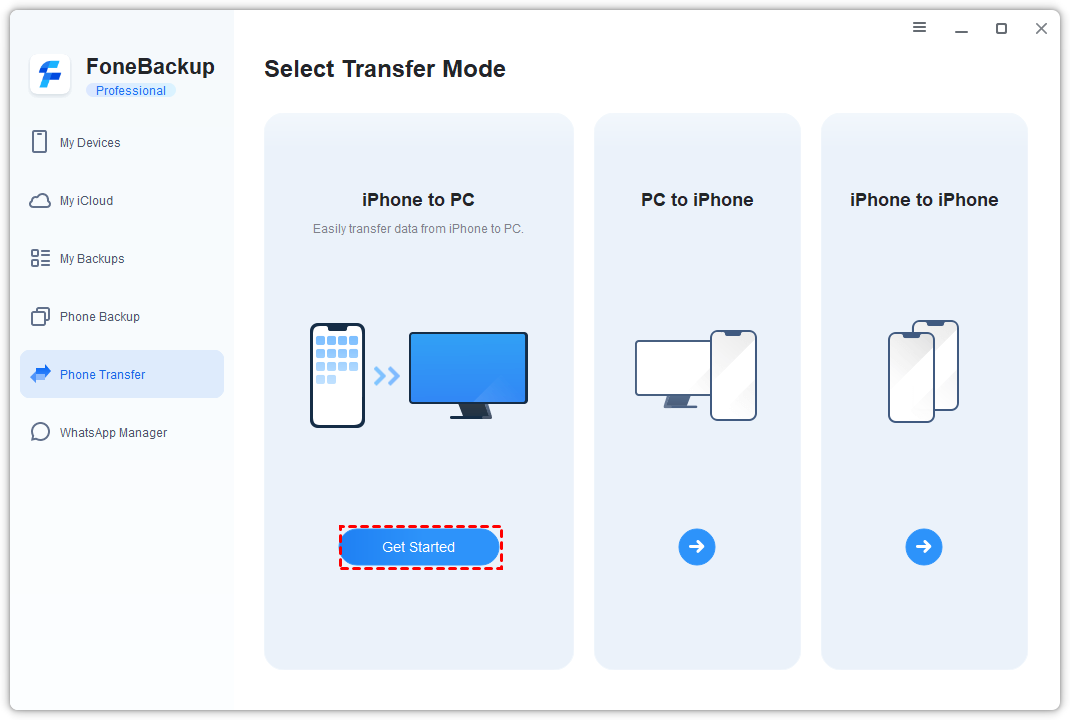
After changing the Apple ID, you can rely on PC to iPhone to get them back with simple clicks.

Conclusion
To transfer purchases to new Apple ID, you cannot make it directly by changing Apple ID on your iPhone. Luckily, you can transfer purchases from one Apple ID to another with Home Sharing or FoneBackup. With easy performance and professional backup service, FoneBackup can be a better choice for you. If this guide helps you, share it with more people.