How to Import Photos/Videos from iPhone to Windows 11/10
How to transfer photos from iPhone to PC Windows 11/10 with or without USB? 4 effective ways are listed here! FoneBackup mentioned in Method 1 might be the best.
By Kathy / Updated on May 14, 2026
Copy photos from iPhone to Windows without quality loss.
What’s the best approach to copy photos and videos from iPhone to Windows 11 without the loss of quality? I’m not using iCloud as of now. Thanks.
- Question from Stack Exchange
In our daily life, we often use photos/videos to record moments, but the storage space of the mobile phone is limited, or sometimes you need to back up them to avoid sudden data loss, then you can transfer photos from iPhone to PC Windows 11/10.
4 ways are here to make it, whether you want to use USB or a wireless way and Method 1 might be the best free option.
![]()
1. How to transfer photos from iPhone to PC Windows 11/10 (Best Way)
When you need to finish the transfer, you may want to ask: "Can I transfer photos from iPhone directly to PC?" Of course! The professional iPhone data transfer software - FoneBackup can help you a lot in a free way!
· You can easily transfer 1000+ full-resolution pictures/live photos within 10 minutes.
· FoneBackup allows you to preview and select specific files you need to transfer.
· Various file types can be recognized, including jpg, jpeg, png, bmp, gif, tif, tiff, heic, raw, etc.
· Various iPhone models and iOS versions can be supported, including iPhone 16 and iOS 18.
You can get this freeware by clicking the button below. We will show you how to move photos from iPhone to Windows 11 laptop/desktop.
Step 1. Install the software and connect device
Install the FoneBackup > Launch it and connect your iPhone to a Windows 11/10 computer via a USB cable.
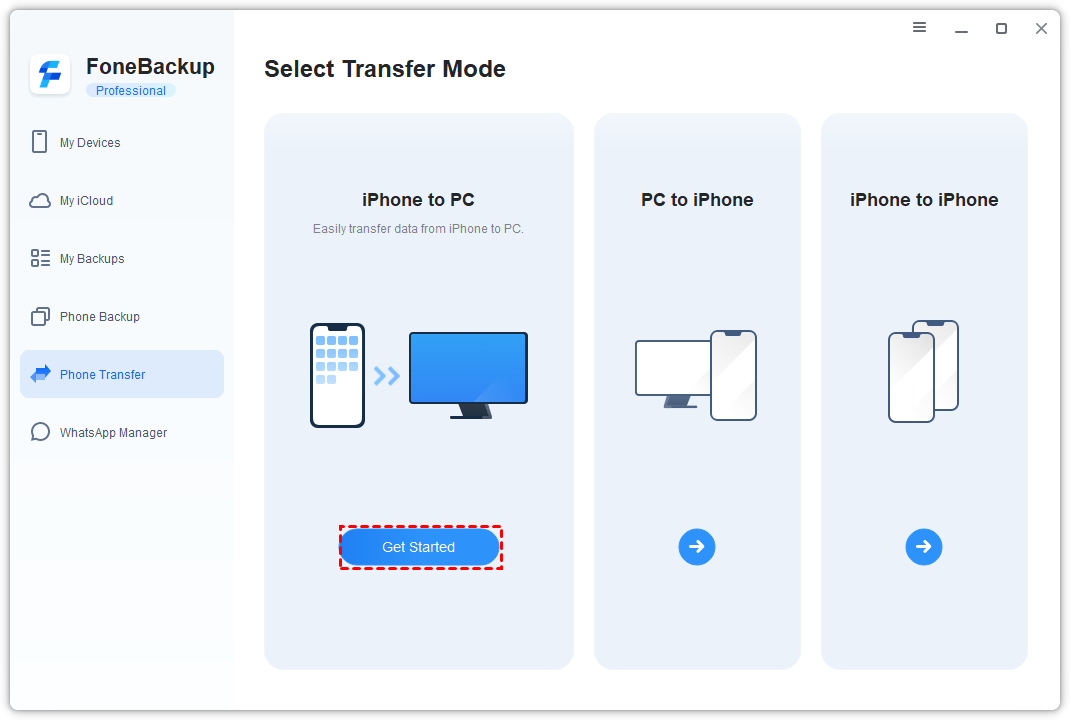
Step 2. Enter the iPhone to PC transfer
Click the Phone Transfer on the home screen and go to iPhone to PC. Then, click Get Started.
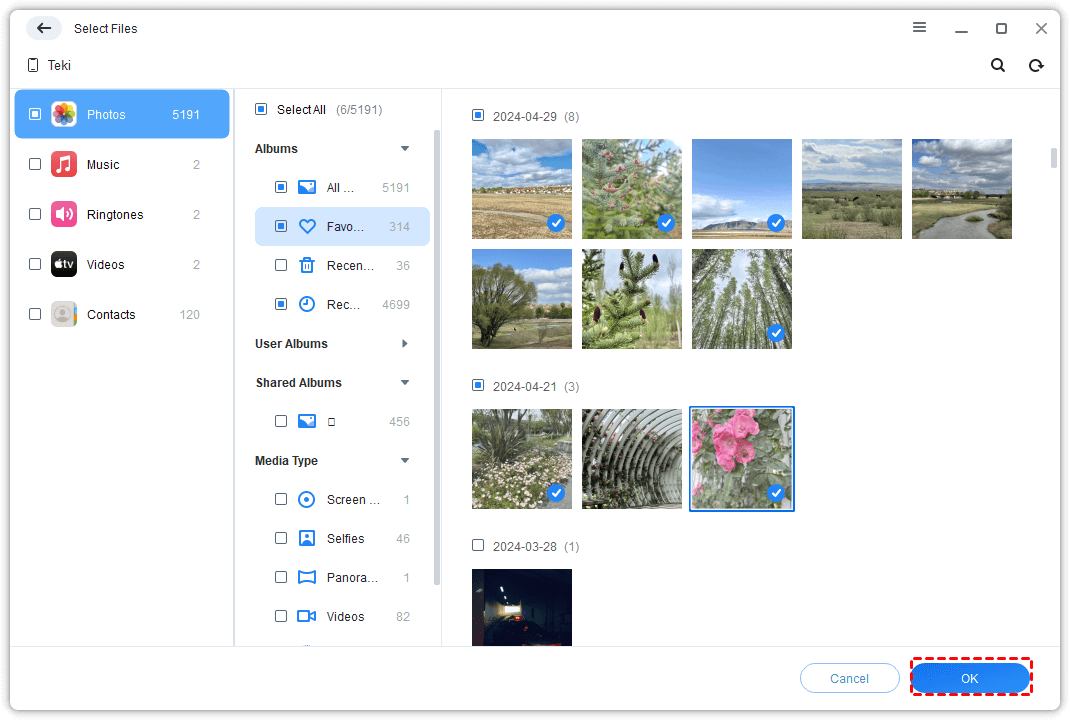
Step 3. Choose photos to transfer
Click Photos and choose targeted photos. Using this way, you can transfer all or part of photos from iPhone to PC. Then, click OK.
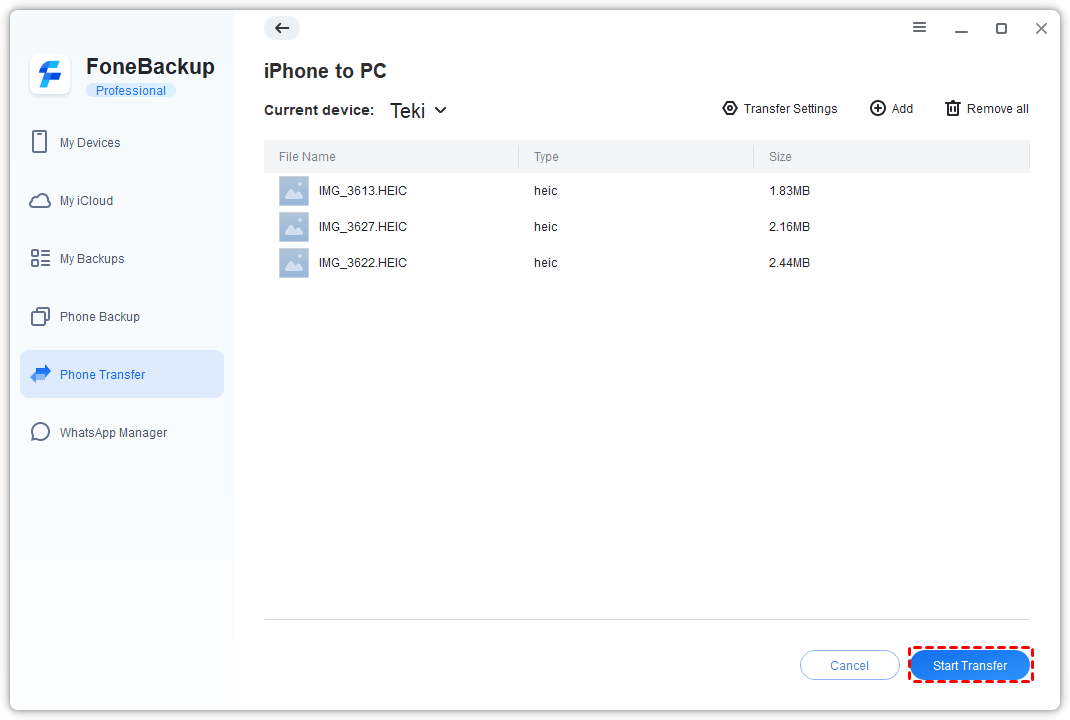
Step 4. Start Windows 11 transfer photos from iPhone
Confirm the files you need > Change the location storage from the Transfer Settings option > Click Start Transfer to complete the process.
Now you can know what's the best way to transfer photos from an iPhone. If you need the best way to transfer photos from PC to iPhone, you can go to the PC to iPhone option to make it.
2. Import photos from iPhone to Windows 11 with Windows Photos app
You can import photos and videos from an iPhone to PC using the Windows Photos app. It can read iPhone “DCIM” folder, and then easily import photos or videos to PC.
Step 1. Connect iPhone to Windows 11 to transfer photos
Connect your iPhone to a PC with a USB cable that can transfer files > If asked, Click Trust on your iPhone to allow the PC access the data on your device.
Step 2. Find iPhone pictures and videos from PC
On your PC, select the Start button and then select Photos to open the Photos app. (Make sure the photos you want to import are actually on the device rather than in the iCloud.)
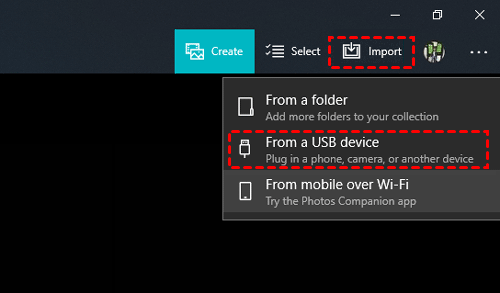
Step 3. Select iPhone photos to transfer
Select Import > From a USB device, then follow the on-screen instructions. You can pick the items you want to import and select where to save them. Allow a few moments to detect and transfer your data.
-
In the importing process, Windows will duplicate the photos and videos into a new folder within your Pictures directory, usually with a timestamp. If you wish to remove all the photos and videos from your iPhone after the importing, select Erase After Importing.
This way can help you easily move iPhone pictures to a computer without any third-party software, but the transfer speed is so slow and the steps are complex for some users.
3. How to transfer photos from iPhone to laptop/desktop wirelessly
Importing photos with iCloud is a good wireless choice. After you turn on the iCloud Photos option on your iPhone, iCloud Photos will automatically upload all photos and videos from your iPhone to the cloud (The premise is that you have enough iCloud space), and then you can go to iCloud.com or use FoneBackup on the computer to download photos from iPhone to PC in Windows 11/10.
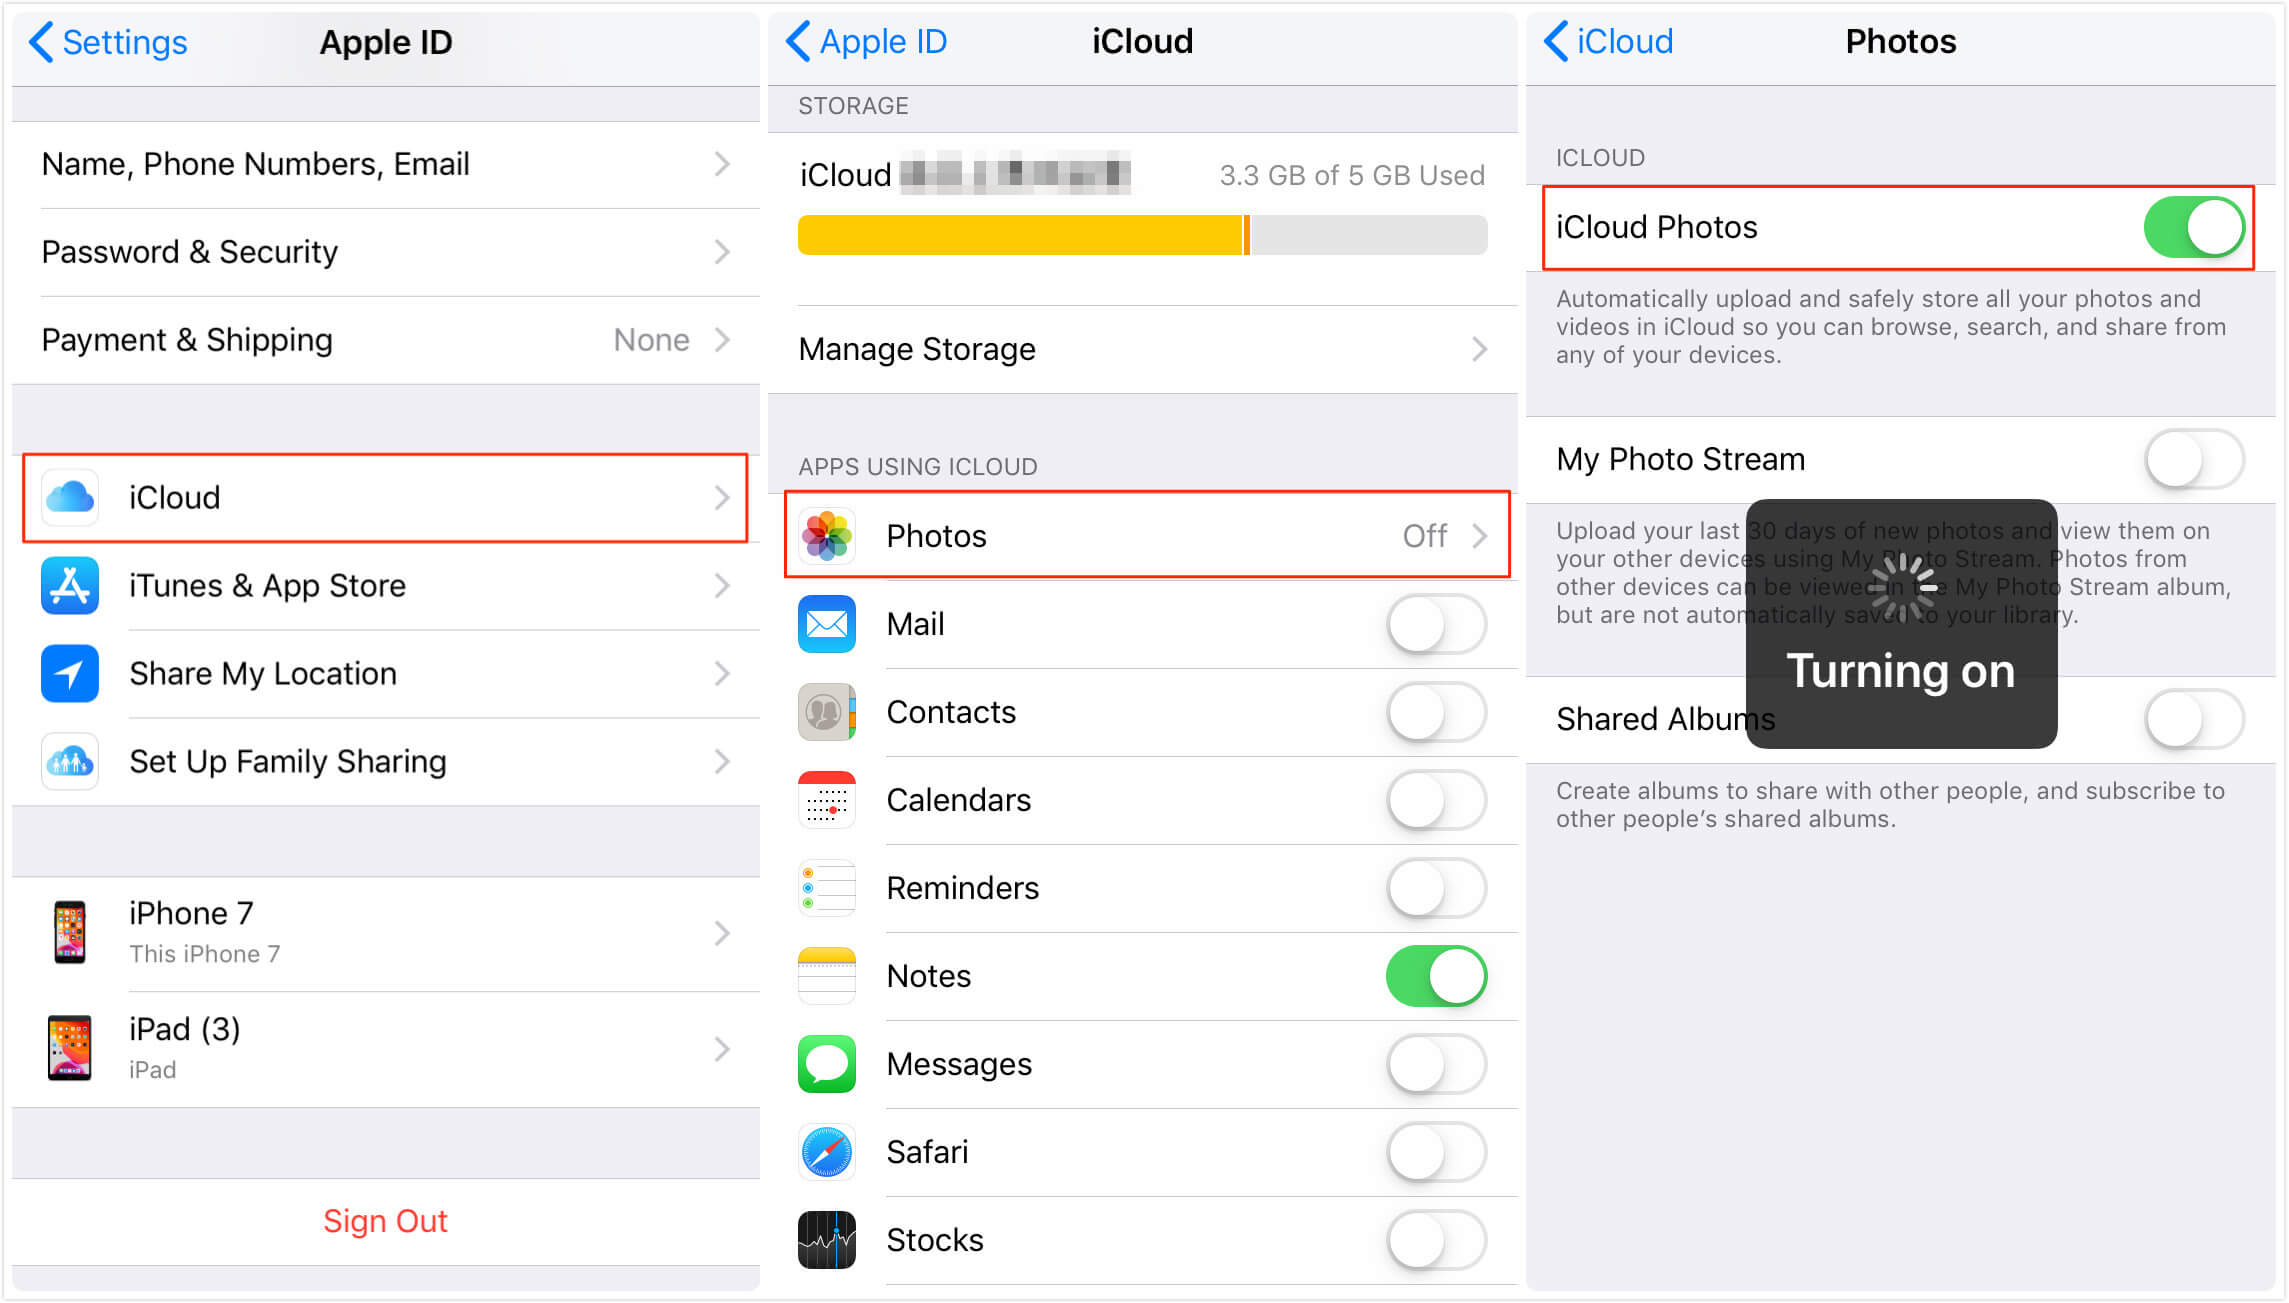
Part 1. Upload photos from iPhone to iCloud
First, you should turn on iCloud Photos on your iPhone. Just go to Settings > Tap on your name > Click iCloud > Find Photos and tap it > Enable the iCloud Photos option.
For Mac users who don't know how to transfer photos from iPhone to Mac, this way is also useful.
Part 2. Download pictures from iPhone to PC via iCloud
After the uploading process, then you can download photos from iCloud to save them to your Windows 11/10 PC. There are 2 options for you to make it. You can use the official iCloud client or the professional iCloud manager - FoneBackup.
If you need to move a large number of pictures, FoneBackup mentioned in Option 2 will accomplish the task at a super-fast speed.
Option 1. Get iCloud photos on Windows 11 PC via the iCloud client
First of all, you should download iCloud.client and sign in with your Apple ID.
Step 1. Check Photos and enable download photos in Options.
Step 2. Right-click the icon of iCloud in the lower-right corner on the desktop to download photos.
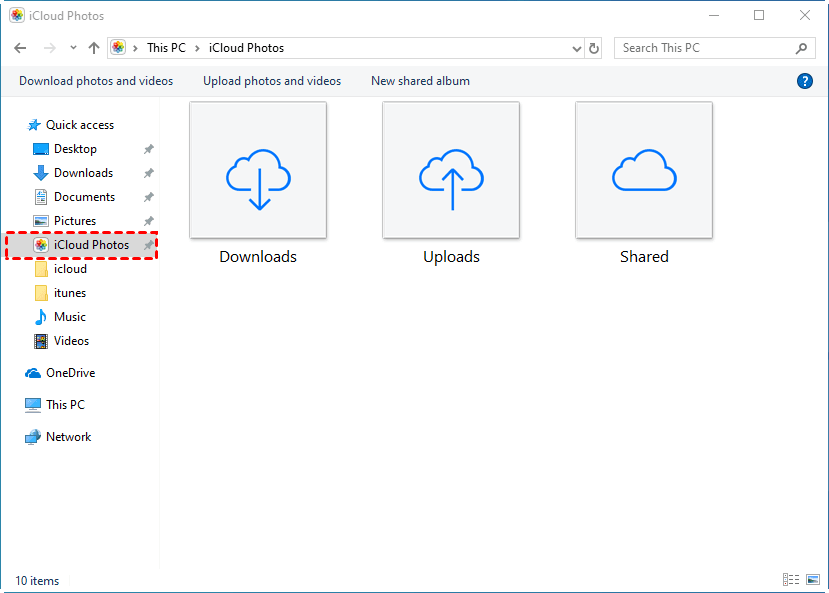
Step 3. Enter Windows Explorer, tap iCloud Photos, and find your photos in the Downloads folder.
Option 2. Download iCloud photos to Windows 11 PC via professional FoneBackup
To get lots of photos from iCloud to PC, FoneBackup might be the best choice to make it.
· Super fast upload/download speed helps you easily save photos to/from iCloud.
· FoneBackup uses two-factor authentication to protect your iCloud data which is the same as the encryption used by Apple.
· The handy iCloud sync feature allows you to efficiently transfer notes, photos, videos, contacts and iCloud Drive data from one account to another.
Step 1. Download FoneBackup on your Windows PC
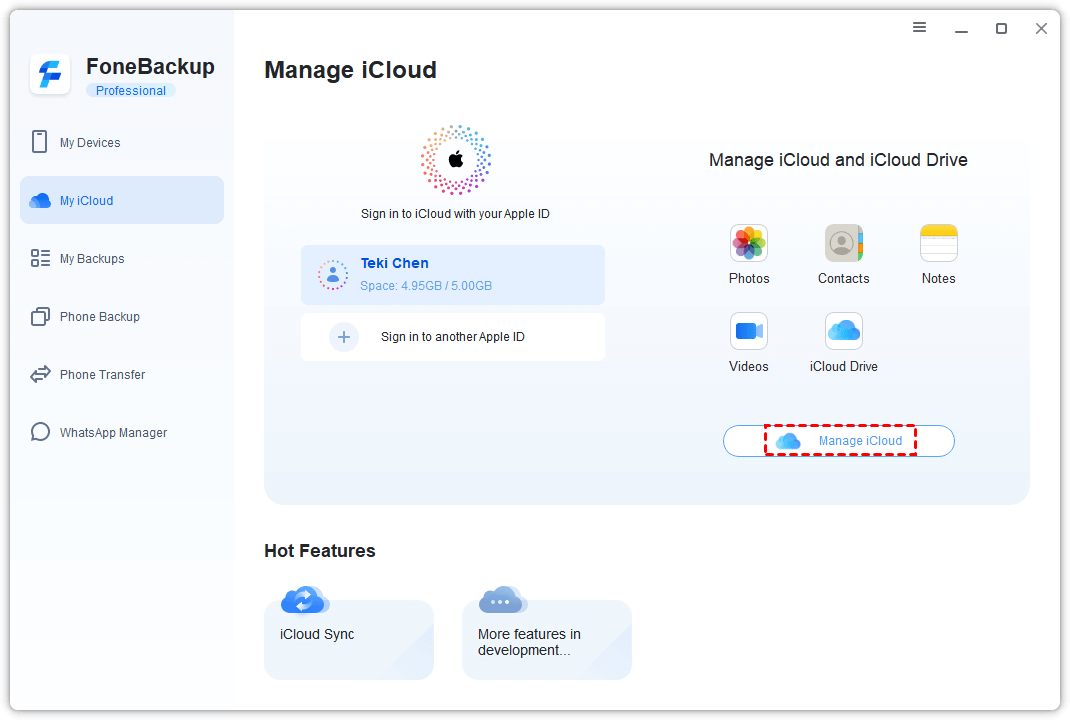
Step 2. Launch FoneBackup and sign in your account
Open FoneBackup from PC > Go to My iCloud > Log in with your Apple ID > Choose Manage iCloud.
Step 3. Choose iCloud photos as you like
Select the photos you need under the Photos option > Click the Download button from the top of the page.

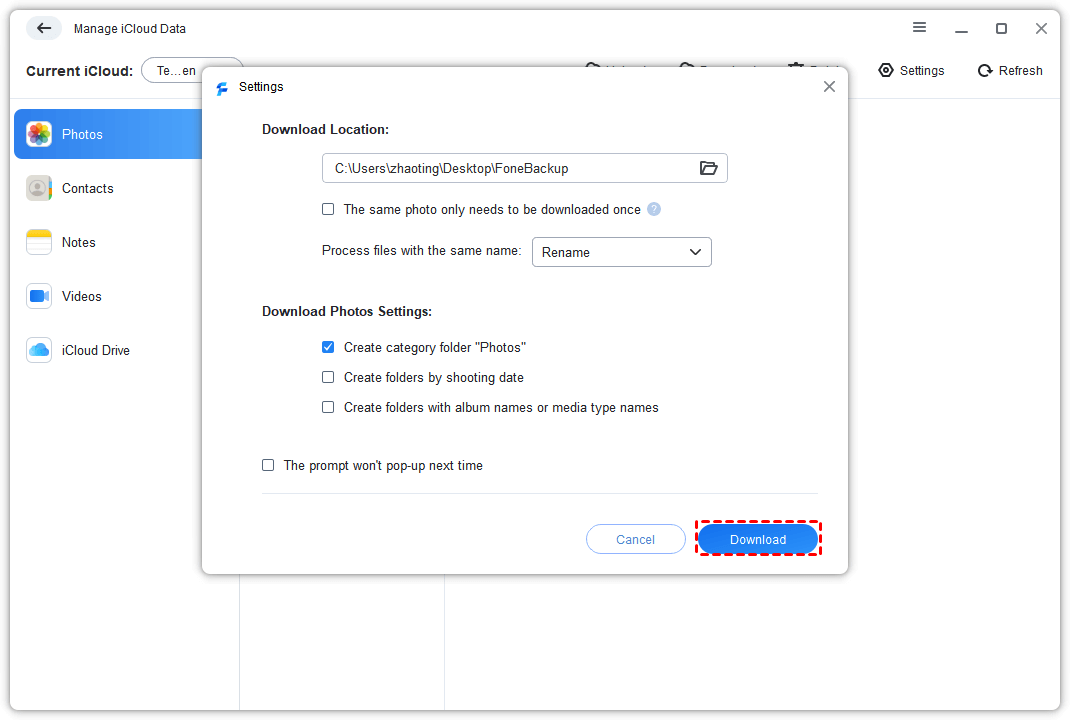
Step 4. Download iCloud photos via FoneBackup
Change the download settings from the pop-up window > Click Download to start.
That's all about how to transfer photos from iPhone to Windows 11 wirelessly.
4. How to import pictures from iPhone to computer using iTunes
iTunes is also an available way to finish the transfer. However, you should make sure that iTunes is the latest version, otherwise, you may encounter some errors like iTunes can’t sync photos to the iPhone.
Step 1. Install iTunes and connect your device
Download and install iTunes on your PC > Connect your iPhone to the computer via a USB cable.
Step 2. Select photos from iTunes
Click the “Device” icon in the upper-left corner, and select Photos.
Step 3. Sync iPhone photos to your computer
Check the Sync Photos option and select the folder on PC, then click Apply to start syncing photos.

Further reading: Can't import photos from iPhone to Windows 11
When your iPhone not Importing Photos to Windows, the possible causes are a USB issue, your phone is locked, the transfer file is too large, or the iOS version is too low.
1. Large data transfer: Too many photos can cause the transfer to get stuck. You can transfer your photos in small batches or use the fastest iPhone transfer software mentioned in Method 1.
2. USB connection: Maybe it's a problem with your USB connection, and you can check your USB port, or change a wire to connect.
3. Lock your iPhone: locking your iPhone will prevent your data transfer, so you should make sure your phone is unlocked.
4. Low iOS version: Sometimes the iOS version is too low, which will cause the photo transfer to fail, you should update your phone in time.
Bottom Line
If you don't know how to quickly transfer photos from iPhone to Windows 11, 4 effective ways in this post will tell you how to import photos from iPhone to Windows 11/10, including utilizing iCloud, Windows Photos app, iTunes, and FoneBackup.
If you need to move multiple high-quality pictures, we must say that FoneBackup will be the fastest way to move photos from iPhone to Windows without quality loss.