


How to Disable Hyper-V on Windows or Windows Server
Sometimes Hyper-V can cause compatibility issues or performance problems. By temporarily or permanently turning off Hyper-V, you can quickly resolve these issues. Please refer to the methods below, which is a straightforward process involving just a few simple steps.
By Crystal / Updated on September 12, 2024
Disable Hyper-V to run other virtualization software
Microsoft Hyper-V as a type 1 hypervisor is an optional feature built into Windows Enterprise, Pro, Education, or Windows Server. It does not require a download and only needs to be enabled in Windows features.
However, you might need to disable Hyper-V or remove Hyper-V feature on your machines under the following cases:
- Conflict with other virtualization software: Hyper-V can cause conflicts with other virtualization tools like VirtualBox or VMware Workstation, making it necessary to disable Hyper-V if you plan to use these tools.
- Performance issues: Hyper-V uses hardware resources to manage virtual machines, which can negatively impact the performance of your host operating system. Disabling Hyper-V can free up resources and improve system performance if virtualization is not required.
- Software compatibility issues: Some software applications may not work properly when Hyper-V is enabled. Disabling Hyper-V can help resolve compatibility issues and ensure that your applications run smoothly.
In this article, I will demonstrate 3 ways on how to disable Hyper-V feature on Windows or Windows Server.

What happens if you disable Hyper-V
In most cases, if you just disable or remove the Hyper-V hypervisor, you will not lose the virtual machine files stored in local storage. However, to avoid accidental errors, it is still recommended that you back up Hyper-V VMs before this risky operation.
✎ Secure VM Backup before disabling Hyper-V
For VM data protection, we highly recommend using AOMEI Cyber Backup. With this freeware, you can back up multiple VMs to local path, external storage, NAS drive, AWS S3 cloud and other secure locations simultaneously without installing an agent. Additionally, the tool is incredibly easy to use, making it a hassle-free solution for your backup needs.
▶ Tip: After uninstalling Hyper-V, you won’t be able to run Hyper-V Manager until you enable it again. So if you want to run the same VMs on another hypervisor later, VMware for example, you may need to convert Hyper-V to VMware before you start.
How to turn off Hyper-V feature from Control Panel
The steps to disable the Hyper-V feature on Windows and Windows Servers are different. In this part, I will demonstrate how to disable Hyper-V on Windows 10 and Windows Server 2016 as an example.
Turn off Hyper-V feature on Windows 10
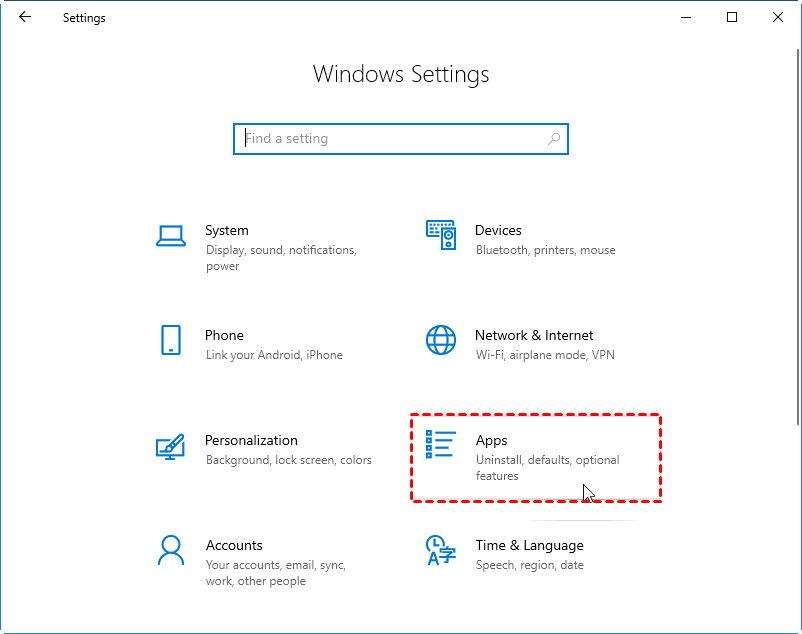
1. Open Windows Settings from the Start menu, and click Apps.
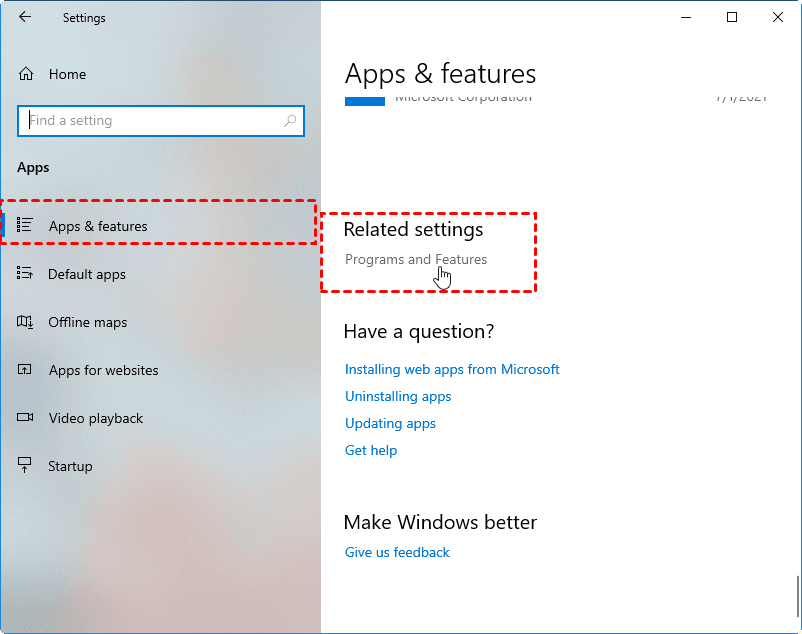
2. On Apps & features page, click Programs and Features below Related settings.
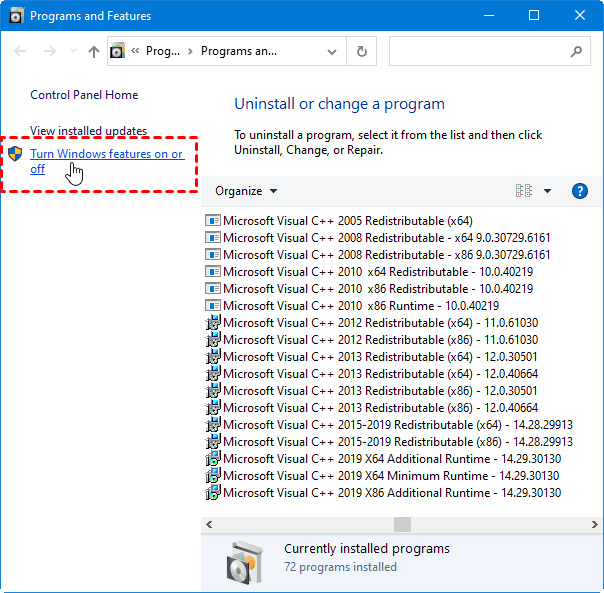
3. Click Turn Windows features on or off on the pop-up window.
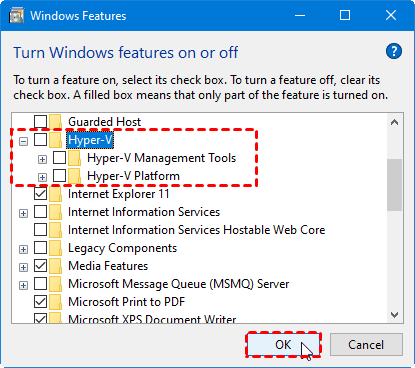
4. Uncheck Hyper-V option from the features list. Click OK to save the change and reboot.
Note: Check the Hyper-V option in Windows Features and you will enable Hyper-V again.
Remove Hyper-V feature on Windows Server 2016
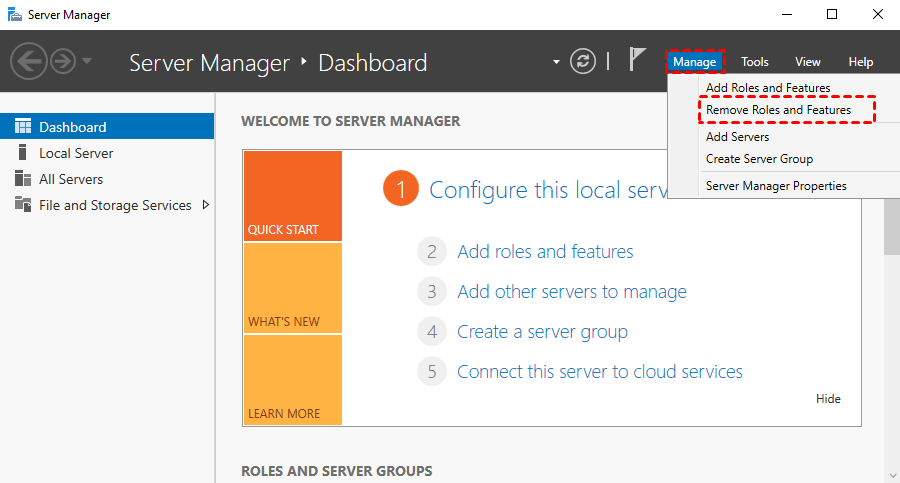
1. Open Server Manager, click Manage > Remove Roles and Features, and click Next on the pop-up wizard.
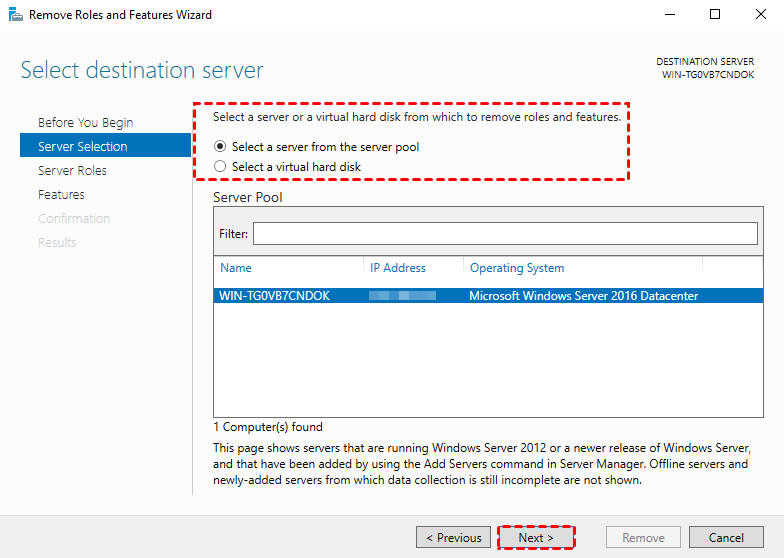
2. Select a server you want to disable Hyper-V feature, click Next to continue.
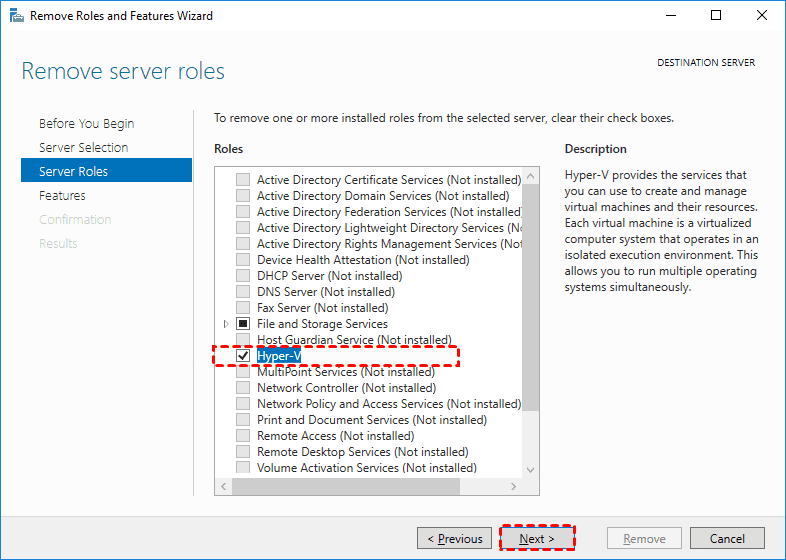
3. On Server Roles page, uncheck the Hyper-V option from the features list.
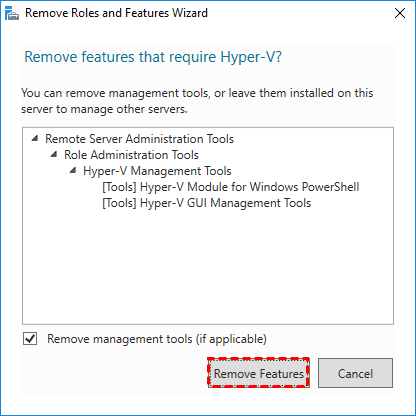
4. Check Remove management tools (if applicable) option and click Remove Features on the pop-up window. Click Next to continue.
5. On Features page, click Next to continue.
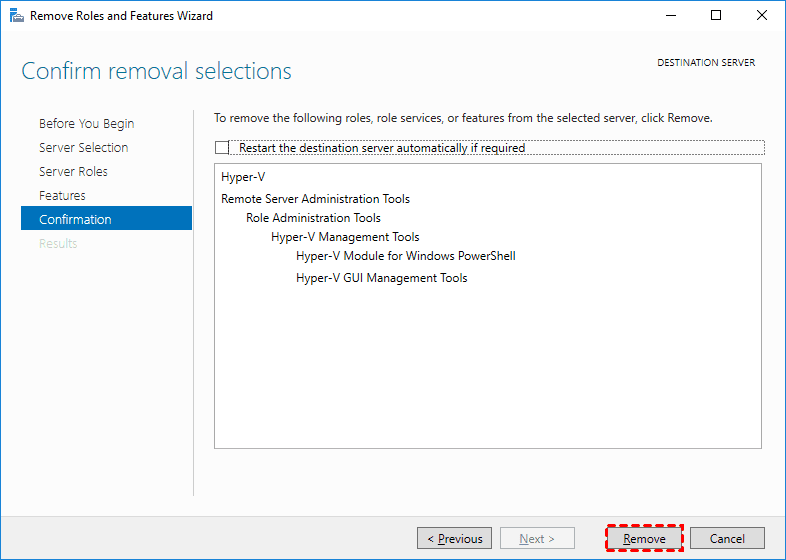
6. Confirm the removal options and click Remove to start.
How to disable Hyper-V via PowerShell
Just as you can install Hyper-V with PowerShell, you can also disable it via PowerShell. Here are the steps:
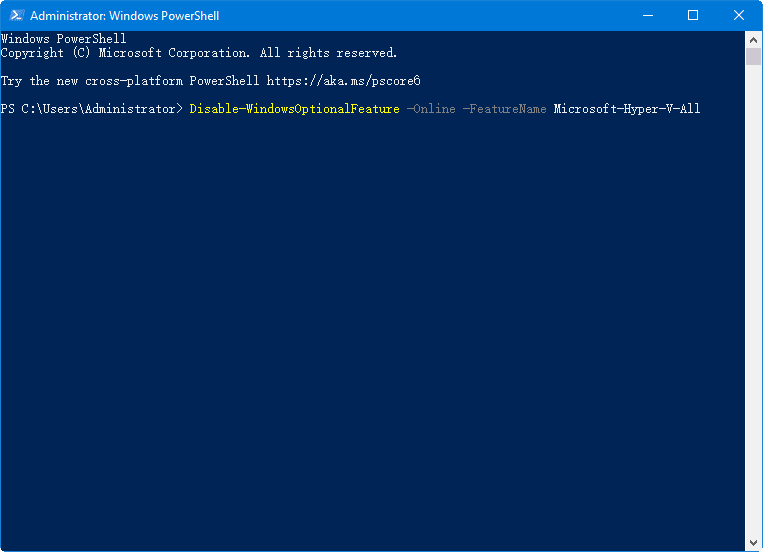
1. Run Windows PowerShell as administrator.
2. Run the following command:
Disable-WindowsOptionalFeature -Online -FeatureName Microsoft-Hyper-V-All
Tip: To enable Hyper-V again, run this command:
Enable-WindowsOptionalFeature -Online -FeatureName Microsoft-Hyper-V -All
Summary
If you are a Hyper-V user and want to switch to VMware or VirtualBox, you need to uninstall Hyper-V first. In this article, I demonstrate 3 ways to disable Hyper-V to run other virtualization software on Windows or Windows Server.
To protect your virtual machine data better, it is recommended to backup your Hyper-V VMs in advance, avoiding unexpected data loss.

