


How to Convert Hyper-V VM to VMware or VMware to Hyper-V
Since VMware and Microsoft Hyper-V are not compatible with each other, you may wonder is there any way to convert Hyper-V to VMware, or migrate VMware VM to Hyper-V? In this article, I will introduce the detailed steps to achieve that.
By Crystal / Updated on September 11, 2024
Why convert VM between Hyper-V and VMware
While VMware and Microsoft Hyper-V are both popular type-1 hypervisors, they are not compatible with each other. VMware products create virtual disks in VMDK format, and Hyper-V creates virtual disks in VHD or VHDX format.
However, sometimes you may need to convert Hyper-V to VMware or migrate VMware to Hyper-V, which is also known as V2V migration. For example:
- Migrating from one hypervisor to another: If you are planning to switch from Hyper-V to VMware or vice versa, you may want to convert your existing virtual machines to the new platform instead of rebuilding them from scratch.
- Compatibility: Sometimes, you may need to run a virtual machine on a different hypervisor platform for compatibility reasons. Converting virtual machines can help you achieve this without having to recreate the environment.
- Testing: In testing scenarios, you may want to move virtual machines between different hypervisors to compare performance or functionality.
![]()
Microsoft Hyper-V vs VMware ESXi
- File System: VMware's Virtual Machine File System (VMFS) holds a slight edge over Hyper-V's ReFS, or Resilient File System, particularly when it comes to clustering.
- Memory: Hyper-V's Dynamic Memory is simpler and better than the complex memory management such as memory compression, transparent page sharing, and oversubscription/overcommit in VMware.
- Snapshots: VMware only allows 32 snapshots, while Hyper-V allows 64 snapshots per VM, and can be exported to other locations.
- Operation System: VMware supports more operating systems, including Windows, Linux, Unix, and macOS. while Hyper-V is limited to Windows plus a few more, including Linux and FreeBSD.
- Pricing: Smaller organizations might find Hyper-V more to their liking. As for larger enterprises, VMware's pricing structure seems ideal.
Important: new version of VMware vCenter Converter 6.3.0
If you are familiar with the virtualization industry, you probably know VMware offered a tool for migrating Hyper-V to VMware, that is vCenter Converter. Similarly, Microsoft used to provide a Virtual Machine Converter that can concert VMware to Hyper-V.
However, Microsoft retired the MVMC tool in 2017 and replaced it with System Center Virtual Machine Manager (SCVMM), which is now a paid tool. And the same thing has also happened to vCenter Converter. Luckily, it makes a comeback as a free tool.
👉 On February 2, 2022, VMware announced that vCenter Converter was completely removed from the Product Downloads list, because VMware Converter has not been updated in a long time and has some potential security concerns.
👉 On October 11, 2022 VMware released the renewed version vCenter Converter 6.3.0, compatible with vSphere 7.0 and ESXi 7.0! You can go to the official product page to download it.

![]() So what are the available methods to switch between VMware and Hyper-V?
So what are the available methods to switch between VMware and Hyper-V?
Until now, there are 2 available methods to convert Hyper-V to VMware or vice versa.
- System Center Virtual Machine Manager (to Hyper-V)
- The new VMware vCenter Converter 6.3.0 (to VMware)
- File-based backup solution (both sides)
No matter what you are trying, please make sure you’ve backed up your VMs to avoid unexpected failures.
How to convert Hyper-V to VMware with Official Free Tool (Legacy)
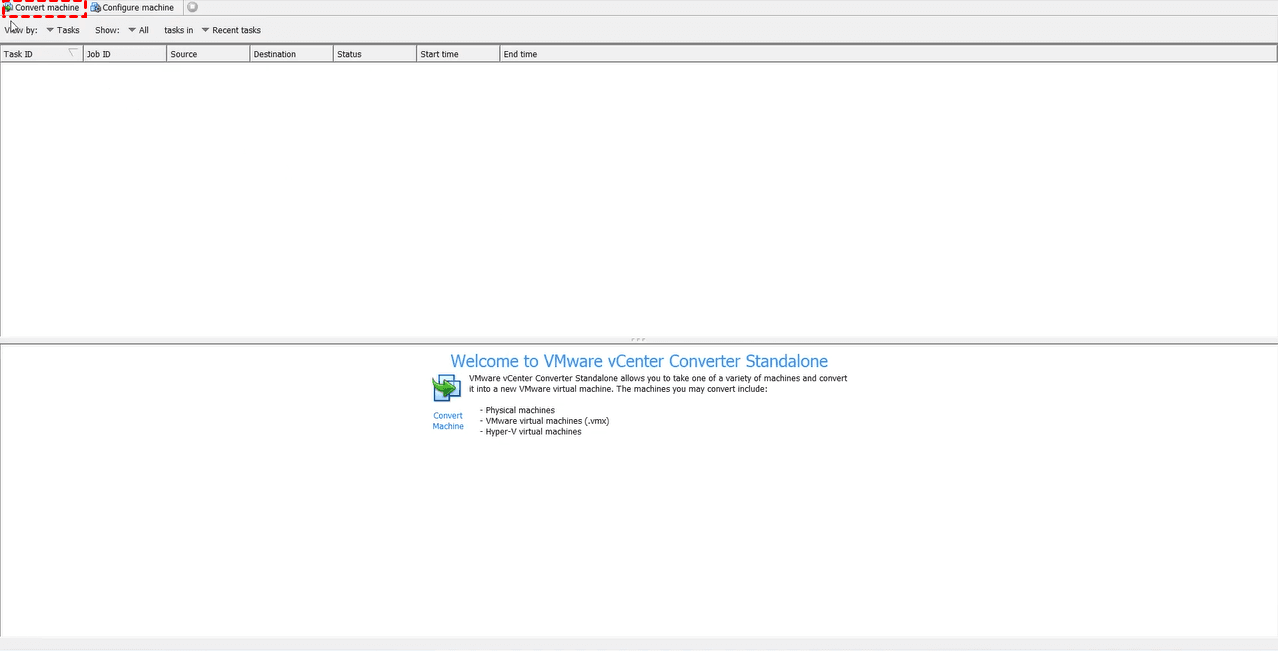
1. Launch VMware vCenter Converter Standalone. Click Convert machine on the toolbar to open the wizard.
2. On Source System page, select source type as Powered off option, and select Hyper-V Server from the below dropping menu.
Specify server connection information, and then click Next.

3. On Source Machine page, select the Hyper-V VM you want to convert. Click Next to continue.
Depending on whether VMware ESXi or Workstation you want to convert the VM to, the following steps are different.
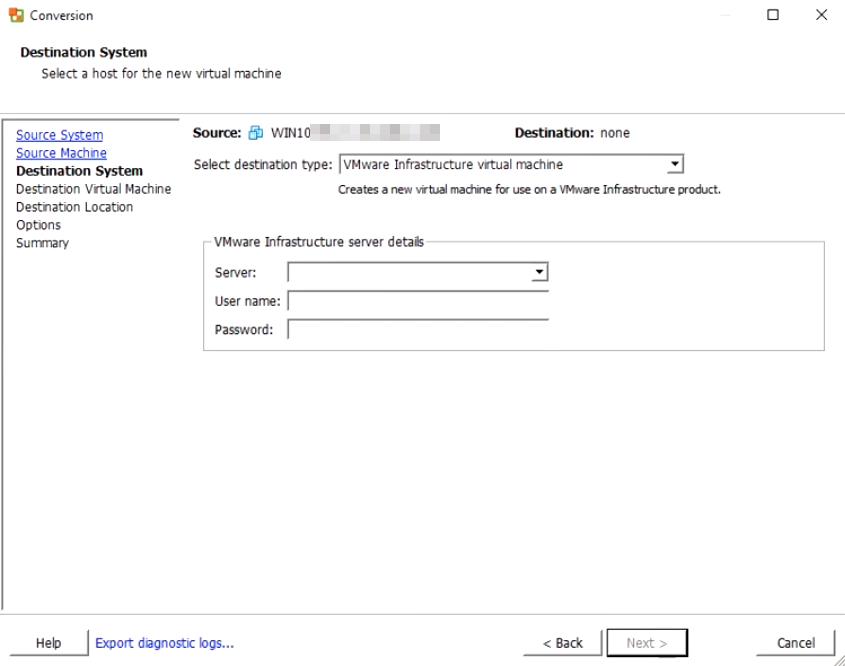
4. If you want to convert to VMware ESXi:
On Destination System page, select VMware Infrastructure virtual machine as the destination type, and provide ESXi or vCenter Server IP Address, User name and Password. Then click Next.
5. On Destination Virtual Machine page, provide a Name for the new VM, and click Next.
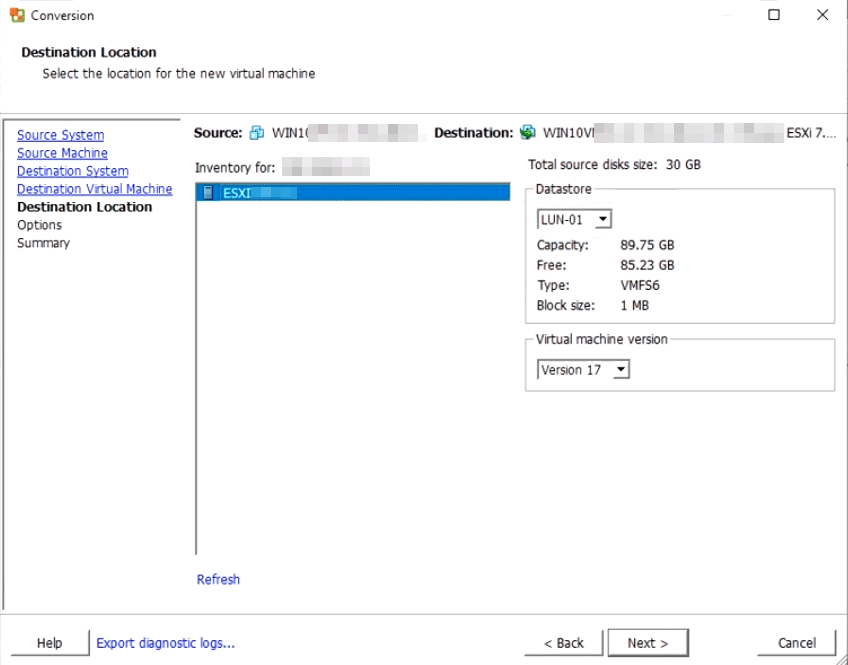
6. On Destination Location page, select the ESXi host, Datastore, and Virtual machine version. Click Next.
Tip:
If you want to convert to VMware Workstation, Fusion, or Player:
On Destination System page, select VMware Workstation or other VMware virtual machine as the destination type, and select VMware product in the dropping menu.
Provide a Name and select a location for the virtual machine. You can select a local folder or a network share, with User name and Password to be used when connecting to the network share of the destination virtual machine. Then click Next.
7. On Options page, browse the Current settings and optionally Edit the parameters for the conversion task. Then you can click Next to continue.
8. On Summary page, review the information and click Finish to start conversion. You can see the progress in Recent Tasks interface.
VMware vCenter Converter Standalone was the most common way to convert Hyper-V to VMware. And there is still no official replacement since it is announced unavailable for download.
If you are finding an effective alternative, it is recommended currently that you can try a file-based backup way to backup everything on the Hyper-V VM and restore it to VMware, just like backup and restore on the physical machines. This also apply for P2V on VMware or Hyper-V.
And if you may need to convert VMware to Hyper-V back in the future. In the next part I will introduce two ways to do it.
How to convert VMware to Hyper-V when necessary
In this section, I will introduce 2 ways to convert VMware to Hyper-V, since Microsoft Virtual Machine Converter (MVMC) is deprecated by Microsoft. If your have previously downloaded MVMC and it’s still available, you can refer to the first method. If you have not, you may need to download it on other site or refer to the second method.
Migrate VMware to Hyper-V using Microsoft Virtual Machine Converter (Legacy)
Before you begin, please power off the target VM and uninstall the VMware tools.
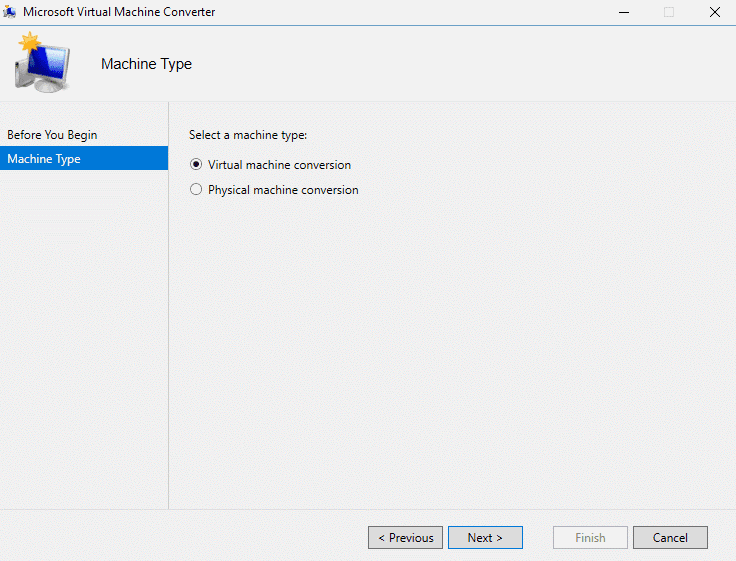
1. Launch Microsoft Virtual Machine Converter (MVMC). Select the Machine Type as Virtual machine conversion, and click Next to continue.
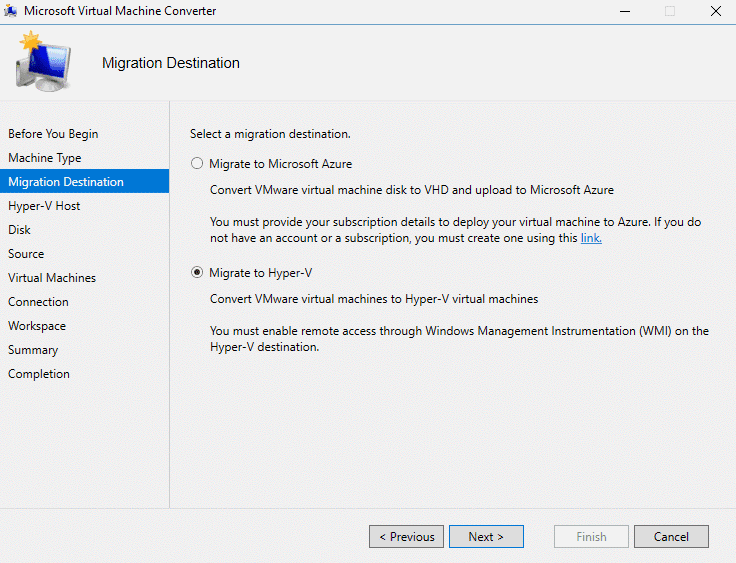
2. On Migration Destination page, select Migrate to Hyper-V, then click Next.
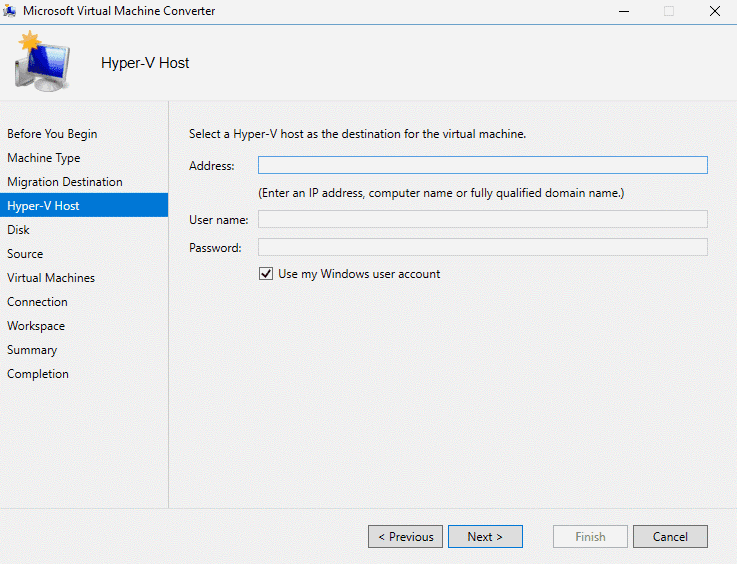
3. On Hyper-V Host page, Enter an IP Address, computer name or fully qualified domain name in Address, to
specify a Hyper-V host as the destination for the new VM.
Check Use my Windows user account option, or provide other User name and password. Click Next to continue.
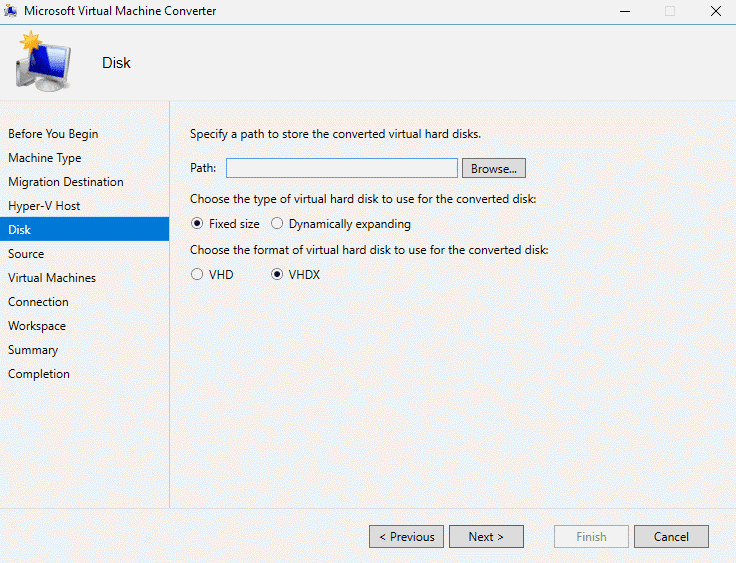
4. On Disk page:
Click Browse… to specify a path to store the converted virtual disks.
Choose the type of virtual hard disk to use for the converted disk as Fixed size or Dynamically expanding.
Choose the format of virtual hard disk to use for the converted disk as VHD or VHDX. Then click Next.
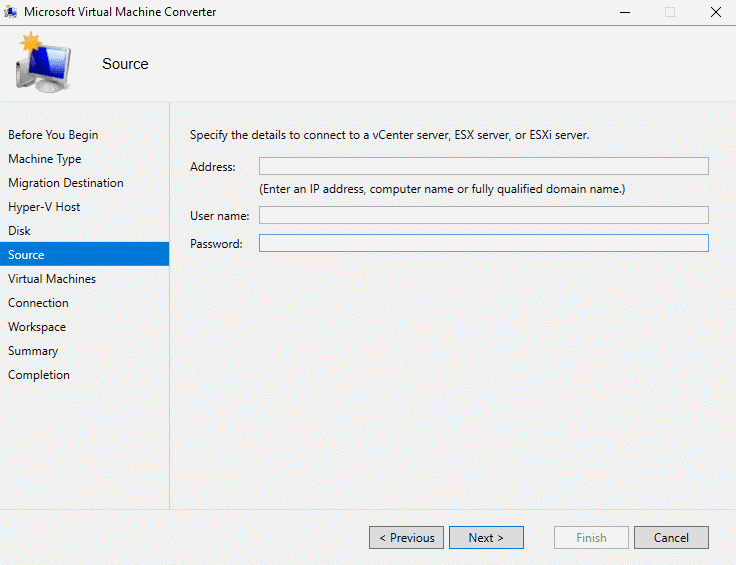
5. On Source page, specify the Address, Username and password to connect to a vCenter server, ESX server, or ESXi server. Click Next.
6. On Virtual Machines page, select the VM you want to convert from the list, and then click Next.
7. On Connection page, select the final state of the source and destination VM as ON or Off.
If the original VM is powered on, have supported versions of Linux installed, and are running the VMware tools, you will need to provide information to connect to the VM, for enabling the VMware tools to be uninstalled. You don’t need to provide it if you uninstalled VMware tools previously.
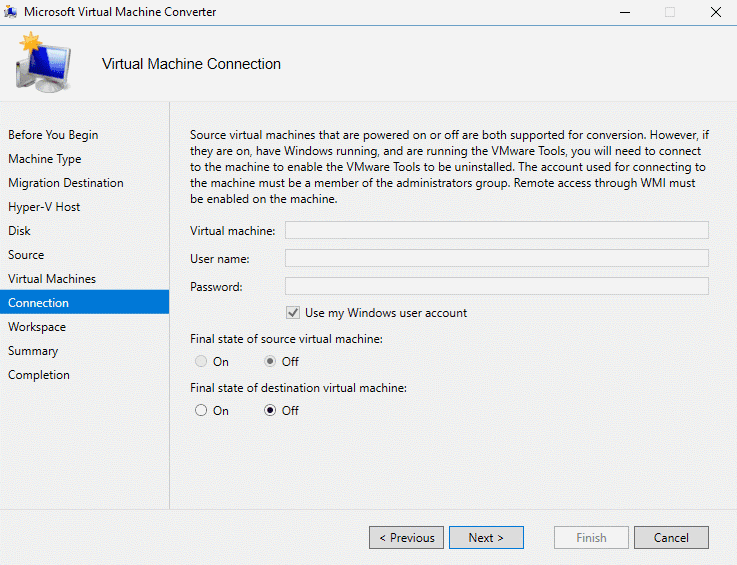
Click Next to continue.
8. On Workspace page, click Browse… to specify a folder for storing temporary files in the conversion process. And click Next.
9. On Summary page, review all the configuration information you specified, and then you can click Finish to start conversion.
10. You can see the progress on Completion page. Click Close when it’s done, and remember to reconfigure the new VM on Hyper-V.
Note: If you don't have MVMC, you can choose Microsoft's paid tool System Center Virtual Machine Manager (SCVMM) or third party tools.
Convert exported VMware VMDK to Hyper-V VHDX using PowerShell
1. Export target VM on VMware ESXi or Workstation to OVF template. Generally it will result in 3 files, the manifest file ends with .mf, the OVF file which provides a complete specification of the virtual machine, and the virtual disk file ends with .vmdk. What we need is the exported VMDK file.
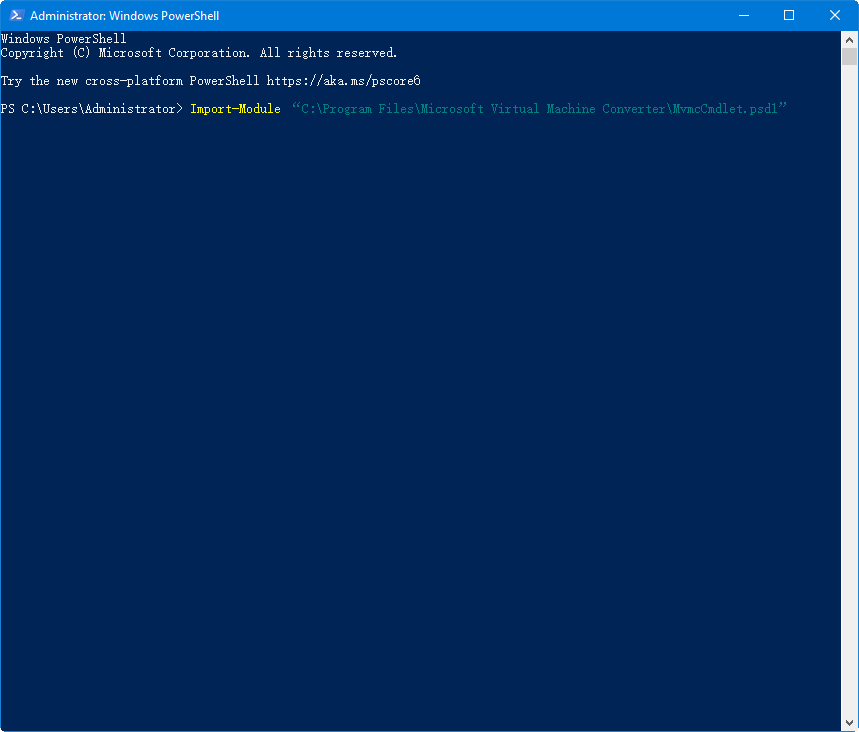
2. Launch PowerShell and input the following command to import MVMC module:
Import-Module “filepath\Microsoft Virtual Machine Converter\MvmcCmdlet.psd1”
Note: As for ‘filepath’ you need to type the path where you store the MVMC folder.
3. Input the following commands to convert the exported VMDK file into VHDX file:
ConvertTo-MvmcVirtualHardDisk -SourceLiteralPath “filepath\filename.vmdk” -VhdType DynamicHardDisk -VhdFormat vhdx -DestinationLiteralPath “newfilepath\newfilename.vhdx”
Note:
1. As for ‘filepath’ and ‘filename’ you need to type the path where you store the exported VMDK file and its name.
2. As for ‘newfilepath’ and ‘newfilename’ you need to type where you want to store the new VHDX file and its name.
3. -VhdType is used to define the type of the converted disk as Fixed size or Dynamically expanding.
4. -VhdFormat is used to define the format of the converted disk as VHD or VHDX.

4. Now you can check the converted disk in the specified folder, and use it to create a new Hyper-V VM.
Tip:
Please note that Hyper-V virtual machines have 2 generations, and currently there is no image-level way for Hyper-V convert generation 1 to generation 2. You can still try file-based backup to convert.
Data Insurance: Always backup VMs before risky operations
Converting VM is a risky operation, many unexpected problems can occur during the process. A failed conversion can even render your original VM unusable, and result in serious data and financial loss.
So keep taking regular backups is crucial before converting Hyper-V to VMware, especially for enterprises. If something goes wrong, having a backup makes it easy to restore to the original state without worrying about VM crashes or data loss. In short, a secure backup also helps in testing and validation in a controlled environment. Here you can try a free enterprise backup software - AOMEI Cyber Backup that can manage VMware and Hyper-V VMs from a centralized console.
✦ Support Hyper-V and VMware: Compatible with Hyper-V in Windows 8/8.1/10/11, Windows Server/Microsoft Hyper-V Server 2012 R2 and later versions, and both paid and free versions of VMware ESXi 6.0 and later versions.
✦ Agentless Backup: Protecting virtual machines in a central console without installing Agents.
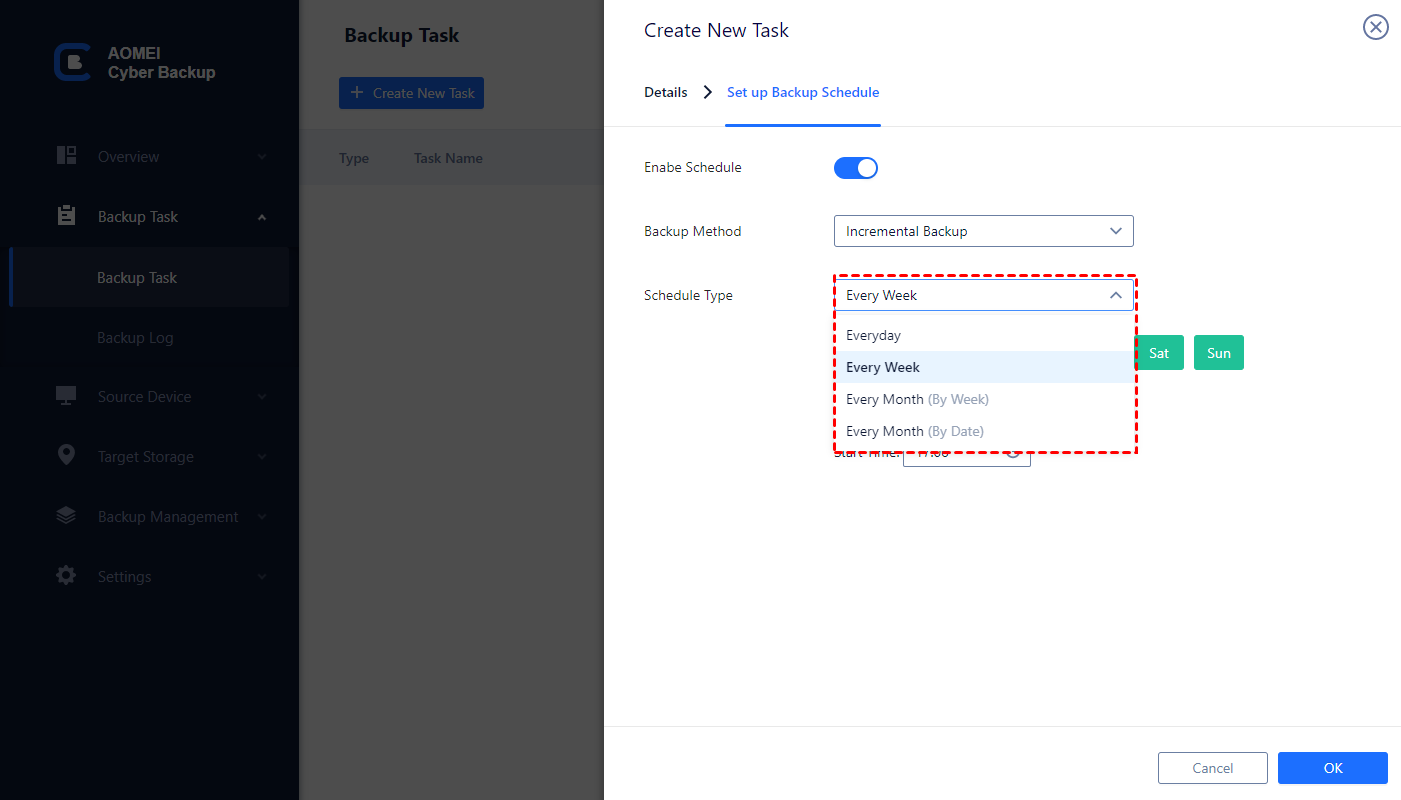
✦ Auto Backup: Creating flexible schedule to run automatic backup daily, weekly, monthly.
✦ Restore from Any Point: Restoring a complete VM from any backed up point quickly and easily.
AOMEI Cyber Backup simplifies a complete backup task into 3 simple steps, and next I will demonstrate how to create one. Please click the button below to download and enjoy the free edition:
3 quick steps to protect VMware and Hyper-V VMs for free
1. Bind devices: Access to AOMEI Cyber Backup web client and navigate to Source Devices tab to add and bind your Hyper-V or VMware ESXi host, the VMs on the host will be clearly listed with their backup status for monitoring.

2. Create backup tasks: Navigate to Backup Task > + Create New Task and provide Task Name, Backup Type, Device, Target, Schedule, Archive and Backup Cleanup on an intuitive page.
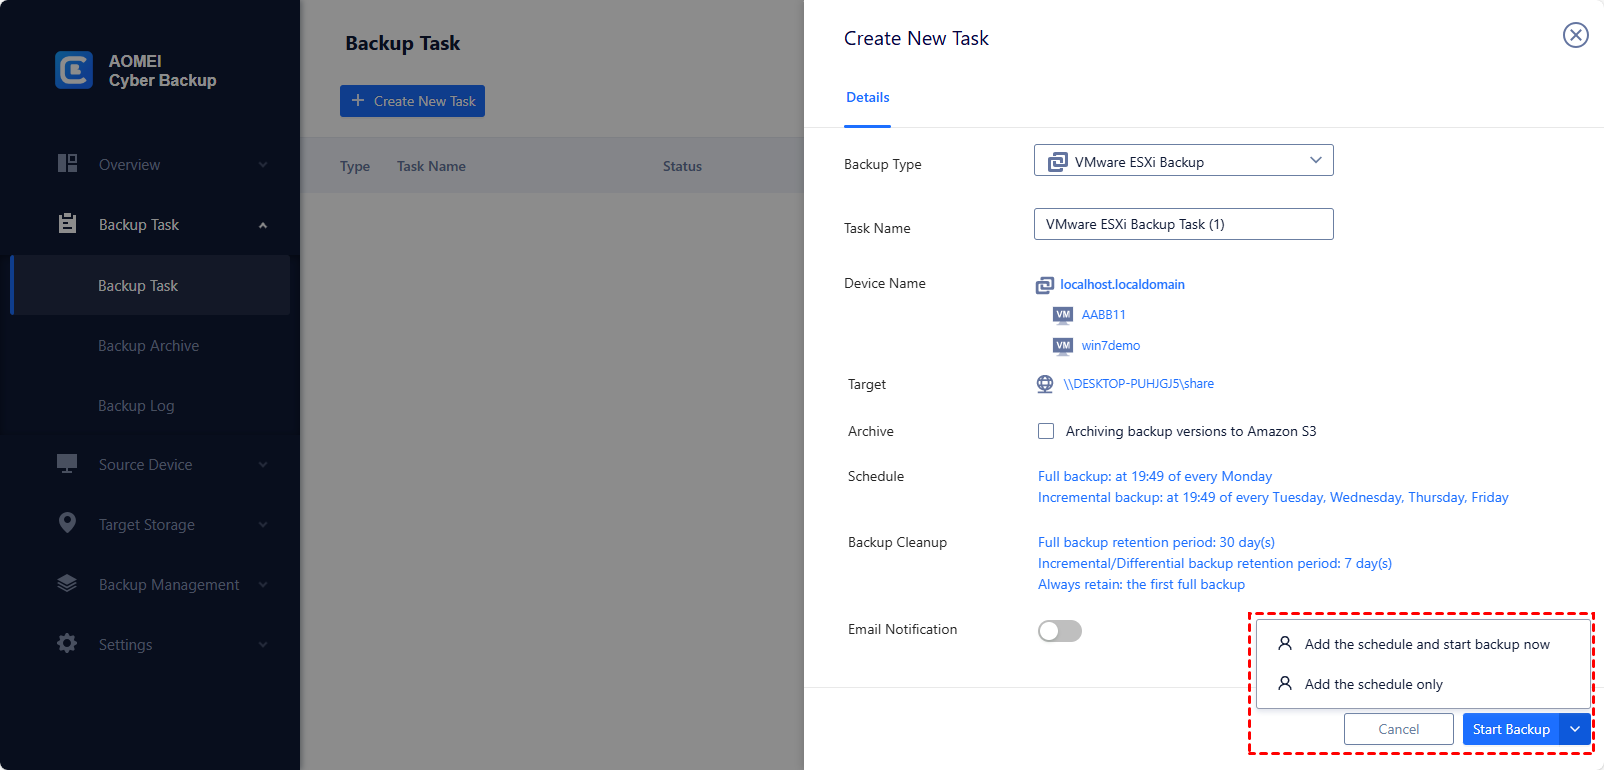
You can quickly create a complete backup task that cover multiple VMs within one task. In addition, a task with Backup Schedule will automatically perform backups regularly (daily, weekly, monthly).
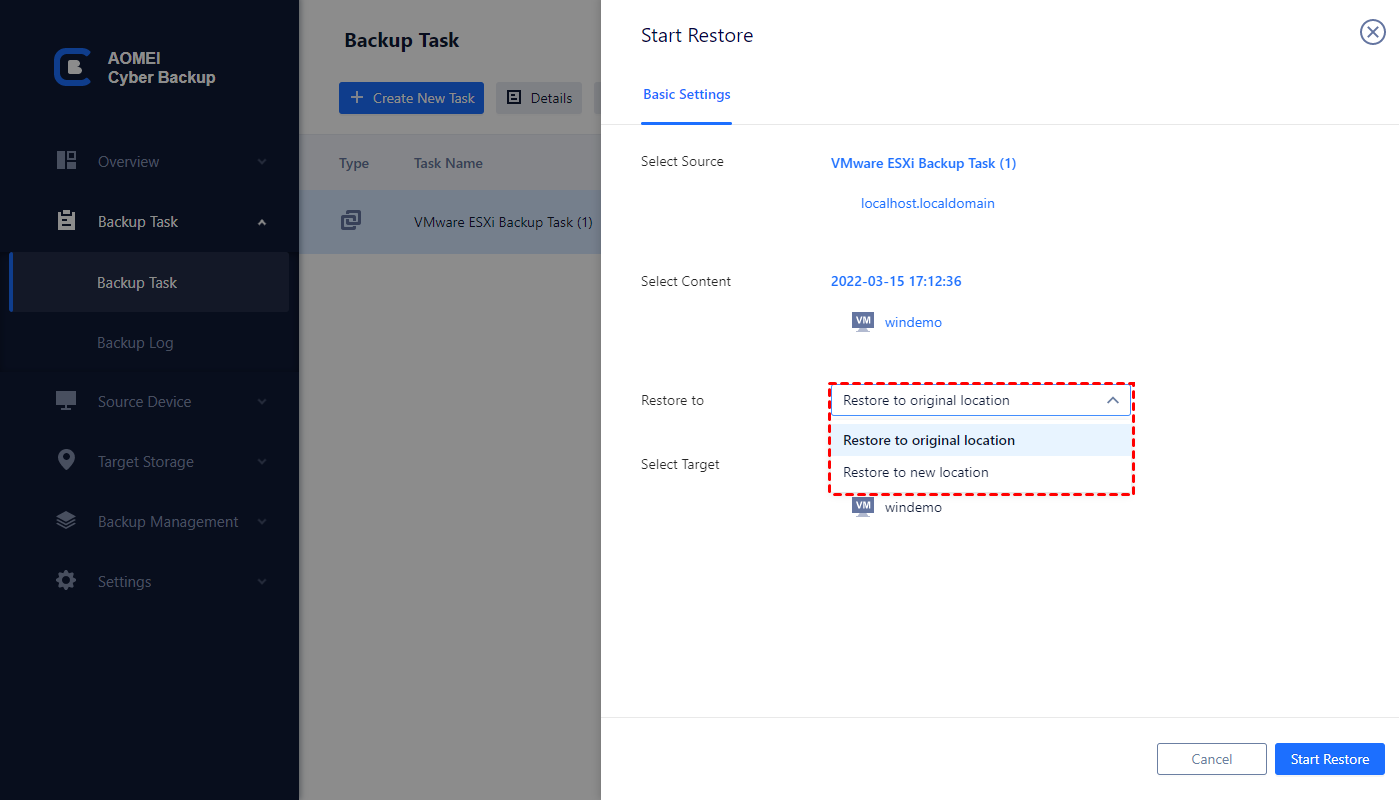
3. Restore from backup: clicking … > Restore on the separately listed backup task, all recovery points related to the task will be listed, you can select from them according to your needs.
✎If you want more advanced functionality, you can also upgrade to enjoy:
Backup cleanup: Set up a retention policy to delete old backup files automatically, thus save your storage space.
Restore to new location: Create an identical VM in the same or another datastore/host directly from the backup.
With AOMEI Cyber Backup you can quickly complete backup and restore tasks of multiple VMs. In addition, you can create sub-accounts with limited privileges, to further protect your VMs from accidental mis-operations.
✍ In addition, if you want to migrate physical PC or Server to the virtual environment, you can also utilize AOMEI Cyber Backup. It's feasible and easy to achieve P2V thourgh installing the agent on your computers.

Summary
In this article I introduced how to use the official free tool VMware vCenter Converter Standalone to convert Hyper-V VM to VMware, how to use Microsoft Virtual Machine Converter (MVMC) to convert VMware ESXi VM to Hyper-V, and how to use PowerShell to import MVMC module to covert VMDK file to VHD file. The last way can be used for VMware Workstation VMs.
However, unfortunately, the MVMC was already deprecated by Microsoft. Therefore, if you don’t have MVMC, you can choose Microsoft’s new paid tool System Center Virtual Machine Manager (SCVMM) or other third-party tools to help you convert VMware VMs to Hyper-V.
Conversion is still a risky operation. To avoid disastrous data loss, please remember to back up your VMs with reliable backup tools. Here I recommend you AOMEI Cyber Backup because it can manage VMs on both VMware and Hyper-V for free.

