


How to Clone VM from Snapshot on VMware ESXi [Guide]
On VMware ESXi, cloning a virtual machine from a snapshot can easily go wrong and result in data unavailability. This article describes specific steps and easy methods to quickly copy many virtual machines with snapshots at once and then restore them easily to ensure business continuity.
By Crystal / Updated on June 13, 2024
Can you clone VM from snapshot?
Case: Is there an easy way to create a new VM from an existing snapshot in VMware ESXi?
Someone needs a new VM created from an existing VM, but from one of its snapshots. Is this easily obtainable? If so, can someone provide instructions? Thank you
- Question from Spiceworks.com
Virtual machine (VM) snapshot preserves the VM’s state and data at a specific point in time. When you perform complex tests in a VM, you can take snapshots before data has been change. Snapshots can roll back the VM to the previous point if task fails, so it can protect your data security.
Some user may ask, “How can I use a snapshot to create a virtual machine for testing purposes?”
Generally, you can select to clone VM from VMware snapshots with built-in feature in VMware Workstation. But for VMware ESXi, unfortunately, there is no direct way for VMware ESXi clone VM from snapshots.
If you want to achieve the purpose of cloning a virtual machine from a snapshot on ESXi, you can refer to the two ways mentioned in this article.
![]()
Specific steps of cloning VM from snapshot on VMware ESXi
In VMware ESXi, how to clone a VM from a snapshot? Normally you can use the built-in feature to copy the VM folders including snapshot files to create an identical VM.
Another efficient and convenient way is to use a professional VMware backup software, thus you can perform regular backups and use them to create virtual machines at the given point.
Way 1. Copy VM folders to create a same VM with snapshots (Built-in tool)
This part will introduce the detailed steps of VMware ESXi 6.5 clone VM from snapshot as demonstration. These steps also apply to vSphere 6.7.
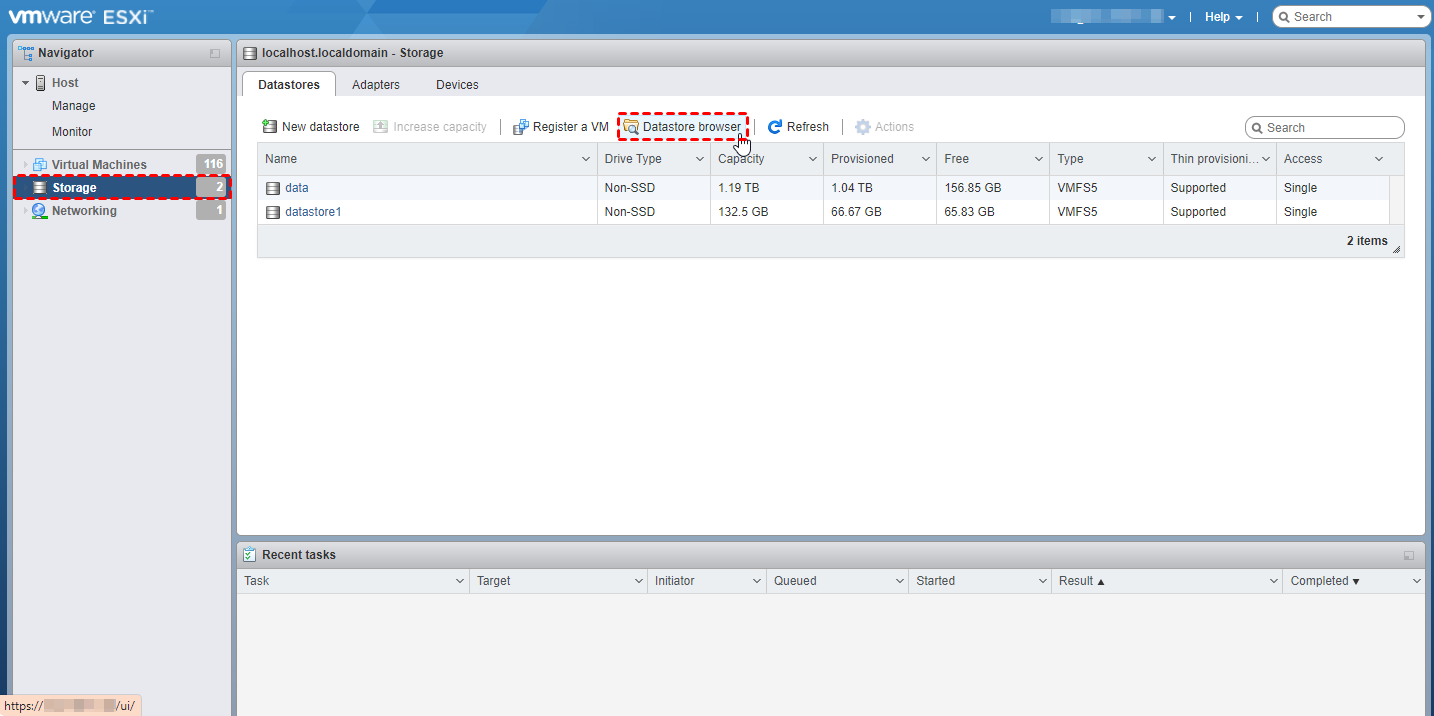
1. Access to vSphere Web Client. Navigate to Storage in the left inventory, and click Datastore Browser on the toolbar.
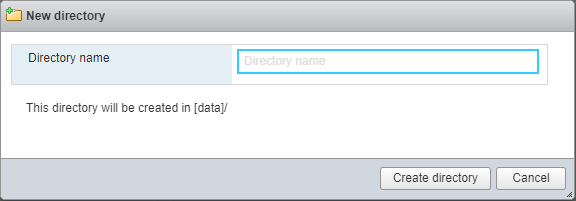
2. To differ from the original VM, click Create directory in Datastore browser, and provide a different Directory name for the new VM. Click Create Directory to confirm.
3. Back to the Datastore browser, find the folder of the original VM and click Copy on the toolbar to copy all files in it to the new folder you just created. This operation on VMware vSphere will clone VM with snapshots.

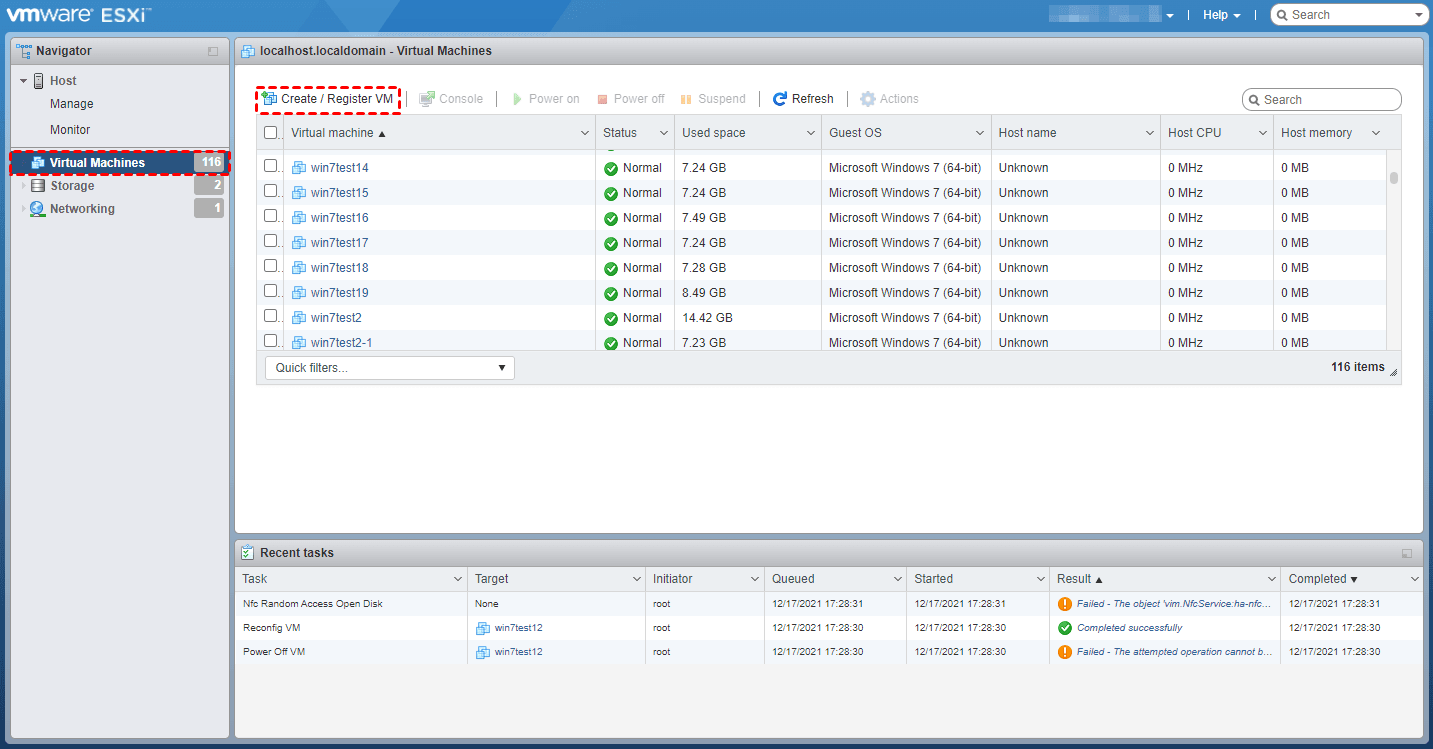
4. Close Datastore browser, and click Virtual Machines in the left inventory. Click Create/Register VM on toolbar to open the wizard.
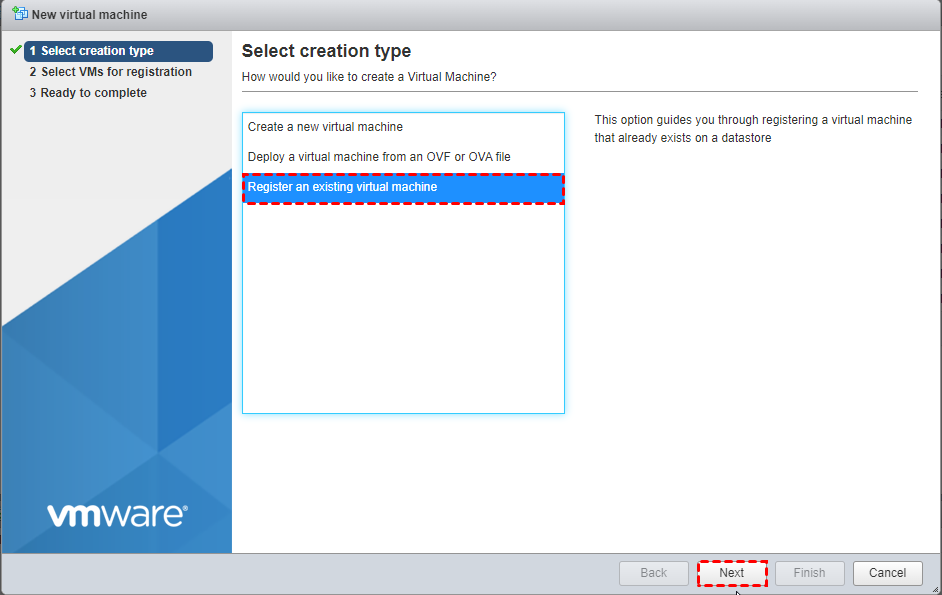
5. On Select creation type page, select Register an existing virtual machine and click Next.
6. On Select VMs for registration page, click Select one or more virtual machines, a datastore or a directory, and select the newly created folder. Click Next.

7. On Ready to complete page, click Finish to close the wizard.
8. Back to Virtual Machines, now you can see the newly copied VM with the same name as the original VM, that’s because the name comes from the .vmx file in folder. You can right-click on the VM name and Rename it.
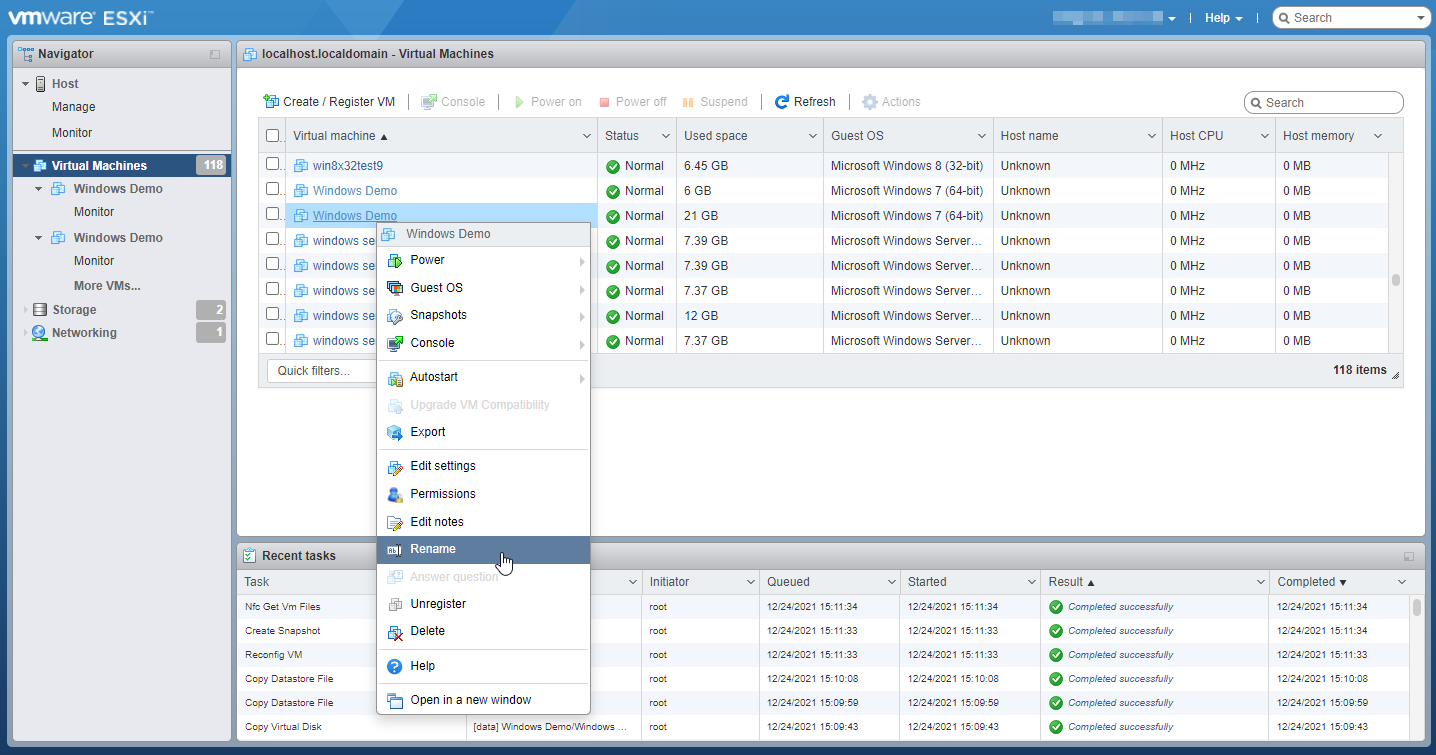
9. Power on the new VM you just copied, select I copied it and click Answer in the pop-up window.
10. Right-click on the new VM name and select Snapshot > Manage Snapshots.
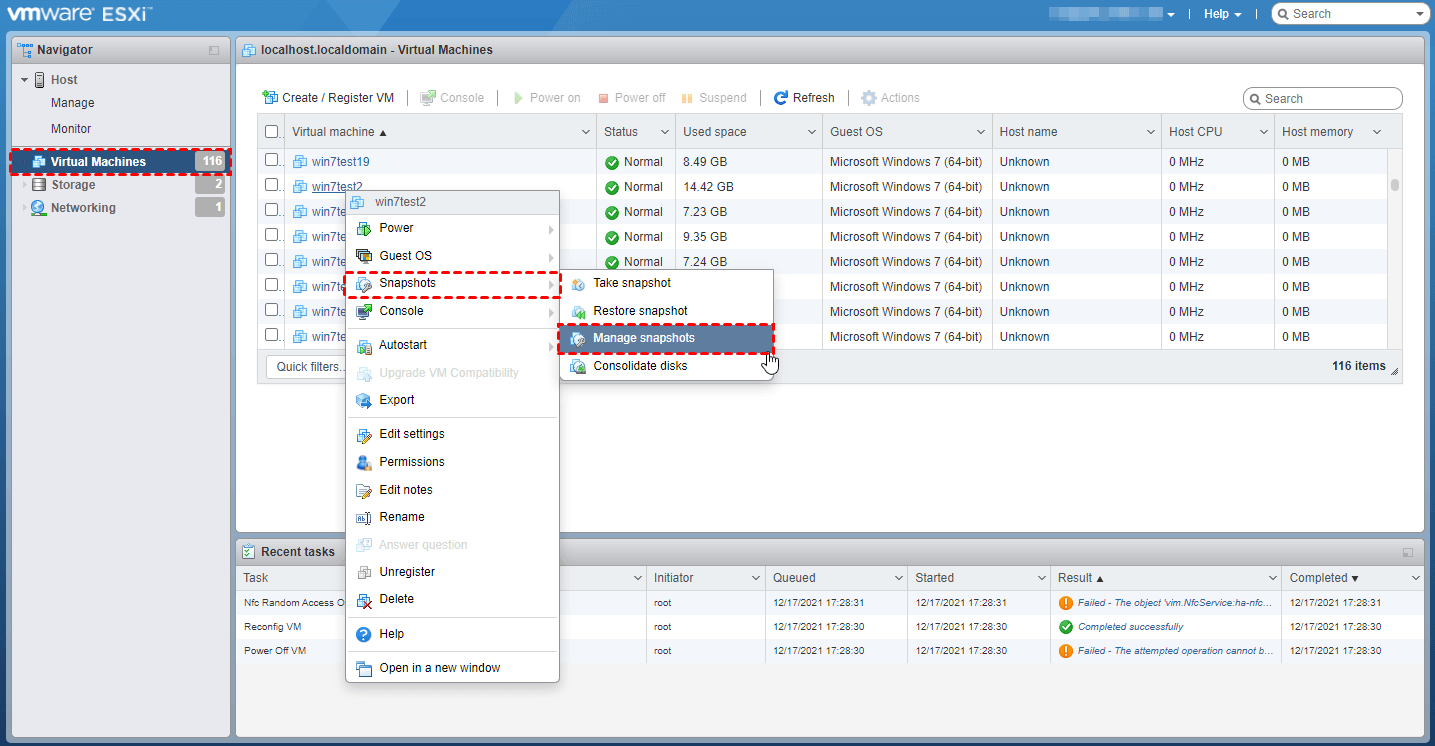
11. In pop-up Snapshot Manager, select the target snapshot and click Restore snapshot on the toolbar. Then you will get a new VM at the specific point in time when the snapshot was taken.

As you can see, unlike VMware Workstation restore snapshot to new VM, VMware ESXi clone VM from snapshot will be more complicated. And there may be errors occurred while taking and cloning a snapshot.
Therefore, next I will introduce a more secure and easier way to clone VMs at specific points of time.
Way 2. Achieve VMware ESXi clone VM from backup (Easier)
To keep virtual machines in a specific point, it is more convenient to use backups than VMware ESXi cloning virtual machines from snapshots. Copying a virtual machine folder and registering a new virtual machine seems both complex and inefficient. Backups are preferred over cloning VMs in several ways:
- Providing flexibility by storing multiple versions of data for targeted recovery.
- Captures only changes, resulting in more efficient use of storage. Ensures rapid data recovery in the event of a disaster.
- Meet long-term archiving needs.
While VMware cloning VM is applicable in certain scenarios, backups remain the best option for comprehensive data protection, disaster recovery and long-term storage in virtualized environments. Therefore, a professional software makes it easier to accomplish the purpose of cloning virtual machines on VMware ESXi, replacing snapshots.
In this part, I will use the professional VMware backup software named AOMEI Cyber Backup to perform ESXi backup. It allows you to schedule backup tasks to provides regular recovery points which can be used to create a new VM of a certain point, supports both paid and free versions of VMware ESXi. It also allows you to manage backups from a central console and perform fast recovery to another host easily.
✓ Scheduled Backups: Set up automatic backup schedules to ensure data continuity and minimizing downtime.
✓ Incremental Backup: Utilize incremental backup technology to efficiently capture only the changes made since the last backup, reducing backup time and storage usage.
✓ Centralized Management: Manage all your VMware backups from a centralized console, simplifying administration tasks.
✓ Flexible Backup Objects: Create comprehensive data protection policies, including virtual machine backups, database backups and physical machine back up.
✓ Reporting: Monitor backup processes in real time and send notifications to ensure the reliability of the backup process.
✓ Amazon S3 archive: You can save your VMware backup to your Amazon S3 object storage.
Download the 30-day free trial to proceed:
💡 Easier steps to backup and restore ESXi virtual machines:
1. Download AOMEI Cyber Bakcup and add vCenter or Standalone ESXi host as the source device.

2. Click Backup Task > Create New Task to start configuring backup task.
Enter task name > Choose VMware ESXi > Add VMs in the task > Schedule backup task > Set retention policies.

3. Click Start Backup.
4. Click Restore, select the recovery point from the backup versions, and then Restore new location. It allows you to restore entire virtual machine to create a new identical virtual machine in the same or another datastore/host.
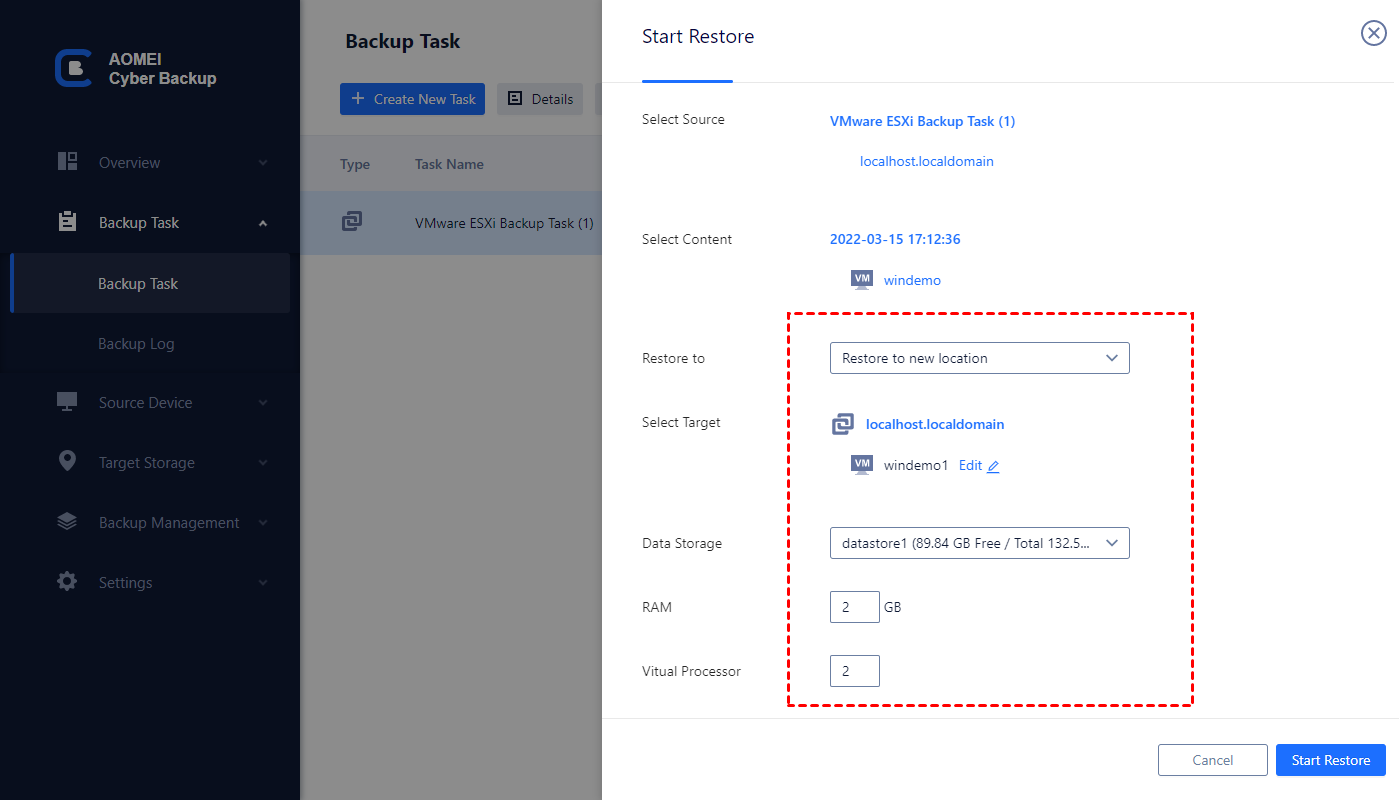
With AOMEI Cyber Backup, you don't have to clone VMs from snapshot in a complicated way, you just create regular backups to ensure the availability and integrity of your VMware data with a few simple clicks.
Summary
Unlike VMware Workstation, there is no built-in feature for VMware ESXi clone VM from snapshot. Therefore, I introduced how to copy all the VM files and restore snapshots to a new VM that helps to clone VM indirectly from snapshot in this article. Whether you choose to copy files manually or choose convenient third-party software, I hope you can find a suitable solution.

