


How to Restore Entire VM for Fast Disaster Recovery | 2+1 Ways
If you want to restore entire VM, instead of some of its files or applications installed on it, there are 3 common ways that suit different cases.
By Crystal / Updated on October 30, 2024
The necessity to restore entire VM
Virtual machine backup is essential for data protection. Regular backups ensure your data is current, allowing for easy restoration in case of VM failure.
There are various methods for VM backup. A physical machine backup or file-based backup can help recover specific files quickly. However, if the VM system crashes, this approach isn't sufficient.
For VMs containing critical business data, minimizing downtime is crucial. You need the ability to quickly restore the entire VM after a disaster. This can be done by either returning the original VM to a usable state or creating an identical VM in a new location.

Available methods to restore entire virtual machine
How to restore VMs depends on how you backed them up. If you want to restore a whole VM that is instantly usable, you need to perform an image-level backup that contains the operating system, configuration files, and all data on disk, including applications, empty disk blocks, system state, etc.
Basically, you can try these ways to restore full VM
- Manually upload VM files and register a new VM
- Import OVF template as a new VM
- Restore VM from backup (third party)
Accordingly, I will take VMware ESXi as an example, to introduce how to restore virtual machine in VMware ESXi.
How to restore entire VM in 2 ESXi built-in ways
If you have only a few VMs to backup and restore, it may be more convenient and affordable to use the built-in ways.
In this section, I will introduce how to restore virtual machine in VMware ESXi built-in ways.
Way 1. How to restore a whole VM from downloaded VM files
Pre-requisites: Manually download VM files
1. Access the VMware ESXi web client, navigate to Storage page and click Datastore browser.

2. In the pop-up window, click Create directory to create a folder for the new VM.
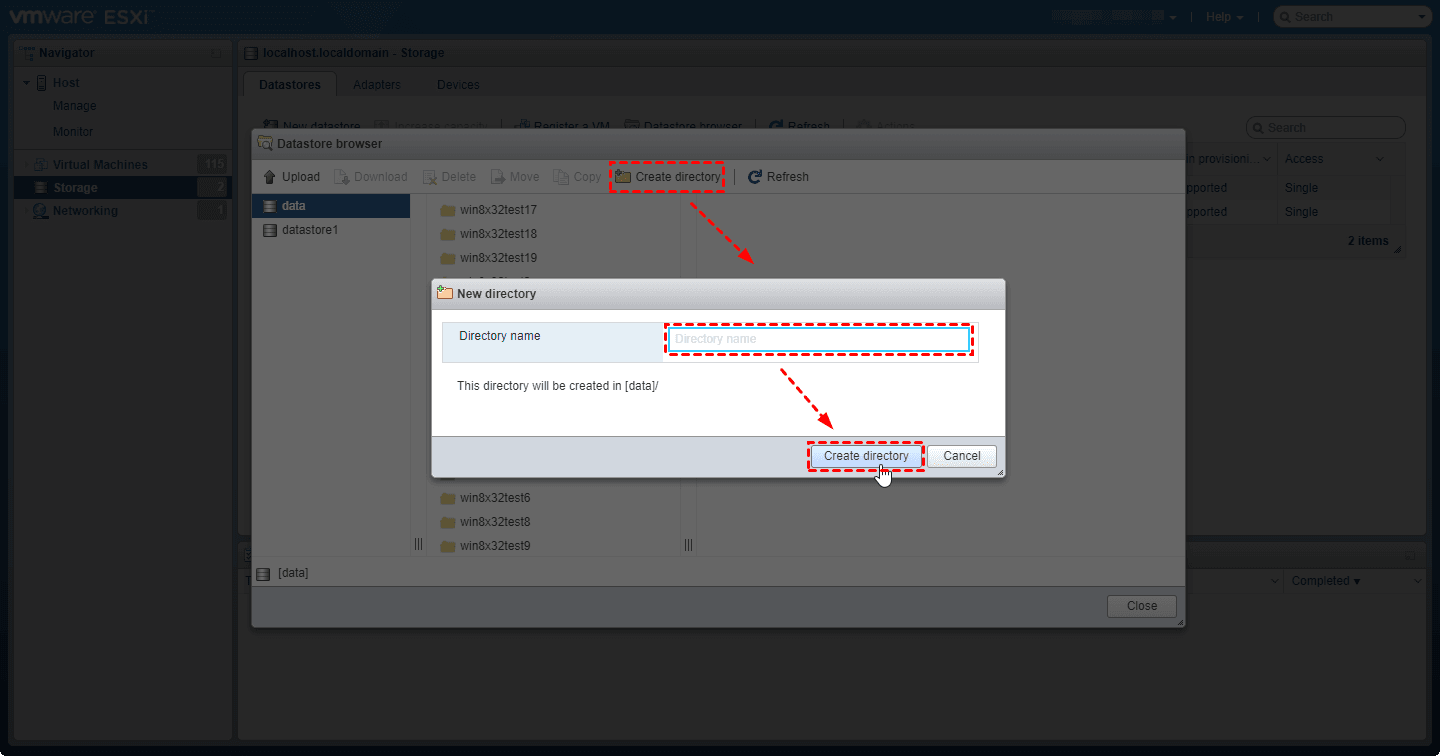
3. Click Upload and specify the VM files to this folder.
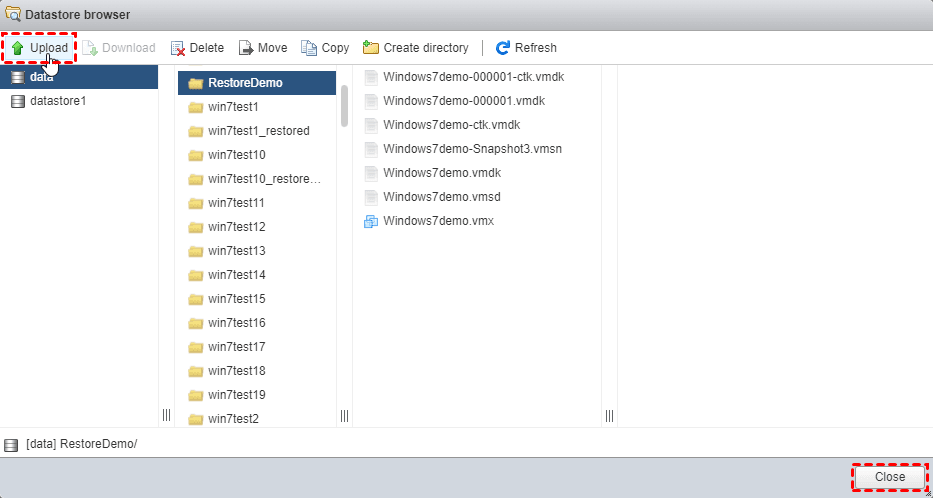
4. Click Close the Datastore browser window, and then click Register a VM to open the wizard.
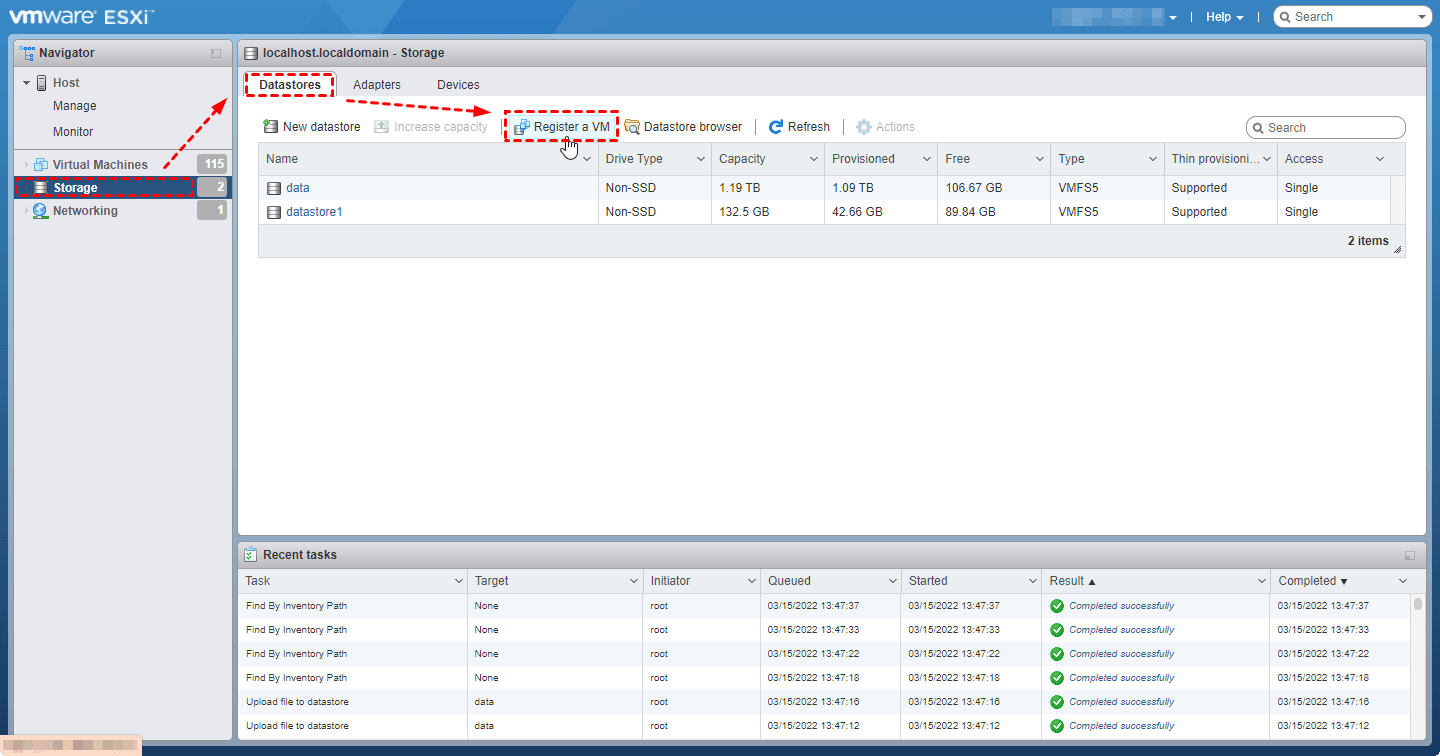
5. In the pop-up window, navigate to the newly created folder, select the VMX file and click Register.

6. Navigate to Virtual Machines, and Refresh the VM list.
Now you can see the new VM with the same name as the VMX file. You can right-click on its name and Rename it.

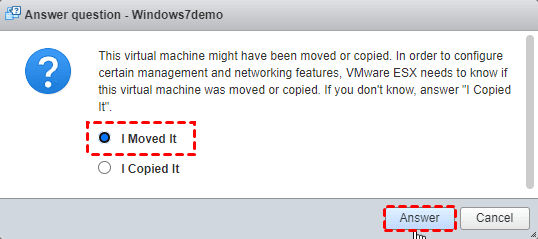
7. Power on the restored VM. There will be pop-up window, select I Moved It and click Answer.
Way 2. How to import OVF template as a new VM
Pre-requisites: Export VM as OVF template
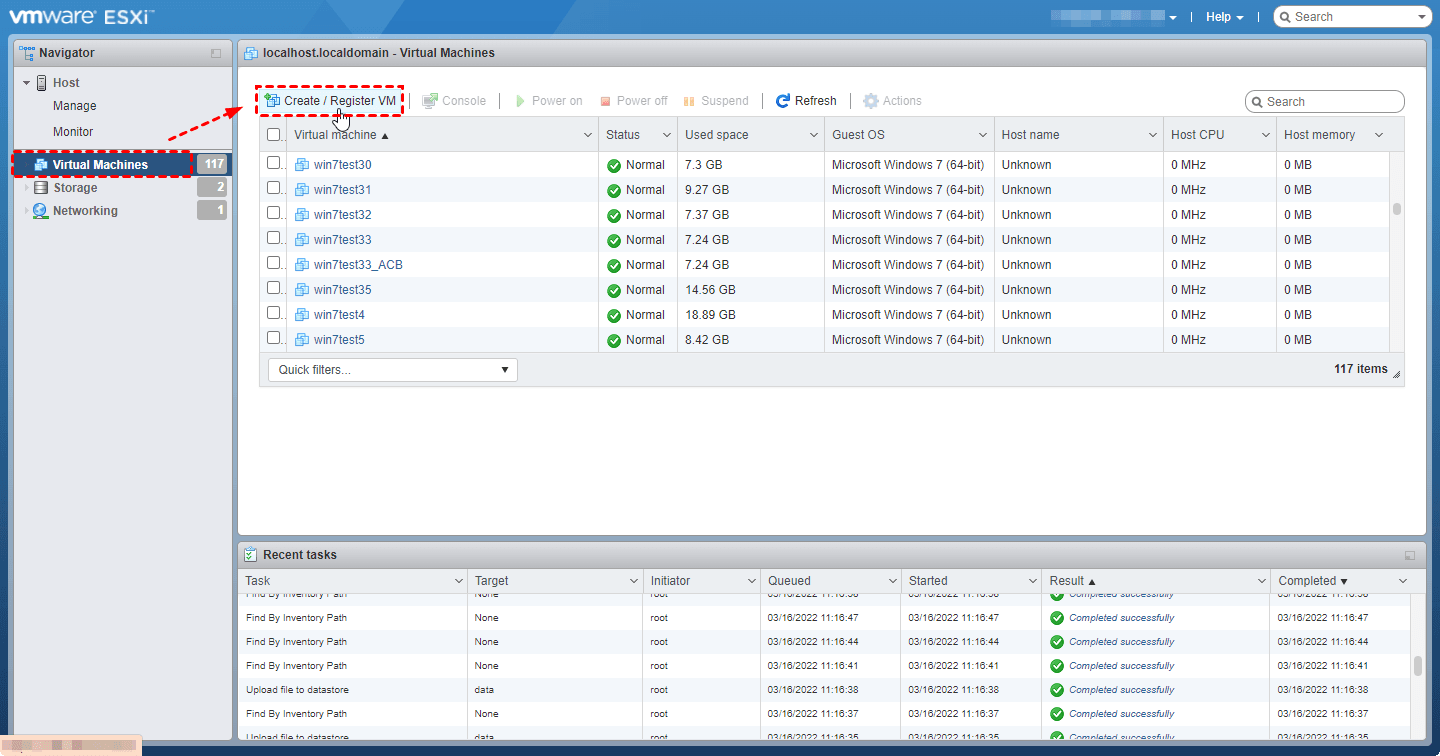
1. Access VMware ESXi web client and navigate to Virtual Machines page.
Click Create/ Register VM to open the wizard.
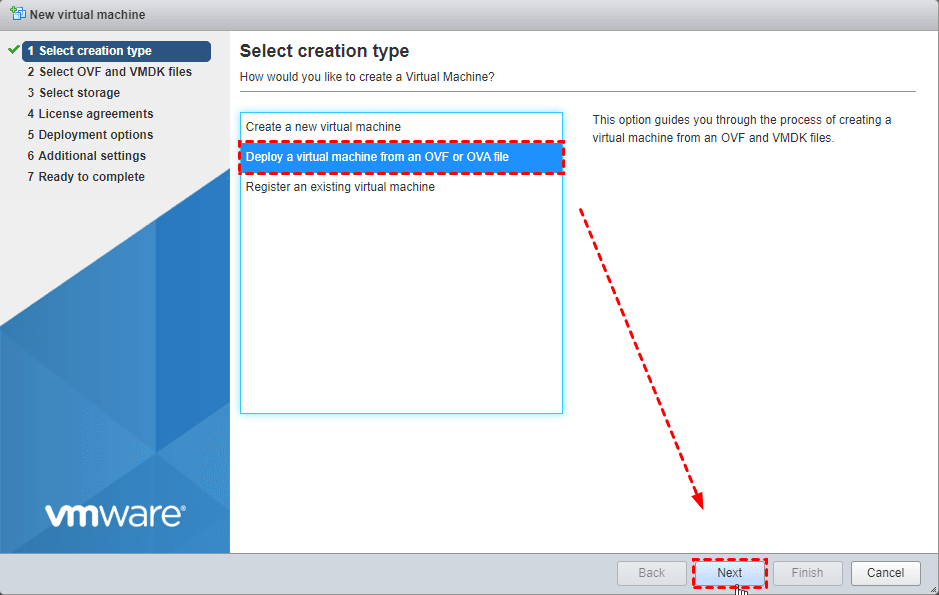
2. On Select creation type tab, select Deploy a virtual machine from an OVF or OVA file, then click Next.
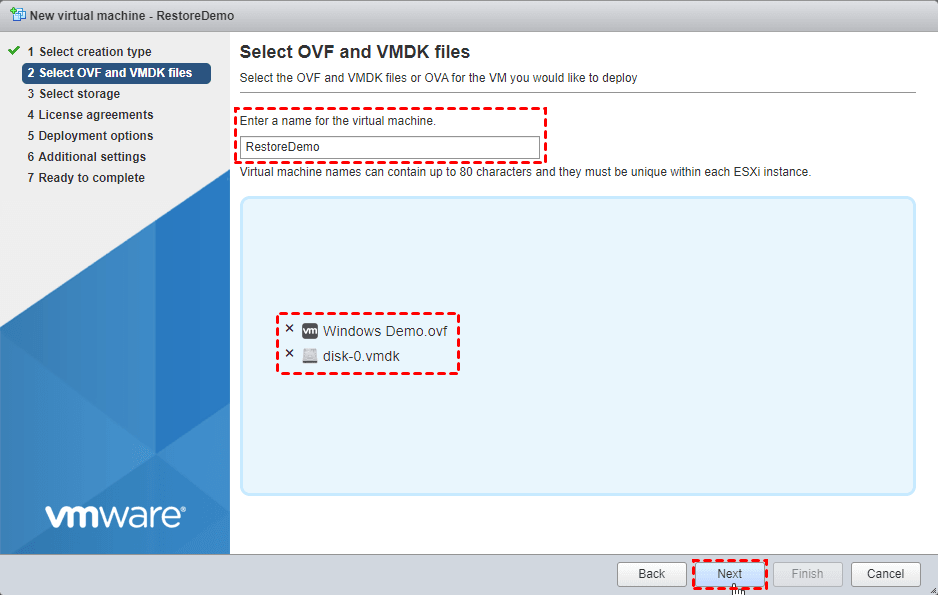
3. On Select OVF and VMDK files tab, provide a name (up to 80 characters) for the new VM, and then click the blank to specify the OVF/OVA file you exported. Click Next to continue.
4. On Select storage tab, specify a datastore to store the VM files, then click Next.

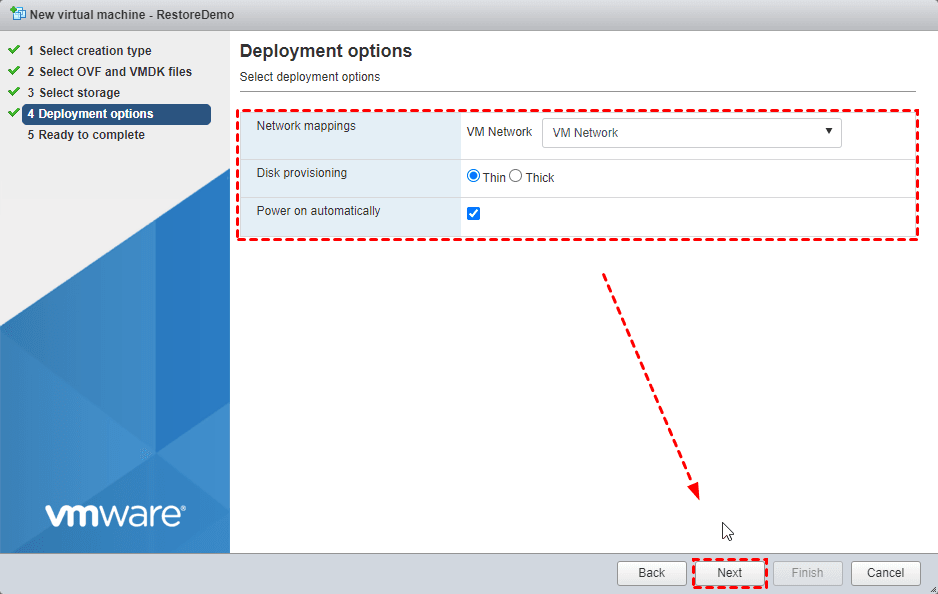
5. On Deployment options page, select the Network mappings, Disk provisioning, and Power on automatically or not. Click Next to continue.
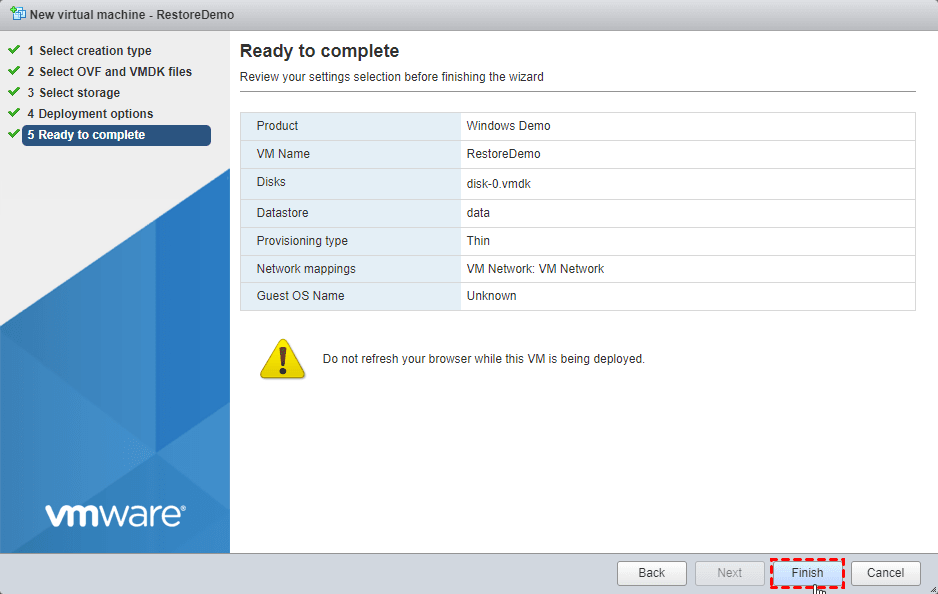
6. On Ready to complete page, review the settings and click Finish to start. You can see the progress in Recent tasks.
Effectively restore an entire VM from image-based backup (Free Tool)
Options such as downloading virtual machine files and exporting virtual machines, while available, are not really image-based backups. They can hardly meet some common backup needs for enterprise, such as backing up multiple VMs, creating VMware backup schedule, etc.
Therefore, many IT staffs prefer to restore entire VM from image-based backups created by dedicated backup tools. Here I introduce you to AOMEI Cyber Backup, the free virtual machine backup software to restore VM from backup. It offers you the following benefits:
|
💡Role-Based Management: Assign other team members as Viewer, Monitor, Backup Operator, Restore Operator with different permissions to team-up efficiently and safely. |
🎇Restore from Any Point: Based on accurate data mapping and change block tracking during backup, and exclusive backup reading technique, restore data from any full or incremental/differential backup point. |
|
🎊Fast Disaster Recovery: With the image-based backups, AOMEI Cyber Backup enables you to restore the entire VMware virtual machine to a usable state quickly without re-creating and configuring a new VM. |
🔔Restore to New Location Directly: Create an identical new VM from the backup to the same or another datastore, host, which can help you with VMware migration or cloning without complex configuration. |
Next, I will demonstrate how to restore VM from backup via AOMEI Cyber Backup. The steps are even simpler than VM backup. You can click the following button to download the freeware.
*You can choose to install this VM backup software on either Windows or Linux system.
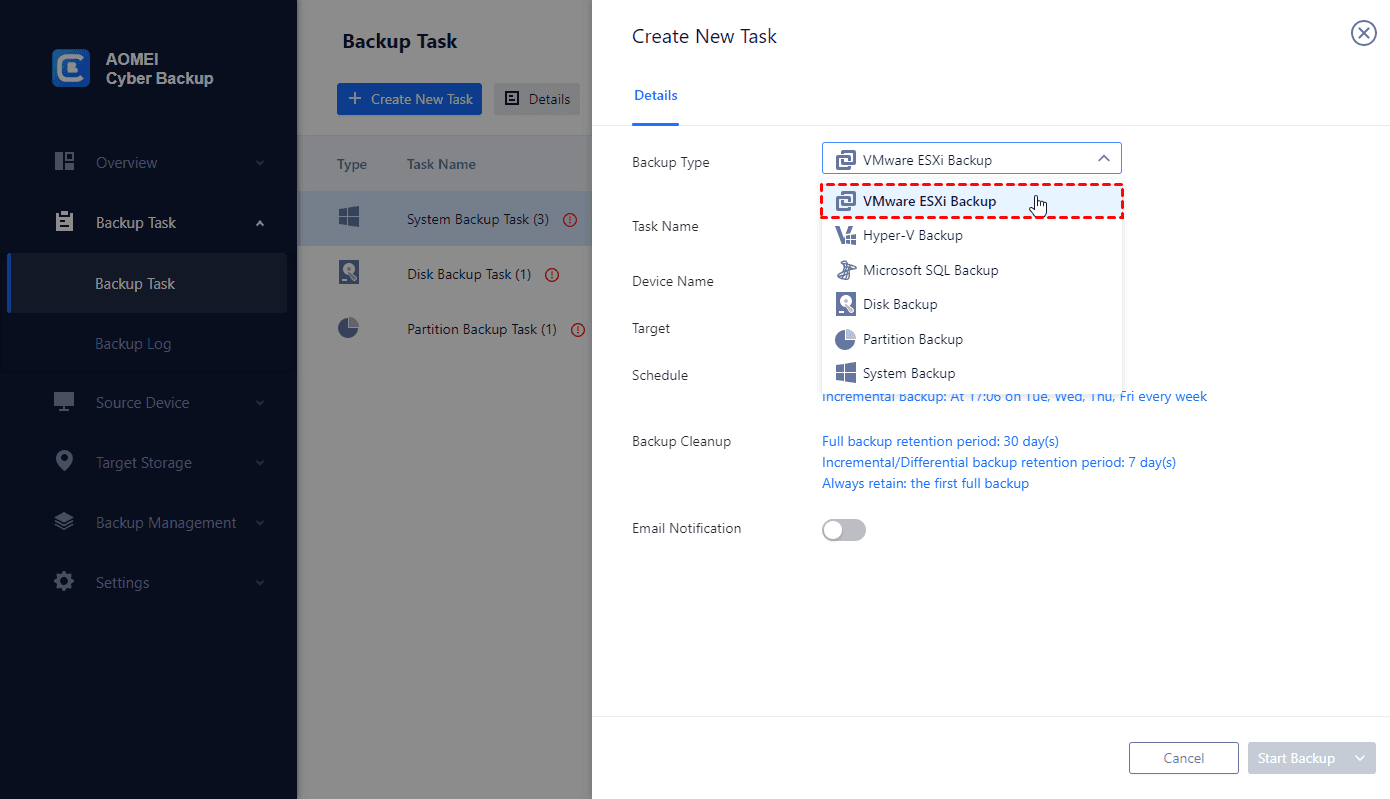
Before recovery, you need to create backup task with the software. The steps are simplified as: Add and bind VMware & Hyper-V device -> Configure the source data/schedule/destination -> Start the backup.
How to restore a full VM easily via AOMEI Cyber Backup
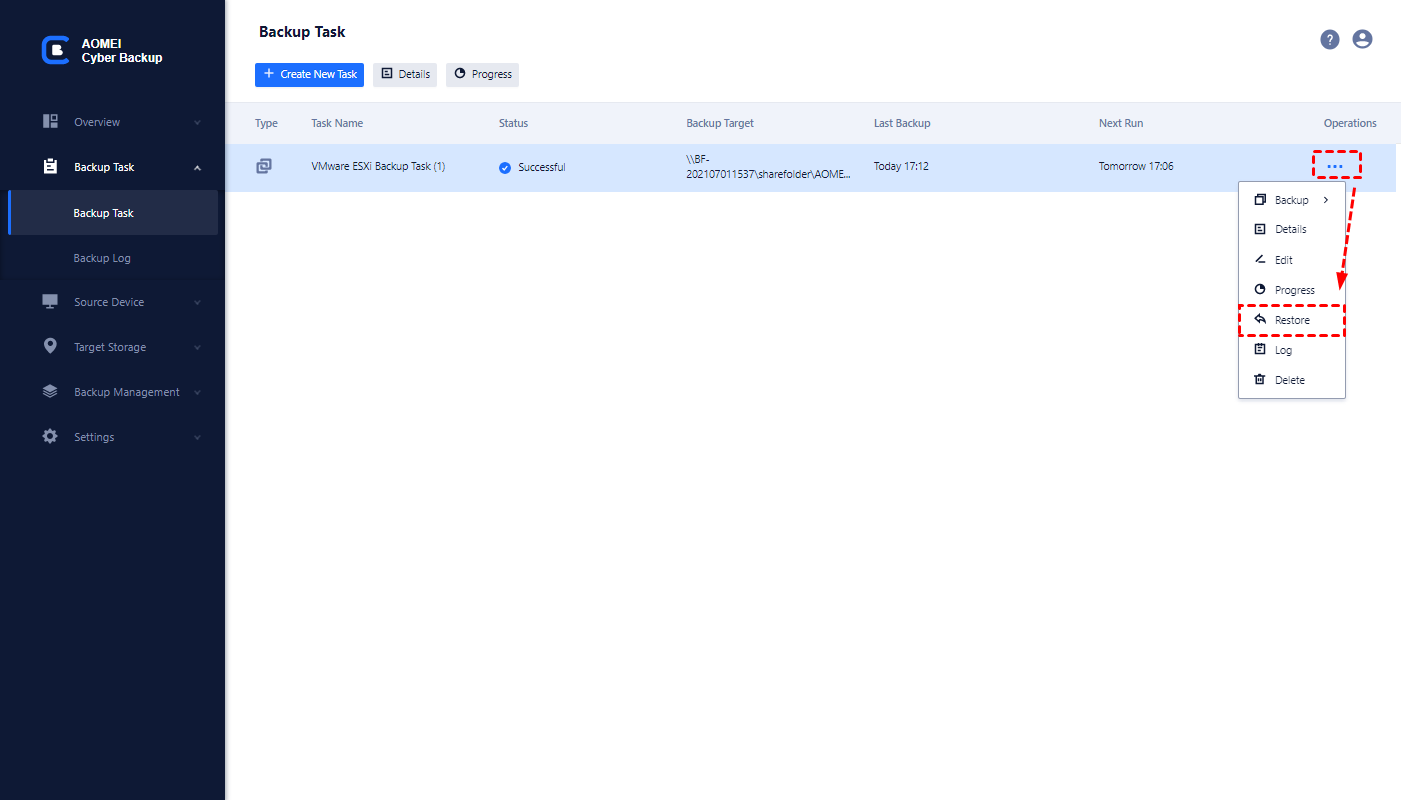
1. Access AOMEI Cyber Backup web client, and Navigate to the backup task you want to restore, click ... > Restore to open the wizard.
Or you can click Backup Management > History Versions. Specify a VM and select a restore point from the left list.
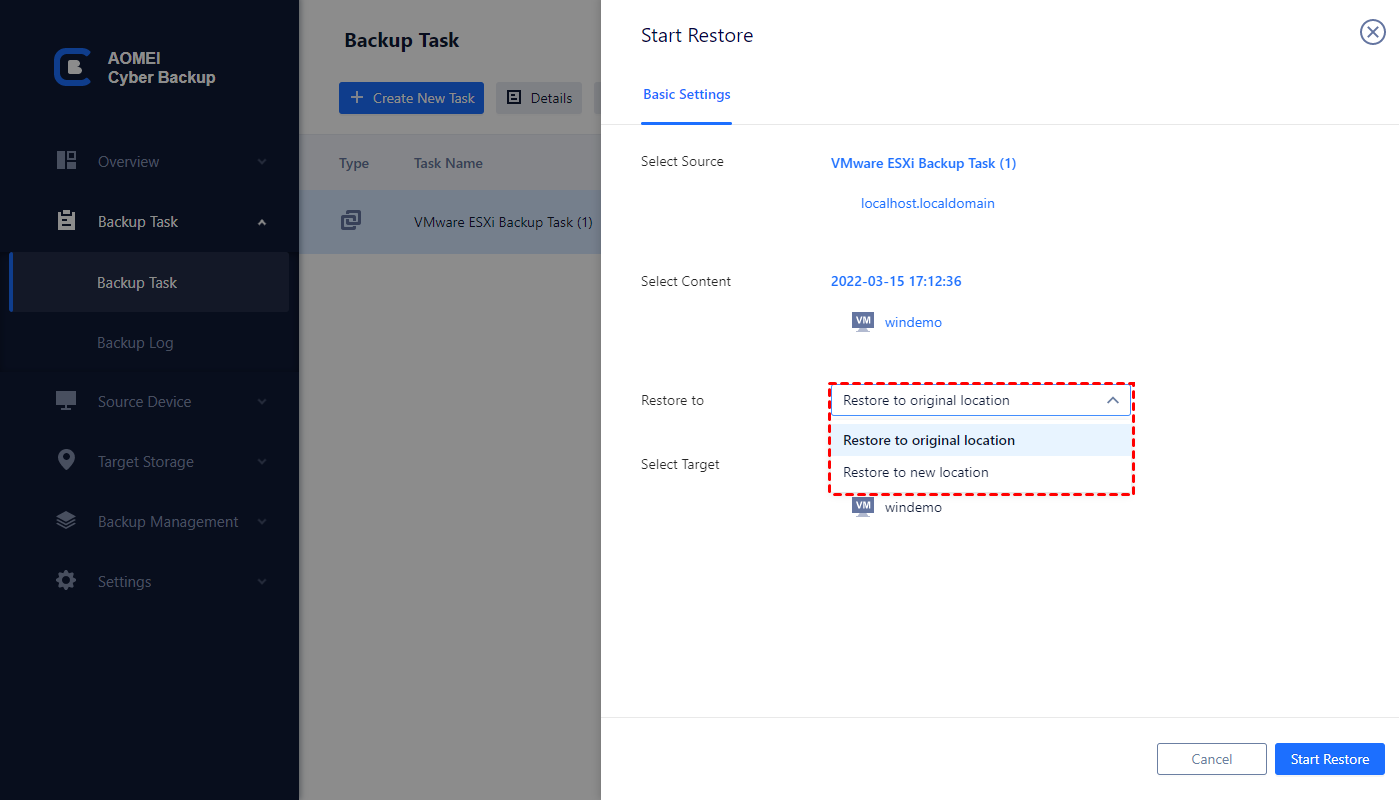
2. Choose to Restore to original location. And click Start Restore to recover the virtual machine in place.
While the Free Edition covers most VM backup needs, you can also upgrade to enjoy more:
▶ Backup cleanup: Configure a retention policy to auto delete old backup files and save storage space.
▶ Batch VM backup & restore: Batch backup and restore large numbers of VMs managed by vCenter Server or standalone ESXi hosts.
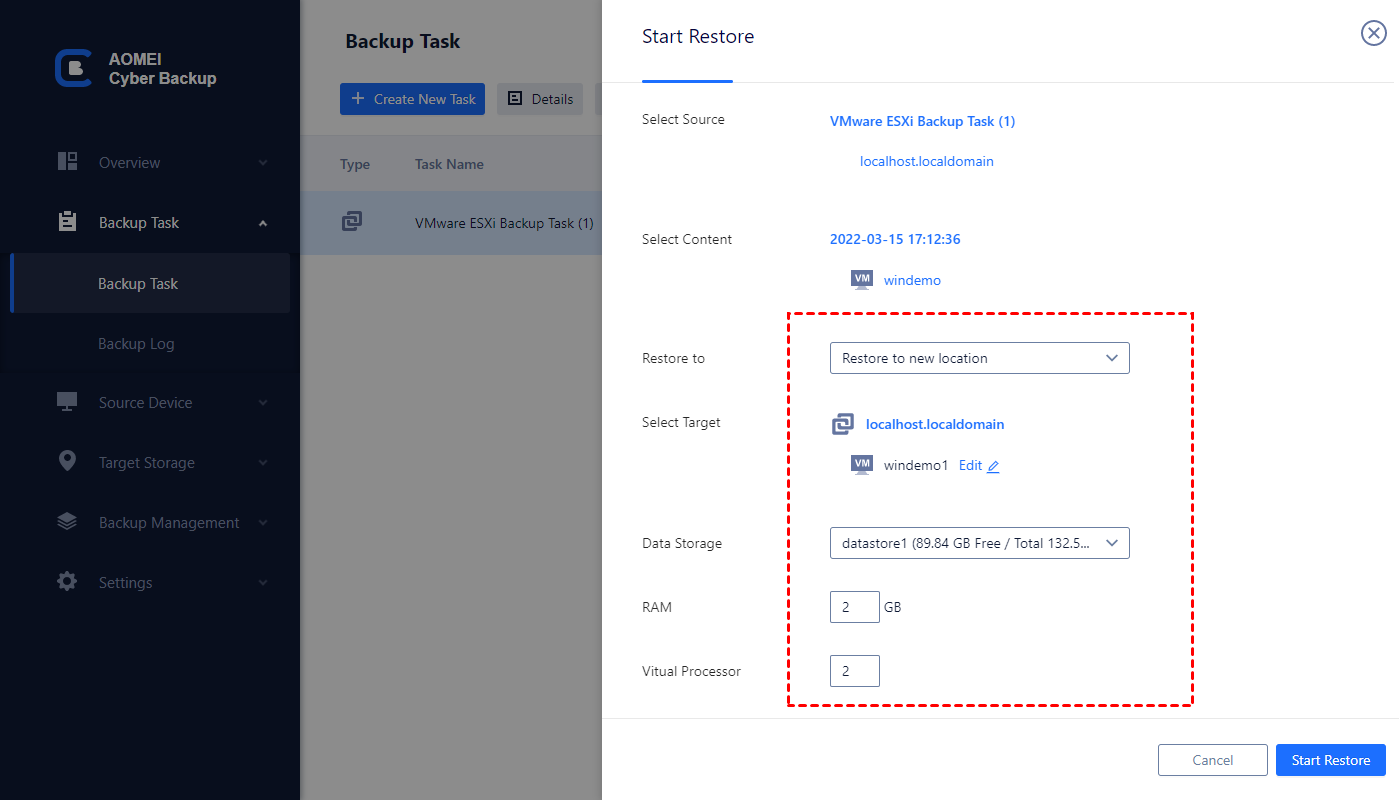
▶ Restore to new location: Create a new VM in the same or another datastore/host directly from the backup to perform out-of-spacre recovery, saving the trouble of re-configuring the new VM.
After a few simple steps, you can restore a whole VM without any complicated reinstallation and configuration.
Summary
Regular backup and restore are essential to protect the VM data. In this article, I introduced 3 available ways to restore an entire VM on VMware ESXi.
If you have multiple VMs that need to be backed up and restored, using native ways may be laborious. Therefore, in most cases, IT staff will choose a suitable VMware backup software.

