


How to Create A New Identical VM via Exporting and Importing
How to clone a Hyper-V virtual machine? In this article, I will introduce the efficient method to create a new identical virtual machine which are based on several clicks.
By Crystal / Updated on October 25, 2024
What is Hyper-V VM template
Microsoft has introduced Hyper-V as a virtualization technology in 2008 which has high scalability that deploy multiple VMs and utilize hardware resources efficiently such as easily expanding virtual disk size.
Today, I will focus on the efficient method to copy a Hyper-V virtual disk using Hyper-V Export and Import Feature which is a base image that can be used to create a new identical Hyper-V VM. With the built-in feature, you create a reference virtual machine as a template and deploy multiple new VMs based on this template, which saves the problems to copy virtual disks or the whole VM files, and reduces the time of reinstalling and configuring the new VM and applications.
Please refer to the following part to know the process of copying a virtual disk to create a new identical VM conveniently.
How to copy a virtual disk to create an identical Hyper-V VM [Export & Import]
Basically in VMware environment, in addition to Hyper-V clone VM or export VM, copying a virtual disk also creates a new identical VM. Meanwhile, in Hyper-V, what should you do?
Here, I will introduce how to use Export and Import feature to clone aHyper-V VM, which is a convenient and fast way to copy virtual hard disk files, virtual machine configuration files, and any checkpoint files to create an identical VM.
Then go to import Hyper-V virtual disk to create a new identical VM.
Tip: If your Hyper-V feature doesn’t show in system, please check the hardware requirements and OS to enable it.
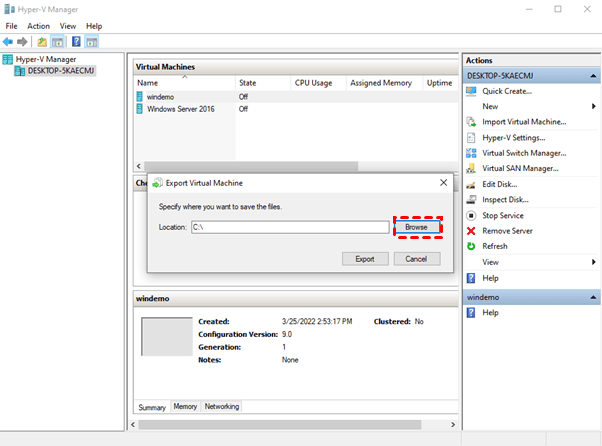
1. Navigate to Hyper-V Manager, right-click the virtual machine and select Export.
2. Click Browse to specify a destination to store the exported VM files, then select Export.
3. Backup to Action menu, select Import Virtual Machine for copying a virtual disk to create a new identical VM.
Tip: When choose the Hyper-V host to which you want to import VM, please note the compatibility result from memory, virtual switches, and virtual processors. Typically, this means that you can import a virtual machine to a Hyper-V host running a newer version of Hyper-V, but you cannot import a virtual machine created on a newer version of Hyper-V to an older version of Hyper-V.
4. In the opened window, click Next to second step. Then locate the exported files and select it, click Next.
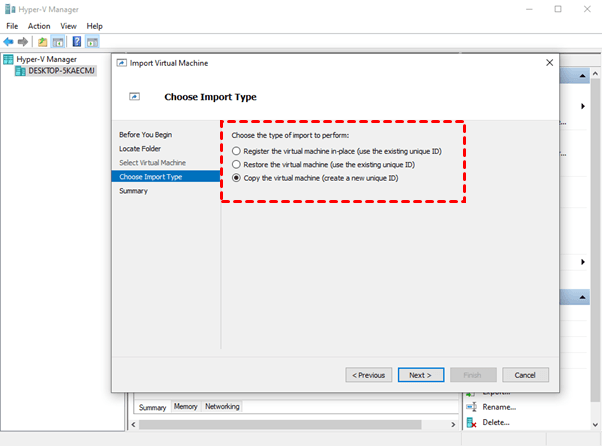
5. Select the virtual machine you want to import. Then go to choose the import type. Click Next.
Register the virtual machine in-place: the exported VM files are in the folder where you will run the virtual machine, and the imported VM had the same ID as the exported one. So you need to delete the exported VM before importing. Use the virtual machine in the folder where you import it from. As the option indicates, the existing virtual machine ID will be retained.
Restore the virtual machine: create a copy of the exported VM files and put it in a new location. The imported virtual machine keeps the same ID of the existing VM, so if the original virtual machine is running in the Hyper-V, you need to delete it first before importing the virtual machine.
Copy the virtual machine: it allows to specify a new destination to store the imported virtual machine files, and it has a new unique ID.
6. If you select the third option, you will be asked to specify a destination to store the virtual machines or leave it as default. Then go to select a folder to store the imported virtual hard disks.

7. Review the settings in Summary and click Finish. You have finished the process of Hyper-V importing virtual machine.
If you are familiar with PowerShell, you can use the Export-VM and Import-VM cmdlet to copy the VM files directly.
Export Hyper-V VM:
Export-VM -Name \ -Path \
Import VM with a new ID:
Import-VM -Path 'C:\\2B91FEB3-F1E0-4FFF-B8BE-29CED892A95A.vmcx' -Copy -GenerateNewId
Register in-place: Import-VM -Path 'C:\\2B91FEB3-F1E0-4FFF-B8BE-29CED892A95A.vmcx'
Restore: Import-VM -Path 'C:\\2B91FEB3-F1E0-4FFF-B8BE-29CED892A95A.vmcx' -Copy -VhdDestinationPath 'D:\Virtual Machines\WIN10DOC' -VirtualMachinePath 'D:\Virtual Machines\WIN10DOC'
How to copy multiple virtual disks one-time
If you are an enterprise user or IT staff who run multiple virtual machines in Hyper-V, exporting individual virtual machines manually seems cumbersome. So you need a professional tool to simplify the creation and management of virtual machines, as well as to continuously secure your business environment.
AOMEI Cyber Backup supports both paid and free versions of VMware and Hyper-V. It can easily export multiple Hyper-V virtual machines with .vhdx format. It also offers scheduled backup based on several clicks that safeguards your Hyper-V VMs. With ACB, you will benefit from the following features.
- Bind multiple Hyper-V host: add multiple device and unlimited virtual machines for backup.
- Easy to use: simplify VM management and exporting process through the central console, which minimizes operational disruptions and human errors.
- Flexible backup strategies: offer full backup and incremental backup to create a comprehensive and powerful protection plan for VM.
- Efficient restore type: easily overwrite the original VM without manually deleting it, and restore the VM to another host without any reconfiguration.
*You can choose to install this VM backup software on either Windows or Linux system.
Hassle-free Hyper-V backup and exporting process
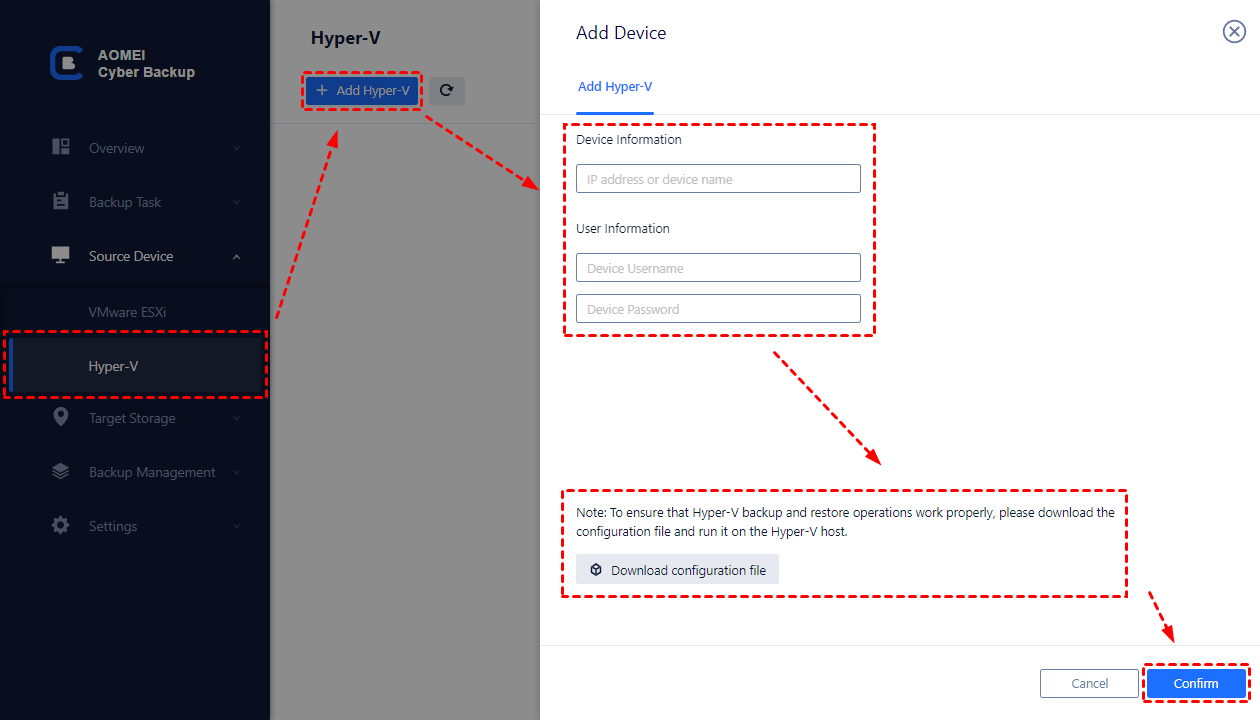
1. First, please download AOMEI Cyber Backup and click Device >> Add Hyper-V, then type the required information.
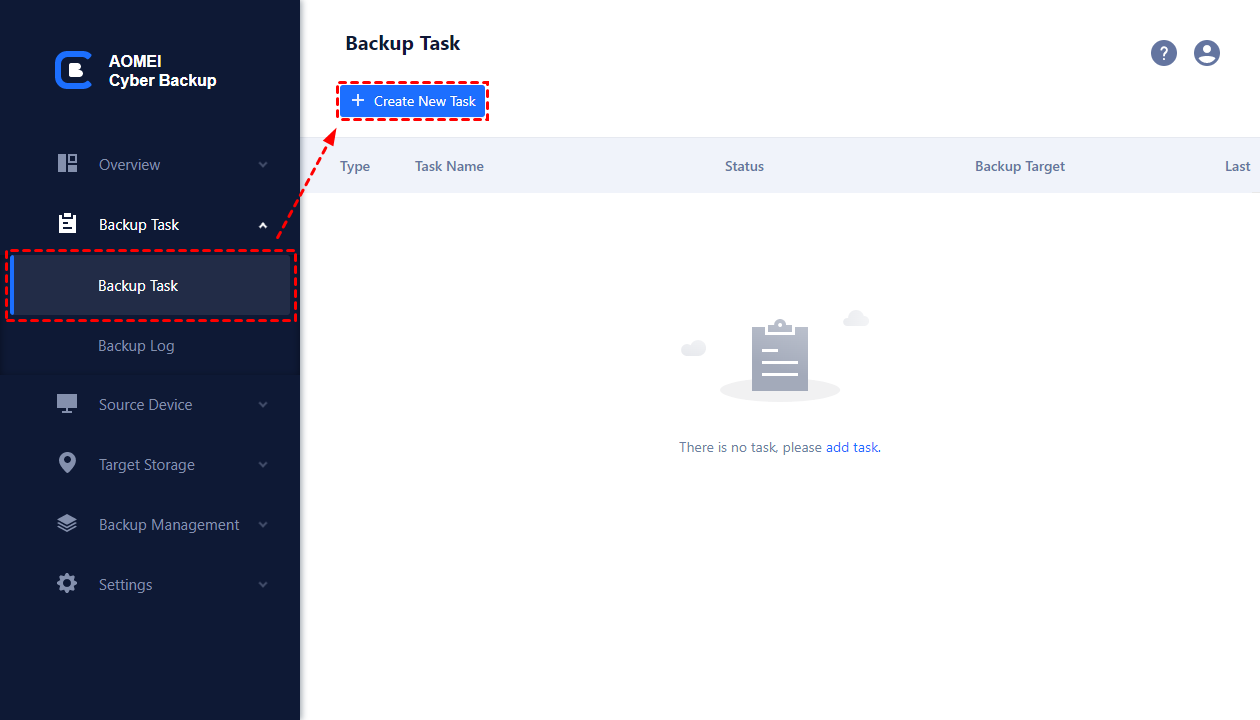
2. Click Backup Task >> Create New Task to open the setting window. In the window, enter task name and select Hyper-V Backup.
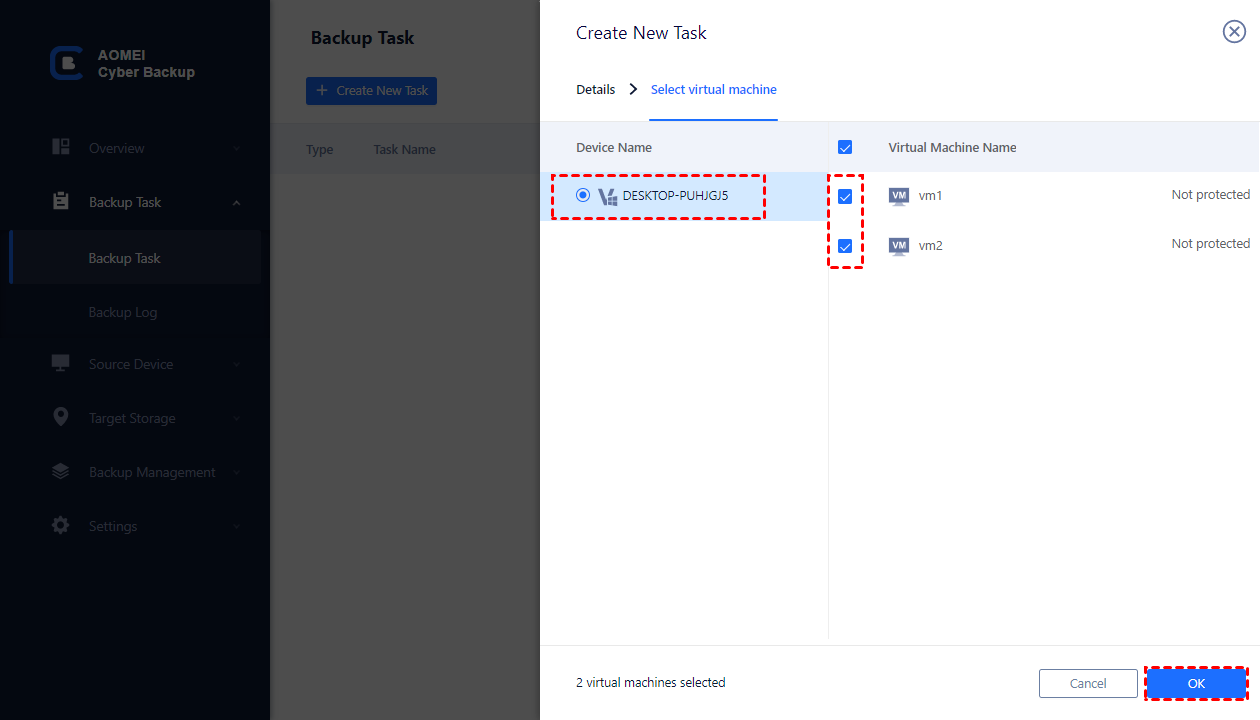
3. Select virtual machines that allows you export multiple Hyper-V VMs.
4. In Schedule window, set up a scheduled backup task with flexible full backup / incremental backup within several clicks.

5. In Backup Cleanup window, specify the retention policy for each backup to delete unwanted backup files.

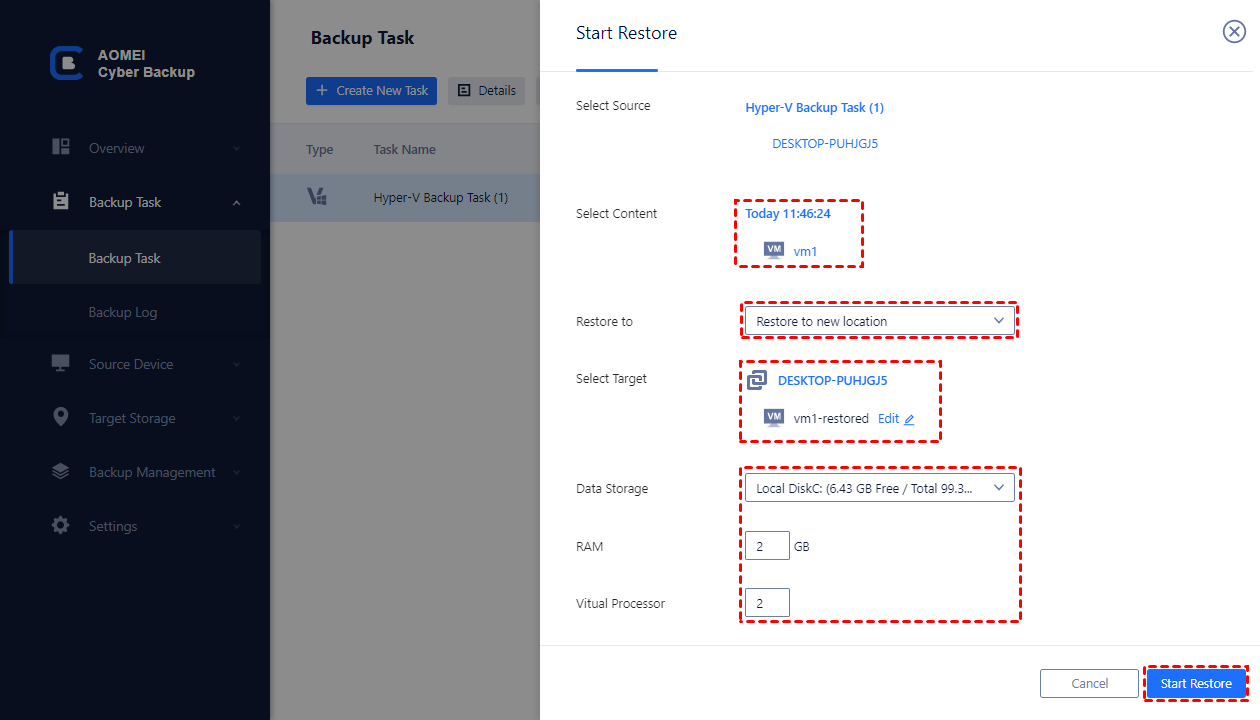
6. In Restore, it’s easy to restore VM to original place or new host that saves time and problems to reinstall and configure VM. It’s efficient and fast to create a new identical Hyper-V virtual machine.
AOMEI Cyber Backup protects Hyper-V virtual machine continuously and simplify the exporting and importing process of numerous VM.
Summary
In this article, copying a virtual disk creates a new identical VM, which is the fast way to clone Hyper-V VM.
However, if you want to export or backup multiple Hyper-V virtual machine automatically, it’s recommended to you to utilize a professional software which can also protect your business security.

