


How to Achieve Virtual to Virtual (V2V) Migration
If you are searching for a way to migrate VM to another virtual platform without reinstalling complicated applications, you can find the solution to achieve V2V migration in this article .
By Crystal / Updated on June 4, 2026
What is V2V migration
V2V migration is called virtual to virtual migration, which refers to migrate operating systems (OS), applications and data from a virtual machine (VM) or disk partition to another virtual machine or disk partition.
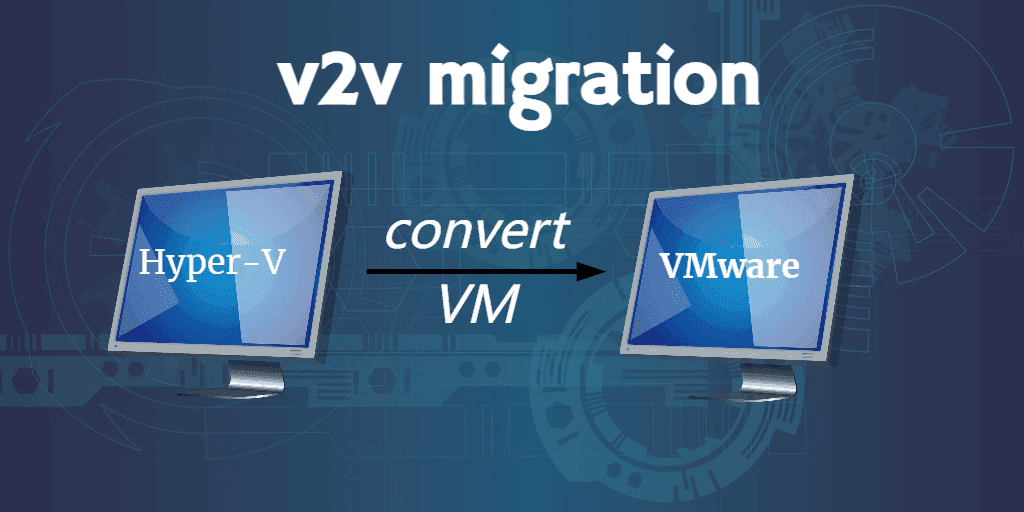
Performing V2V migration contributes to move VM to another virtual platform in a short time without installing or configuring any applications. For example, you can convert Hyper-V to VMware format. It saves time, reduces workloads and also minimizes the cost for hardware and storage.
If you want to migrate a virtual machine to another VMware platform directly, you can utilize VMware vCenter Converter. Meanwhile, if you simply want to migrate a virtual machine to the same or a different host, this article also describes effective methods of virtual machine migration.
How to migrate VM to another VMware platform
Performing V2V migration is to migrate a virtual machine to a different virtual platform such as moving Hyper-V to VMware. Mastering VM migration methods can save you a lot of time reinstalling and reconfiguring a new virtual machine. So, I will introduce how to achieve V2V migration step by step in this part.
How to use VMware Converter to perform V2V migration
VMware vCenter Converter is a convenient tool to create VMware virtual machines from physical machines (running Windows and Linux) and other virtual machine formats. It allows you to remotely and centrally manage the converting process of multiple physical servers or virtual machines.
👉 VMware once announced that vCenter Converter was removed from Product Downloads list on February 2, 2022. But now the renewed version vCenter Converter 6.3.0 makes a comeback, compatible with vSphere 7.0 and ESXi 7.0! You can go to the official site to download it.

For an instance, I will show you how to migrate Hyper-V VM to VMware ESXi in the following part.
Steps to achieve V2V migration using VMware Converter Standalone
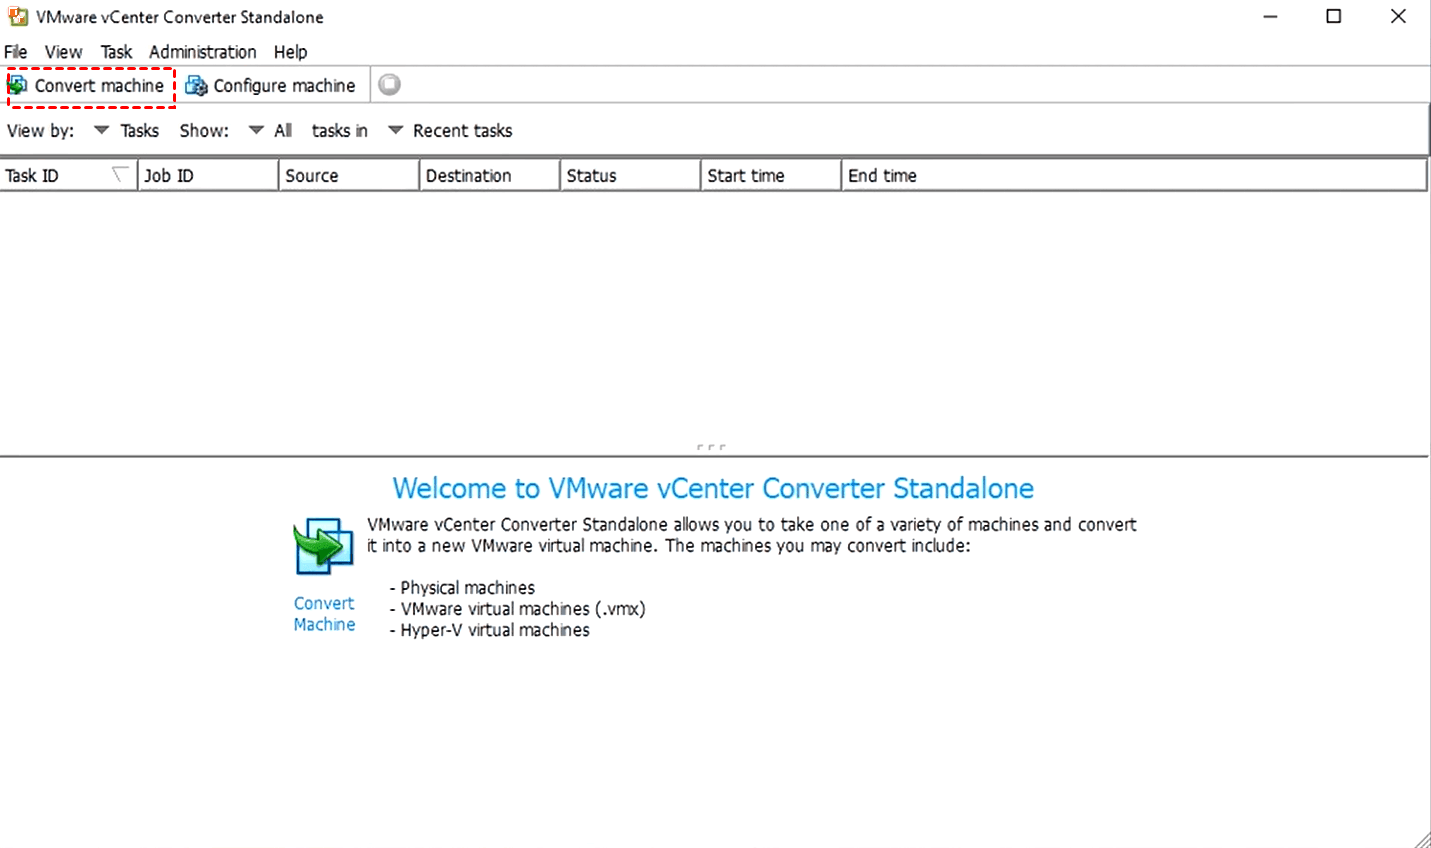
1. Download the latest version of VMware Converter Standalone from VMware website. Then click Convert machine to start the migration.
2. Select source type as Power on to select Remote Windows/Linux/This local machine or Powered off. For example, click Power off, and in the drop-down options, select Hyper-V Server as source. Enter the related IP address, name and password. Then click Next.
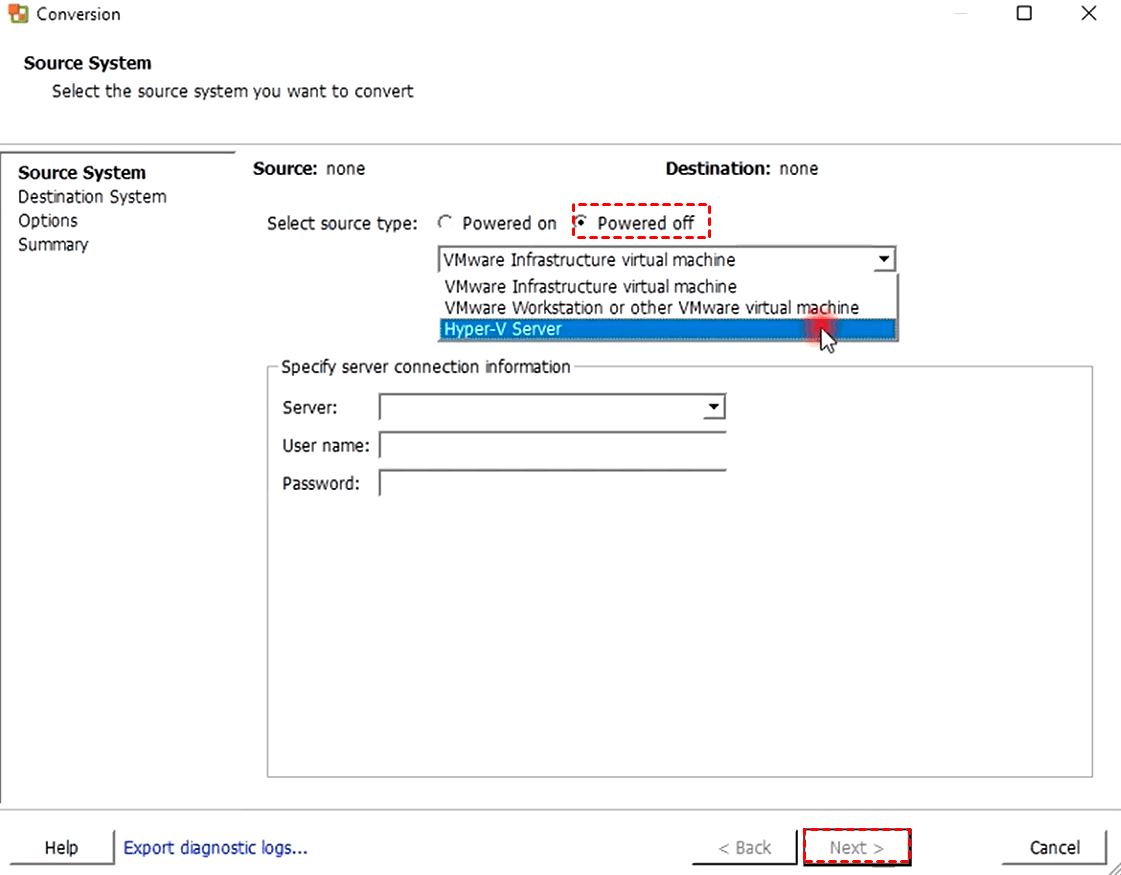
Tip: If you select VMware Workstation or other VMware virtual machine as source type, you can click Browse to select the .vmx file of VM.
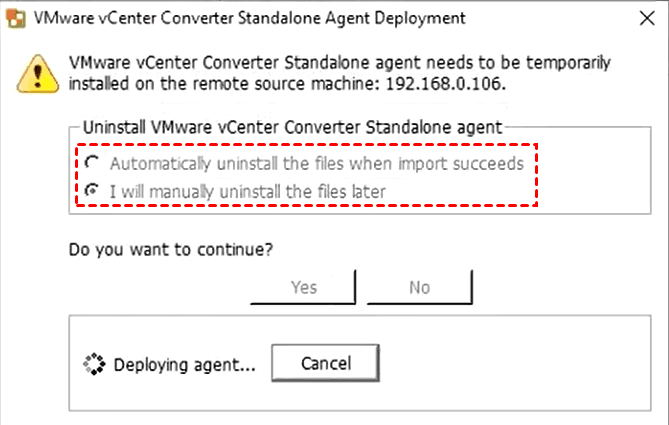
After that, VMware Converter will be temporarily installed on the remoted source machine, you need to select Automatically uninstall the file when import succeeds or manually uninstall the file later, then click Yes.
3. Select the source virtual machine which you want to convert and click Next.
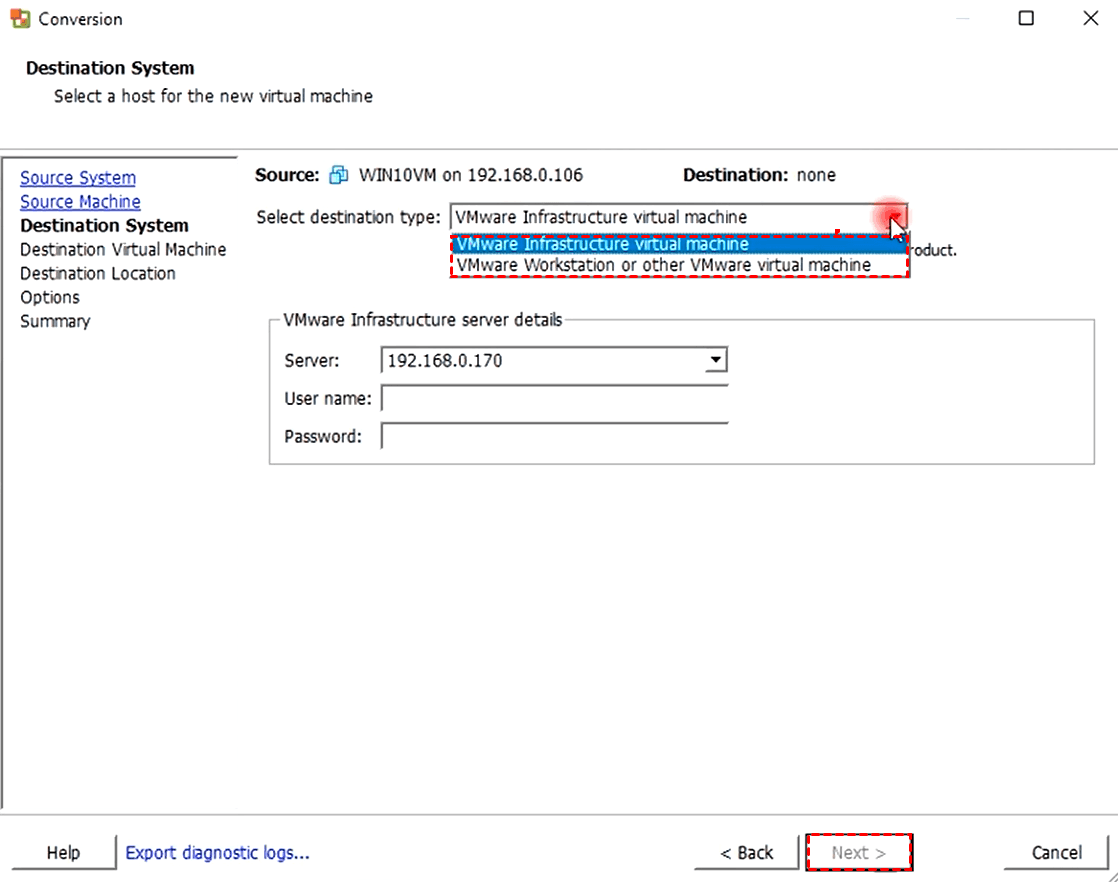
4. Select destination type as VMware Infrastructure virtual machine or VMware Workstation or other VMware virtual machine. Enter the IP address, name and password of destination server.
5. Enter a new name for the destination virtual machine.
6. Select the datastore and version for destination virtual machine.
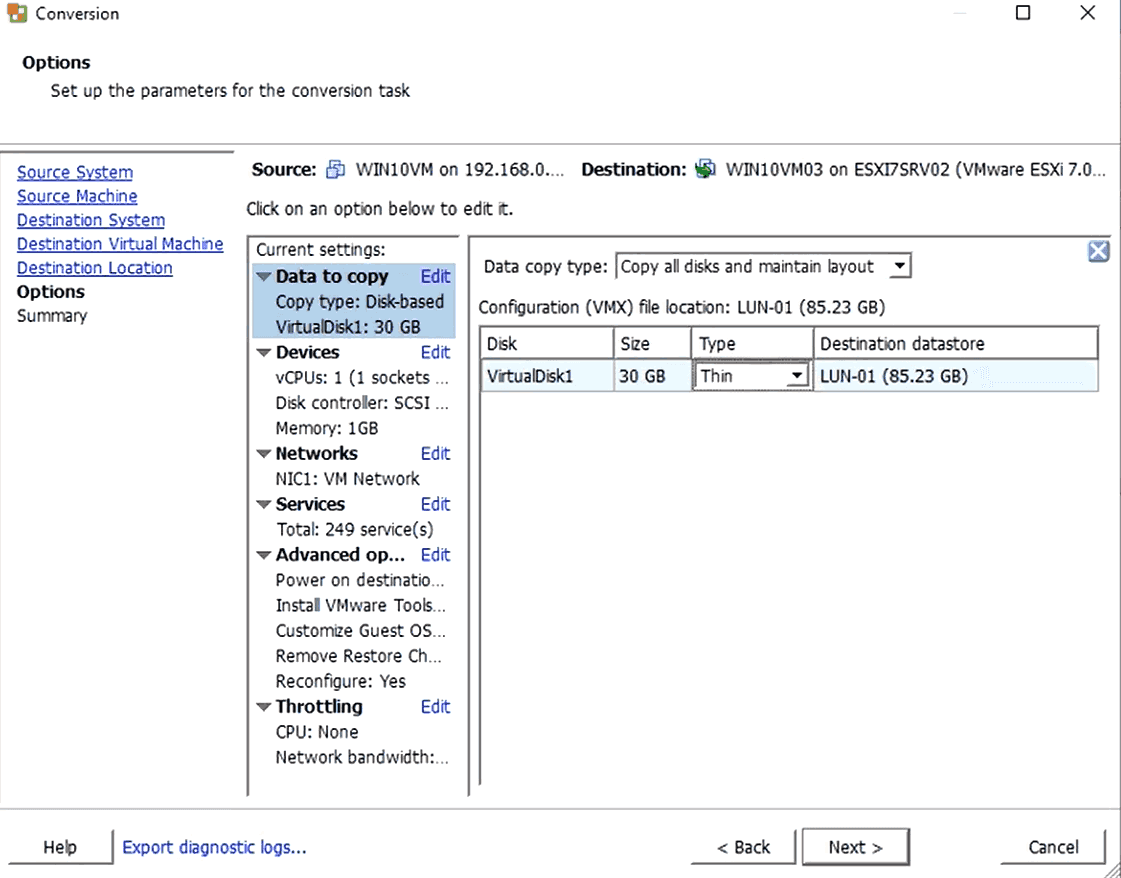
7. In Destination Location page, you can edit the parameters.
Data to copy: select which disks and volumes you want to copy and disk type as Thick or Thin.
Devices: specify memory size and CPU settings.
Networks: select the suitable network for virtual network adapters to connect with.
Services: On the Source Services, you can stop the running services on the source Windows machine before starting V2V migration. On the Destination Services, you can choose the startup mode for services on the destination virtual machine.
8. Check the information of source and destination system. Then click Finish.
Then you can monitor the progress of converting VM to another VM format and its detail.
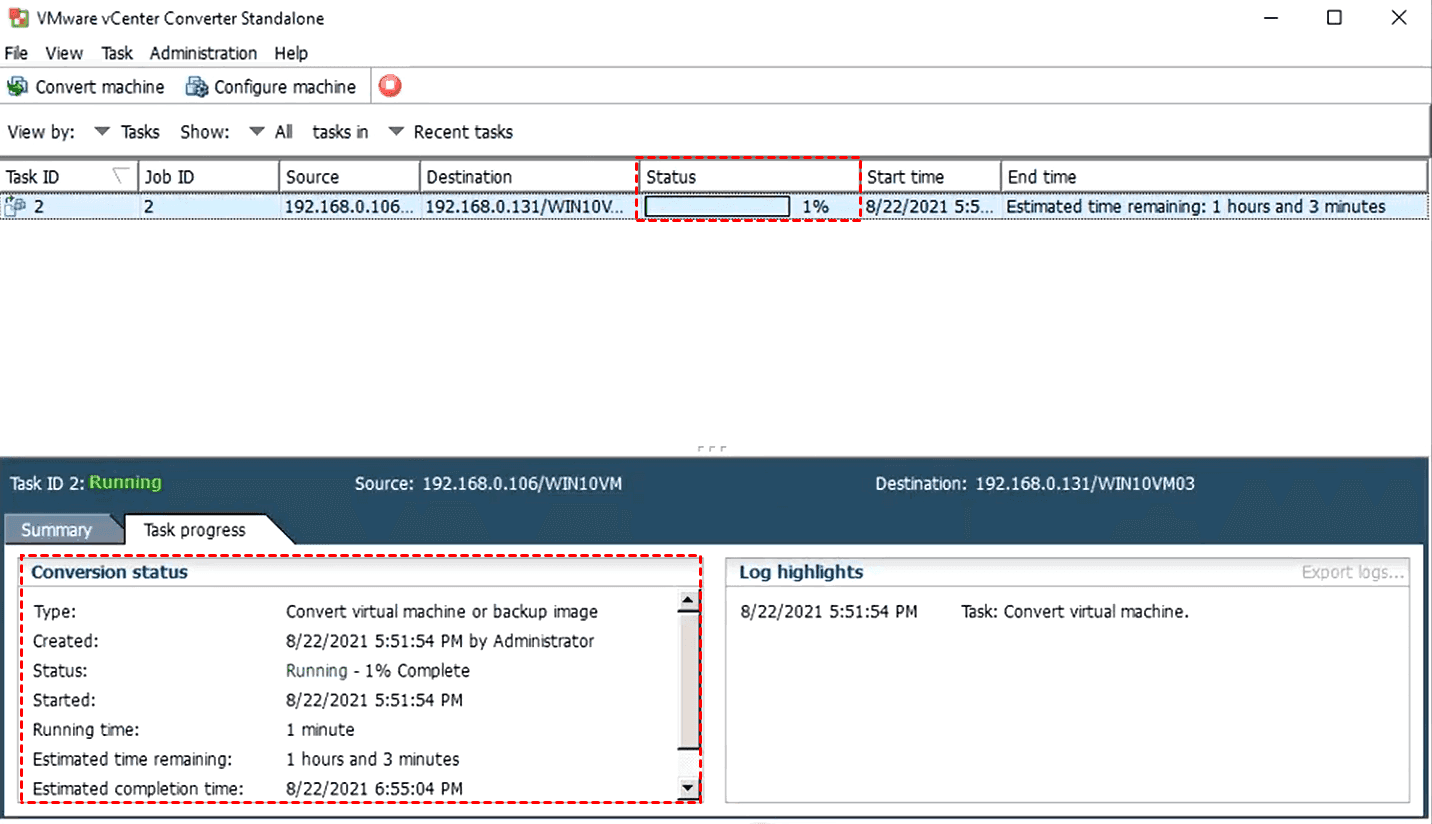
When the converting is completed, you can log in ESXi host to check that the new virtual machine has been migrated from Hyper-V successfully.
How to restore VM to another host simply
If you just simply want to move a virtual machine in a same platform, you can migrate VM manually or refer to the following methods to migrate multiple VMs to different host using backup and restoring.
For VMware migration, you can copy VM files, clone VM, export / import VM manually. In Hyper-V, you can also choose copy or cloning, and Hyper-V Replica, live migration, backup and restore are all feasible.
However, for automatic and centralized management of multiple virtual machines, a professional backup software is necessary for you. If you use teh free VMware ESXi, you will need additional support since it does not support vStorage APIs. You can try AOMEI Cyber Backup which supports both paid and free versions of VMware ESXi and Hyper-V.
In this part, I will use AOMEI Cyber Backup to show a secure and convenient migration process.
4 steps to backup and restore VM:
Before start the task, please install AOMEI Cyber Backup first, and add Hyper-V, vCenter or Standalone ESXi host as the source device.
*You can choose to install this VM backup software on either Windows or Linux system.
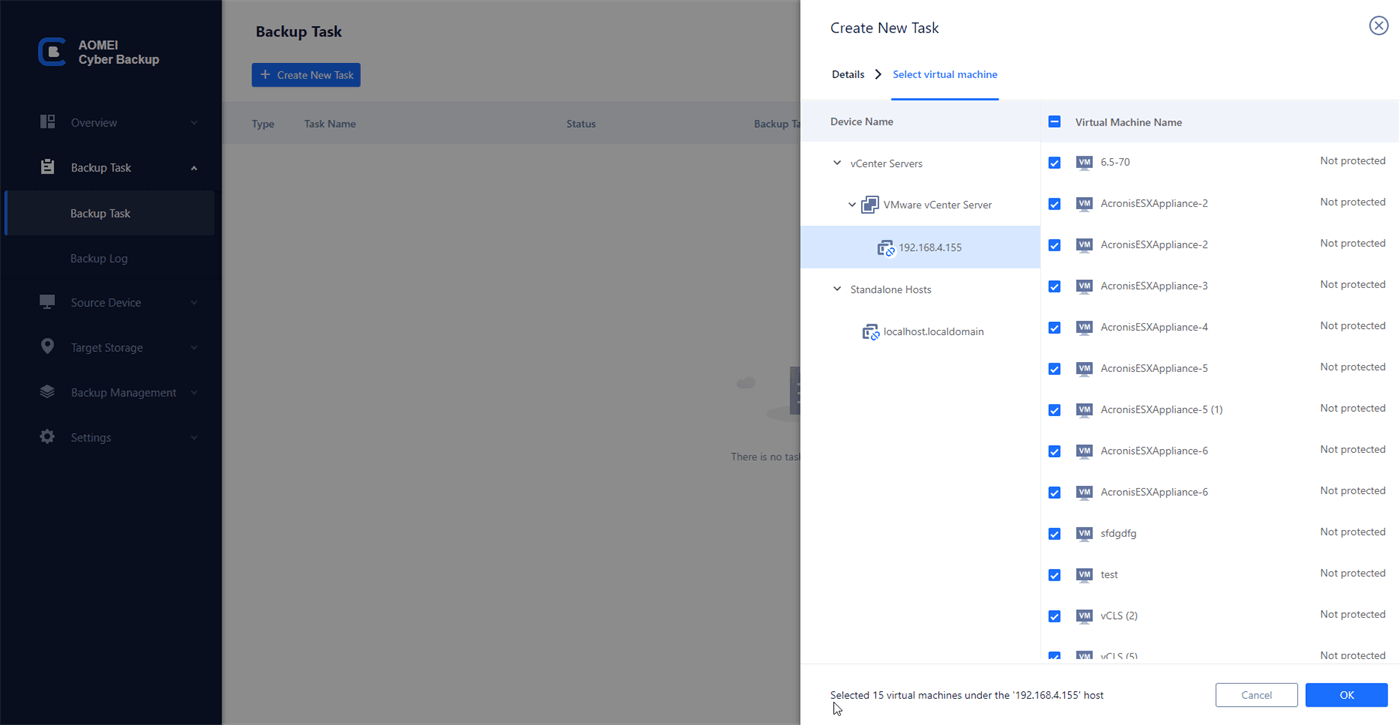
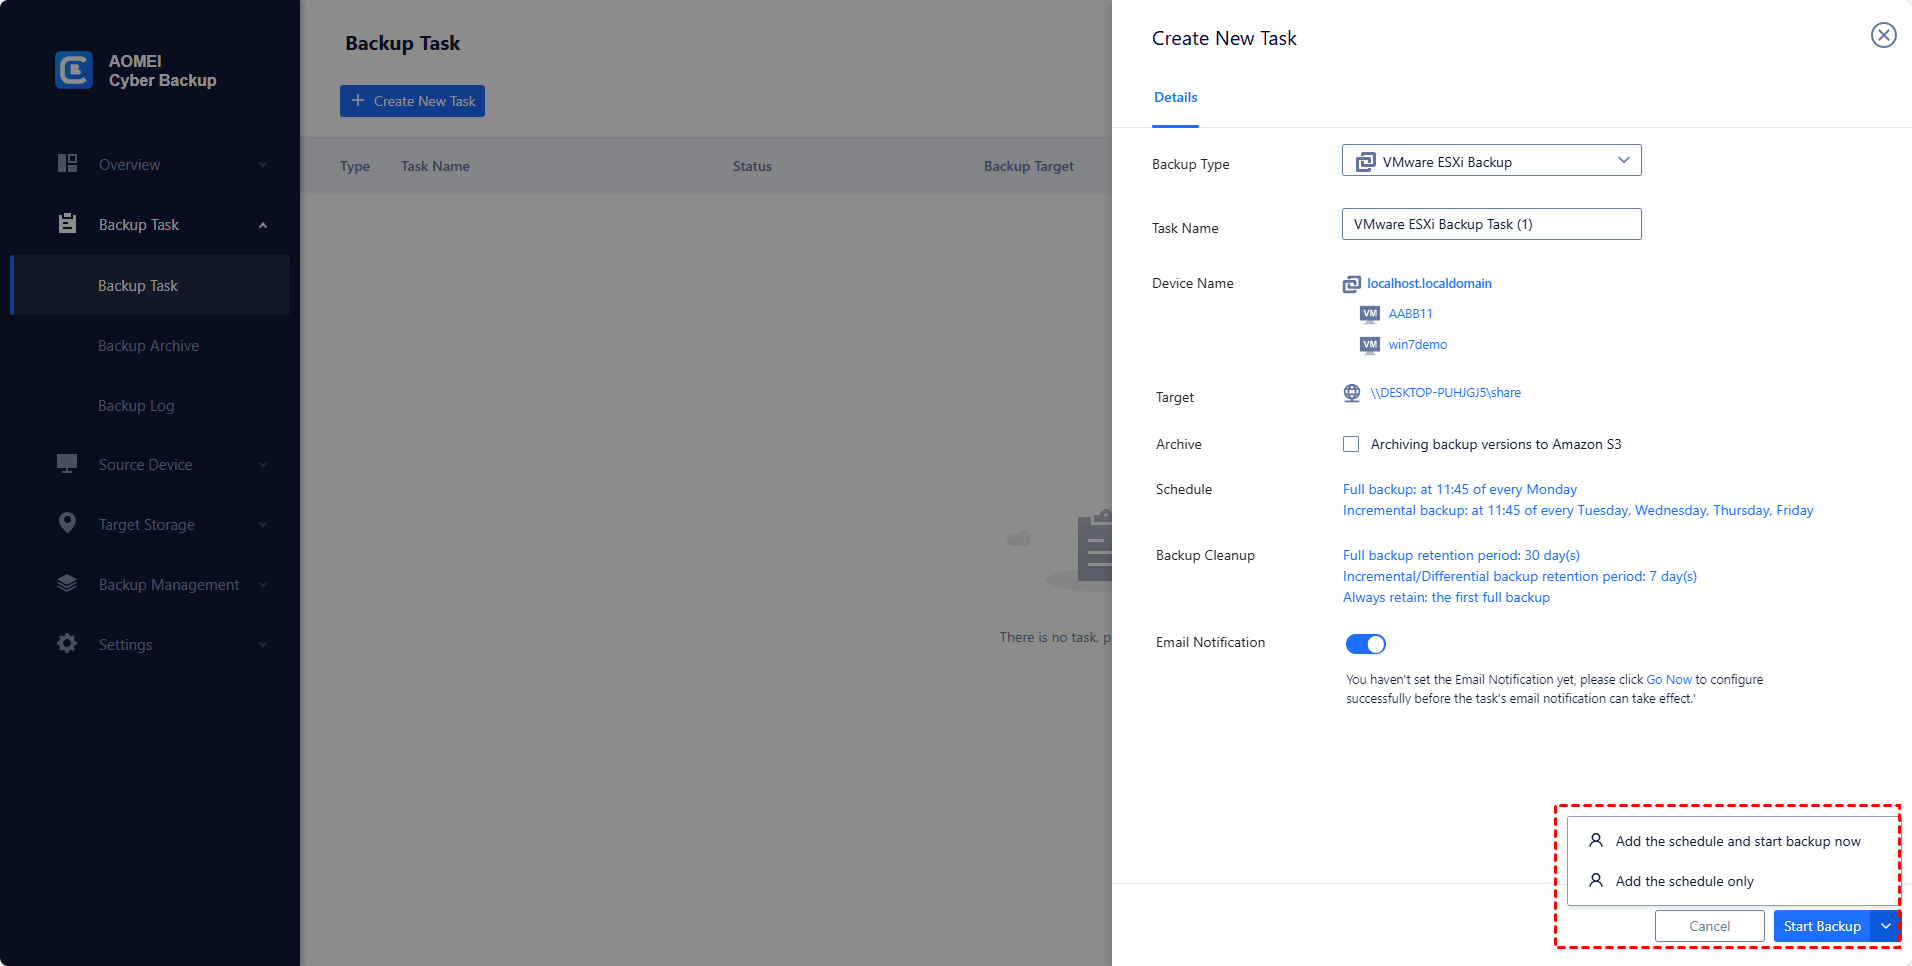
1. Select Task >> Backup Task >> Create New Task. Enter the name and select backup device and VMs. You are able to select numerous VMs at the same time for backup.
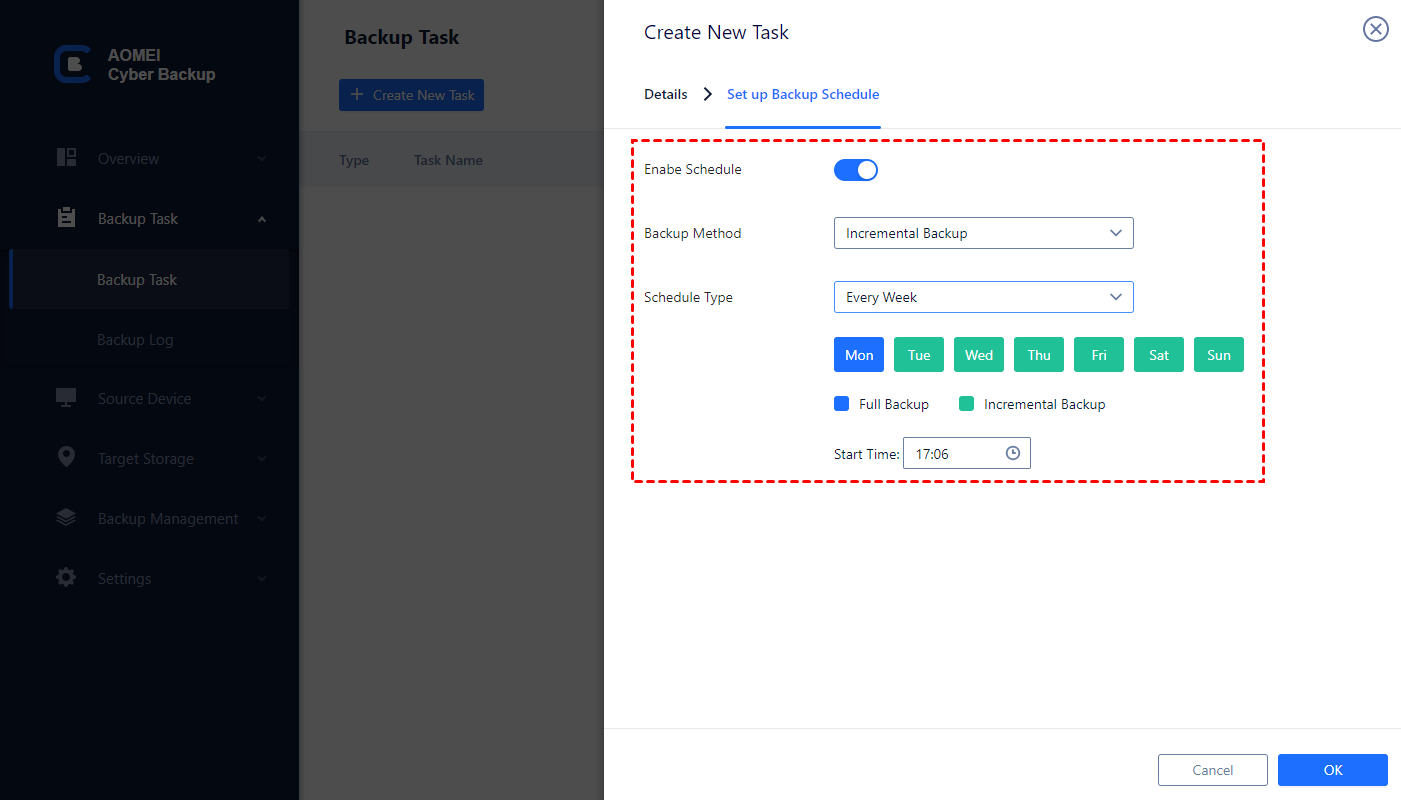
2. Schedule the backup: specify the backup way as full / incremental / differential backup, and select the specific time for automatic backup.
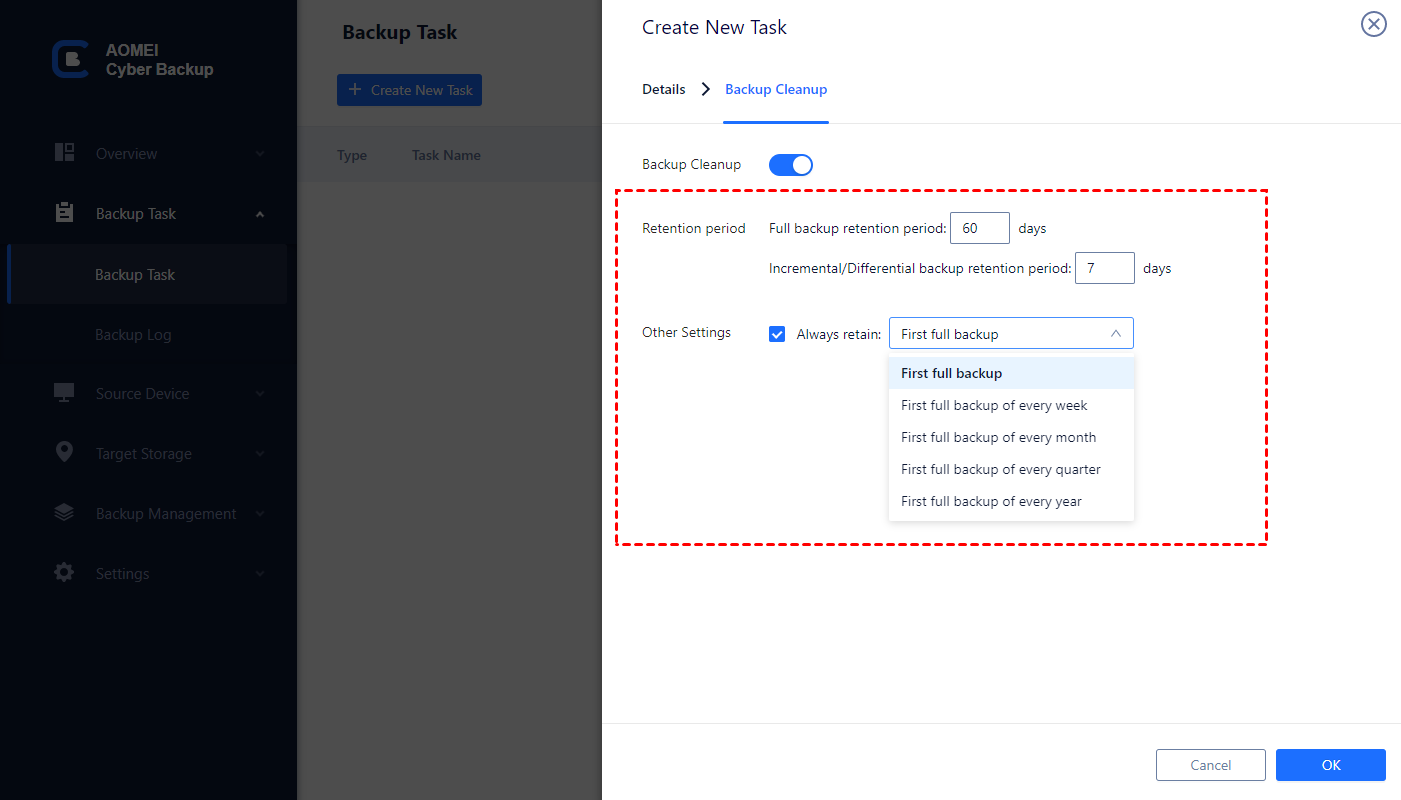
3. Select backup retention policy to delete old files to free up disk space.
4. After the configuration, just click Start Backup to enable the task. You can easily achieve data protection for VM migration.
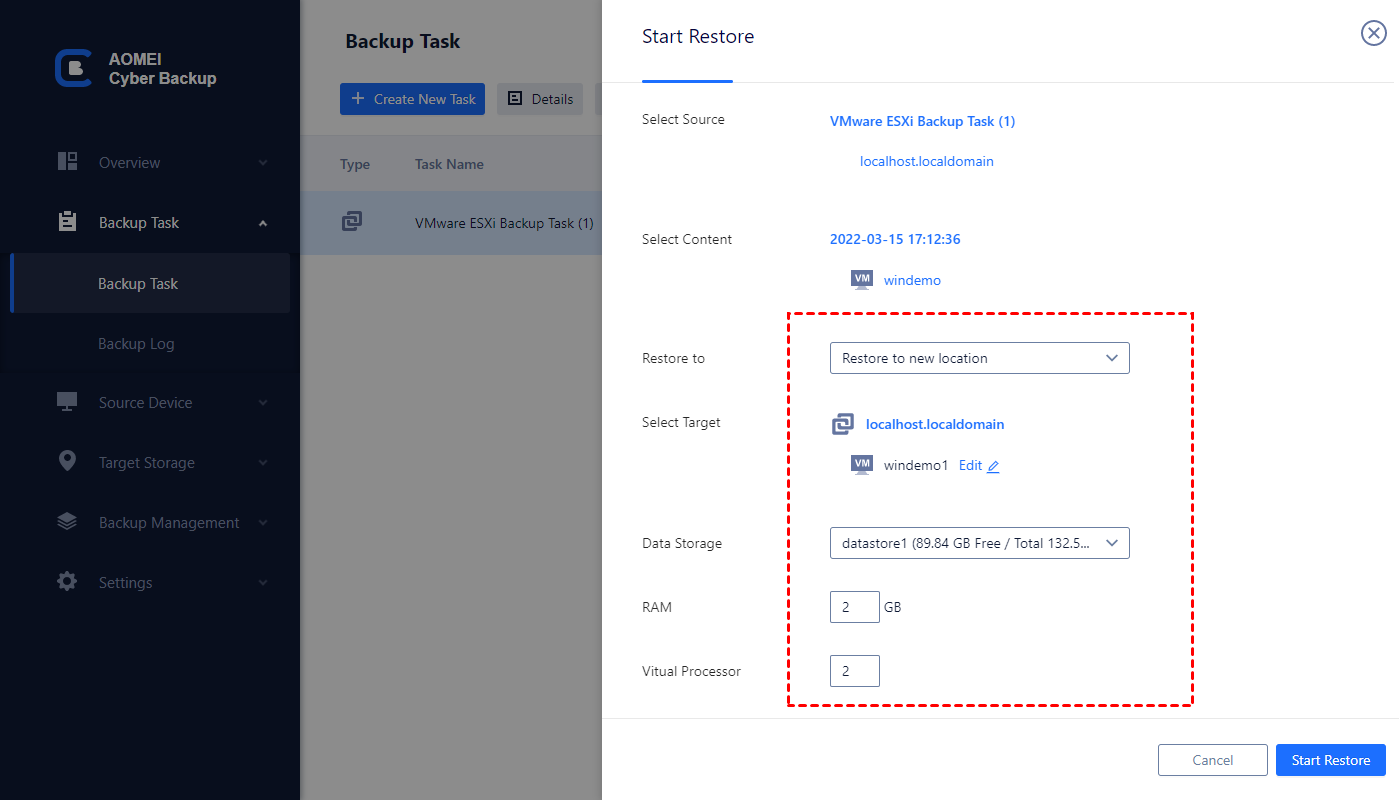
5. Click Restore >> Restore to new location to migrate VM to another host easily. It is rather simple and convenient.
Frequently asked questions about V2V migration
Q: What is V2V migration and P2V migration?
A: V2V migration is as we explained before, so for P2V migration, it is to copy the operating system running on a physical system to a virtual machine. They both have similarities in operation.
Q: What’s the difference between hot and cold migration in V2V migration?
A: The V2V migration is almost cold migration to keep data consistency. Cold migration is to migrate the source system in an offline state. It is recommended to convert SQL server and other server with continuous changes. However, for hot migration, it converts the source system in a running state, and you’d better stop all applications and services that may write data to the disk before performing hot migration.
Summary
In this article, I have introduced V2V migration and specific procedures of converting Hyper-V to VMware by using VMware Converter. It enables to convert a VM from one format to another VMware format directly, and reduces the time of reinstalling multiple applications of VM. At the same time, for VM migration to another host, you can also achieve it in several simple ways as we mentioned above. All these methods are beneficial to VM data migration and protection.
Before converting, you should make a virtual machine backup that avoids data loss and protect business from security threats.

