
How to Recover Deleted Photos from USB Drive (3 Ways)
You can easily recover deleted photos from USB drive with or without software like FastRecovery or Windows File Recovery. Scroll down to explore more.
By Ivy / Updated on March 9, 2026
Help!!! I accidentally deleted photos on USB drive
USB is an excellent choice to save or transfer data, such as photos, videos, documents, etc., thanks to its light, tiny, and portable feature. But where data exists, there is data loss. Here's a real case:
I accidentally deleted my photos from the USB flash drive. The folder is empty. Where did these files go? How to recover deleted photos from USB drive? Please help me!
Fear not, your data are still on the disk and recoverable. We will introduce you to two reliable data recovery software and one manual method below.
#1: Recover deleted photos from USB drive with software
Here we will show you two reliable data recovery software to help you recover deleted photos from USB drives in a few steps.
🥇Option 1: FastRecovery
FastRecovery will be one of the most recommended data recovery software to scan and recover pictures from USB drives without effort as it has a user-friendly interface, integrates with powerful scanning algorithms, and supports multiple data loss scenarios and storage devices.
❤❤❤ Why Choose FastRecovery?
✔ Recover 1000+ data, from photos (e.g. recover deleted PNG files) to audios, videos, documents, compressed files, etc.
✔ Perform Quick Scan and Deep Scan automatically to detect all deleted files and other lost files.
✔ Search or filter files quickly through data types, file names, extensions, etc.
✔ Preview and recover files while scanning.
✔ Recover specific files or folders instead of all.
✔ Compatible with NTFS, FAT32, exFAT, and ReFS file systems.
✔ Support deleted file recovery, formatted file recovery, virus infection data recovery, etc.
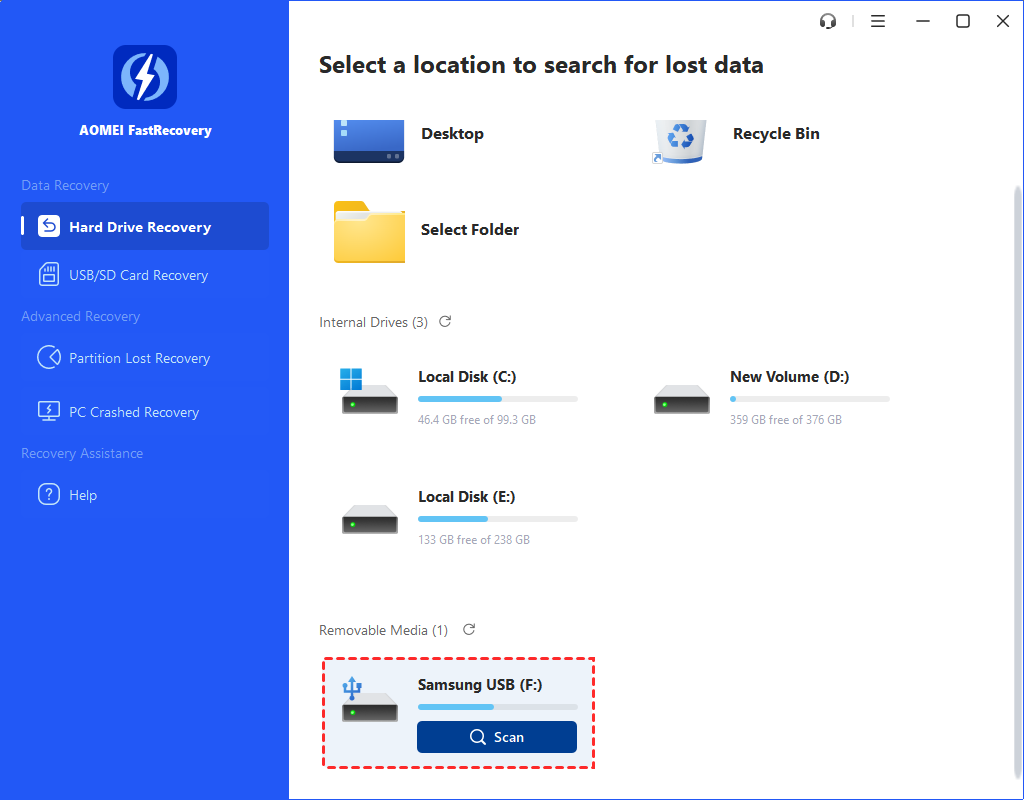
Then, free download FastRecovery and open it. At the same time, you need to connect the USB flash drive to a computer for data recovery.
Step 1. Hover the mouse over the USB drive, and click Scan to scan.
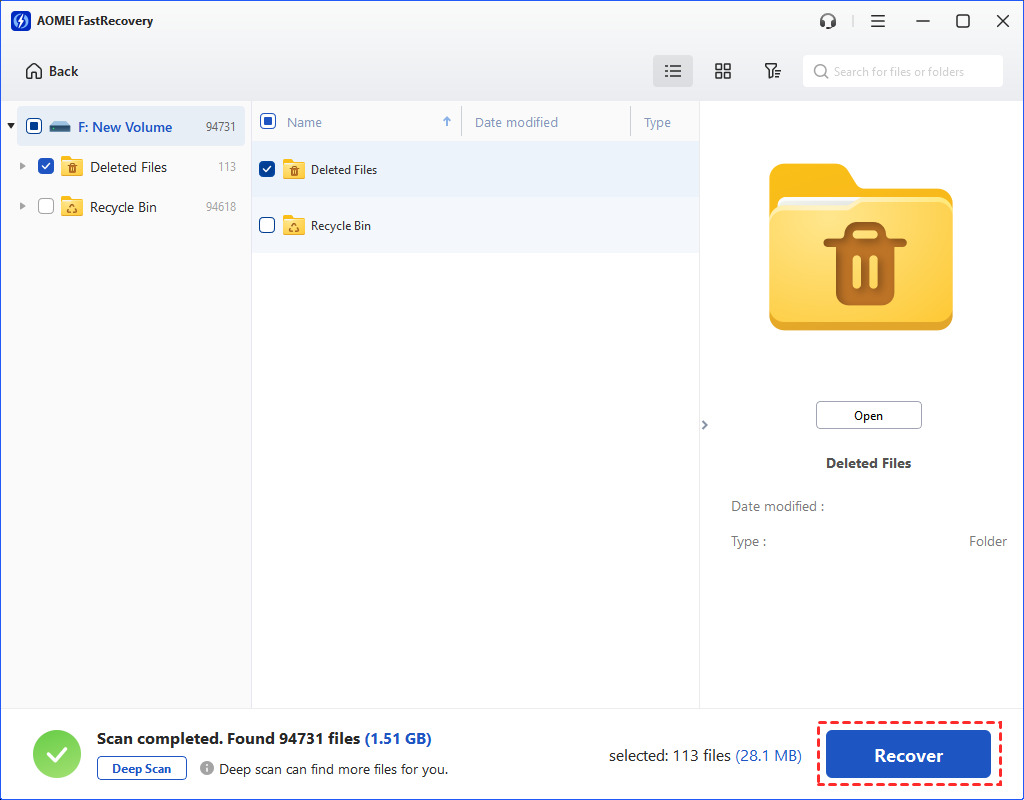
Step 2. You’ll see all the deleted files and other lost files saved on your USB after scanning. The "Quick Scan" for a faster scan of recently deleted files and the "Deep Scan" for a more thorough search.

Step 3. Check your scanning results and select the photos you need by ticking the checkboxes or leaving them blank. Then click “Recover x files” to start the recovery process.
In addition, you still can use it to recover deleted or lost files from SSD, HDD, external disks, memory cards, and other storage media in the following scenarios.
- Recover files from formatted hard drive
- Recover files deleted by virus
- Recover files from lost partition
- Recover deleted files from Recycle Bin
- Recover permanently deleted files
- ......
Option 2. Windows File Recovery
Released by Microsoft, Windows File Recovery is a free data recovery software that aims to recover lost files from your local storage devices, such as internal and external drives, solid-state drives, USB drives, SD cards. It only works with Windows 10/11.
It's closely linked to the command prompt because there’s no graphical user interface. Therefore, you can use it to recover files using CMD according to the syntax, file system, data loss scenarios, etc.
-
syntax: winfr source-drive: destination-drive: [/mode] [/switches]
-
source & destination drive: They are used to store Handycam videos and save recovered data. Make sure they are different.
-
mode: two basic modes-Regular and Extensive and two advanced options. The previous option is the standard option for non-corrupted NTFS drives while the latter one is more thorough & suitable for all file systems
-
Switches: It makes filtering more specific and less extensive.
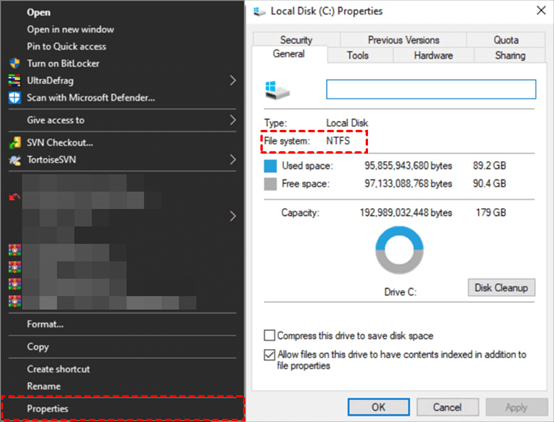
Step 1. Check the file system. Connect your USB to your PC. Click “This PC” > right-click on the USB > click “Properties” to check it
Step 2. After figuring out your file system, select a mode based on your data loss scenarios and then switches.
Step 3. Click “Get” to download “Windows File Recovery” from the Microsoft Store and install it on your PC.
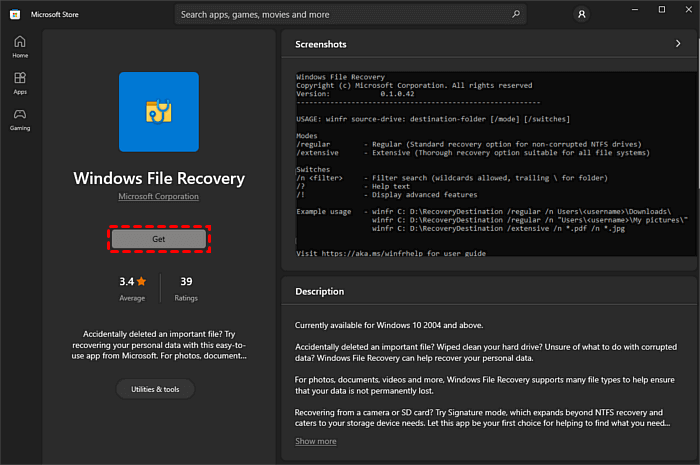
Step 4. After installation, “Open” it and try to recover deleted photos from USB drive with CMD.
- Let’s take PNG pictures as an example.
- The source drive: your USB flash drive (assume the drive letter of your USB is “U”).
- The destination drive: the E drive of your PC.
- You can enter “winfr U: E: /n \Users \Username\Pictures \*.PNG” in the window.
Step 5. Enter “y” to go on. If you want to stop the recovery process, press “Ctrl + C”. Please wait patiently, you’ll get your recovered photos after the process.
#2: Recover pictures from USB drive without software
If your files are hidden instead of deleted, you can't view them by default. It doesn't matter, you can use CMD to recover the hidden files from USB. The Attrib command can assist you in modifying and changing file attributes (read-only, hidden, system, and archive). Here's how:
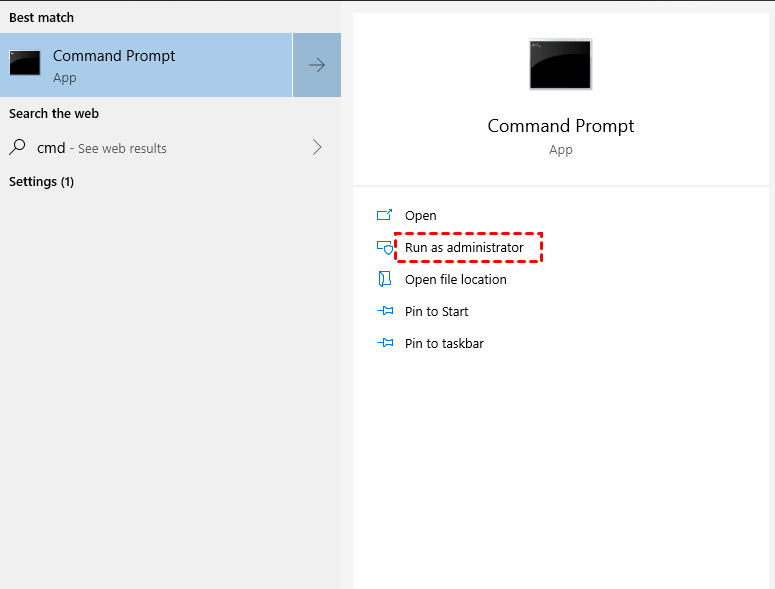
Step 1. Connect the USB to your PC. Then, type “cmd” in the search bar, and select “Run as administrator”.
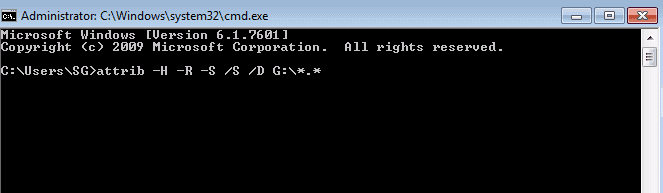
Step 2. Copy “attrib –h –r –s /s /d G:\*.*” in the window and hit “Enter”. Please replace the letter G with the real drive letter of your USB.
Step 3. After the process, you’ll find these retrieved photos saved in a new folder on your USB. If needed, change its chk format and store it at your destination place.
✨Bonus tips: Practical tricks for data loss prevention
This part offers you some practical tricks for data loss prevention. Moreover, it’s better to act than to think. If you are unwilling to suffer data loss, follow a pertinent suggestion at once!
✦Backup and Restore: Only backup files and folders.
✦File History: You can add a folder to backup specific files as well as save them to an external drive.
✦System Image: Support file recovery, system image recovery, etc.
✦AOMEI Backupper: This best freeware for Windows offers good coverage for making backups, syncing files and folders, and cloning data for disk upgrade and disk migration.
Compared with the first three Windows features, restoring data with the last free backup software seems easier.
Conclusion
This article describes 3 easy and effective methods to recover deleted photos from USB drive successfully. Among them, using reliable data recovery software like FastRecovery will be much easier. Free download it to have a try.
The software has an intuitive interface, and there is no need to learn any CMD, you just need to move your fingers. At the same time, it comes with many useful features, such as file preview, recover files while scanning, file filter, etc., making the recovery process go smoothly.

