Recover Files Using Command Prompt in Two Free Ways
Seeking ways to recover files using command prompt? This post shares several free tools with you to recover deleted files using command prompt.
By Penny / Updated on March 9, 2026
Is it possible to recover deleted files using command prompt?
I lost my folder, and I want to recover my data using the command prompt. So, how can I recover my folder, and which command line should I use? Thanks.
- A user from Stack overflow
As a user, it’s inevitable to suffer data loss such as accidental deletion, misplacement of physical storage media, and inability to read the unknown file format. Thankfully, you can recover the deleted files using command prompt. So if you’re in a similar situation, don’t panic.
Until now, many users still need to use CMD because there’s no accessible graphical user interface and menu-driven interactions for some specific programs and tasks. In other words, the command prompt is powerful enough to handle many troubleshooting issues like recovering the deleted or lost files on Windows.
How to recover files using command prompt?
Let’s learn more about the command prompt first. It refers to the default window title on Windows. As the name suggests, the command prompt (CMD/cmd prompt) is executable and adjustable.
An experienced user may find it easy to access with repetitive line editing. In contrast, it’s not so for beginners. If you’re in the latter case, you can scroll down to get explicit instructions for file recovery using the command prompt.
Way 1. Recover hidden files using the Command Prompt
The first method is used to explain how to recover hidden files using CMD. To be more precise, the files you deleted are most likely still visible on your computer, but it’s invisible to you. You can refer to the following operations to get them back.
Step 1. Press Windows + X keys, then select “Windows PowerShell (Admin)” for Windows 10.
Step 2. Open your Command Prompt window, then type chkdsk ‘drive letter’:/f and press "Enter".
("drive letter" refers to the certain drive which includes your deleted files before deletion. For example, it’s G drive in the reference picture.)
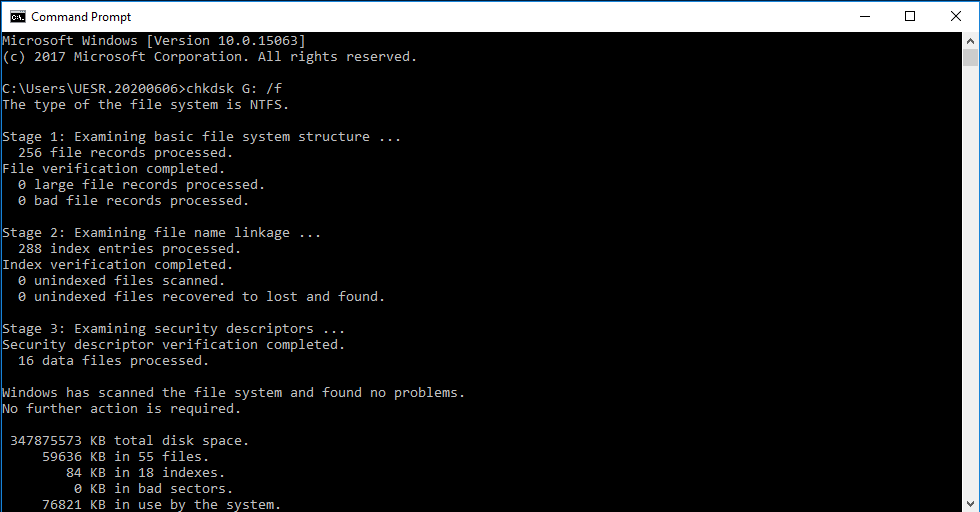
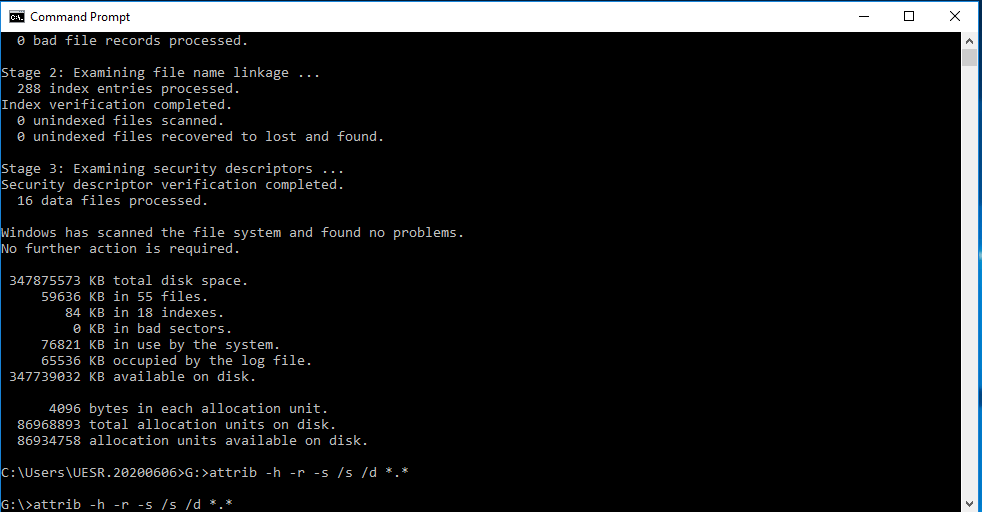
Step 3. Press "Y" and wait patiently. Then type your drive letter again and press "Enter".
Step 4. Enter "attrib -h -r -s /s /d *.* "and press "Enter".
Way 2. Recover deleted files using Windows File Recovery
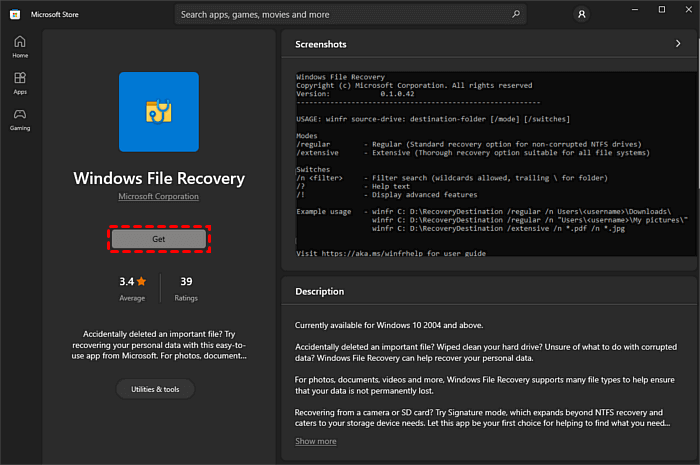
Apart from cmd, you can also utilize Windows File Recovery to recover deleted files using command prompt. That is Windows File Recovery without an available graphical user interface. Meanwhile, this free application is only compatible with Windows 10 2004 and later versions from the Microsoft Store.
Windows File Recovery has 4 modes (Regular, Segmented, Signature, Extensive) and enables you to recover files from hard disk drives (HDD), USB flash drives, or memory cards.
Here comes two basic modes. The Regular mode only supports non-corrupted NTFS drives. But the Extensive mode can support all the file systems. You need to adjust the basic command line according to the corresponding file types.
- Notes:✎...
- The basic format: winfr source-drive: destination-drive [/mode] [/switches]
- Ensure your recovered files will be stored in a new location.
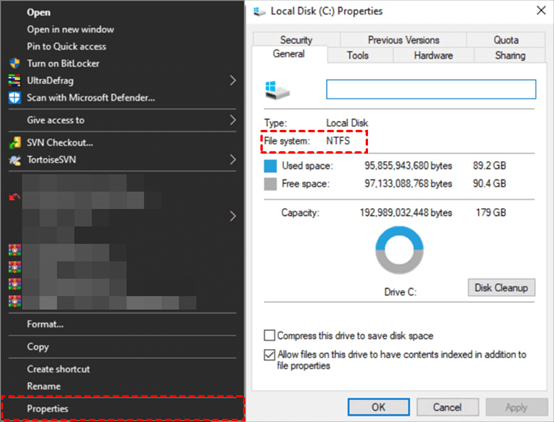
- Check your file systems with these clicks. Go to “This PC”, and right-click on the drive that includes the deleted files, then click “Properties”.
Step 1. Click “Get” to download Windows File Recovery from the Microsoft Store, then install it on your computer.
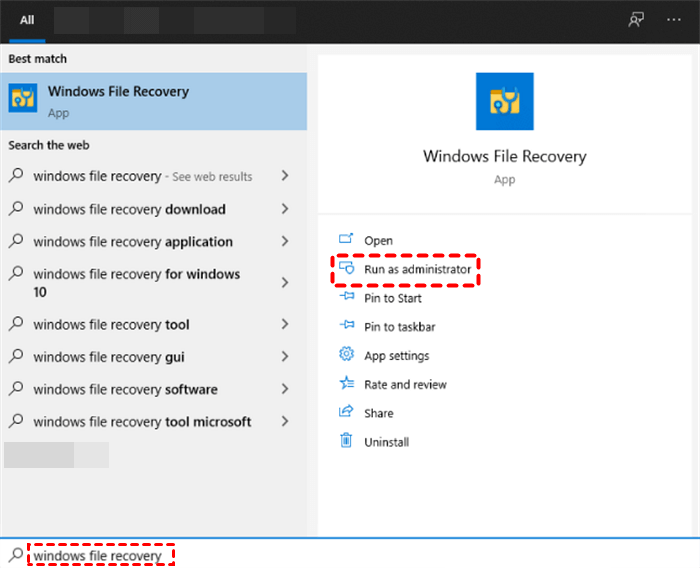
Step 2. Input Windows File Recovery in the search bar. Then open it and click “Run as administrator”.
Step 3. After checking your file system, you can select a comprehensive mode with the following form.
Scenarios for data loss
|
File system |
Circumstances |
Recommended mode |
|
NTFS |
Deleted recently |
Regular |
|
NTFS |
Deleted a while ago |
Extensive |
|
NTFS |
After formatting a disk |
Extensive |
|
NTFS |
A corrupted disk |
Extensive |
|
FAT and exFAT |
Any |
Extensive |
Step 4. Resemble your command line with the common General and Advanced syntax.
General syntax:
|
Parameter / switch |
Description |
Supported mode(s) |
|
/regular |
Regular mode, the standard recovery option for non-corrupted NTFS drives |
Regular |
|
/extensive |
Extensive mode, a thorough recovery option suitable for all file systems |
Extensive |
|
/n |
Scans for a specific file by using a file name, file path, file type, or wildcards. For example: File name: /n myfile.docx File path: /n /users//Documents/ |
All |
Advanced syntax:
|
Switch |
Description |
Supported modes |
|
/ntfs |
NTFS mode, a fast recovery option for healthy NTFS drives using the master file table |
NTFS |
|
/segment |
Segment mode, recovery option for NTFS drives using file record segments |
Segment |
|
/signature |
Signature mode, recovery option for all file system types using file headers |
Signature |
Step 5. Let’s take an example. If you’re going to recover the targeted file from the C drive to the E drive, you can input winfr C: E:/n \Users\ \Documents\QuarterlyStatement.docx
Step 6. Press “y” to continue. Then you can click the destination drive and open the destination folder containing your recovered files.
WinfrGUI: Alternative 100% free utility
As stated earlier, it might be tough for newcomers to memorize all the commands and input the correct ones. Perhaps you can try this 100% free utility WinfrGUI with a graphical user interface. It’s also a trustable tool because WinfrGUI has invoked all the functions of Windows File Recovery.
If there’s a stop during the scanning process, WinfrGUI will continue recovering data from the scanned data. These steps depict how to recover your deleted/lost files within a few clicks in Windows 10/11.
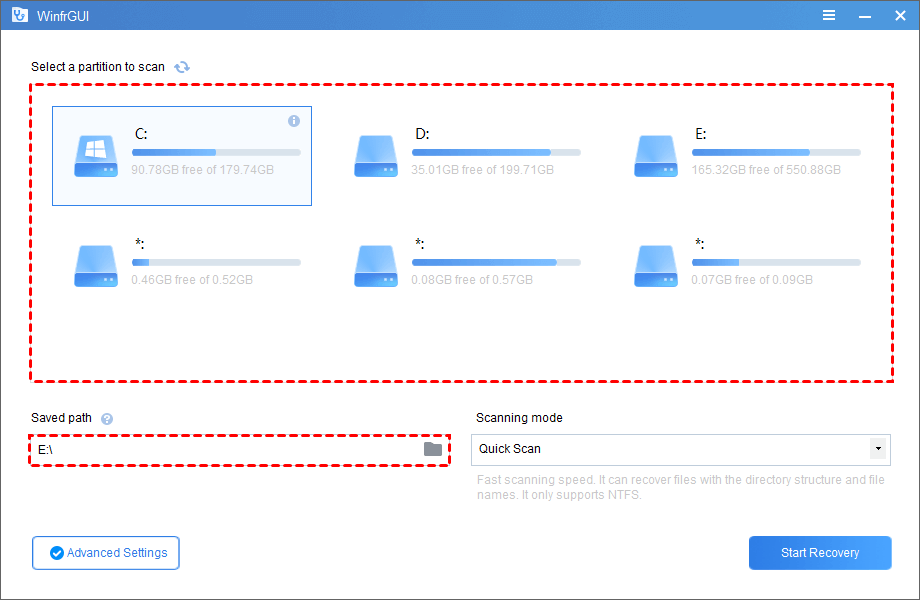
Step 1. Download and install WinfrGUI on your computer. Select a partition to scan your data, then target a destination place to save your recovered files.
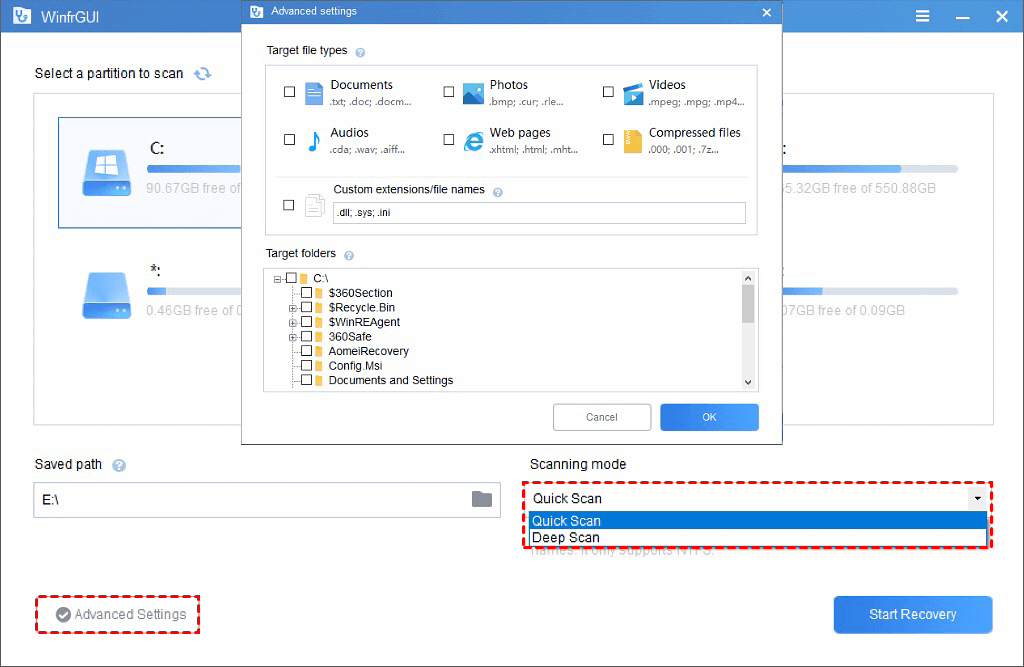
Step 2. Click Quick Scan or Deep Scan. Then click “Advanced Settings” to select some file types or folders you need.
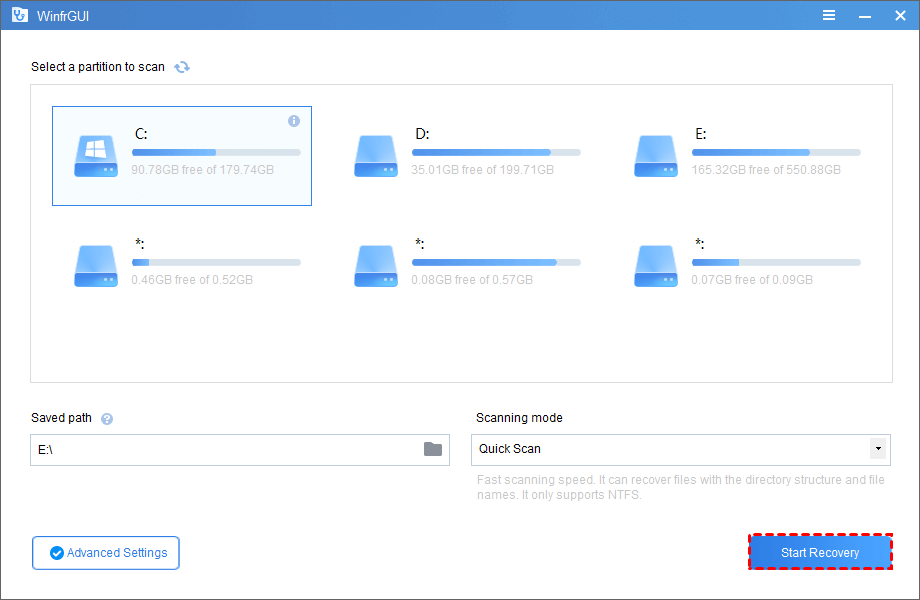
Step 3. Click the “Start Recovery” to scan. After that, you can get your recovered files in your destination drive which you’ve chosen.
Windows Data Recovery for Windows: the most recommended
As you can see, free WinfrGUI indeed can recover the deleted/lost files before data coverage. However, the compatible operating system of WinfrGUI could put Windows 7/8 and Windows Server at a disadvantage. Thus, you're supposed to utilize another more user-friendly software-FastRecovery.
Advanced scanning algorithms and a higher data recovery rate make it easier for you to recover the deleted/lost files from SSD/HHD/USB.
Key features of FastRecovery:
❥Recover 200+ types of data: Office files, Photos, Videos, Audios, Emails, Webpages, and Compressed files.
❥Keep the original format for the deleted/lost data.
❥Handle recently/permanently deletion, disk formatting, system crash, and more.
❥Support NTFS, FAT32, exFAT, and ReFS in Windows 11/10/8/7 and Windows Server.
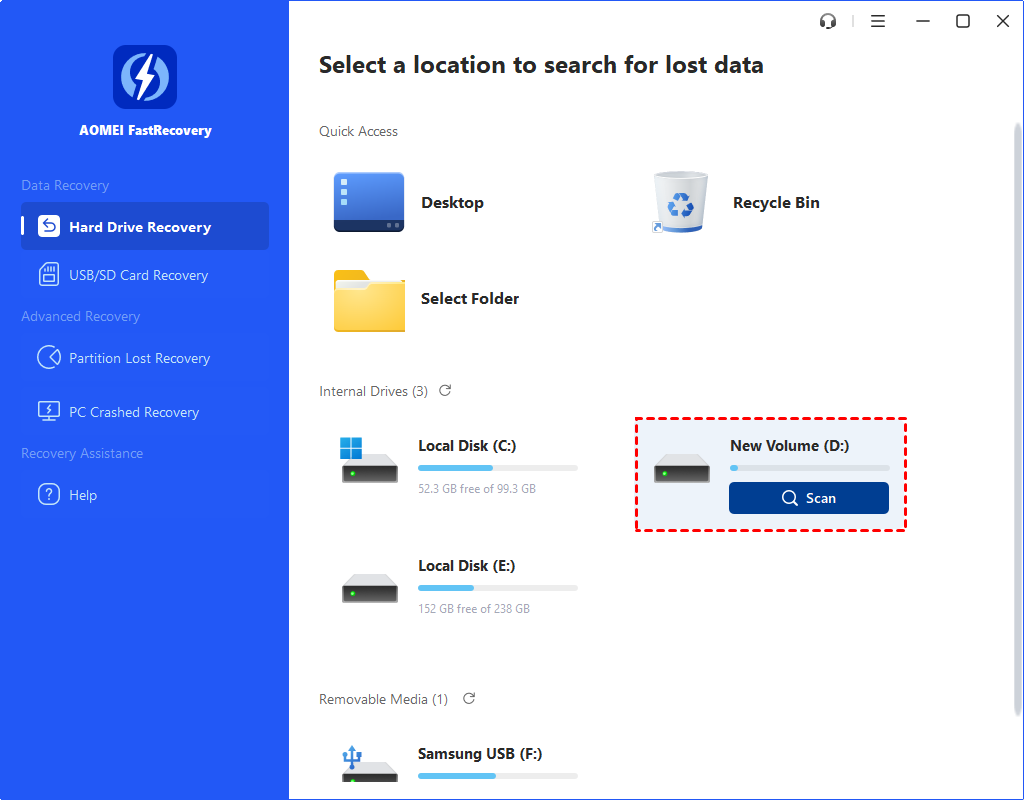
Step 1. Launch FastRecovery on your PC. Hover the mouse over the drive saved deleted files before, and click Scan.
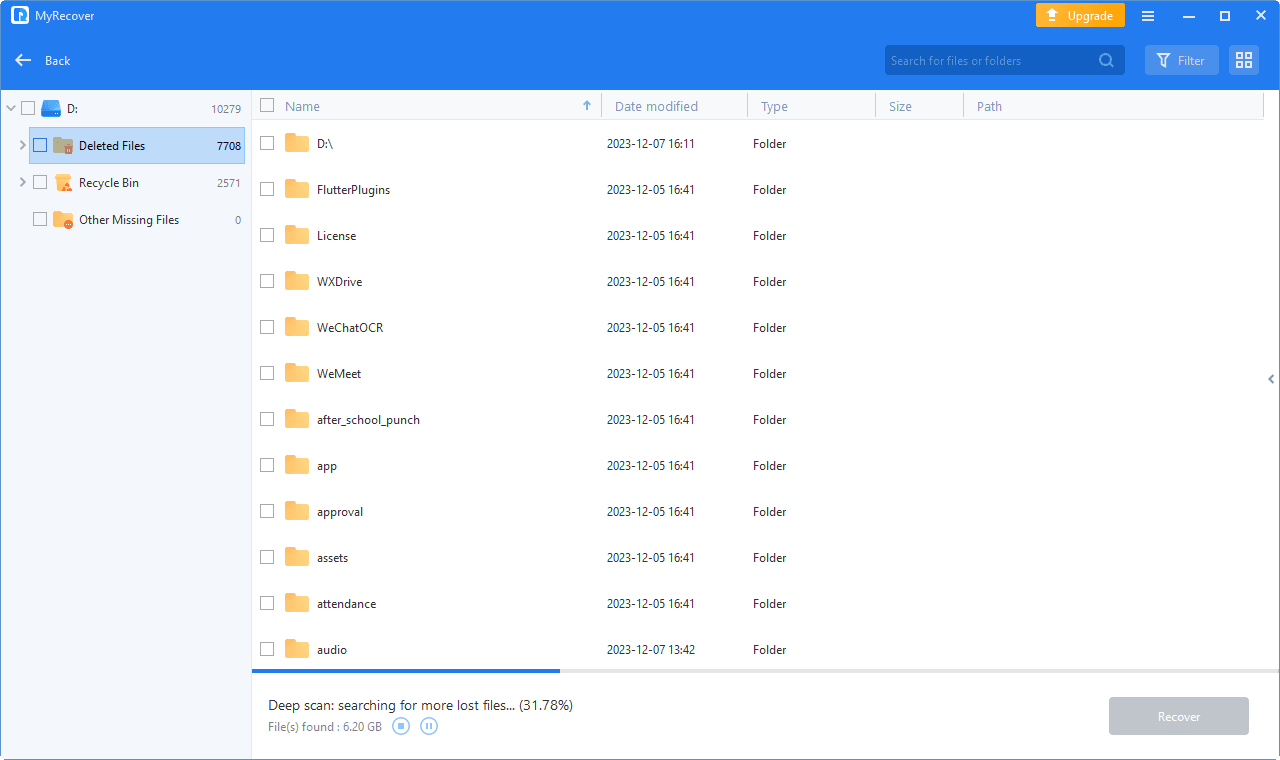
Step 2. The software will run Quick Scan and Deep Scan automatically to detect all the deleted files and other lost files.
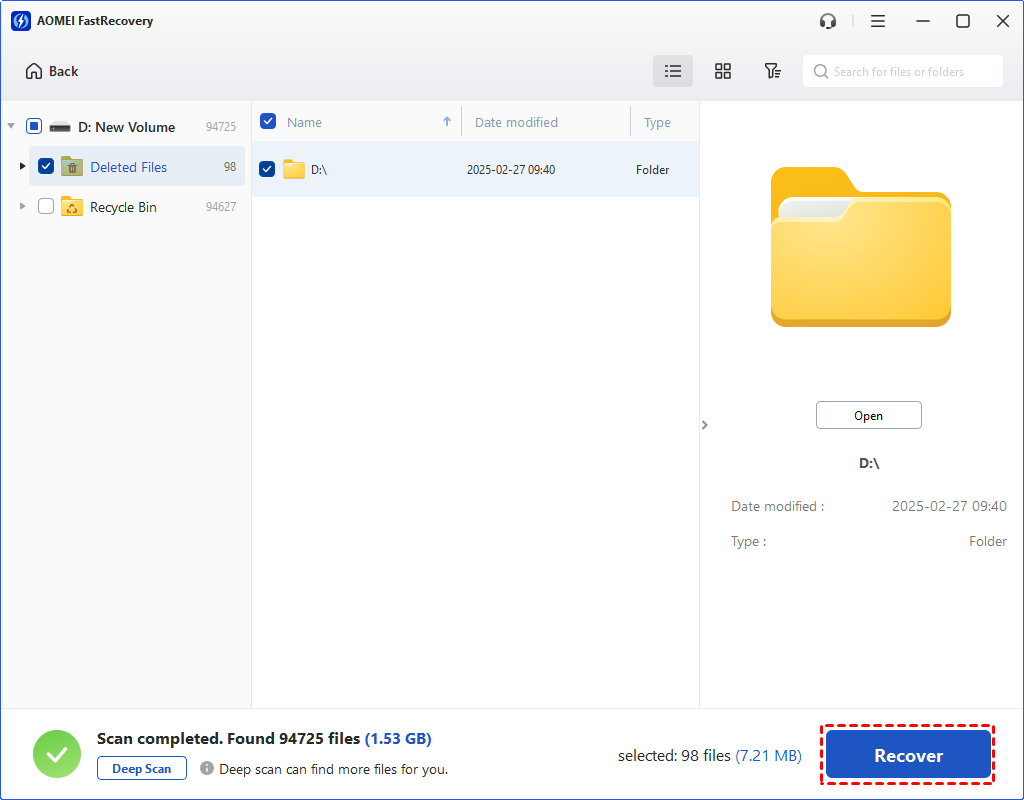
Step 3. Check the scanning results and click "Recover x files". Then save these recovered files in a new location.
In conclusion
This tutorial provides several freeways and other efficient solutions to recover files using command prompt with you. As you can see, CMD is an excellent tool to solve all sorts of problems. But it’s hard for novices to input the correct command lines without a graphical user interface. WinfrGUI has overcome these hurdles.
Furthermore, you're supposed to use FastRecovery if you prefer the original file names and format. Why don’t you witness by yourself?