SSD Data Recovery: Effective Ways to Recover Deleted Files SSD
This guide offers you effective ways to recover deleted files SSD using SSD data recovery software.
By Penny / Updated on May 8, 2026
Is there any SSD deleted file recovery that can help me out?
I have a laptop with an SSD disk (120 GB). I deleted some files from SSD to keep on working on that laptop, and I have used it for six months. Are these deleted files still on my laptop? Can these deleted files be recovered? Someone told me that SSD disks cannot save deleted data like HDD.
- A user from toms hardware
For many users, there might be countless regrets after intentional deletion. Fortunately, thanks to progress in technology, it’s possible to recover the deleted files SSD in many cases. So don’t panic! You can retrieve your needed data with viable solutions.
Two characteristics of SSD: Different from HDD
Drives include SSD and HDD. Because of the characteristics of the SSD card, SSD data recovery is different from hard disk drives. Two points deserve your attention.
The first characteristic is that SSD uses a flash memory chip as the storage medium. Because flash memory is completely erased once, called 1 P/E, which implies the life of flash memory is calculated by the unit of P/E. But it indeed upgrades its writing access speed for better performance. Compared with the latter drive, SSD is more reliable and compact.
The second characteristic is that SSD drives to store data in cells. So TRIM (disable delete notify) is an essential factor for the data cycle (data erasing and data writing).

HDD allows new data to overwrite the deleted data directly. But data-overwritten is disabled for flash memory. To write new data to a cell, SSD must relocate the existing data. So it’s clear the deleted files from solid-state drives are not wiped out. It is merely removed from the directory, and the space is marked as free for use.
To be more precise, TRIM makes it more efficient for SSD to perform GC (Garbage Collection) operations to erase invalid blocks to get free flash memory space. Then new data could be written in the free space.
Furthermore, the garbage collection mechanism of SSD provides adequate “disk defragmentation.” There’s no need for you to use further defragmentation. Please scroll down to get explicit instructions for SSD deleted file recovery.
How to recover deleted files SSD?
Now that we’ve captured the necessary items of the solid-state disk, let’s tap into how to recover deleted files SSD in this part. But before SSD data recovery, you have to disable TRIM. As stated earlier, TRIM is a critical feature of an SSD. But it also can lead to more irritating issues after data loss. Follow these steps within clicks.
Step 1. Press the “Winkey/Start” key, and input “cmd” in the search bar. Then select “Run as administrator”.
Step 2. Type “fustil behavior query disabledeletenotify” in the Command Prompt window and press the “Enter” key.
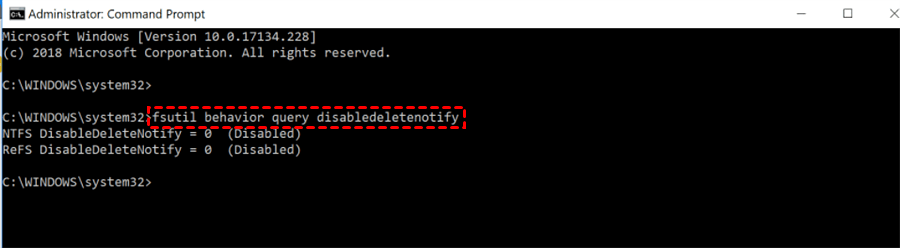
Step 3. Then you’ll see the return data. If the return data is 0, which suggests Trim is activated. If the return data is 1, which suggests Trim is disabled.
Step 4. If you need, you can input “fustil behavior query disabledeletenotify 1” to disable Trim.
Way 1. Recover deleted files SSD from the Recycle Bin
Let’s start with the easiest one. You can pay a visit to your Recycle Bin regardless of the circumstances. The following steps depict how to recover the deleted files from recycle bin.
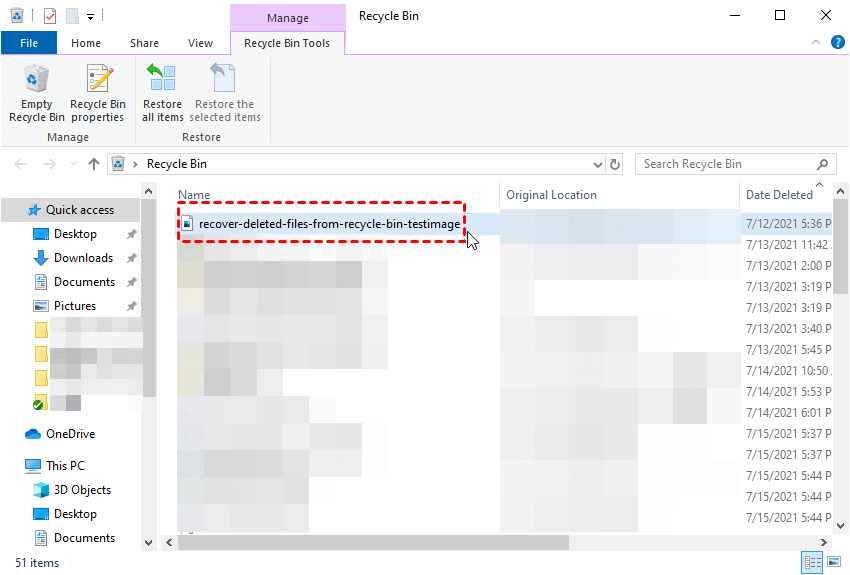
Step 1. Double click on the Recycle Bin icon on your Desktop.
Step 2. Open it and select deleted SSD files from the Recycle BIn.
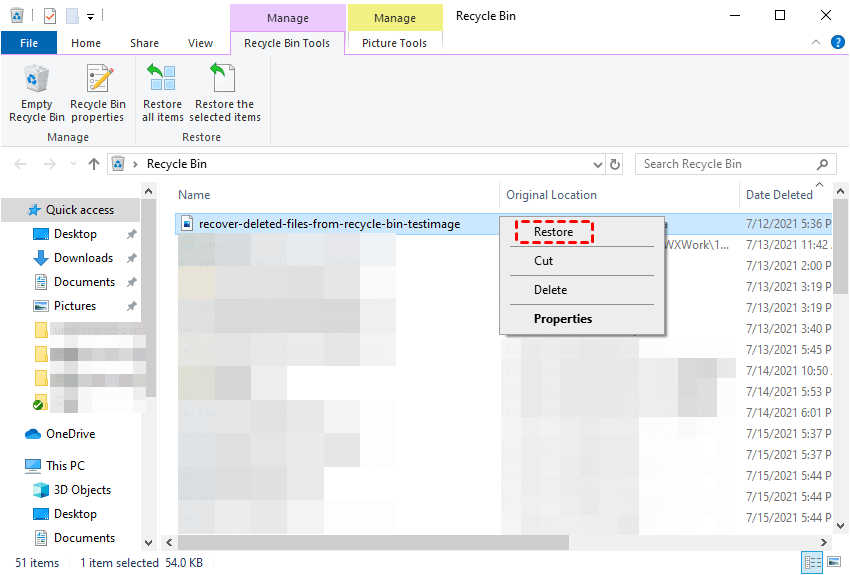
Step 3. Right-click on your desired files, then click “Restore”. You can also drag your desired files out of the recycle bin directly.
If your deleted files SSD are not in the Recycle Bin, you can tweak your thoughts and take the latter SSD deleted file recovery into account.
Way 2. Recover deleted files SSD with powerful Windows File Recovery
Windows File Recovery (a command-line program) focuses on deleted file recovery. One of the most powerful features is that Windows File Recovery even can work to recover deleted files from solid-state drives. It can address your issue in a good manner.
Windows File Recovery currently is only available for Windows 10 19041 and later versions from the Microsoft Store. It can support NTFS, FAT, ex-FAT, and REFS file systems with four modes (Regular, Extensive, Segment, and Signature).
|
Parameter / switch |
Description |
Supported mode(s) |
|
/regular |
Regular mode, the standard recovery option for non-corrupted NTFS drives |
Regular |
|
/extensive |
Extensive mode, a thorough recovery option suitable for all file systems |
Extensive |
|
/segment |
Segment mode, recovery option for NTFS drives using file record segments |
Segment |
|
/signature |
Signature mode, recovery option for all file system types using file headers |
Signature |
There’s no accessible graphical user interface, so you’d better be familiar with this command format: winfr source-drive: destination-drive: [/mode] [/switches] before command lines combination. Then you can input the adjusted cmd in the Command Prompt window.
- Notes:✎...
- If possible, stop using your PC. Because any use of the computer might lead to overwriting the free space on your computer.
- The source drive (specify where are your deleted files) and destination drive (save your recovered files) must be different.
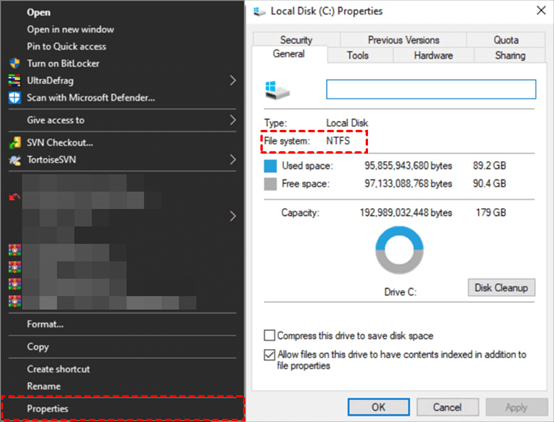
- Check your file systems with these clicks. Click “This PC” and right-click on your source drive, then click “Properties”.
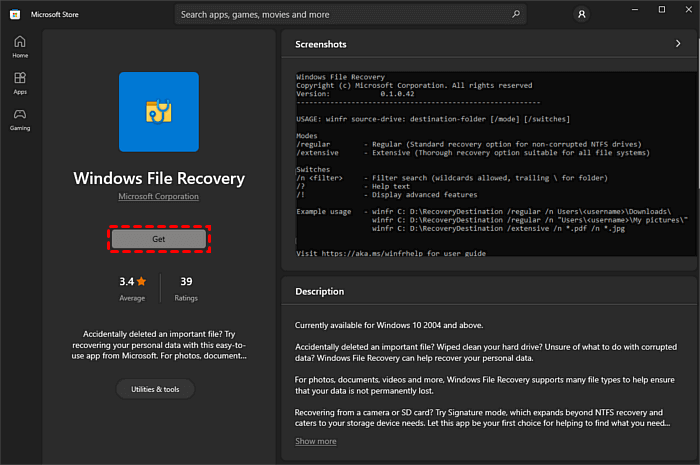
Step 1. Enter "Windows File Recovery" in the search box of the Microsoft Store, and click “Get” to download. Then install it on your computer.
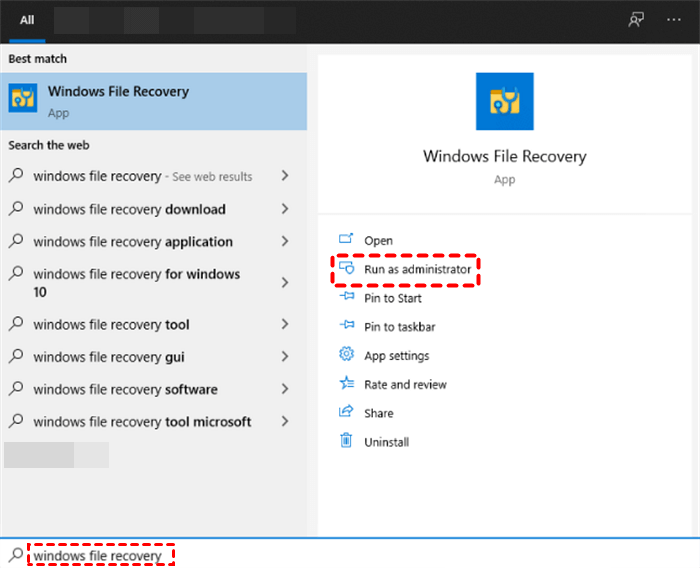
Step 2. Enter "Windows File Recovery" in the search bar, then click the “Run as administrator” button.
Step 3. After checking your file systems, select the most suitable mode with this tip.
- If your files were deleted recently, select the Regular mode. Apart from that, select the Extensive mode.
Step 4. Combine command lines with some common syntaxes below.
|
Switches |
Meaning |
Supported mode(s) |
|
/n |
Filter the scan range: scans for a specific file with its file name/path/type, etc. |
All |
|
/y: |
Recover specific extension groups. |
Signature |
|
/k |
Recovers system files. |
NTFS Segment |
|
/u |
Recovers undeleted files, for example, from the Recycle Bin. |
NTFS Segment |
For example: If you plan to recover PDF and Word files from source C drive to your destination E drive, you can input command lines like this: winfr C: E: /regular /n *.pdf /n *.docx
Step 5. Press “y” to continue. The size of your source drive has an impact on the process. Please wait patiently. Then you can get recovered files saved on your destination drive. If you want to stop the recovery process, press "Ctrl + C."
Way 3. FastRecovery
Although WinfrGUI can recover the deleted files from SSD, it is impossible to retain their original file name and format. FastRecovery can address this concern perfectly.
Developed by AOMEI Tech, this professional software permits you to recover deleted/lost files from SSD, HDD, USB, and other storage devices. It supports NFTS, FAT32, exFAT, and ReFS in Windows 11/10/8/7 and Windows Server.
You're allowed to recover 1000+ types of data such as Word, PPT, Excel, Photos, Videos, Audio, Emails, Webpages, Compressed files, and other lost files. Please follow the steps below.
-
Don't download and install FastRecovery on the drive where you store deleted files, as this may cause data overwriting.
-
Any newly added data or disk formatting can overwrite data. Please avoid these operations after deletion.
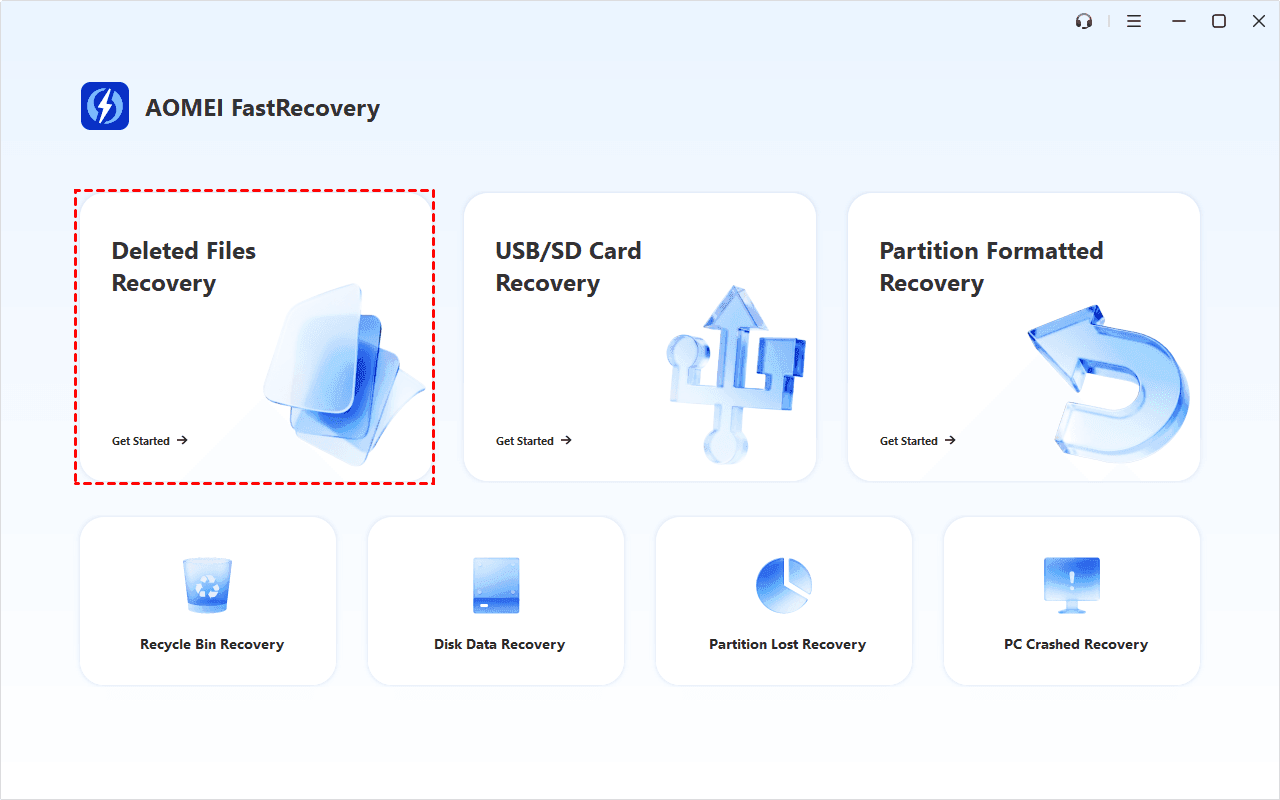
Step 1. Install and launch FastRecovery on your PC. Click Deleted Files Recovery. You can also choose a more suitable alternative. All of them can help you retrieve data without causing any damage.
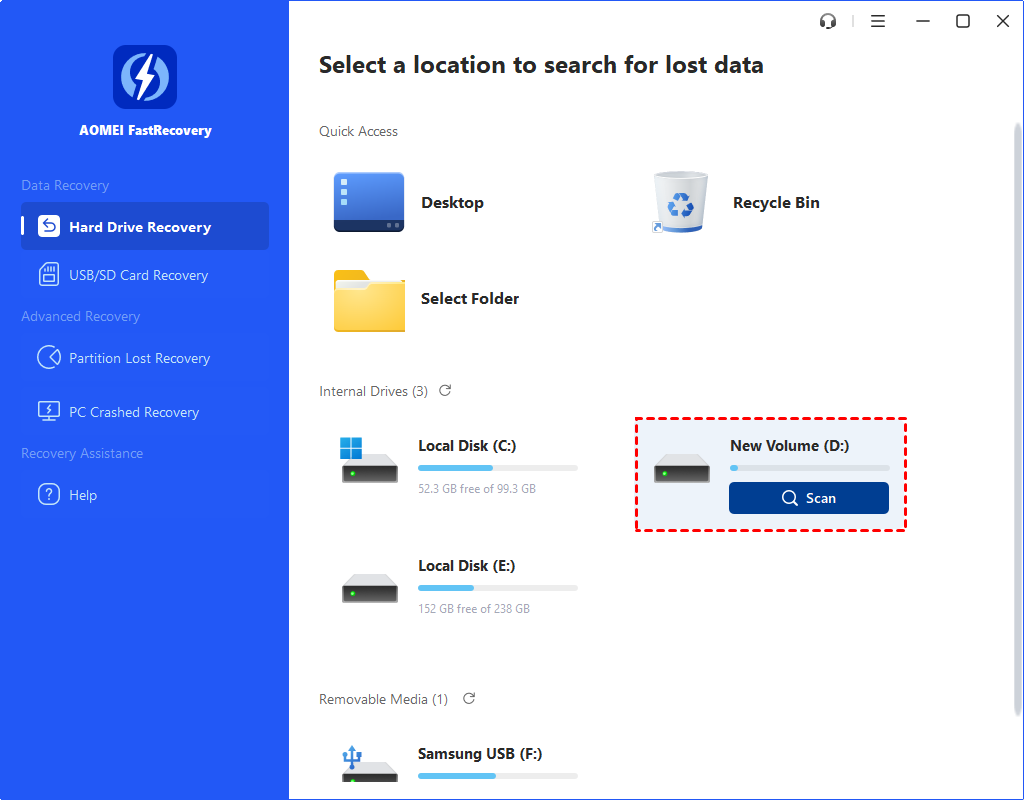
Step 2. After loading the disk, hover the mouse over the SSD, including your deleted files, then click Scan.
Step 3. The Quick Scan will start automatically for deleted or lost data. During scanning, you can click the Stop or Pause button if you select the wrong disk or something goes wrong.
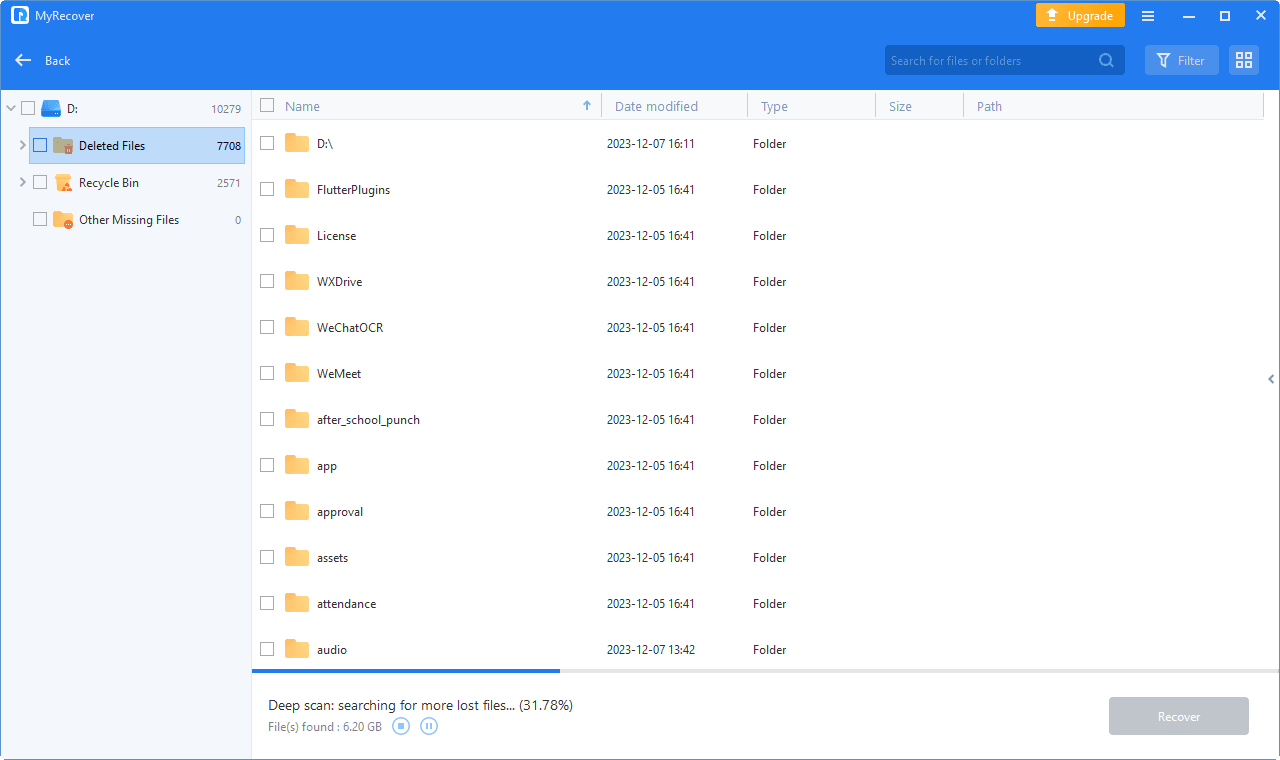
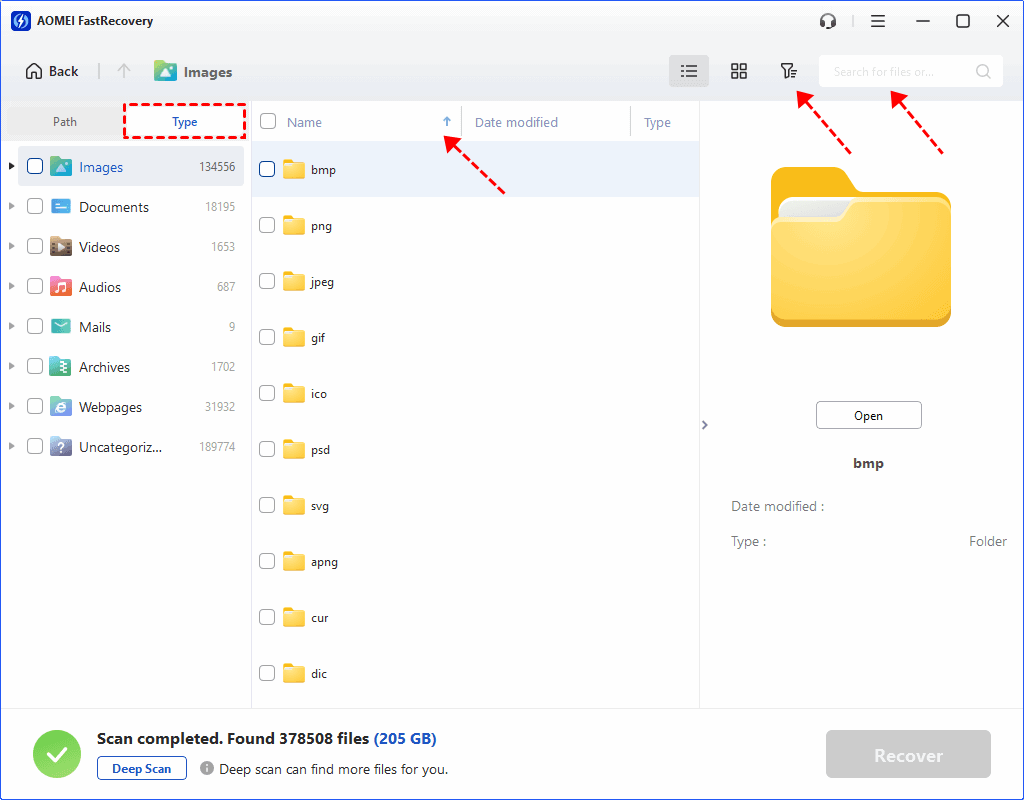
Step 4. Wait for the process to complete, then select files by Type (default) or Path, with options to sort, search, filter, and preview files.
👉Under the Type section:
- Specify the data type and click the arrow next to type, size, date modified, etc., to sort files.
- To locate files quickly, type the file name or extension in the search box.
- Or use the filter feature, similar to the Type category, allowing you to further specify the size of files, from less than 512 KB to 1GB above.
- Once found, double-click the files to preview.
👉 Under the Path section: Directly navigate to the original location where you saved deleted files. Sort files if needed.
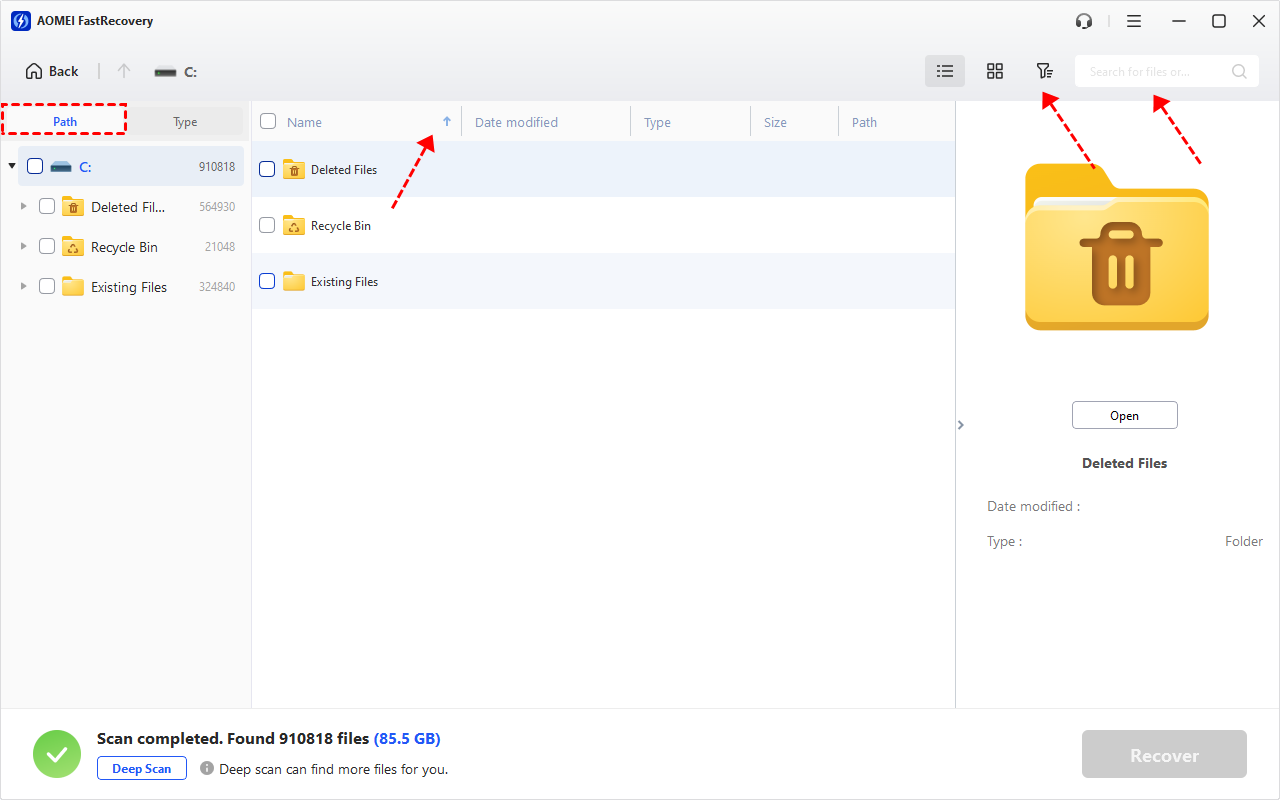
- The Type categories and filter options include all supported data types, such as images, videos, documents, mails, web pages, compressed files, etc.
- Click the Deep Scan to find more data if Quick Scan fails. It will scan every sector of the disk and take longer.
Step 5. Select the files you want to recover and click "Recover". Please select a new location (not the original SSD) to save these recovered files.
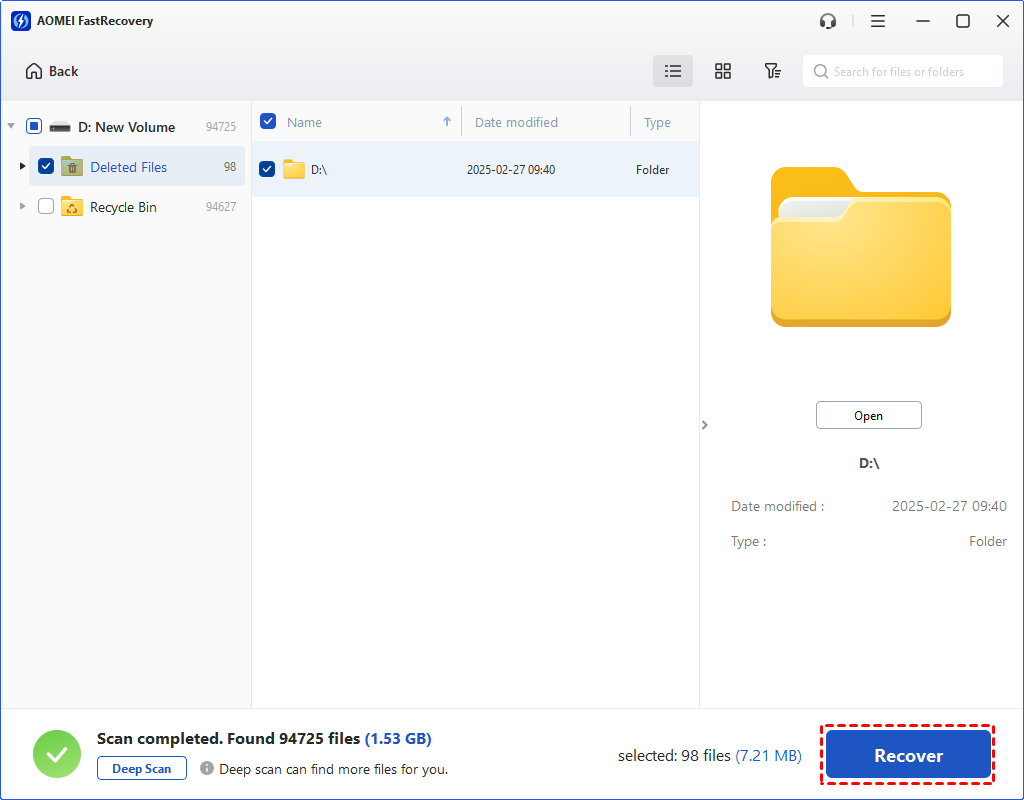
-
Don't save the recovered files to the original location, as it may cause data overwriting.
-
The free edition only supports 500MB of data recovery. To recover more data, please upgrade FastRecovery to the advanced editions.
Related suggestions
In summary, if your solid-state drives suffer data loss because of accidental or artificial deletion, you can check your Recycle Bin first and try to restore it. If it fails, you’d better ask reliable and professional SSD data recovery file recovery for help, you can salvage your deleted files from these electronic devices efficiently. For instance, you can use FastRecovery for help in this case.
It’s more important to avoid making mistakes than to make up for them afterward. As a result, one of the most secure methods is to plan ahead of time and create regular backups. AOMEI Backupper enables you to create automatic, full, incremental, and differential backups based on your needs. This free backup software supports Windows 11/10/8/7. Maybe it’s just for your treatment.