How to Use Command Prompt to Recover Hidden Files from USB?
Seeking explicit instructions to use command prompt to recover hidden files from USB? Check these solutions to recover hidden/deleted files on this page.
By Penny / Updated on March 9, 2026
Case A. How to show hidden files in USB using CMD?
In computing, a hidden file has the hidden attribute enabled, making it invisible to users when listing files. Most computers run the Windows operating system, which is set up by default to hide hidden files.
Hidden files are still created by some users who’re inclined to save data in this way to keep data secure. Naturally, other users may fail to access your hidden files from USB without accessible solutions.
However, if you’re about to use others’ hidden files for an emergency, how do you uncover hidden files on a USB? If you’re not sure, please scroll down to get clear instructions on how to retrieve hidden files in USB using CMD.
Attrib command to recover hidden files from USB
ATTRIB is a command in Windows Microsoft that allows users to modify various characteristics or “attributes” of a computer file or directory. Therefore, this feature is an ideal solution to this issue. Let’s take Windows 10 as an example. Please refer to the following steps.
Step 1. Connect the USB that saves hidden files to your computer. Please ensure your PC recognizes this USB flash drive.
Step 2. Press the “Windows + X” keys, then select “Windows PowerShell (Admin)”.
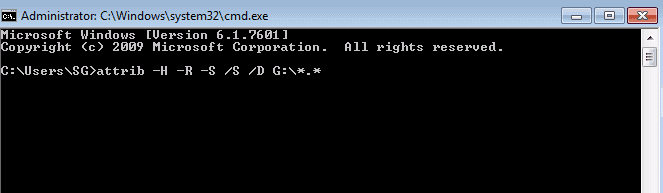
Step 3. Enter “attrib -h -r -s /s /d G:\*.*” and press “Enter” after the Command Prompt window pops up. You can replace “G” with the drive letter of your USB.
Step 4. This process will finish after the command prompt returns back the original location. Then you can go to the destination place to check these files.
However, if the attrib command not working, you can scroll down to get other efficient solutions.
Case B. How to recover the deleted files from USB?
The former case aims to resolve issues on how to show hidden files in USB using CMD. This case tends to share two solutions to recover the deleted files from USB with you because deletion is the most common scenario for data loss. These two data recovery software also boost our Windows data recovery.
Way 1. Windows File Recovery
Designed to recover lost files, here comes a powerful command-line utility, Windows File Recovery. Nevertheless, this free accessible software is incompatible with versions below Windows 10. So you’d better check for updates in advance.
If there’s no sign of your deleted files in the Recycle Bin, you can use Windows File Recovery to recover deleted files (ZIP/PDF/PNG/MPEG/MP3/JPEG) from your local storage devices (HDD/SSD/USB/Memory card such as an SD card). There’re 4 modes (Extensive/Regular/Segment/Signature) could support NTFS/FAT/ex-FAT/ReFS file systems.
As stated earlier, this software runs using the winfr command. That is to say, users need to enter the adjusted command lines in the Command Prompt window because it lacks a graphical user interface.
- Notes:✎...
- Adjust command lines according to winfr source-drive: destination drive: [/mode] [/switches]
- If you cannot access your files from USB, stop using your USB and don’t write new data on it.
- The source drive (locate where are the lost files before deletion) and destination drive (where to save your recovered files) are different.
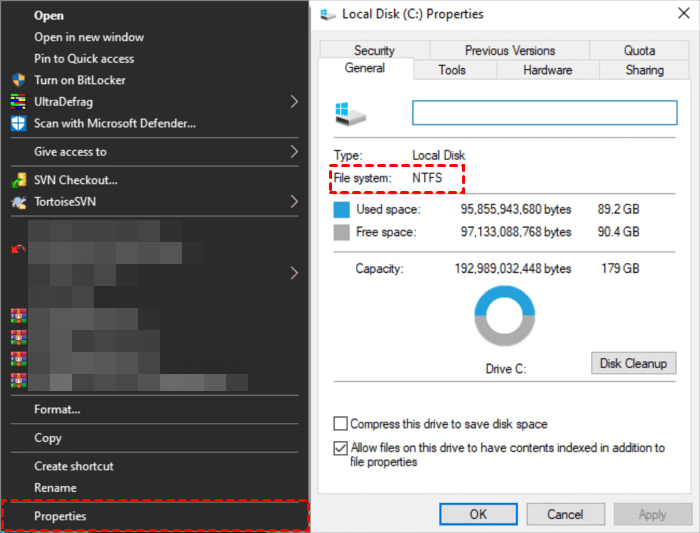
- Figure out your file system within these clicks. Click “This PC”, and right-click on the source drive including your lost files before losing, then click “Properties”.
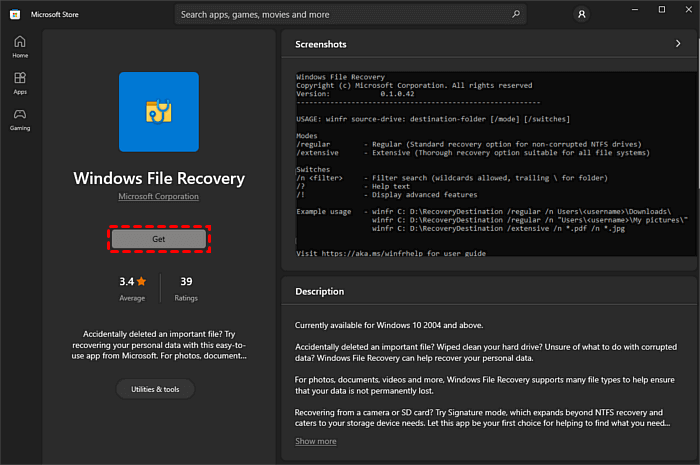
Step 1. Download Windows File Recovery from the Microsoft Store by clicking “Get”, then install it on your PC.
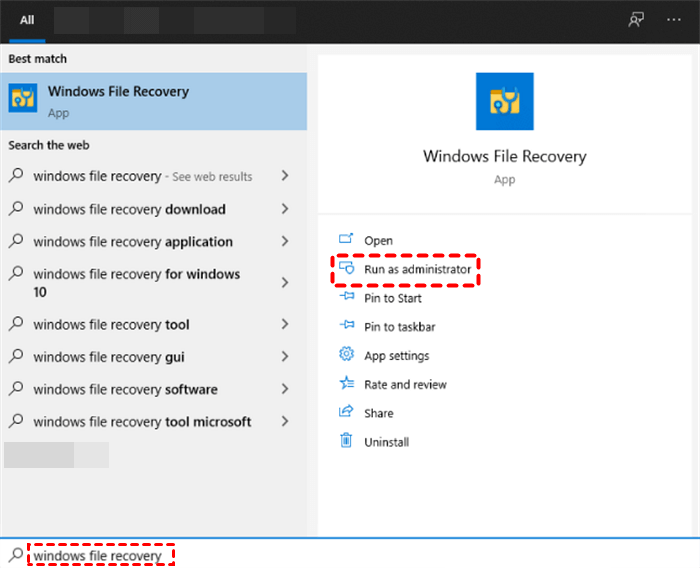
Step 2. Enter “Windows File Recovery” in the search bar. Then select “Run as administrator” to run it.
Step 3. You can select a comprehensive mode after figuring out your file system.
|
File system |
Circumstances |
Recommended mode |
|
NTFS |
Deleted recently |
Regular |
|
NTFS |
Deleted a while ago |
Extensive |
|
NTFS |
After formatting a disk |
Extensive |
|
NTFS |
A corrupted disk |
Extensive |
|
FAT and exFAT |
Any |
Extensive |
If you have a closer look at this form, you’ll find Windows File Recovery even can recover lost files from corrupted and formatted disks. This little trick might lend you a hand in the future.
Step 4. Adjust and resemble command lines with some common switches below.
|
Switches |
Definition |
Supported mode(s) |
|
/n |
Filter the scan range: scans for a specific file with its file name/path/type, etc. |
All |
|
/y: |
Recover specific extension groups. |
Signature |
|
/k |
Recovers system files. |
NTFS Segment |
|
/u |
Recovers undeleted files, for example, from the Recycle Bin. |
NTFS Segment |
Step 5. Let’s use the Regular mode and the Extensive mode as an example respectively.
Example 1. Enter winfr C: E: /regular /n *.pdf /n *.docx to salvage your PDF and Word files from the C drive and save these files on the E drive.
Example 2. Enter winfr C: E: /extensive /n *invoice* to recover any file with the string “invoice” in the filename by using wildcard characters.
Step 6. Press “y” to continue. If you want to stop, you can press the “Ctrl + C” keys.
Way 2. FastRecovery
If you’re worried about making mistakes when typing in command lines, you can try FastRecovery. This tool can recover deleted Word, PPT, Excel, Photos, Videos, Audios, Emails, ZIP files, and other lost files from HDD/SSD/USB flash drives.
This user-friendly software could keep its original path, filename, and format for the deleted files. It supports NTFS, FAT32, exFAT, and ReFS in Windows 7/8/10/11 and Windows Server. Please follow the steps below.
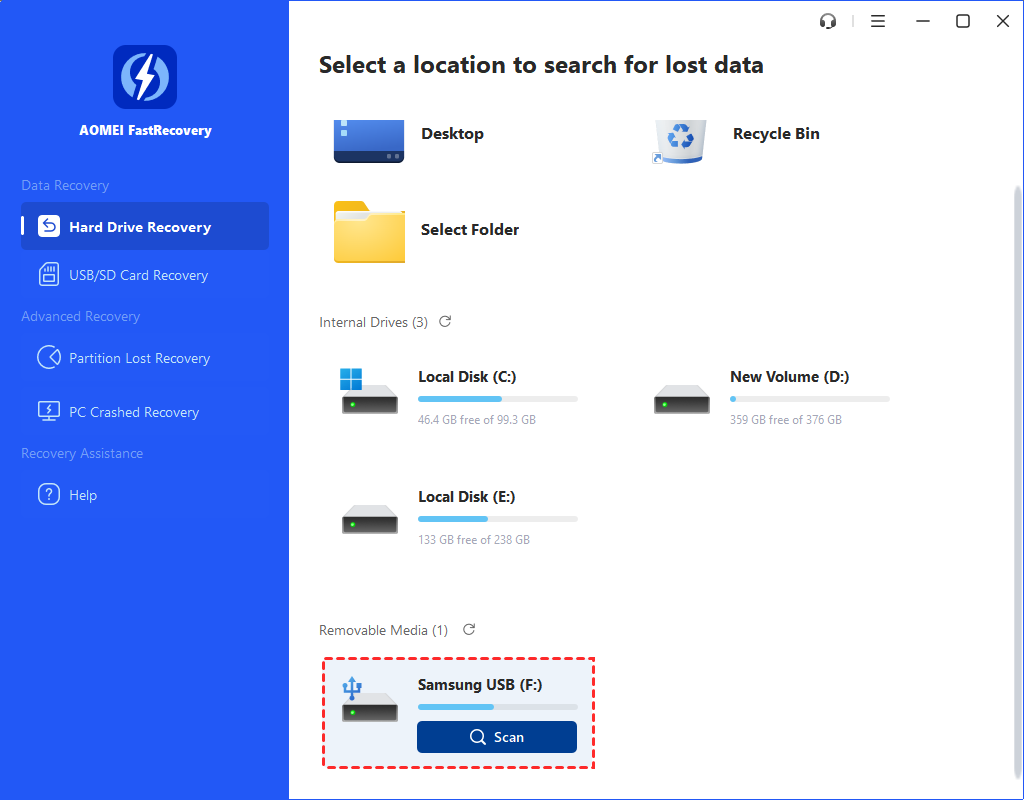
Step 1. Download and install FastRecovery on your PC. Then, connect the USB flash drive to the computer.
Step 2. Hover the mouse over the USB drive, and click Scan.
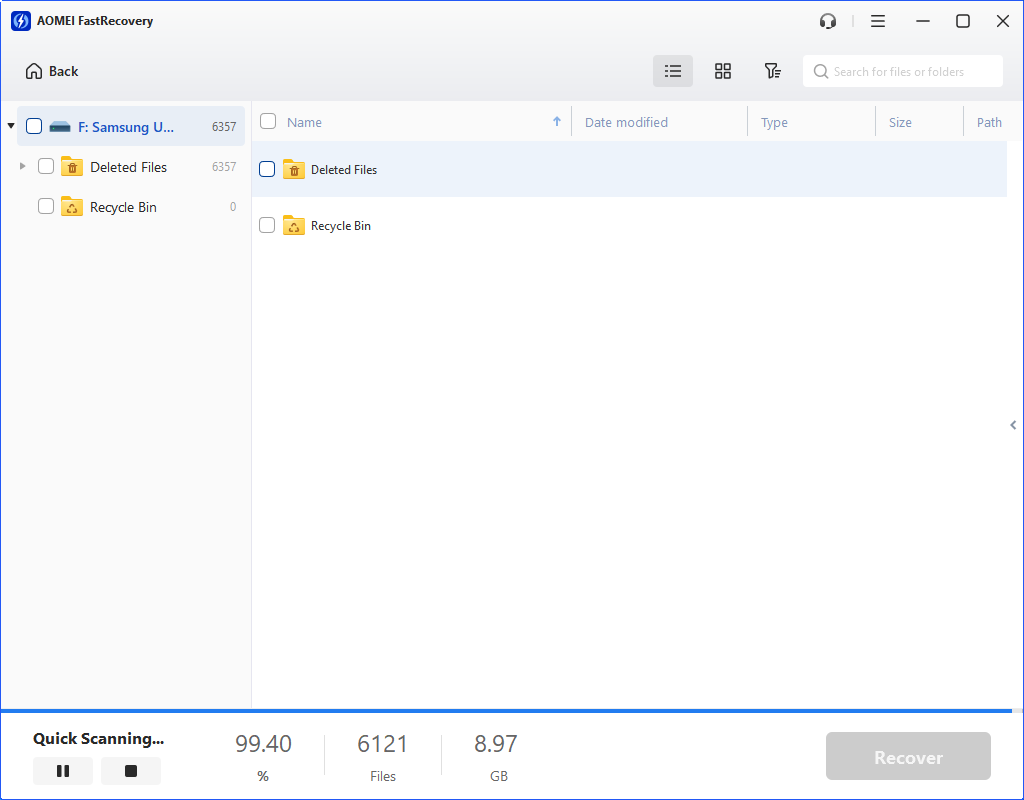
Step 3. It will perform Quick Scan automatically to find deleted and lost files. You can search, filter, preview and select files to recover immediately.
Step 4. Select the files you want to restore and click “Recover”. Then, choose another destination place to save your recovered files.
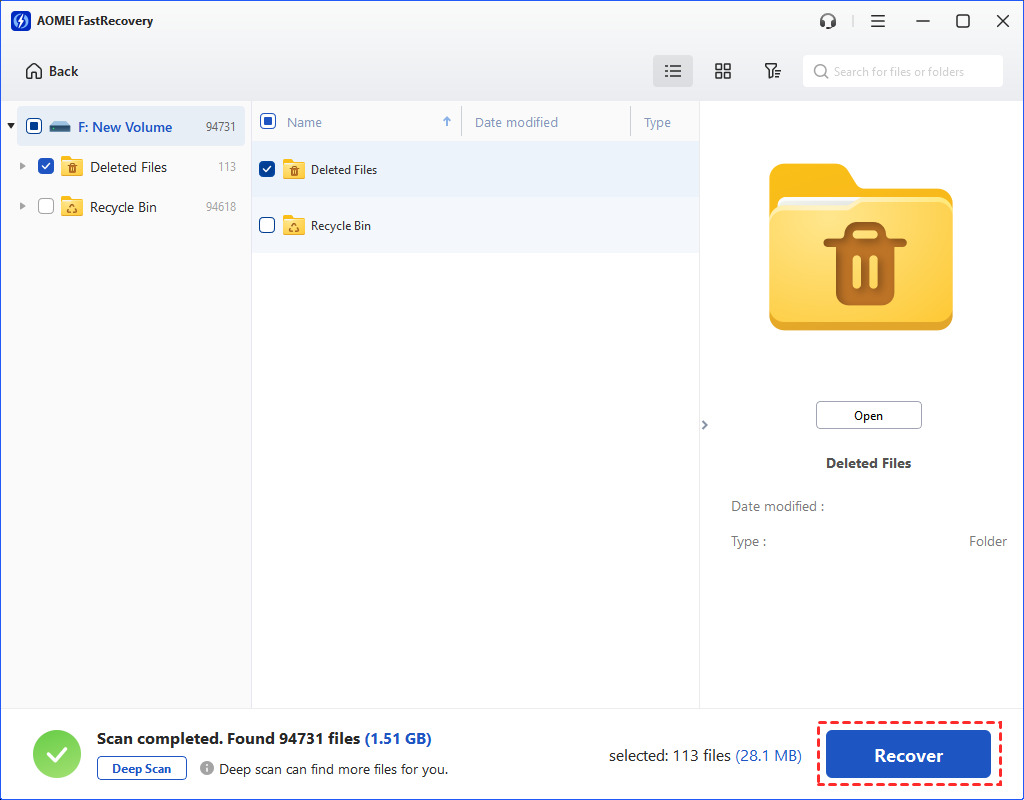
After that, go to your destination place to check your recovered files.
Wrapping up
This article offers you a feasible way to use the command prompt to recover hidden files from USB. At the same time, you can also get several efficient and handy solutions to recover the deleted files using Windows data recovery software.
Compared with Windows File Recovery, maybe FastRecovery is a more user-friendly application for you to use. All in all, wish you can address your issues efficiently.