How to Fix Windows 11 23H2 Fails to Install Easily: 7 Ways
On this page, you will learn the reasons for Windows 11 23H2 fails to install and 7 useful fixes. Besides, you will get a free backup tool for Windows backup to prevent system failure after upgrade.
By Jonna Updated on August 28, 2025
Unable to Install Win 11 23H2
I am trying to upgrade my existing PC configured with Win 11 22H2 to 23H2 but had no good luck, and got the install error - 0x800f081f. Any ideas on how to successfully complete the update?
User case from techcommunity.microsoft.com
Microsoft Released Windows 11 version 23H2 on October 31, 2023, with several new features, system improvements, and bug fixes. However, the upgrade process may not be smooth for all users, with some users reporting various issues like Windows 11 updates stuck downloading for hours or Windows 11 23H2 fails to install with different errors. The most common reasons behind the Windows 11 23H2 failed to install include:
- Insufficient storage space for saving Win 11 23H2 update
- Corrupted system files that prevent the 23H2 update from being installed
- Third-party antivirus software interfering with the update
- External hardware interrupting the update
- Network issues
If you are also struggling with Windows 11 update installation problems, here are some effective solutions you can apply and the last one can help you get Windows 11 23H2 update easily.
How to Fix Windows 11 23H2 Fails to Install in 7 Methods
To fix Windows 11 version 23H2 download error, you can try the following troubleshooting tips. Before that, you can first verify if your network connection is right and reboot your computer for a simple check.
Solution 1. Run Windows Update troubleshooter
The built-in Windows update troubleshoot tool is designed to identify and fix prevalent issues associated with Windows updates. The troubleshooter scans for issues that might be hindering Windows updates from installing correctly and tries to address them automatically or offers solutions.
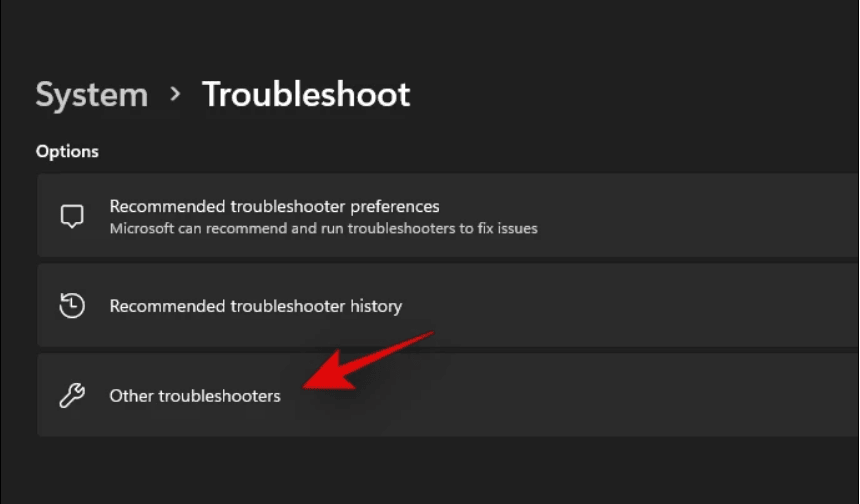
1. Press Windows key + I to open the settings app.
2. Go to System then Troubleshoot and click on Other troubleshooters.
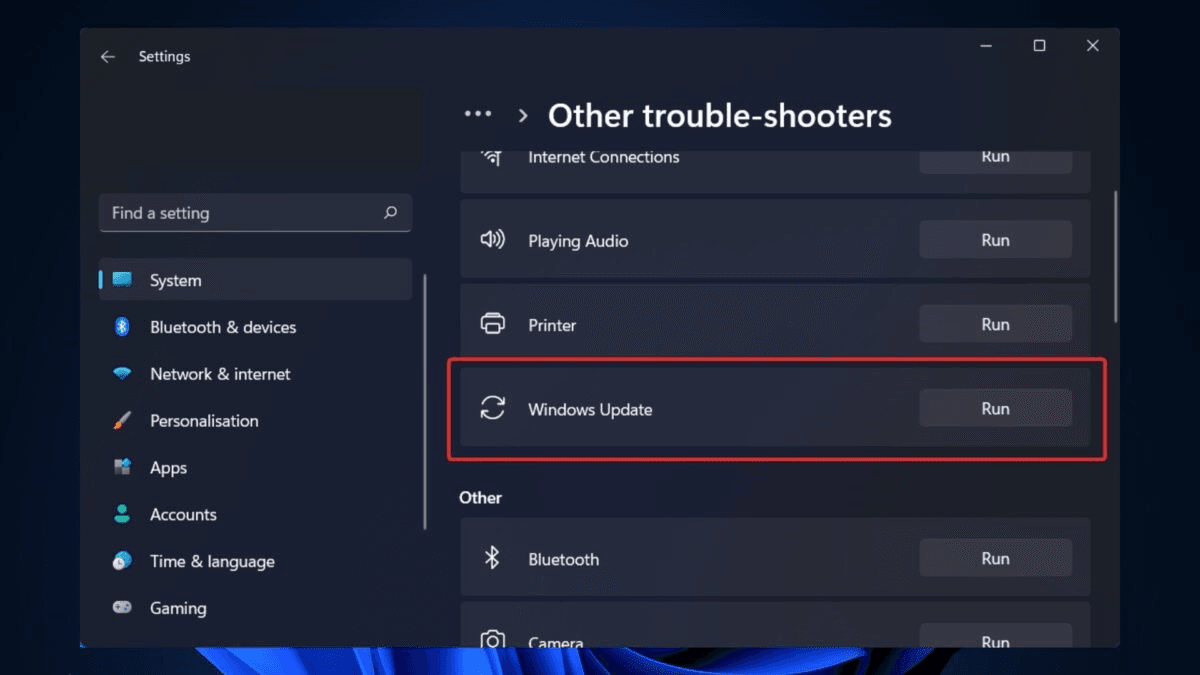
3. Look for Windows Update and click Run next to it, to identify and resolve common issues related to Windows updates.
4. Restart Windows after completing the troubleshooting process, and check for updates again.
Solution 2. Free up Space on System Drive
Lack of enough space on the system drive, usually the C drive, can lead to update installation failures. This is because the system needs enough temporary space to download, unpack and install the Windows 11 23H2 update files. In this case, you can use Disk Cleanup tool to free up space on Windows 11 system drive:
1. Open the Windows search bar and type Disk Cleanup. Press Enter to open the Disk Cleanup utility.
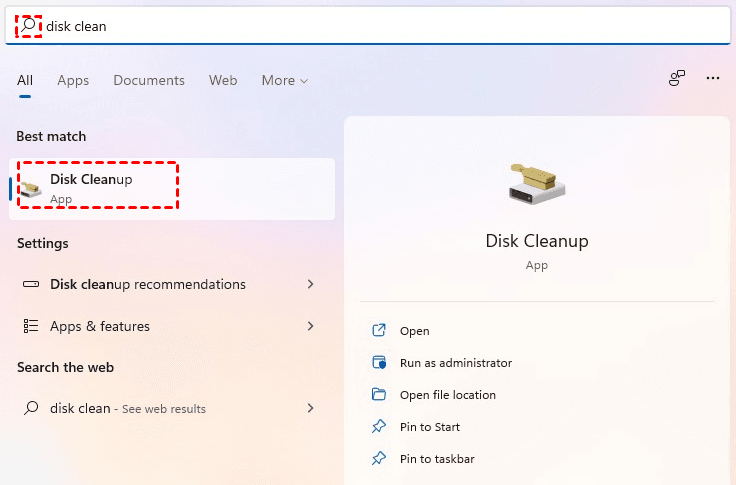
2. Select your system drive to cleanup and tap OK.
3. Choose files to be deleted, such as Temporary Internet Files, Windows Update, Temporary Files, and others. And click OK.
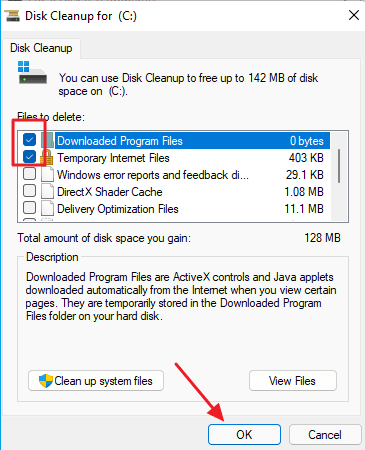
4. You can also run this tool and select the drive again to click Clean up system files for removing deletable system files.
Solution 3. Reset Windows Update Components
Windows 11 23H2 failed to install may be caused by corrupted Windows Update Components. To remedy this issue, consider resetting these components.
#1. Stop Windows Update and its related services
1. Search for Command Prompt, right-click the top result, and select Run as administrator.
2. Stop the Background Intelligent Transfer Service (BITS), Windows Update service, and Cryptographic service by running the following commands one by one:
- net stop wuauserv
- net stop cryptSvc
- net stop bits
- net stop msiserver
#2. Clear Windows update cache
1. Open file explorer and navigate C:\Windows\SoftwareDistribution\.
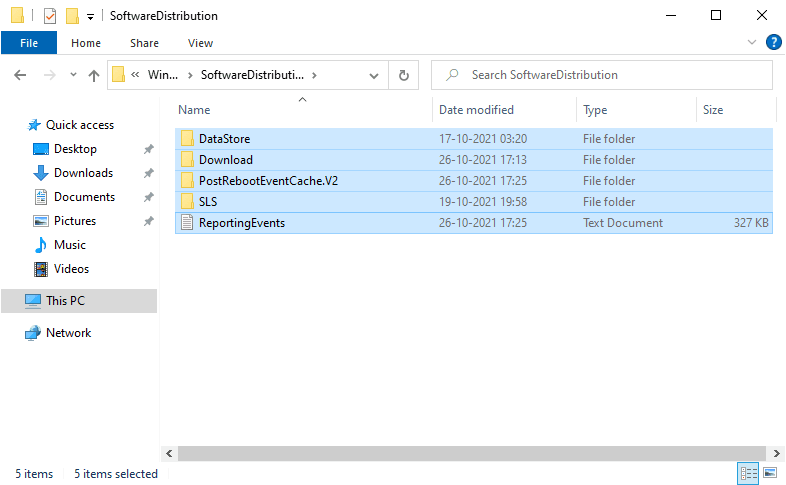
2. This folder has all the files related to Windows updates, Open the Download subfolder, select all the files using Ctrl + A, and hit the Delete key.
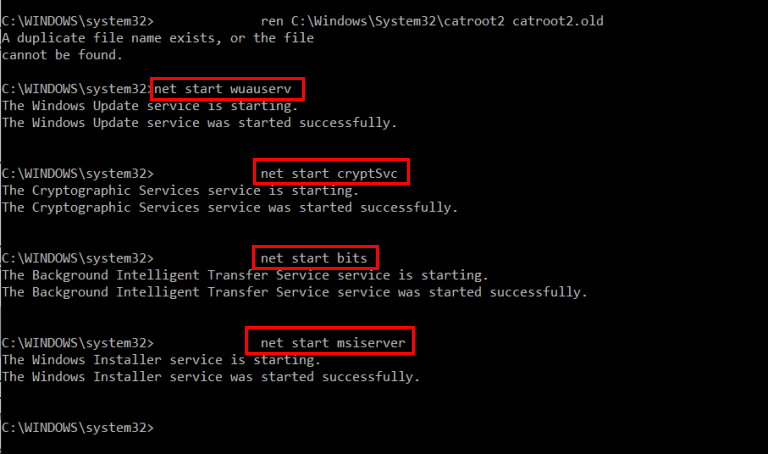
#3. Restart the Windows services
Reboot the BITS, Windows Update, and Cryptographic services by executing the following commands, and ensure to press Enter after each line:
- net start wuauserv
- net start cryptSvc
- net start bits
- net start msiserver
Restart your computer now and check for updates to see if the Windows 11 23H2 fails to install issue is solved.
Solution 4. Run SFC and DISM Commands
The System File Checker (SFC) and Deployment Image Servicing and Management (DISM) tools can also be helpful to repair corrupted or damaged Windows system files during the Windows 11 installation error.
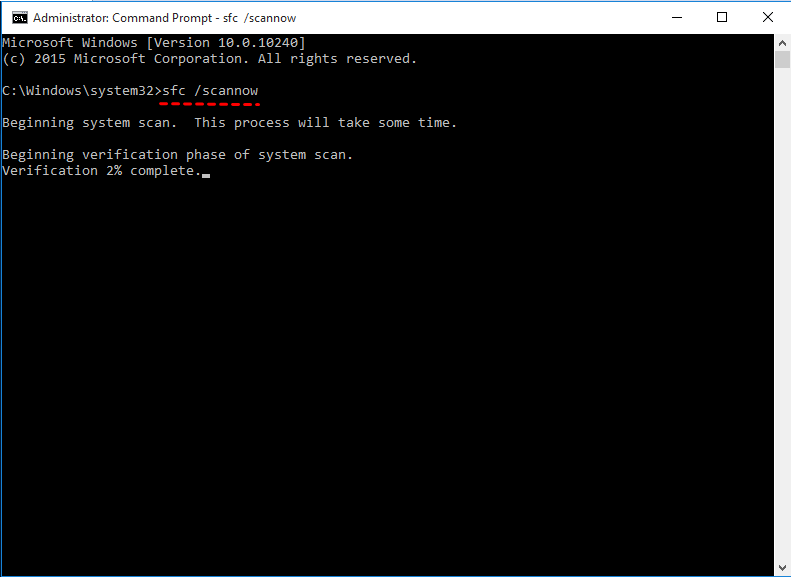
1. Open Command Prompt with administrative privileges.
2. Type sfc /scannow and press Enter, and allow the scan to complete. It will attempt to repair any identified system issues.
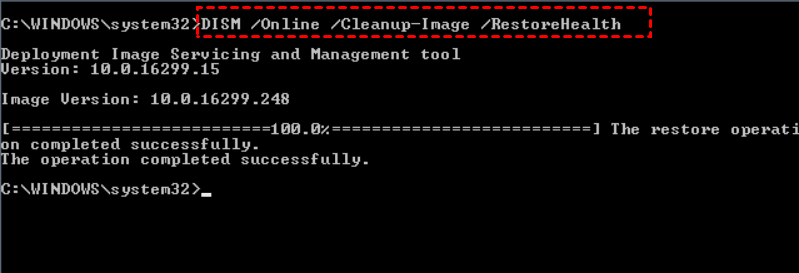
3. When done, run the following commands one by one to check Windows 11 for issues:
- DISM /Online /Cleanup-Image /CheckHealth
- DISM /Online /Cleanup-Image /ScanHealth
4. If there are problems detected, run DISM /Online /Cleanup-Image /RestoreHealth to repair them.
Solution 5. Disable Third-party Antivirus
Certain third-party antivirus programs may inadvertently clash with the Windows 11 23H2 update process. They might block essential system operations required for seamless updates. A potential resolution involves temporarily deactivating the antivirus software during the update process.
Solution 6. Temporarily Remove External Devices
Occasionally, installation errors and issues arise from external devices like USB flash drives, external hard drives, cameras, and printers. Typically, it’s recommended to disconnect the peripherals to avoid Windows 11 version 23H2 install errors. For a smooth installation, retain only essential components: monitor, keyboard, mouse, and an active internet connection.
Bluetooth devices may introduce complications as well. If your system incorporates this wireless technology, disable it from Settings > Bluetooth & devices and turn off the Bluetooth toggle switch before upgrading.
Solution 7. Install and Update using Windows 11 Installation Assistant
If Windows 11 23H2 failed to install after trying all the above solutions, you can get Windows 11 23H2 update using the official media creation tool or Windows 11 installation assistant. Here, we take using Installation Assistant as an example to show you a detailed guide.
👉Note: Before installing, it is necessary to use the PC Health Check app to check PC health on Windows 11, so to make sure that your computer meets the Windows 11 23H2 requirements for installing. If it is not satisfied, the update cannot be installed.
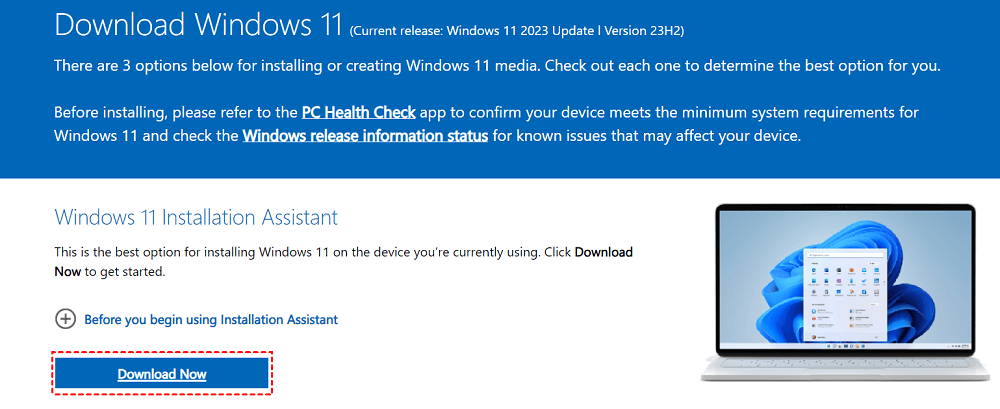
1. Go to the Windows 11 download page from Microsoft, and click on the Download button under Windows 11 Installation Assistant.
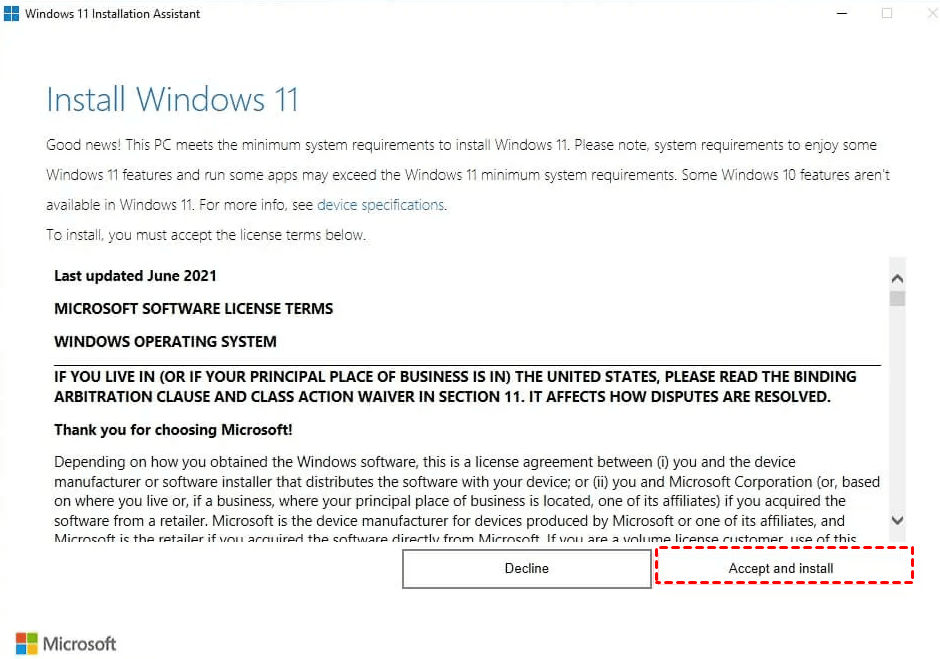
2. Open the installer, accept the license terms, and click Accept and install.
3. Let it download and install files. Your computer will restart in 30 or more minutes or choose Restart now. Then, Windows 11 version 23H2 will be available on your computer.
Safety Tip: Backup Your Computer before Making Major Changes
Whether you are installing a new version of Windows 11 or correcting system installation problems, we strongly recommend that you backup your computer system and important computer files beforehand. Because once certain problem occurs, your system may crash and your important files will no longer be accessible.
To back up your computer, it is recommended to use professional and free Windows backup software - AOMEI Backupper. It allows you to backup system, partition, disk, and files as needed. You are able to perform automatic backups in Windows based on the Daily (By Interval), Daily, Weekly, Monthly (By Week), Monthly (By Date), One Time, and Event triggers frequency.
- It supports you to create Windows 11 backup to network drive, NAS, external hard drive, USB flash drive, cloud storage, and various destinations.
- It also comes with other features like create bootable media to quickly rescue your computer when it cannot boot up correctly; you can also use its clone function to clone hard drive to another disk with ease.
This tool is fully compatible with Windows 11, 10, 8, 8.1, and 7. If you are a server user, please turn to AOMEI Backupper Server. You can follow the steps below to backup your computer:
1. Download AOMEI Backupper and open this tool. Click Backup and select System Backup.

2. The system-related partitions will be chosen by default. You only need to designate a destination for storing the backup image.

3. (Optional) To maintain an up-to-date backup, initiate the process by clicking on Schedule, enabling automatic system backups at regular intervals.

4. Then you can select Start Backup to begin the Windows 11 process.
Summary
That’s all for how to fix Windows 11 23H2 fails to install. Hopefully, one of the solutions can help you get over this issue. Besides, don’t forget to make a backup for your computer using AOMEI Backupper so that you can restore data backups effortlessly in the event of accidents.
You can enjoy the default options, such as normal compression, incremental backup, etc, to save your backup disk space, or unlock premium features like differential backup, automatic backup cleanup, and more in Backup Scheme.

