5 Ways to Fix Windows 11 Won’t Install from USB (Updated)
You can learn why Windows 11 won’t install from USB drive and how to fix this problem in 5 methods including the easiest one. Every method includes a tutorial. Keep reading for more details.
By Miya Updated on September 5, 2025
Why Windows 11 won’t Install from USB?
If you encounter the problem that Windows 11 cannot be installed from USB when installing Windows 11, you need to first understand what may be causing the problem, and then take steps to fix it. This article summarizes the following common reasons for you.
- The USB drive itself is not bootable: Not all USB flash drives are bootable, so you'll need to convert the USB drive to a bootable format before using it to boot into Windows 11.
- Incorrectly configured UEFI settings: If UEFI settings are incorrectly configured, they can interfere with the installation. So, make sure the settings are correct before starting the installation process.
- Not enough free space: Installing Windows 11 on your PC requires a considerable amount of space (at least 64GB). If it doesn't have enough free space, you can't complete the program.
- The USB drive is too old: If the USB drive is too old, Windows 11 may not recognize it. For example, USB 1.0 or 2.0 are not compatible in this case.
How to Fix Windows 11 won’t Install from USB
After knowing why Windows 11 installation has failed and the Windows 11 won’t install from USB, you can continue reading this article to know 5 solutions to fix this problem, including the easiest one. Each method includes a specific operation tutorial. Therefore, you can try these methods in turn to fix this issue.
Fix 1. Perform Universal Restore (Easiest)Fix 2. Check if the USB Drive Is Bootable
Fix 3. Free up space to install Windows 11
Fix 4. Update the USB driver
Fix 5. Run Windows Troubleshooter
Fix 1. Perform Universal Restore (Easiest)
You can choose the easiest method to fix this problem. That is to use a professional backup and restore software AOMEI Backupper Professional to back up the system, and then restore the created backup.
If you have encountered the problem that Windows 11 cannot be installed from USB when installing Windows 11. Then you can first find a computer that has Windows 11 installed and can run normally, and then use this software to create a system image in Windows 11, and its Universal Restore function can help you restore the system backup to a computer with different hardware.
You just need to restore the backup to the computer you are using now. Its Universal Restore function can also help you in the following situations.
- Install Windows 11 bypass TPM 2.0 and Secure Boot.
- Install Windows 11 without disk conversion.
- Instant recovery of a crashed system on different hardware.
- Migrate system to a computer with dissimilar hardware installed.
- Install your system between real and virtual machines.
- Reinstall your system after replacing your motherboard, CPU and other hardware.
After creating a system backup of Windows 11, you can follow the steps below to start restoring to achieve the goal of installing Windows 11 on your computer. By the way, if your computer can’t boot, you also need to create a bootable disk in advance.
Step 1. Insert the USB containing system image and bootable disk into the computer you want to install Windows 11. Then, restart your computer and boot from the bootable disk. When the software interface appears, click Home > Restore > Select image to restore.

Step 2. Select the backup image you want to restore and click Open.
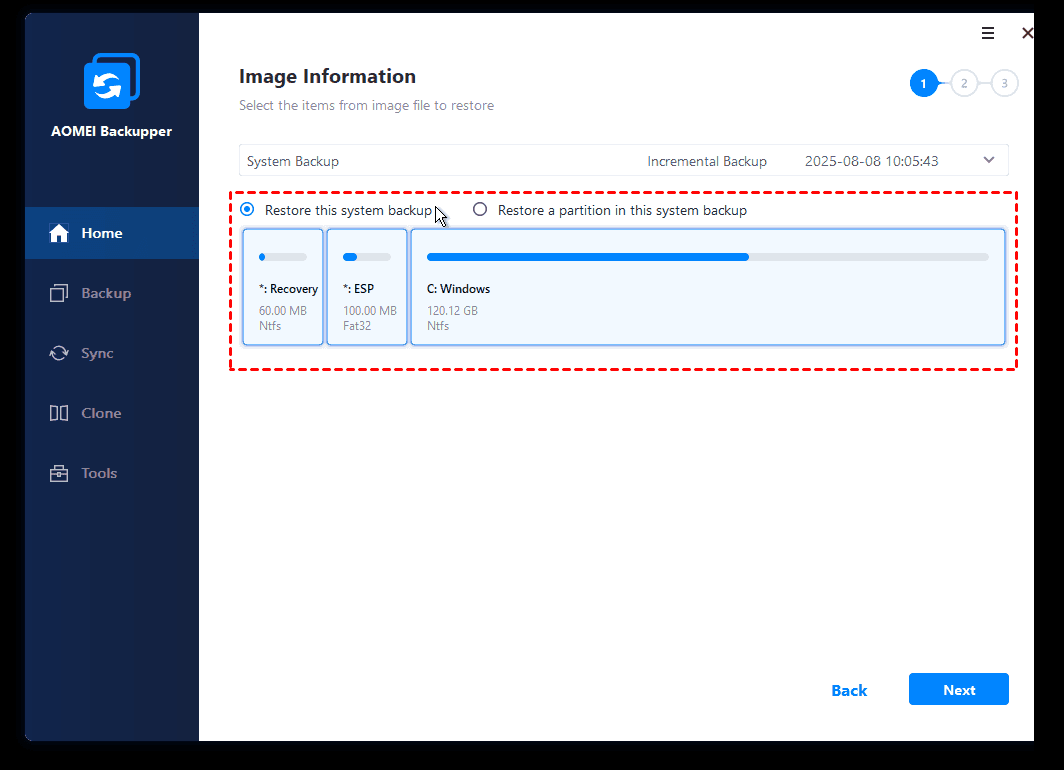
Step 3. Tick Restore this system backup and click Next.
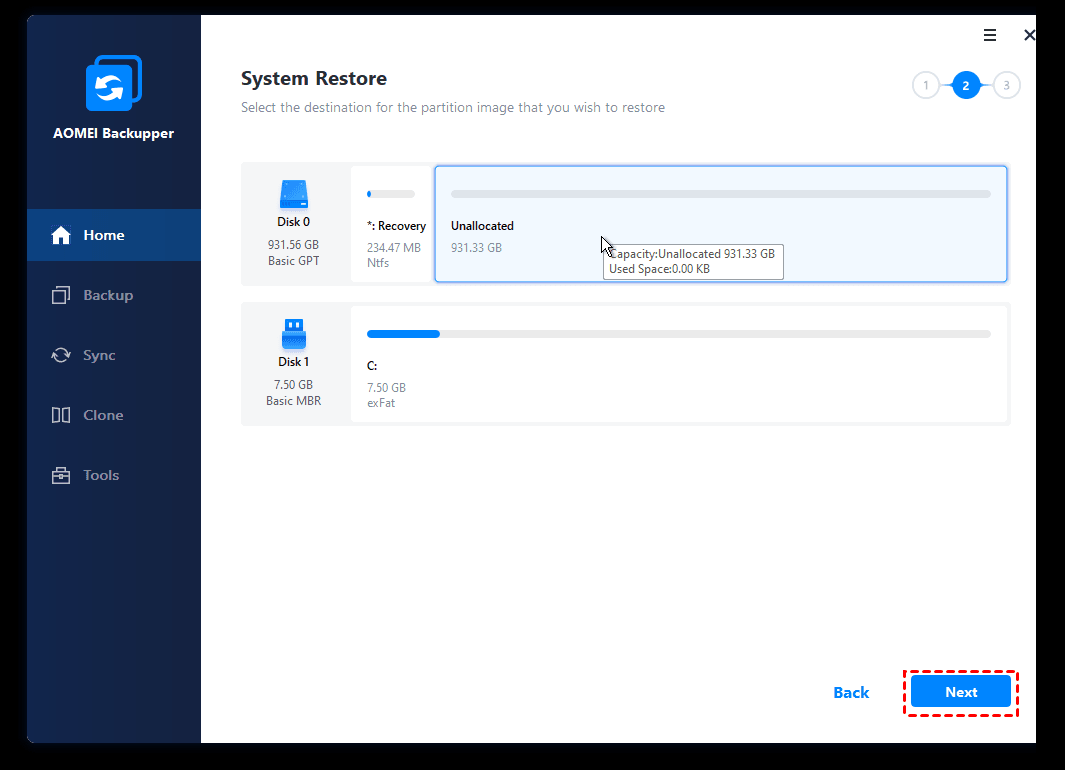
Step 4. Select the destination to restore your Windows 11 to the computer you want and click Next.
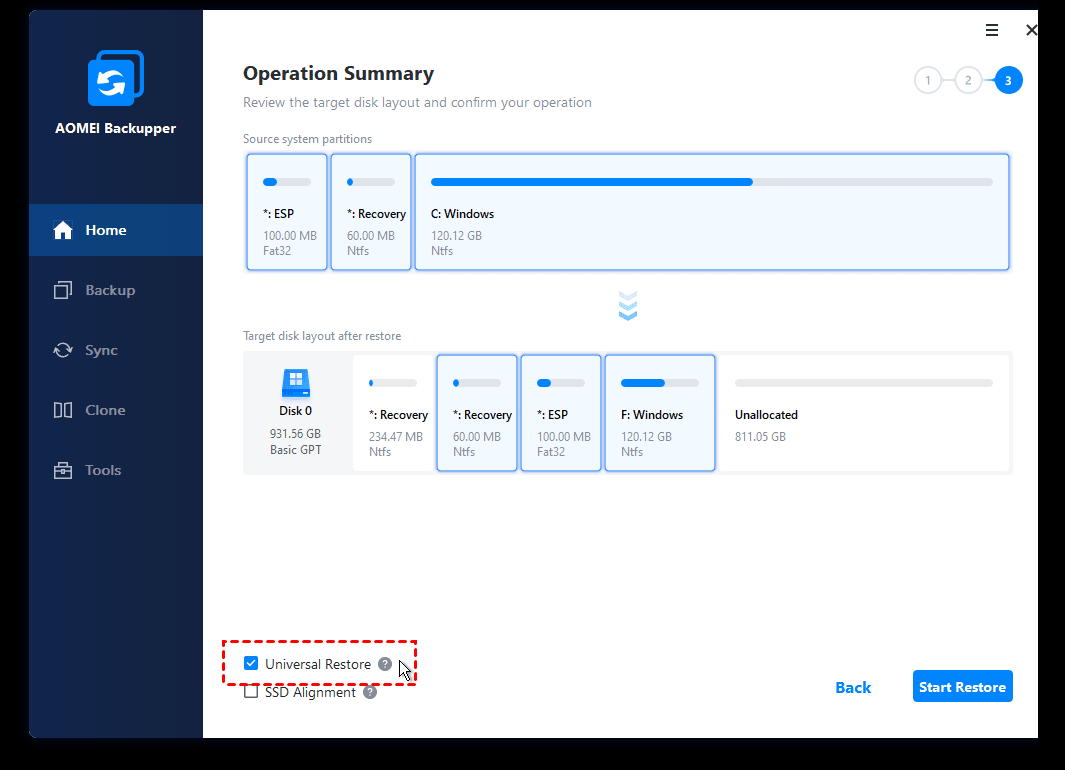
Step 5. If you are restoring the system backup to a computer with different hardware, the software will automatically check the Universal Restore option. You just need to click the Start Restore button.
Fix 2. Check if the USB Drive Is Bootable
If you encounter this Windows not installing from USB problem, first of all, you need to confirm whether your USB flash drive is bootable. You can check the USB drive in File Explorer and start Windows 11 from the Quick Start menu. Then you can follow the steps below.
Step 1. Click the Start button in the taskbar and select Power.
Step 2. Press and hold the Shift key and then click the Restart.
Step 3. Your Windows 11 computer will restart and then boot into the Advanced Startup Options screen as follows. Then, click Use a device to continue.

Step 4. Select the target bootable USB drive and check if your PC can boot from that USB drive.
If your computer can successfully boot from the USB drive, then your USB disk is bootable. If you can't, you can make a bootable USB drive for your Windows 11 computer.
Fix 3. Free up space to install Windows 11
If your computer has insufficient memory, it may also cannot install Windows from USB. Therefore, you can follow the steps below to free up space to ensure that Windows 11 can be installed successfully.
Step 1. Press Windows+ X key and locate File Explorer.
Step 2. Navigate to This PC and verify the disk with the Windows label has at least 20 GB of free space.
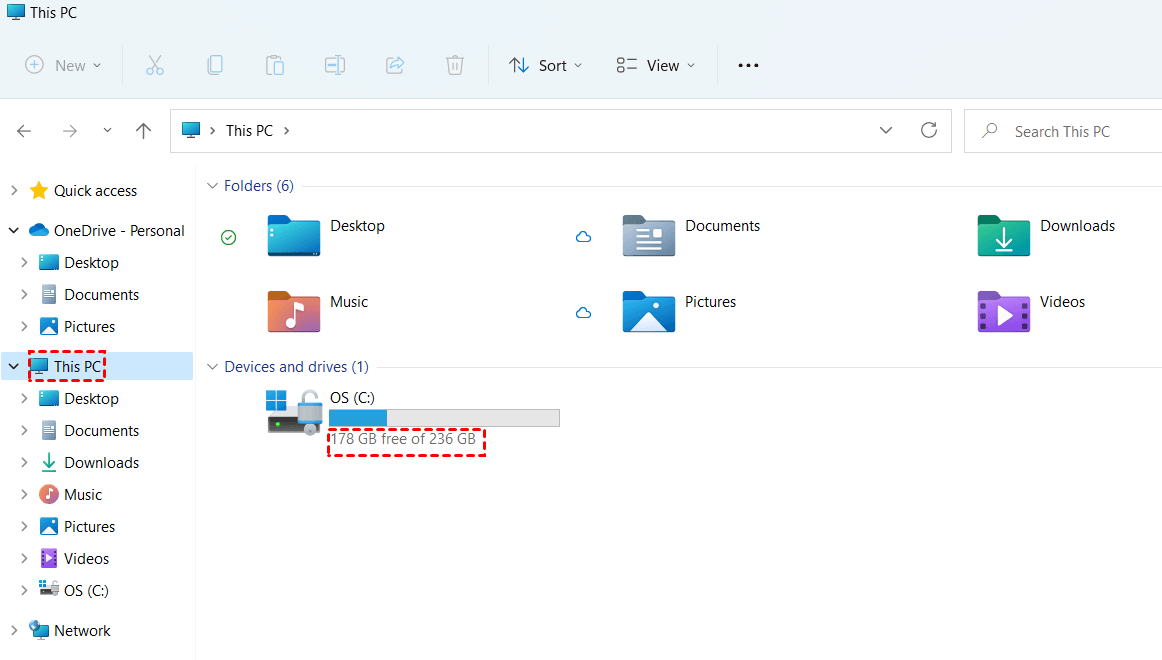
Step 3. If not, you need to delete some files to free up space for Windows 11.
Windows 11 installations require a certain amount of free space on the storage drive. If enough space is not available, then the installation will be interrupted.
Fix 4. Update the USB driver
If the USB drive is too old, Windows 11 may not recognize it. In this case, it will also cause the problem that Windows 11 won’t install from USB. You can update the USB drive by following the steps below.
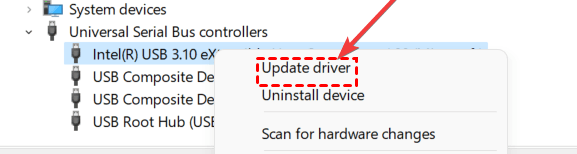
Step 1. Go to the Windows Search bar and type Device Manager then hit Enter.
Step 2. In the Device Manager, locate the USB in question.
Step 3. Right-click the USB and select Update driver.
Fix 5. Run Windows Troubleshooter
If you have tried the previous methods and still cannot solve the problem, you can also try to use the troubleshooting tool that comes with Windows. It can help you automatically troubleshoot some operating system-related problems and help you fix them. You can follow the steps below.
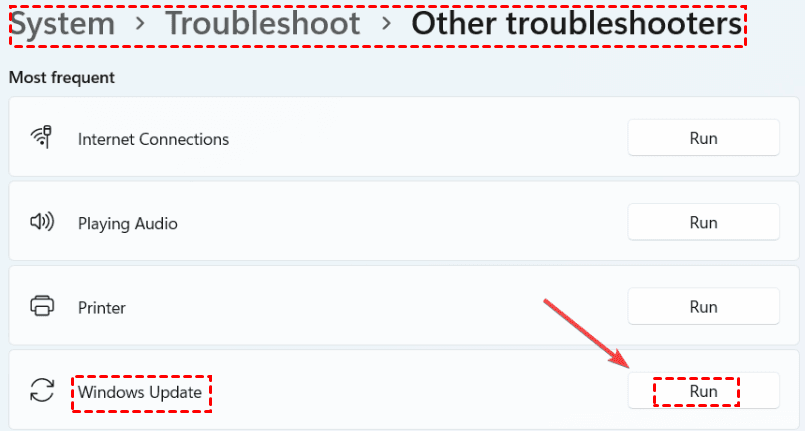
Step 1. Go to the Windows Search bar and type Troubleshoot settings. Hit Enter.
Step 2. Select the Options > Other troubleshooters.
Step 3. Navigate to Windows Update and click on Run.
Summary
This post explains why you might encounter Windows 11 won't install from USB and 5 ways to fix it. You can try these methods in turn, or just choose the easiest method. Use the professional backup and restore software AOMEI Backpper Professional to back up the system on a computer that has Windows 11 installed, and then use the Universal Restore function to restore the system backup to the computer you want to install Windows 11 on.
Besides that, this software is also an excellent cloning software if you want to upgrade the disk. Its Disk Clone function can help you directly transfer all the data of the source disk to the new disk and can successfully start the computer from the new disk. You can download this software to explore more useful functions.

