Fix Windows 11/10 Reset Not Working: Quick Solutions
Don’t know how to fix the Windows 11/10 reset not working problem? Read this detailed post to learn a step-by-step tutorial to fix pc won’t reset. On this page, you can find various solutions to this BSOD error and an easier way to perform PC resetting.
By Yuka Updated on August 28, 2025
User case: Windows 11/10 reset not working
“I don’t understand what is happening. So when I am trying to reset my PC at a certain point, it will say undoing changes, and then a blue screen will pop up and say there was a problem with the PC won't reset. No changes were made. I have no clue what is happening. Can someone explain to me how this happened? Any help would be appreciated.”
- Question from Reddit
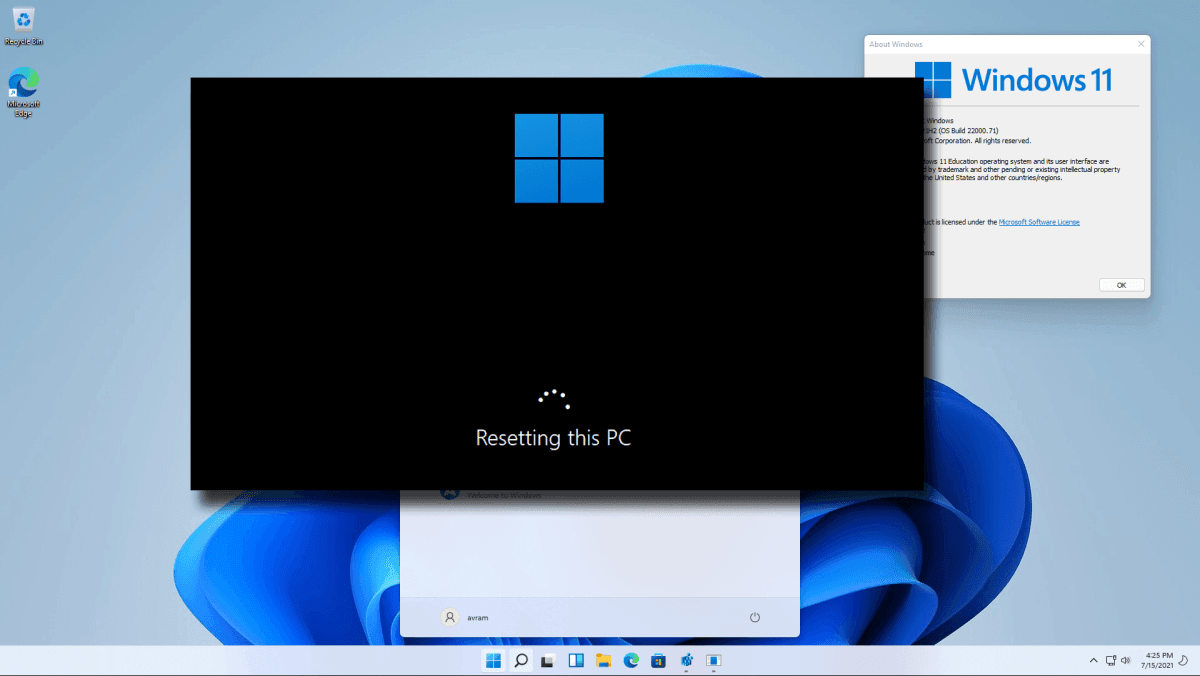
“Reset this PC” is an option in Windows 11/10 that quickly restores Windows to its factory default configuration. It’s faster and more convenient than reinstalling Windows from scratch or using your manufacturer’s recovery partition.
If you plan to sell or donate your computer to someone else, it’s suggested that you reset the computer to factory settings so that your information or privacy will not be leaked.
As shown in the above case, many users have encountered some reset failed problems when using the "Reset this PC" function. When your Windows 11/10 reset not working properly, do not be panic. The following methods will help you solve this problem.
For a Windows 11/10 restoration without reinstalling, consider utilizing professional backup software - AOMEI Backupper. This tool efficiently backs up your system and facilitates swift restoration to its previous state. Additionally, it automates regular data backups. Click the link below to learn more.
Easier Way to Perform Resetting in Windows 11/10🔥
How to Fix There Was a Problem Resetting Your PC in Windows 11/10
Now let’s start to see how to fix the “There was a problem resetting your PC. No changes were made.” error in Windows 11/10. Most of these solutions also work for Windows 7 or Windows 8.
|
✅ 1. Run Startup Repair |
Start your PC -> press the power button as soon as the Windows…Full steps |
|
✅ 2. Try Command Prompt |
First of all, open an elevated command prompt. To do this, type cmd in the search box…Full steps |
|
✅ 3. Use a restore point |
Press Windows + R on your keyboard to open the Run box…Full steps |
|
✅ 4. System Image Recovery |
Open the Start menu and select Settings. Navigate to System -> Recovery…Full steps |
|
✅ 5. Use a recovery drive |
Insert an empty USB Flash drive (16GB recommended) into your computer…Full steps |
|
✅ 6. Fresh install Windows |
Insert the installation media, and then restart your computer…Full steps |
Solution 1. Run Startup Repair🔥
Windows 11/10 includes a built-in startup repair tool designed to detect and fix common startup problems. This tool can be a lifesaver when your system fails to boot properly. To run Windows startup repair, follow the steps below:
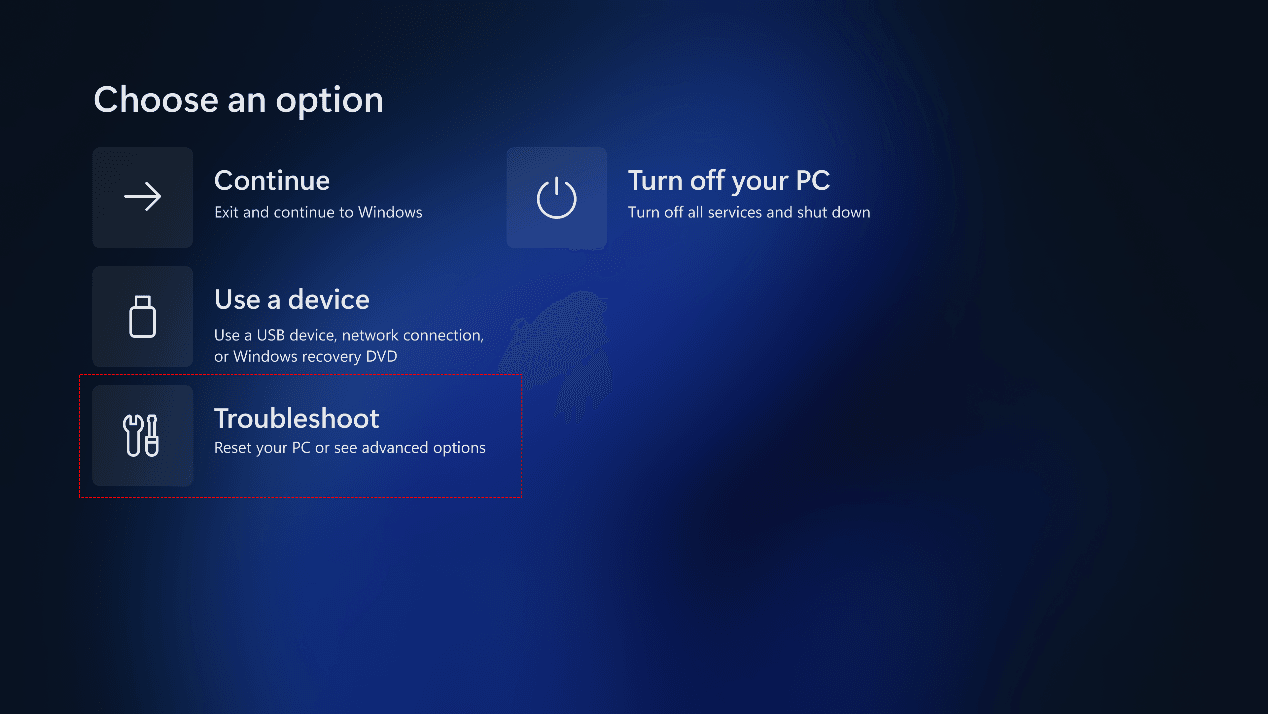
- Start your PC -> press the power button as soon as the Windows logo appears -> keep pressing the power button to perform a hard shut. Then repeat this step two more times to access the advanced startup environment.
- Choose Advanced options when the recovery screen appears.
- Then click Troubleshoot -> Advanced options.
- In the Advanced options tab, select Start-up Repair.
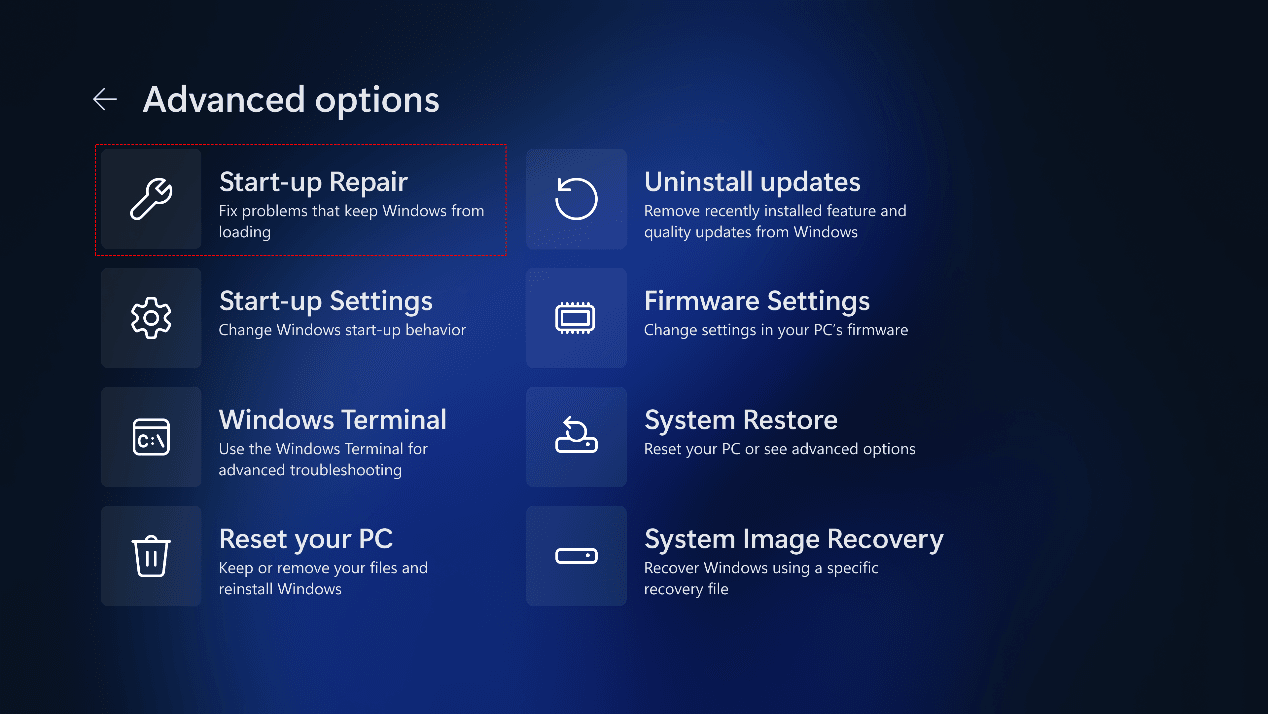
Soon after, Windows will scan and diagnose your PC for any issues that may be preventing it from functioning properly.
Solution 2. Try Command Prompt🔥
To fix the Windows 11/10 PC won't reset error, Command Prompt is another way to go. There are four groups of commands you can try.
First of all, open an elevated command prompt. To do this, type cmd in the search box, right-click Command Prompt, and then click Run as administrator.
♦ Using the SFC command
SFC can be used to scan and verify protected files (Windows Files). If it finds that a file has been damaged and cannot be verified, it attempts to restore a fresh copy from the below folder in your PC.
- Once in Command Prompt, type in the following command and hit Enter:
☞ sfc /scannow - Then type exit to close the command prompt and reboot the system, go to see whether you can reset your PC or not.
♦ Restore health with DISM
SFC and DISM are two command-line tools that are more commonly used by IT techs. DISM can be used to fix what SFC does not. Thus, if the sfc /scannow is not working, you could try DISM.
- Open command prompt with administrator priority.
- Type the following command and hit Enter.
☞ DISM /Online /Cleanup-Image /RestoreHealth
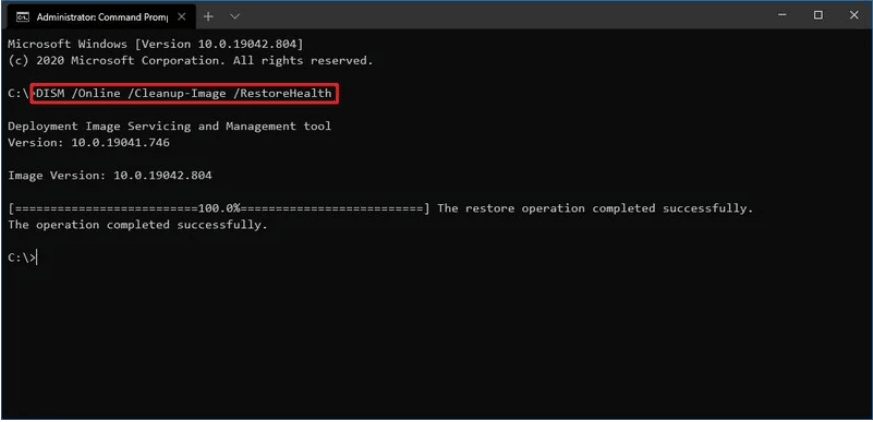
- Reboot your system, and attempt to Reset this PC again.
♦ Rename system and software registry
- Type the following commands in the command prompt window and press Enter:
cd %windir%\system32\config
ren system system.001
ren software software.001
- Close the Command Prompt. When you are in the Windows Recovery Environment, select Continue to boot your Windows. Check if the “There was a problem resetting your PC” error is fixed.
♦ Disable and enable reagent
- Type the following commands one by one in the command prompt window. Each one finished by pressing the Enter key.
- reagentc /disable
- reagentc /enable
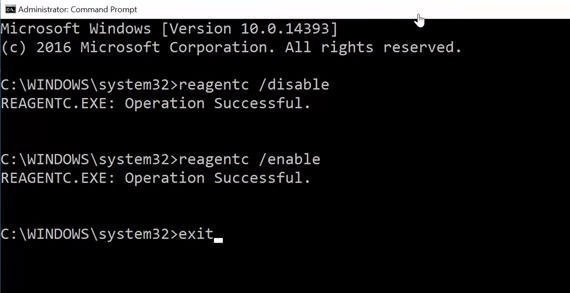
- Type “exit” to leave the Command Prompt. Restart Windows and try to reset your computer.
Solution 3. Use a system restore point🔥
System Restore in Windows 11/10 creates restore points so that your computer can be restored to its previous working state. In some systems, System Restore is disabled by default. You must enable it before your system will begin creating restore points.
If your system restore point is created, you can simply follow the task below to restore your system to an earlier state.
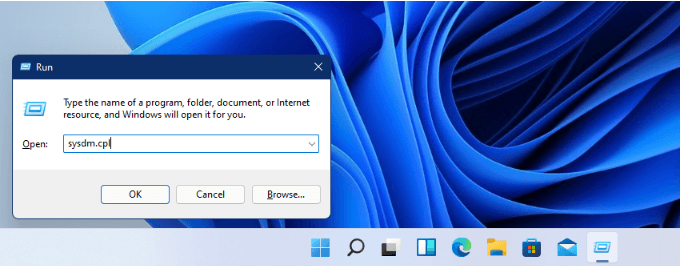
- Press Windows + R on your keyboard to open the Run box. Then type sysdm.cpl command and press Enter to open.
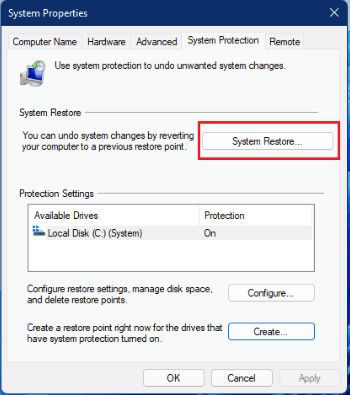
- Go to the System Protection tab and click System Restore.
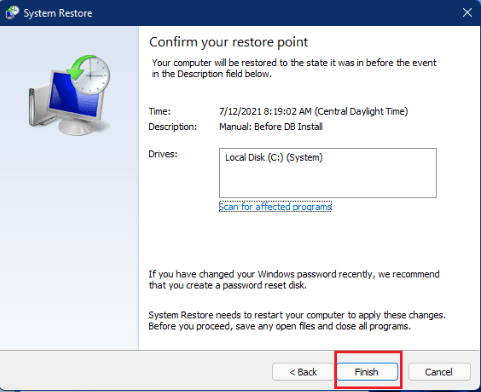
- Select the restore point you wish to restore to and click Next.
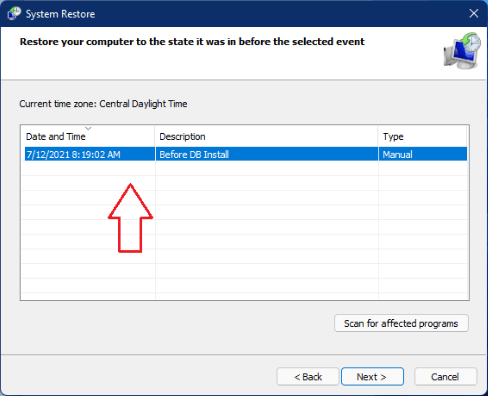
- Then click Finish to begin the restoration.
Solution 4. Restore from system image backup
A system image is a backup file of your system drive that can restore your operating system in case a system failure occurs. There is not much change in creating a system image in Windows 11/10, it is similar to the process of creating a Windows 10 system image backup.
When you are unable to reset Windows 11/10, you can solve this issue by restoring the system to the previous version from a backup if you have one. To restore from an image backup, follow the steps below.
- Open the Start menu and select Settings.
- Navigate to System -> Recovery.
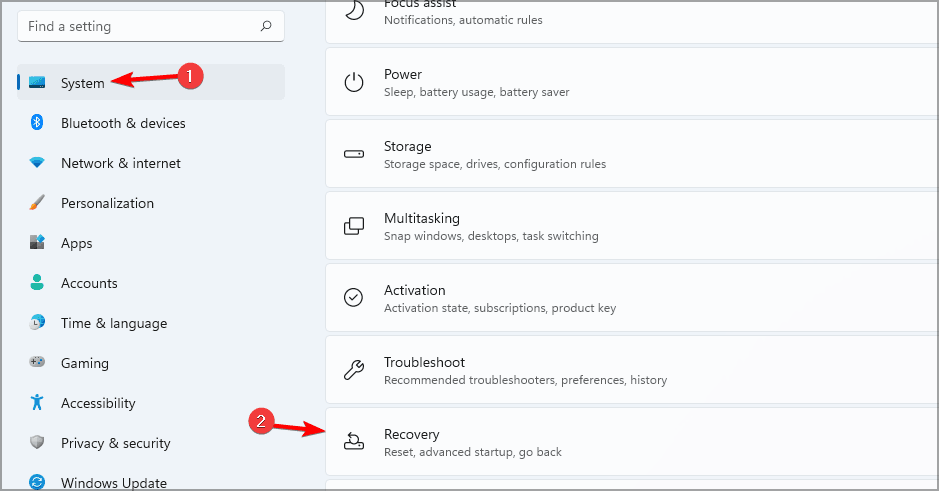
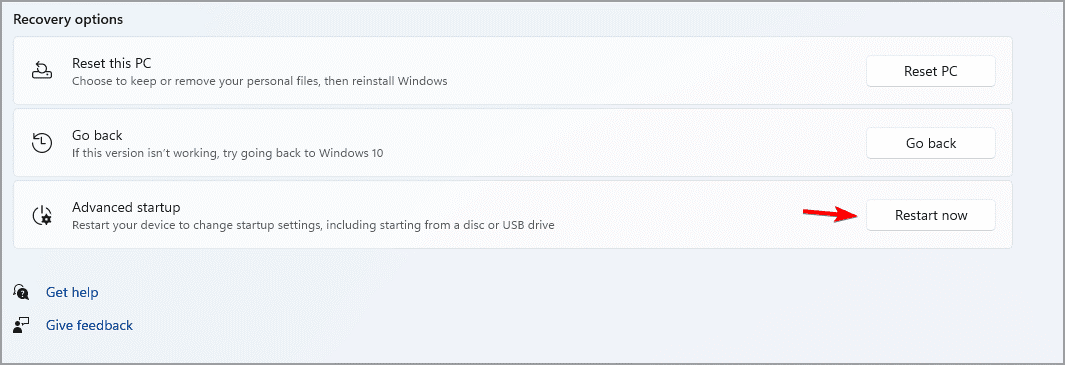
- In the Advanced startup click on Restart now.
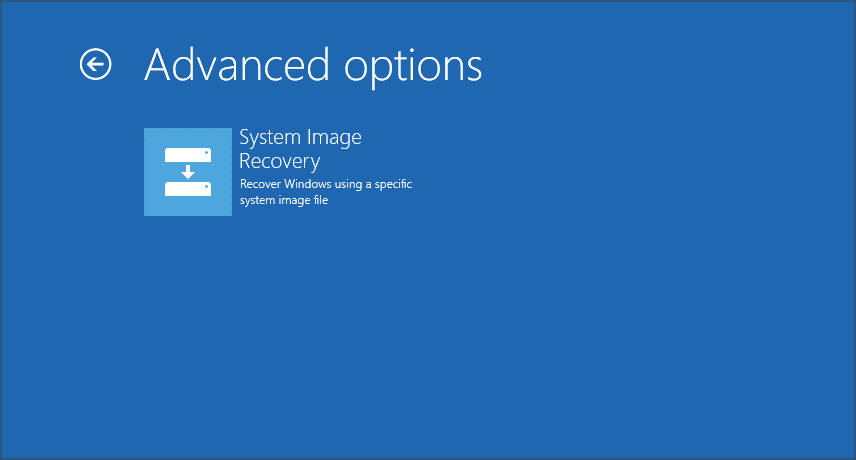
- When the PC restarts, select Troubleshoot -> Advanced options -> See more recovery options.
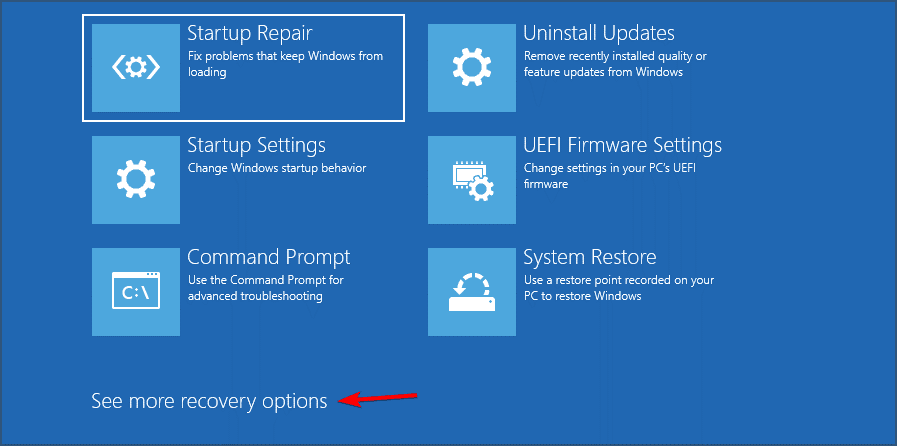
- Select System Image Recovery.
- Then choose your system image and click on Next.
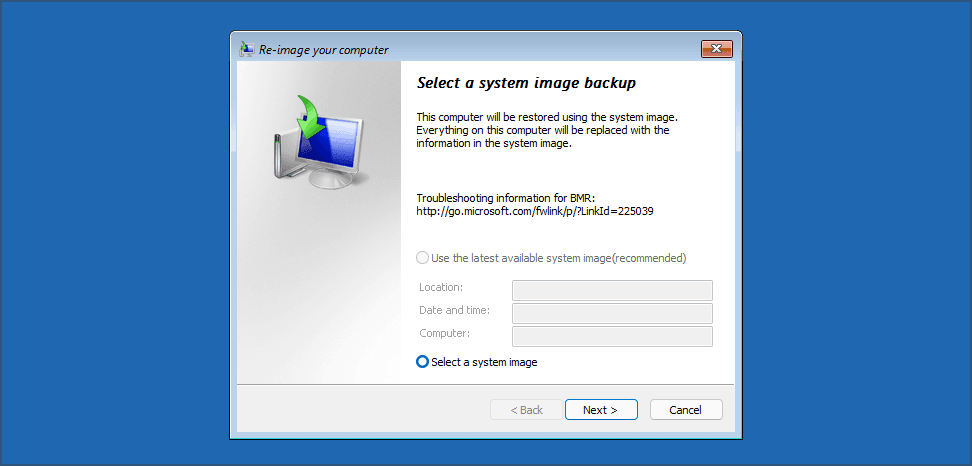
- Follow the instructions on the screen to complete the process.
Solution 5. Recover from a recovery drive
♦ Create a recovery drive in Windows 11/10.
Note: The destination drive will be formatted and everything on the drive will be deleted. If the drive contains personal files and data, make sure to back up files first before erasing them.
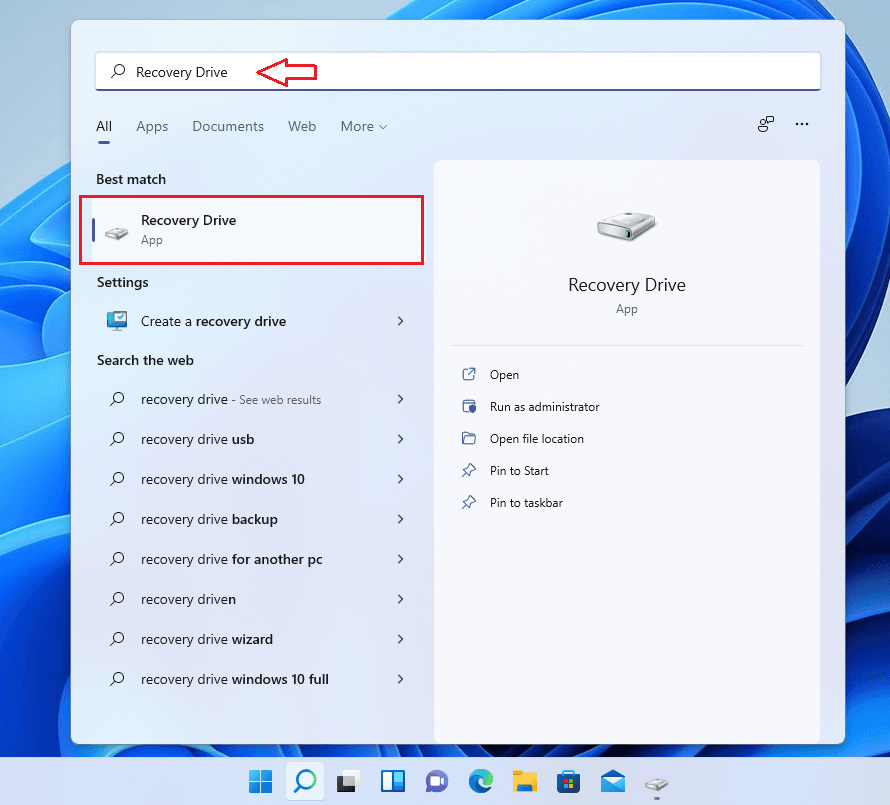
- Insert an empty USB Flash drive (16GB recommended) into your computer.
- Click on the Start menu, then search for “Recovery Drive” and select it.
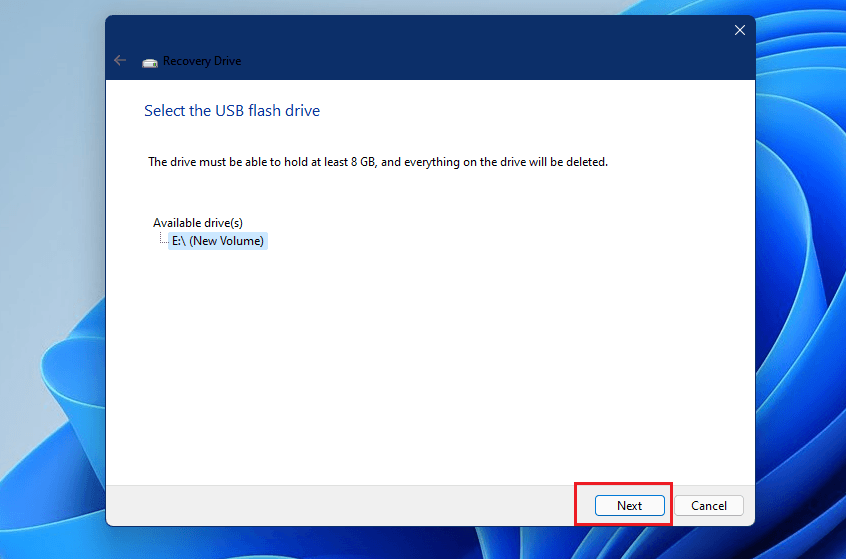
- When the program opens, Windows will automatically begin searching your computer for a suitable drive. Once the drive is located, click Next to continue.
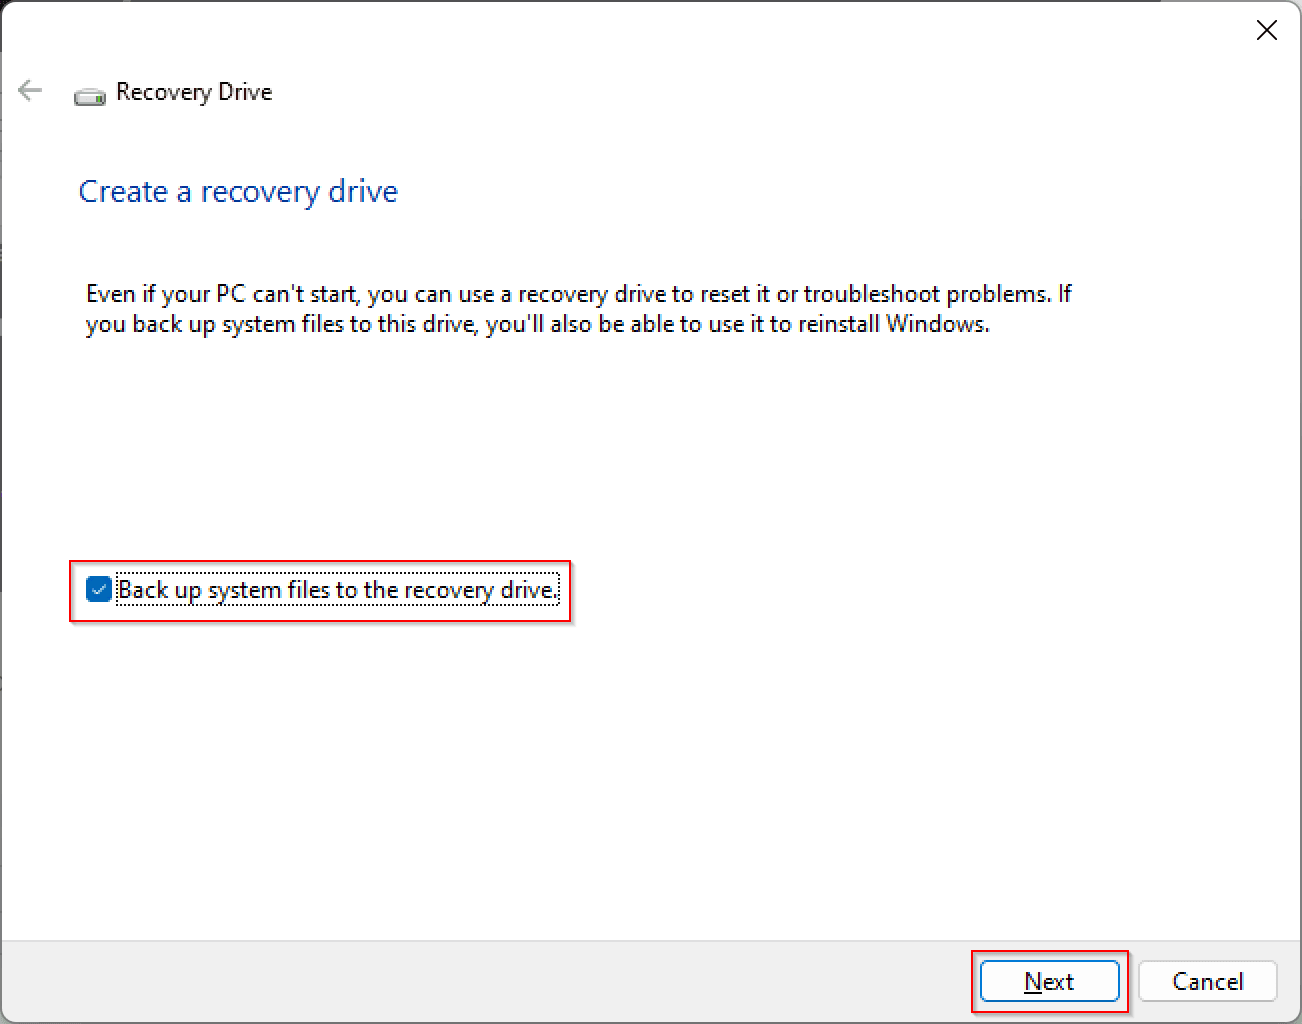
- Recovering your PC from a drive will remove all your files and apps, you can choose to tick on Back up system files to the recovery drive to back up and then click on Next.
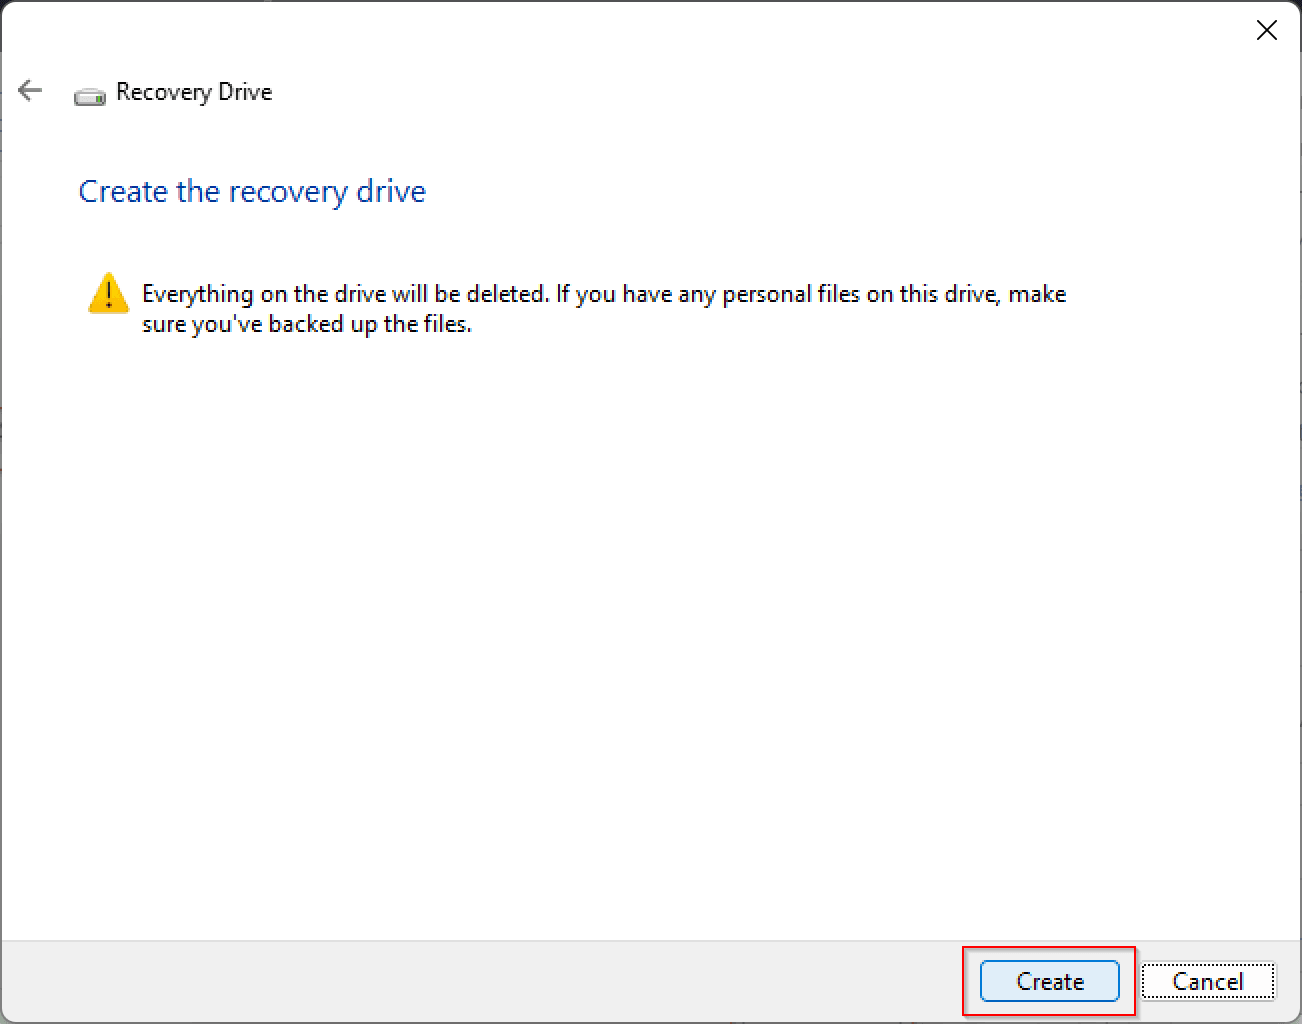
- It will prompt you that the drive will be formatted. Once ready, click Create.
♦ Recover Windows 11/10 from the recovery drive
- Connect your flash drive to the computer.
- If you have an OS installed, restart it to Advanced Startup Options.
- In the Advanced Startup Options, select Use a Device.
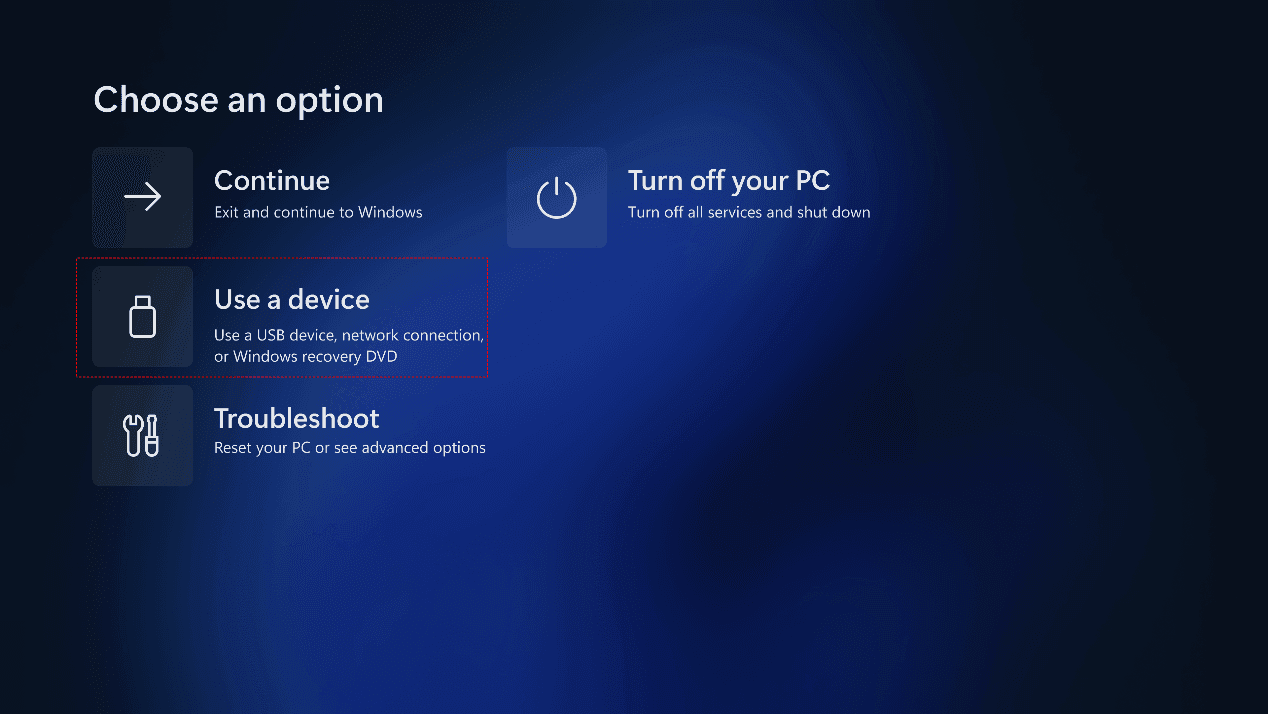
- Click on the USB drive to boot from it. Finally, follow the on-screen instructions to recover the PC.
Solution 6. Fresh install Windows
If none of the above methods solve the problem of “resetting the PC”, you can try to fresh install Windows 11/10. To clean and install Windows, you can use the Windows 11 Media Creation tool to create an installation package on a USB flash drive or a CD.
It’s worth noting that please back up your Windows 11/10 to a USB drive in advance in case you will not lose any important data.
- Insert the installation media, and then restart your computer.
- Press a specified key (usually F2 or F11) when the computer starts up to boot into BIOS and modify the boot order so that your computer will boot from the installation disk.
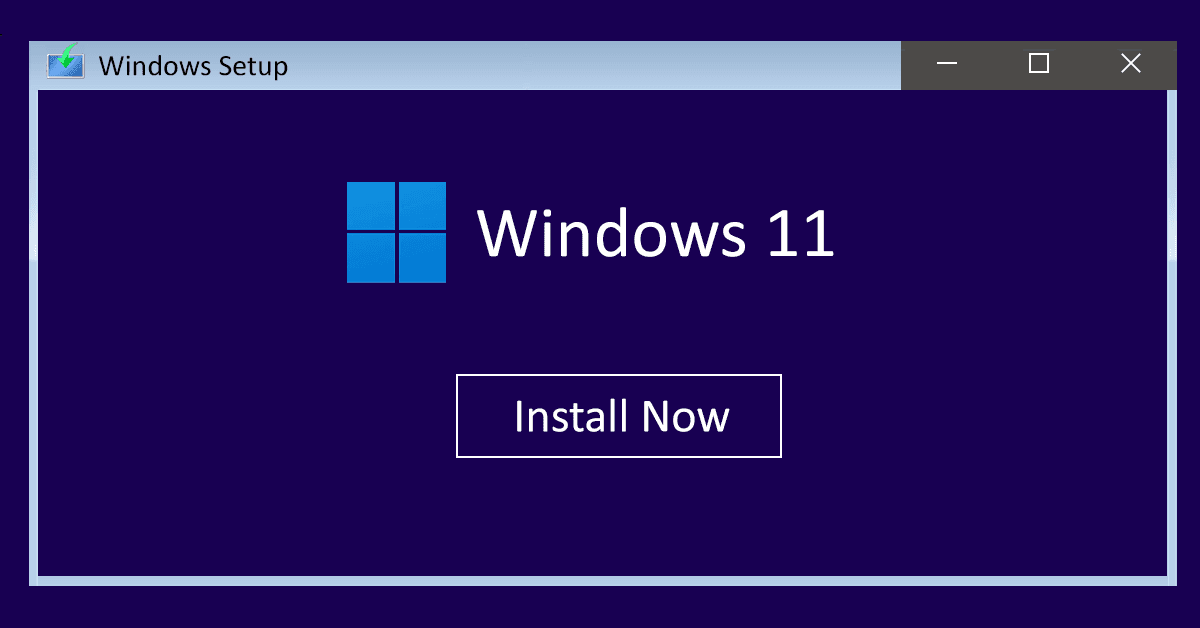
When loaded, click Install Now, and follow the instructions to complete the process.
Easier Way to Perform Resetting in Windows 11/10
As you know, resetting your PC takes it back to factory settings. This means all of your software and some of your personal data will be removed. In the process of resetting the computer, some system problems may occur. Once a system problem occurs, it will cause a lot of trouble and even cause permanent loss of some of your important data.
Therefore, it is necessary to back up your system and data to protect your computer. You can use free software like AOMEI Backupper and here are the reasons why you would choose it:

- Powerful Free Backup Software: Create system images for various Windows versions (11/10/8.1/8/7/XP/Vista).
- System Image Backup for Restoration: Restoring Windows to a previous state using the system image backup.
- Create Bootable USB for System Restore: Enables easy creation of a bootable USB drive for WinPE, facilitating system restore.
- Comprehensive Data and System Protection: Offers a range of features including Backup, Clone, Sync, and Restore.
Next, we will show you how to restore the computer to an earlier state easily via AOMEI Backupper. Download the freeware and do some preparations to get started:
Preparations:
◑ Go to the Backup tab and choose System Backup to create a system image for recovery needs.
◑ Go to the Tools tab and use the Create Bootable Media tool to make a recovery media in case the computer fails to boot.
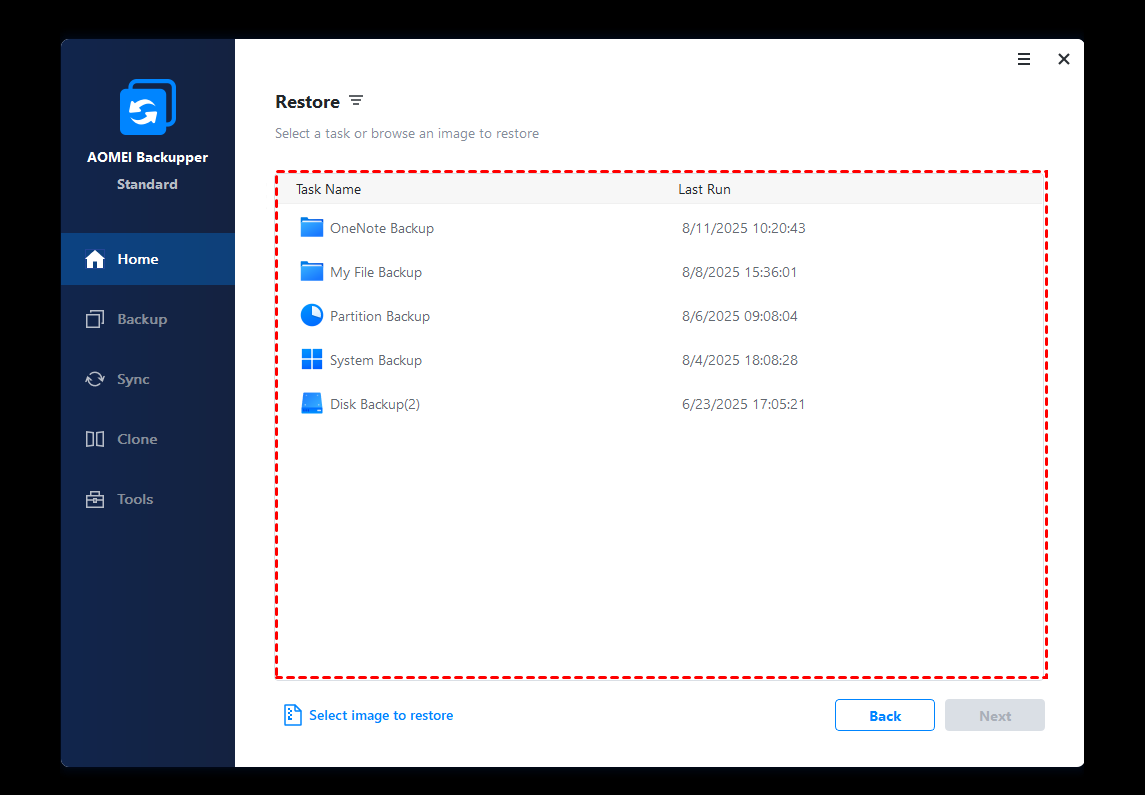
Step 1. Launch AOMEI Backupper. Click Home > Restore on the left side. Then, select the target task to restore or click on Select image to restore to find the system image you created before.
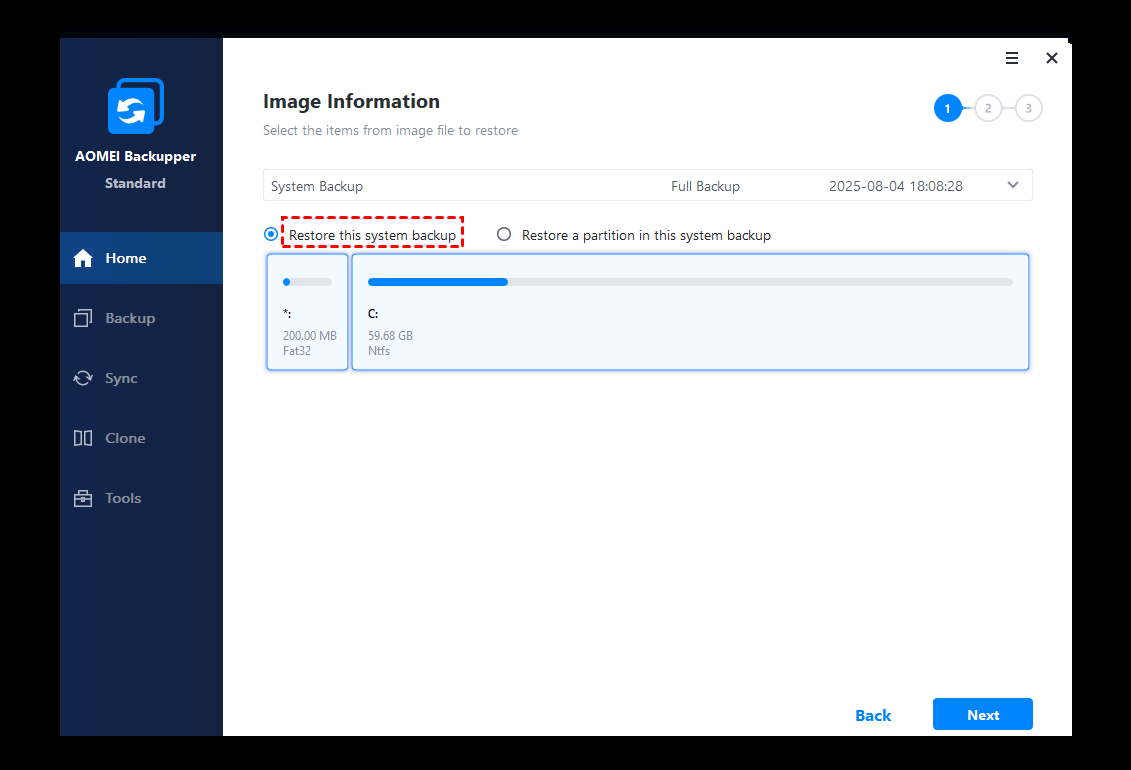
Step 3. Then, select to restore the entire backup or a part and click Next. Then, select the restore destination as needed.
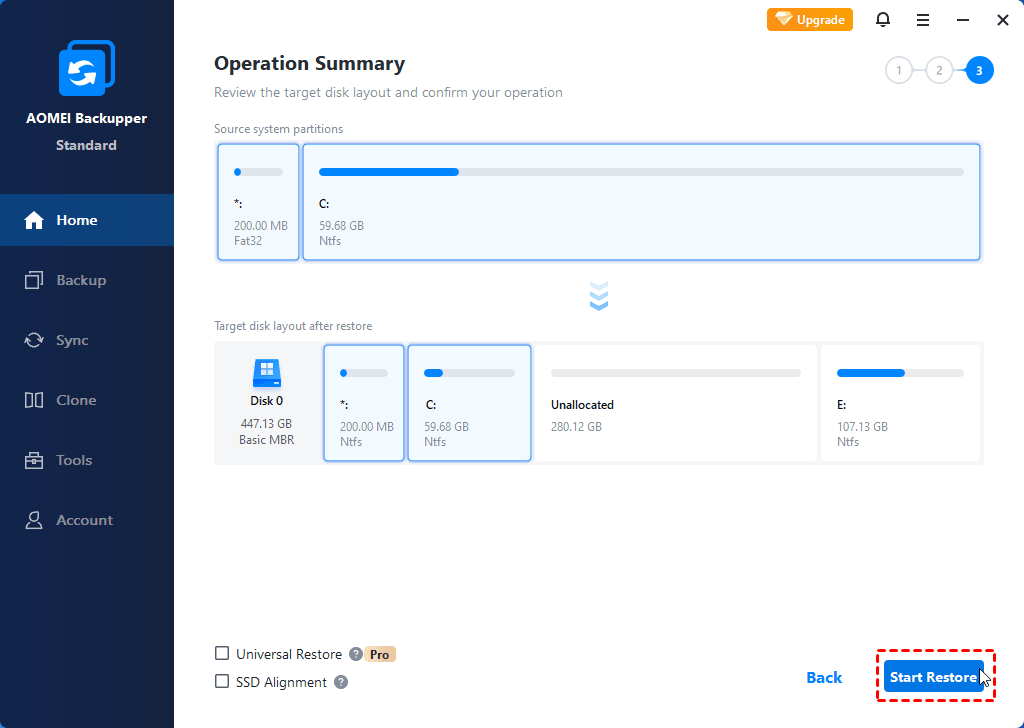
Step 4. Then, click Start Restore to execute the process. When the progress is complete, click OK to exit.
Tip✍:
Universal Restore: If the system image is created on another PC with different hardware, you need to tick Universal Restore to make sure the computer can boot up after restoration (supported by the professional edition).
FAQs on Windows 11/10 Reset Not Working
Conclusion
That’s all for solving the “Windows 11/10 reset not working” problem. Hope one of the above solutions can help you get out of the trouble.
Before resetting your PC, it is necessary to make a full backup to prevent data loss. With the image backup created by AOMEI Backupper, you can restore your computer to its previous normal working state at any time. It can also help you transfer data between a laptop and desktop, replace the old hard drive with a larger SSD, etc. Try it right now!

