Synology Real Time Sync Between Computer/Another NAS: 2 Ways
How to sync data on Synology in real time with your PC or another NAS drive? Generally, you can try built-in tools, but if you want simpler operation or want to real-time sync other NAS like QNAP, Asustor, etc., here’s another solution worth trying.
What is real time sync?
Sync means to replicate folder(s) and maintain the original structure, ensuring the target and source directories have identical files. Therefore, it’s also known as mirror backup. Compared to backup files, synchronized data isn't compressed and can be used directly, which is especially useful for off-site work or multi-person collaboration. To automate the sync, many users would add a schedule to execute it daily, weekly, etc. But there are still gaps between scheduled time points; any changes made to the data won't be captured immediately. That's where real time sync comes in.
Real time synchronization refers to the uninterrupted (or continuous) exchange of data between systems, ensuring that changes in one system are immediately reflected in other systems. It can boost efficiency, as it synchronizes the target folder with the source folder in real time without a delay. Take real time sync Synology as an example, you can:
- Real-time sync computer files to Synology NAS
- Real-time sync data between multiple Synology NAS
This way, while you modify data in the source folder, anyone who logs into the NAS can see the latest changes almost simultaneously. And you don't need to do any further operations after the first-time setup. Everything will run in the background intelligently and smoothly.
How to perform Synology real time sync in 2 methods
Synology provides a variety of tools to help you protect and share data, including the one that is commonly used for Synology real-time sync, called Synology Drive. It allows you to synchronize files between a centralized Synology NAS with multiple client Synology NAS devices or computers.
If you want a more comprehensive sync and backup solution that works on Synology as well as other NAS devices, AOMEI Backupper is a good choice. This software supports all Windows OS and various storage devices, offering you rich functions within an intuitive interface. For example, you can easily sync Synology with computer, sync two Synology NAS, or sync NAS to cloud and other storage.
Method 1. Real time sync Synology NAS with client NAS or PC
Grew out of Cloud Station, Synology Drive inherits all its features and has better performance. Synology also recommends you use this utility for file synchronization. If you still want to use Cloud Station, however, there is a detailed official tutorial for your reference.
>> To use Synology Drive, you need to install the Synology Drive Server package on both the host Synology NAS and the client Synology NAS first, then the sync app Synology Drive ShareSync will be installed on DSM automatically.
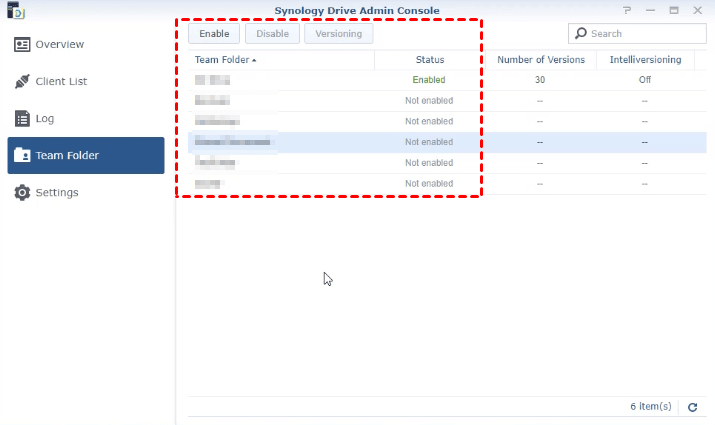
>> After installation, please enable shared folders in DSM > Synology Drive Admin Console > Team Folder. Thus, you can access them in Synology Drive.
>> Go to Download Center and enter your product type and model name to download Synology Drive Client desktop application from Desktop Utilities. Then install it following the wizard.
After installing Synology Drive on both host NAS and client NAS, you can try the following steps to real-time sync Synology NAS with multiple NAS or local PC, either one-way or two-way.
How to sync data between multiple Synology NAS:
💡To sync data between multiple Synology NAS devices in real time, your Synology NAS device should be the host server, and the paired Synology NAS devices will be its client devices.
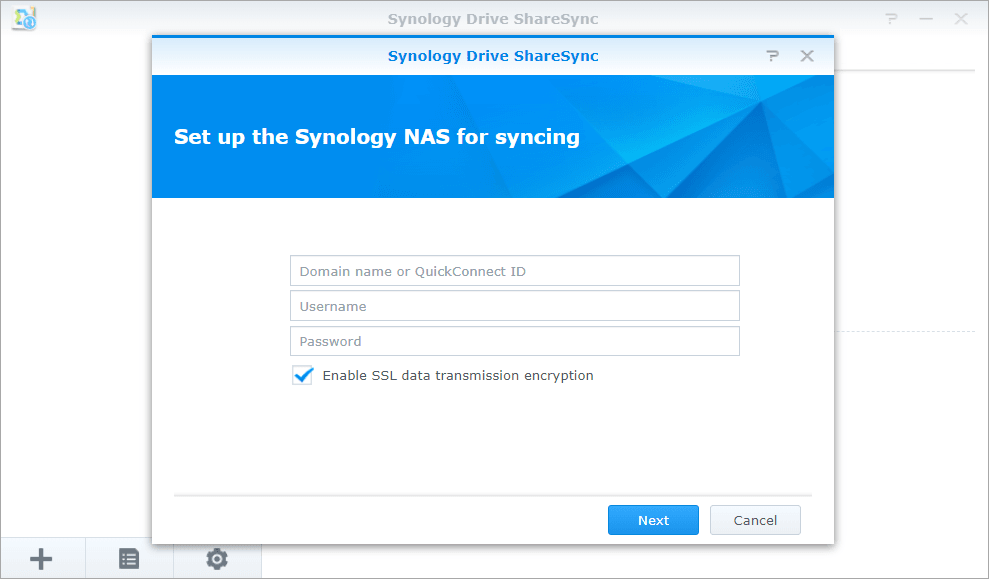
1. Launch Synology Drive ShareSync in DSM to establish the connection. Enter the login credential of your host Synology NAS device. For domain users, use domain name/username instead.
If you have further problems connecting to the host Synology NAS, please go to this guide for details.
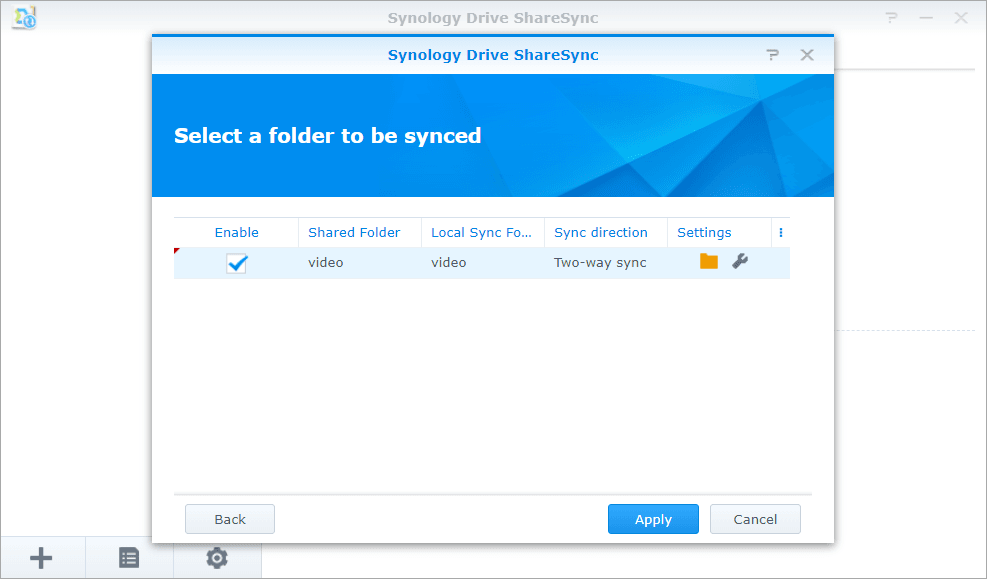
2. Select the remote and local shared folders you want to sync, then Apply it.
3. After completing the setup, you can then manage the task or create more tasks with the Synology NAS.
How to real-time sync Synology NAS with computer:
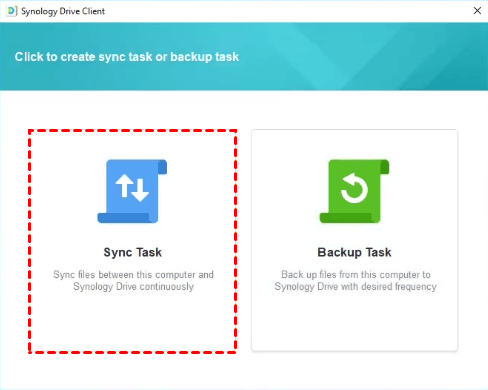
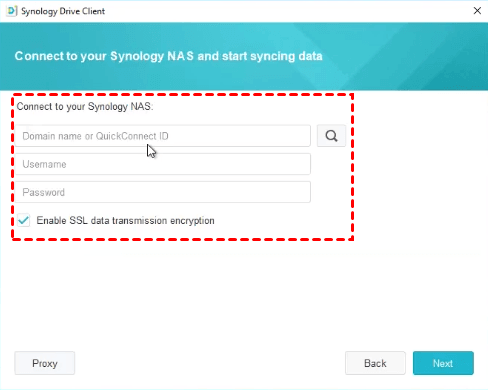
1. Launch Synology Drive Client from your desktop, choose Sync Task to set up Synology NAS data synchronization.
2. Connect to the Synology NAS with Synology Drive Server installed.
3. Click Edit (pencil icon) to select the local and remote folders you want to sync, and do further settings in Advance.
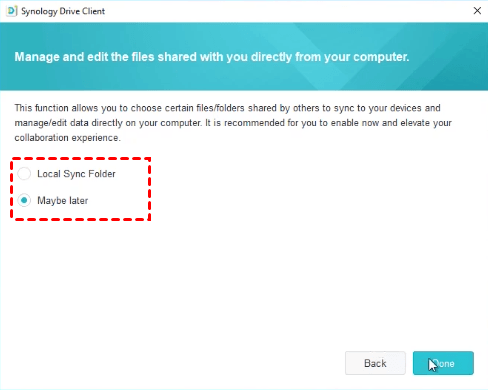
4. Choose whether you want to sync files in the Synology Drive “Shared with me” folder to a local folder.
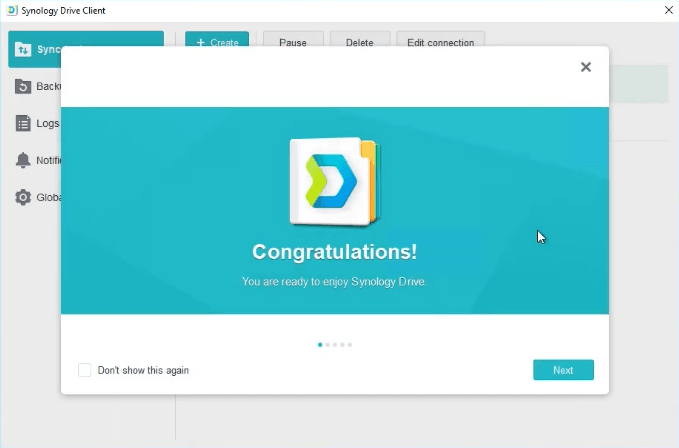
5. After finishing the setup, you could then manage your backup task or create new tasks in Synology Drive Client.
Method 2. Real-time sync Synology NAS between computer or another NAS
Not only Synology, AOMEI Backupper Professional supports various NAS drives, network shares, cloud services, and also internal/external hard drives. As long as you are running a Windows PC (Windows 11, 10, 8.1/8, 7, or Vista), you can arrange data synchronization very easily.

- It offers several sync modes to replicate folders between the supported devices, including Real-Time Sync, Two-Way Sync, and Mirror Sync as per your needs.
- It allows to sync files between Snology NAS and computer, perform Synology sync between two NAS, and sync Synology NAS to external hard drive, and it also supports QNAP NAS, Asustor NAS, etc.
- If you sometimes want to create restorable backups for important files or OS, this tool can help you with it. Add a schedule to run automatic Synology incremental backups, which will copy only changed files each time and enable you to recover any of the earlier versions.
In Synology, you may need to install multiple utilities to obtain all these features, but AOMEI Backupper simply provides you an all-around solution. Just click the button below to start the free trial. Now I'll give an example of how to sync between two Synology NAS to show you the operation.
*Real-Time Sync is available in Pro or higher editions. If you are fine with scheduled automatic synchronization, the completely free Standard edition could work just fine.
How to perform Synology real time sync with another NAS or computer:
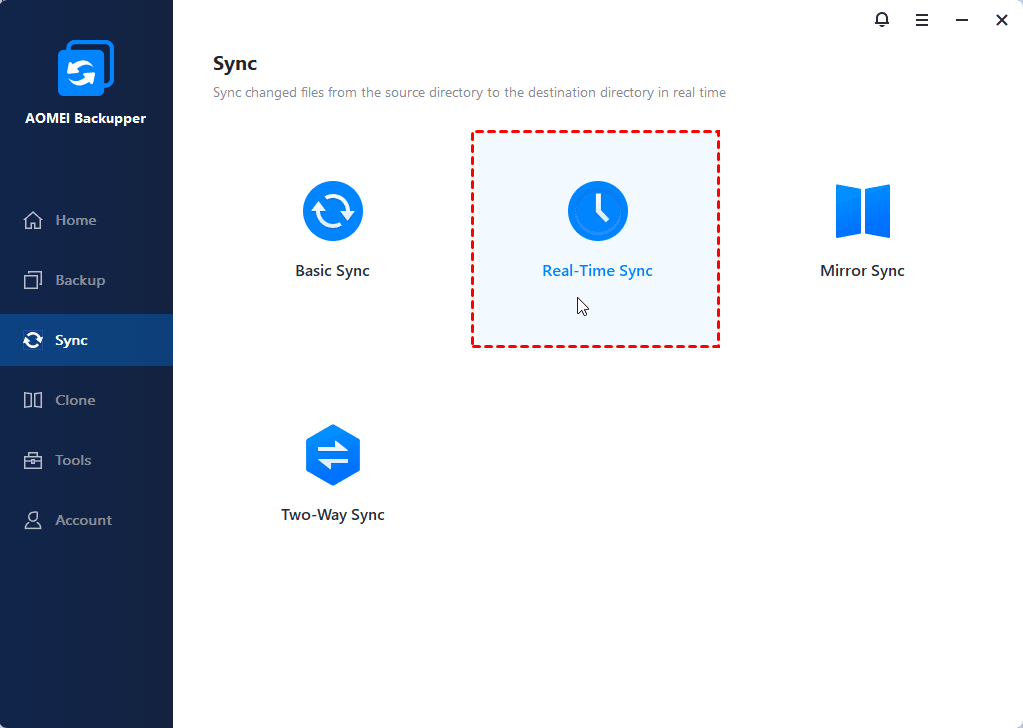
1. Launch its main interface, select Sync on the left panel, and then choose Real-Time Sync.
👉Basic Sync: One-way sync changed files from folder A to folder B.
👉Mirror Sync: Make folder B identical to folder A. Changes made to folder B solely will be reversed at the next sync.
👉Two-Way Sync: Sync changed files from folder A to folder B and vice versa.
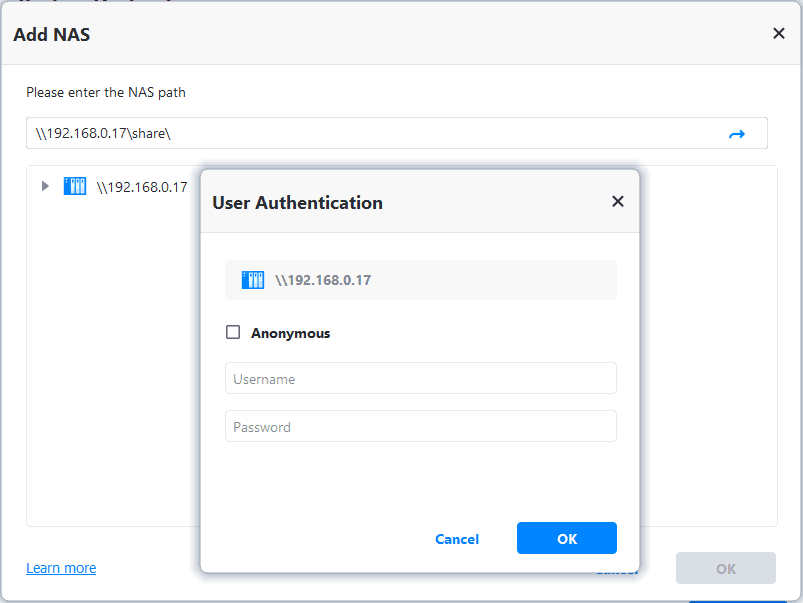
2. Click Select Source > Share/NAS > Add NAS to enter the path of Synology (or other NAS as you like). Then hit OK to confirm and select a folder as the target path.
3. To sync Synology NAS with another NAS, please click on the destination box and add your target NAS in the same way. Of course, you can simply specify a local or external drive as well.
If you want to sync Synology NAS with cloud, you can choose the target cloud local folder as the destination path.
4. As it's real-time sync, you don't need to add a schedule. Just click Start Sync to make it work.
Related tips:
- Sync is mainly designed for individual folders. If you want to protect the Windows operating system or an entire disk, please go to Backup and choose the corresponding backup mode.
- If you create an AOMEI account, you can back up files to AOMEI Cloud.
- Alternatively, you can add and manage network shares or NAS devices in Tools > Storage Management.
Conclusion
Synology NAS real-time sync could capture any change made to the files and synchronize it to the target path in no time. If you want to access the latest data remotely or share it with others, this is the most efficient way.
To implement it, you can either use Synology utilities or turn to the powerful backup & sync software, AOMEI Backupper Professional. It's not only for Synology NAS, but also enables you to backup or sync other brands of NAS.
For example, you can backup Synology to QNAP NAS or vice versa. Even if you are running Windows Server and trying to sync files on it (or even between two servers), there’s Server edition to suit your case.
