How Can I Backup Synology NAS to Cloud? (2 Ways)
Want to backup Synology NAS to cloud but do not know how? Scroll down to get two Synology NAS backup tools to help you.
By Lily Updated on January 18, 2024
Why you need to backup Synology NAS to cloud?
The Network Attached Storage (NAS) is very convenient - you can share data on it or backup data to NAS, and Synology NAS is one of the best NAS servers in the world. However, the data on the Synology NAS also faces the danger of data loss. Thus, the most effective way to keep the data safe is to backup Synology NAS.
Cloud storage drive is another popular storage drive. Compared with NAS, it has many advantages: you do not need to buy a server, just sign up in the cloud’s main interface, and you can store data online. Also, it is cost-effective, because you only pay for the storage you use.
You may backup Synology NAS to cloud for the following reasons:
- Add an additional layer of redundancy and data protection.
- Quickly restore your data from the cloud backup when your NAS breaks down.
- Access your data from anywhere with an internet connection.
How to backup Synology NAS to cloud step by step
There are two Synology NAS backup tools that can give you a hand. I’ll show you one by one. It is worth mentioning that Tool 2 applies to not only Synology NAS but also QNAP NAS, Asustor NAS, WD My Cloud, etc.
Tool 1: Synology Cloud Sync
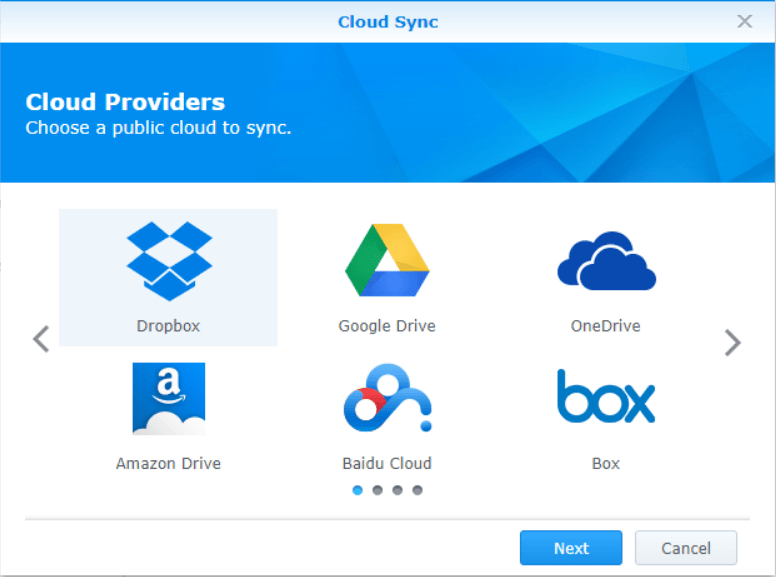
Cloud Sync is an application provided by Synology to help users sync files between Synology NAS and public cloud services, such as Amazon Drive, Dropbox, and OneDrive. Take OneDrive as an example. Learn how to backup Synology to OneDrive as follows:
Step 1. Install Cloud Sync from the Package Center and open it.
Step 2. Click the + button in the lower-left corner. In the pop-up window, choose OneDrive and click Next. Then, sign in to your OneDrive account and allow Synology NAS to access your OneDrive cloud.
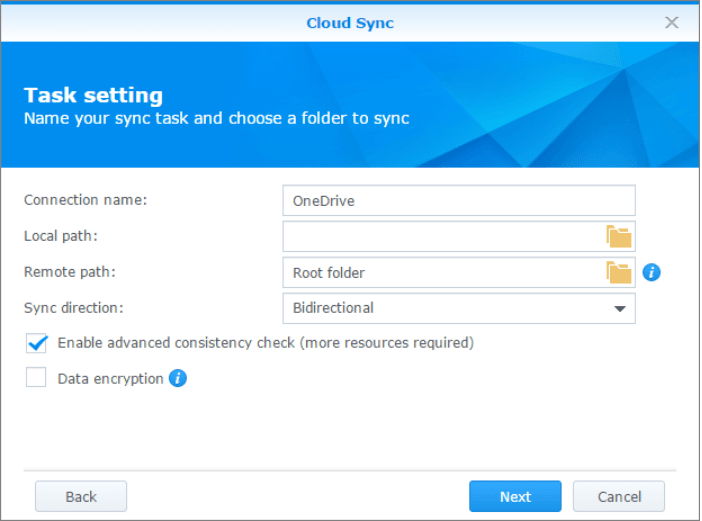
Step 3. You’ll move to the Task setting window.
- Connection name: It is OneDrive by default. You can change it as necessary.
- Local path: Just select a local folder on your Synology NAS that you want to backup.
- Remote path: Select a remote folder to sync your NAS files with. It chooses “Root folder” by default.
- Sync direction: Choose between bidirectional, download, or upload only.
- Tick the box Data encryption and Don't remove files in the destination folder when they are removed in the source folder.
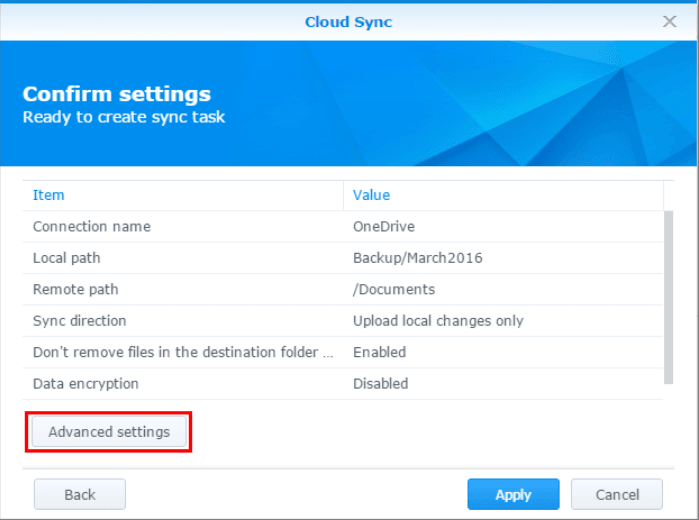
Step 4. Confirm your settings and click Apply to begin the syncing process. For more configuration options, you can hit Advanced settings.
Tool 2: AOMEI Backupper Standard
Speaking of Synology NAS backup to cloud, here we highly recommend a free backup software - AOMEI Backupper Standard.
💜 It allows you to backup all files and data on your Synology NAS to many cloud drives like Google Drive, Dropbox, OneDrive, Box, SugarSync, hubiC and Cloudme (cloud which has desktop app).
💜 You can create multiple backup schedules, including daily/weekly/monthly.
💜 You can choose to do full/incremental/differential backup for the scheduled task as per your needs. Differential backup is available in AOMEI Backupper Professional.
Here we take an example of how to backup Synology NAS to OneDrive. Before you do, you need to prepare for it:
- Install OneDrive desktop app on your computer if you are running Windows 7/8. For Windows 11/10/8.1 users, it is already installed.
- Download free AOMEI Backupper.
Then, you can follow the detailed operations step by step.
Step 1. Install and launch AOMEI Backupper. To backup Synology NAS to cloud drive, click Backup and select File Backup.

Step 2. Here you need to add the folders or files you stored on the Synology NAS to AOMEI Backupper as the source party.
- Click Add Folder or Add File.

- Choose Share/NAS at the left side and it will pop out the Select Share/NAS Device window.
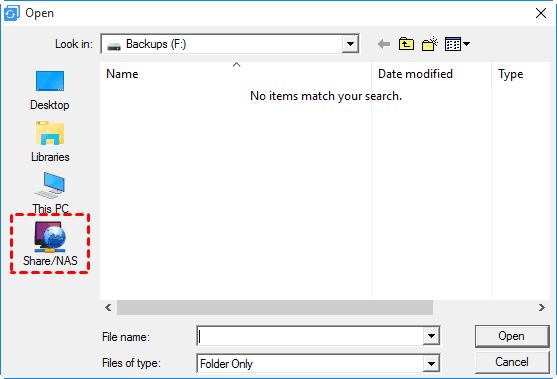
- Click Add Share or NAS Devices. Type in the IP address of your NAS to add it. You can also edit Display Name if you like. If the NAS is encrypted, you need to type in its Username and the Password.
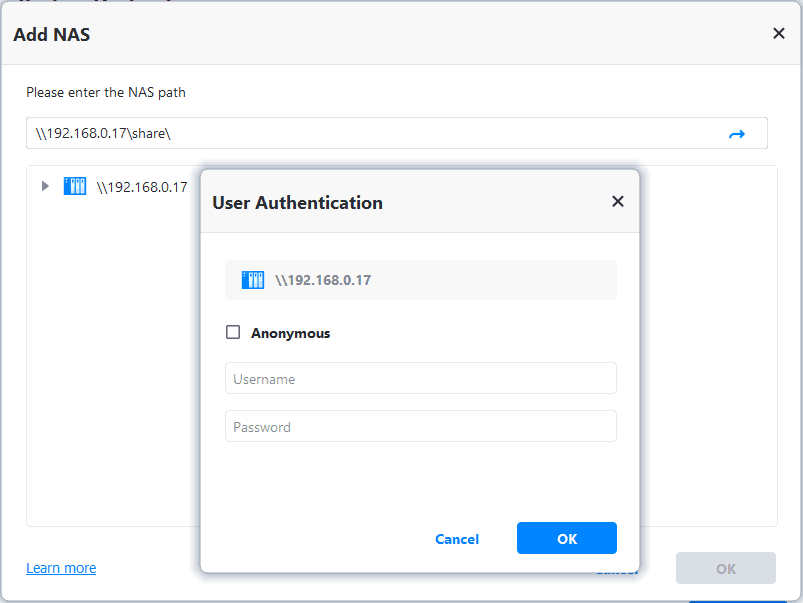
- Choose the folder on your Synology NAS that needs to be backed up. If you have multiple folders to be backed up, please select them one by one.
Tip: You can automatically backup files with a certain file extension using Filter settings. It is available after upgrading to higher editions.
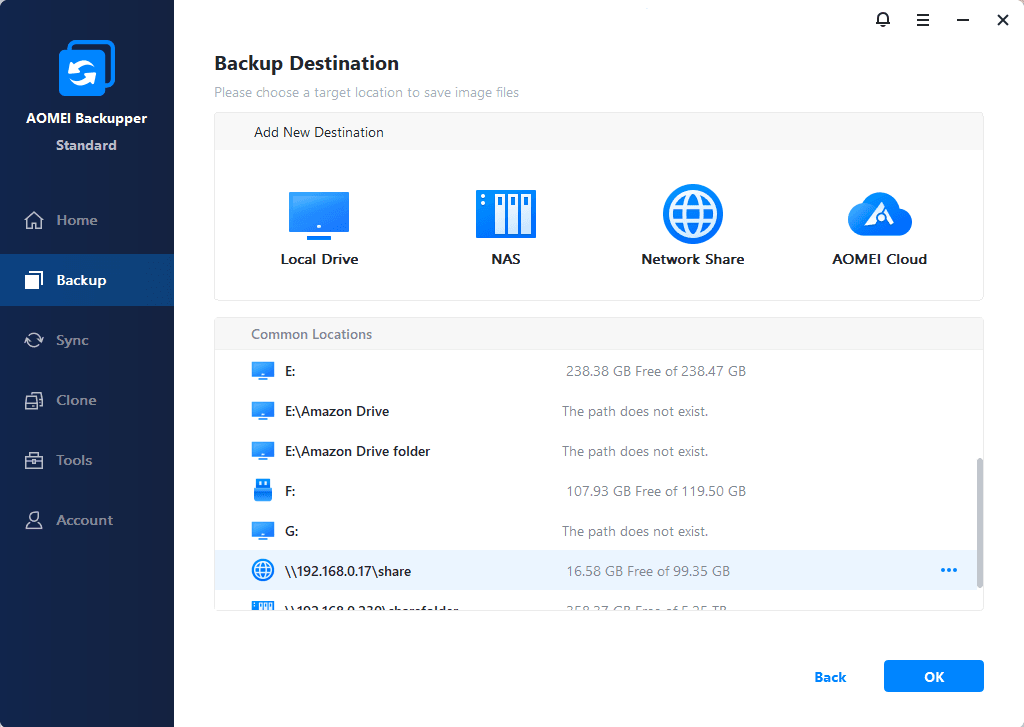
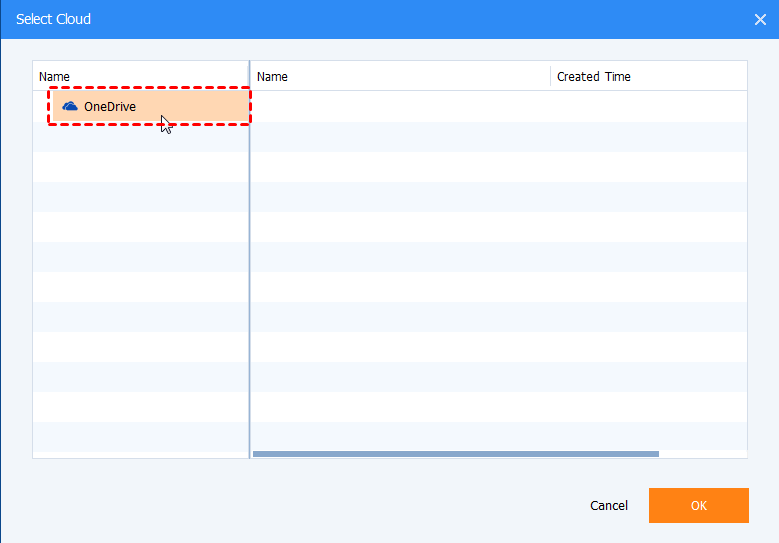
Step 3. After selecting the source party, you need to choose the cloud drive as the destination place. Click Select a cloud drive. AOMEI Backupper will list all cloud drives installed on your PC. Select the cloud drive (here is OneDrive) and click OK.
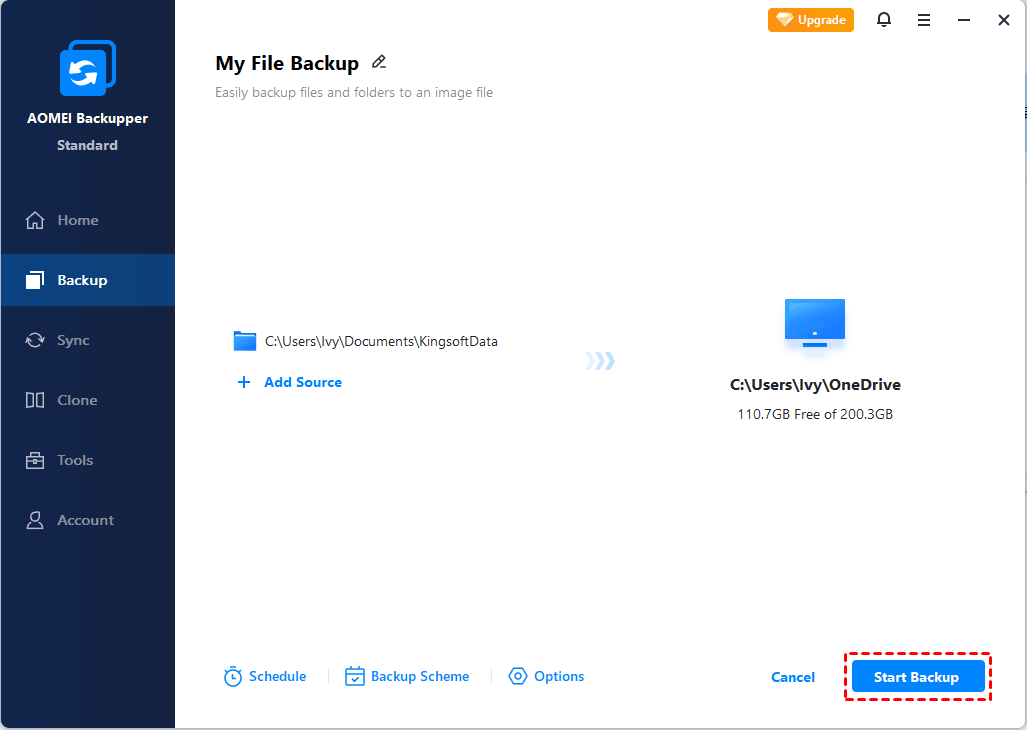
Step 4. You can set up more for your backup. Like, add a comment in Options, or set up an automatic backup in Schedule Backup. After all backup settings, click Start Backup to execute the task.
Conclusion
That’s all for how to backup Synology NAS to cloud using Synology Cloud Sync or AOMEI Backupper. By using AOMEI Backupper, you do not need to open many websites and re-upload all data from your NAS to cloud. It will save a lot of time. Finally, if you are a Windows Server user, AOMEI Backupper Server is suitable for you.

